Ce contenu n'est pas disponible dans la langue sélectionnée.
Chapter 3. Using the web console to analyze applications
You can create a project in the web console to analyze your applications.
Each project groups the applications for a specific analysis, which you can configure with custom rules and labels.
The analysis process generates reports that describe the readiness of your applications for migration or modernization.
3.1. Creating a project
You can create a project in the web console with the Create project wizard.
Procedure
- In the web console, click Projects.
- Click Create project.
- Enter a unique name for the project, an optional description, and click Next.
To upload applications, click the Upload tab, click Browse, select the application files you want to upload, and click Close.
Uploading applications stores them directly on the MTR server.
To register a server path, click the Server path tab and enter the Server-side path of the application in the field.
Registering the server path of an application ensures that MTR always uses the latest version.
- Click Next.
Click one or more transformation targets.
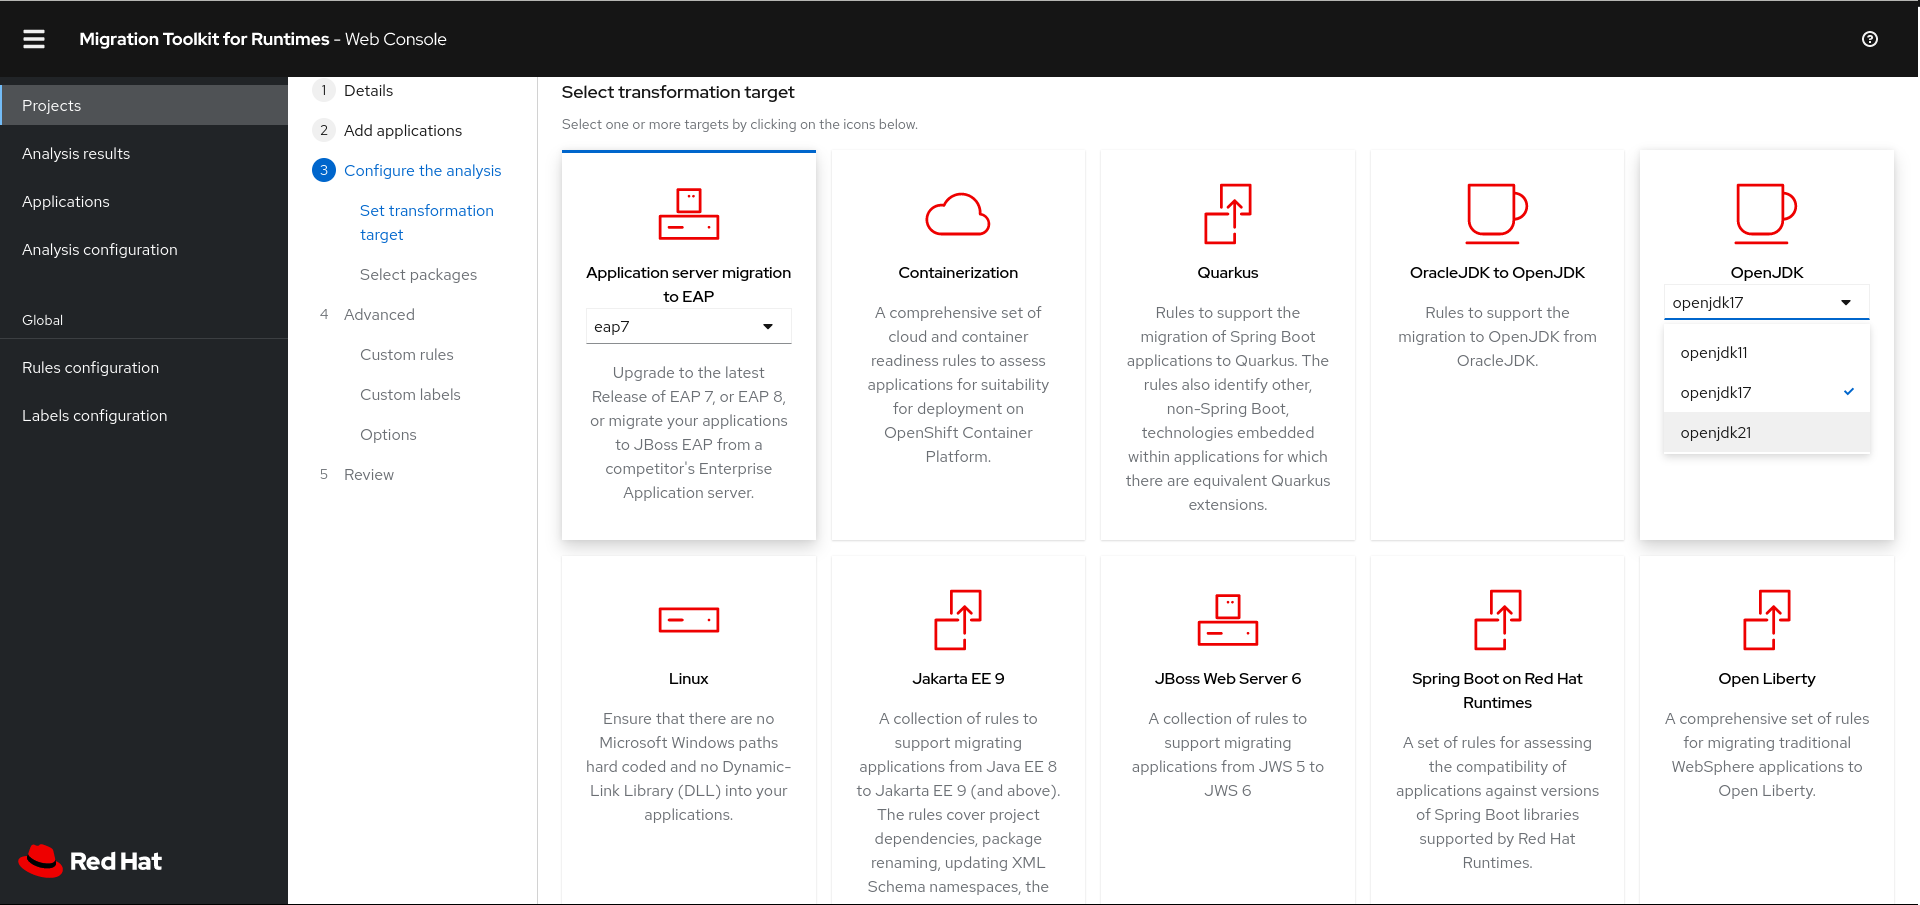
- Click Next.
- Select packages and click > to include them in the analysis.
- Click Next.
If you want to add a custom rule, click Add rule.
See the Rule Development Guide for more information.
To upload a ruleset file, click the Upload tab, click Browse, select one or more files, and click Close.
A ruleset file must have a
.windup.xmlextension. The uploaded file is stored on the MTR server.To register the server path of a ruleset file, click the Server path tab, enter the Rules path, and click Save.
Registering the server path ensures that the MTR server always uses the latest version of the ruleset files.
- Click Next.
If you want to add a custom label, click Add label.
To upload a labelset file, click the Upload tab, click Browse, select one or more files, and click Close.
A labelset file must have a
.windup.label.xmlextension. The uploaded file is stored on the MTR server.To register a server path, click the Server path tab, enter the Labels path of the label files in the field, and click Save.
Registering the server path ensures that the MTR server always uses the latest version of the labelset files.
- Click Next.
Review the following Advanced options and make any necessary changes:
- Target
- Source
- Exclude tags: Rules with these tags are not processed.
-
Additional classpath: Enter a space-delimited list of additional
.jarfiles or directories so that they are available for decompilation or other analysis. - Application name
- Mavenize group ID
- Ignore path: Enter a path for files to exclude from analysis.
- Export CSV: Exports the report data as a CSV file.
-
Export Summary: Generates an
analysisSummary.jsonexport file in the output directory. The file contains analysis summary information for each application analyzed, including the number of incidents and story points by category, and all of the technology tags associated with the analyzed applications. -
Export reports zip: Creates a
reports.zipfile in the output folder. The file contains the analysis output, typically, the reports. If requested, it can also contain the CSV export files. - Disable Tattletale: Disables generation of a Tattletale report for each application.
Class Not Found analysis: Enables analysis of Java files that are not available on the class path.
NoteThis option should not be used if some classes are unavailable for analysis.
- Compatible Files report: Generating a Compatible Files report might take a long time for large applications.
- Exploded app: The input directory contains the unpackaged source files of an application.
- Keep work dirs: Retains temporary files, for example, the graph database or extracted archive files, for debugging purposes.
- Skip reports: HTML reports are not generated. Must be enabled if you enabled Export CSV.
Allow network access: Validates any XML files within the analyzed applications against their schema.
NoteThis option might reduce performance.
- Mavenize: Creates a Maven project directory structure based on the structure and content of the application.
- Source mode: Indicates that the application files are raw source files, not compiled binaries. The sourceMode argument has been deprecated. There is no longer the need to specify it. MTR can intuitively process any inputs that are presented to it. In addition, project source folders can be analyzed with binary inputs within the same analysis execution.
Analyze known libraries: Analyze known software artifacts embedded within your application. By default, MTR only analyzes application code.
NoteThis option might result in a longer execution time and a large number of migration issues being reported.
Transaction analysis: [Tech Preview] Generates a Transactions report that displays the call stack, which executes operations on relational database tables. The Enable Transaction Analysis feature supports Spring Data JPA and the traditional
preparedStatement()method for SQL statement execution. It does not support ORM frameworks, such as Hibernate.NoteTransaction analysis is a Technology Preview feature only. Technology Preview features are not supported with Red Hat production service level agreements (SLAs) and might not be functionally complete. Red Hat does not recommend using them in production. These features provide early access to upcoming product features, enabling customers to test functionality and provide feedback during the development process.
- Skip source code reports: Adding this option skips generating a Source code report when generating the application analysis report. Use this advanced option when concerned about source code information appearing in the application analysis.
- Click Next.
Review your project and click Save or Save and run.
The project is displayed in the Projects screen.
3.2. Running a saved analysis
You can run a saved analysis.
Procedure
- In the web console, click Analysis results.
- Select a project.
- Click Run analysis.
A progress bar displays the progress of your analysis.
3.3. Viewing analysis results
The results of all analyses are grouped and listed by project on the Analysis results screen.
Procedure
- In the web console, click Analysis results.
Select a project from the list.
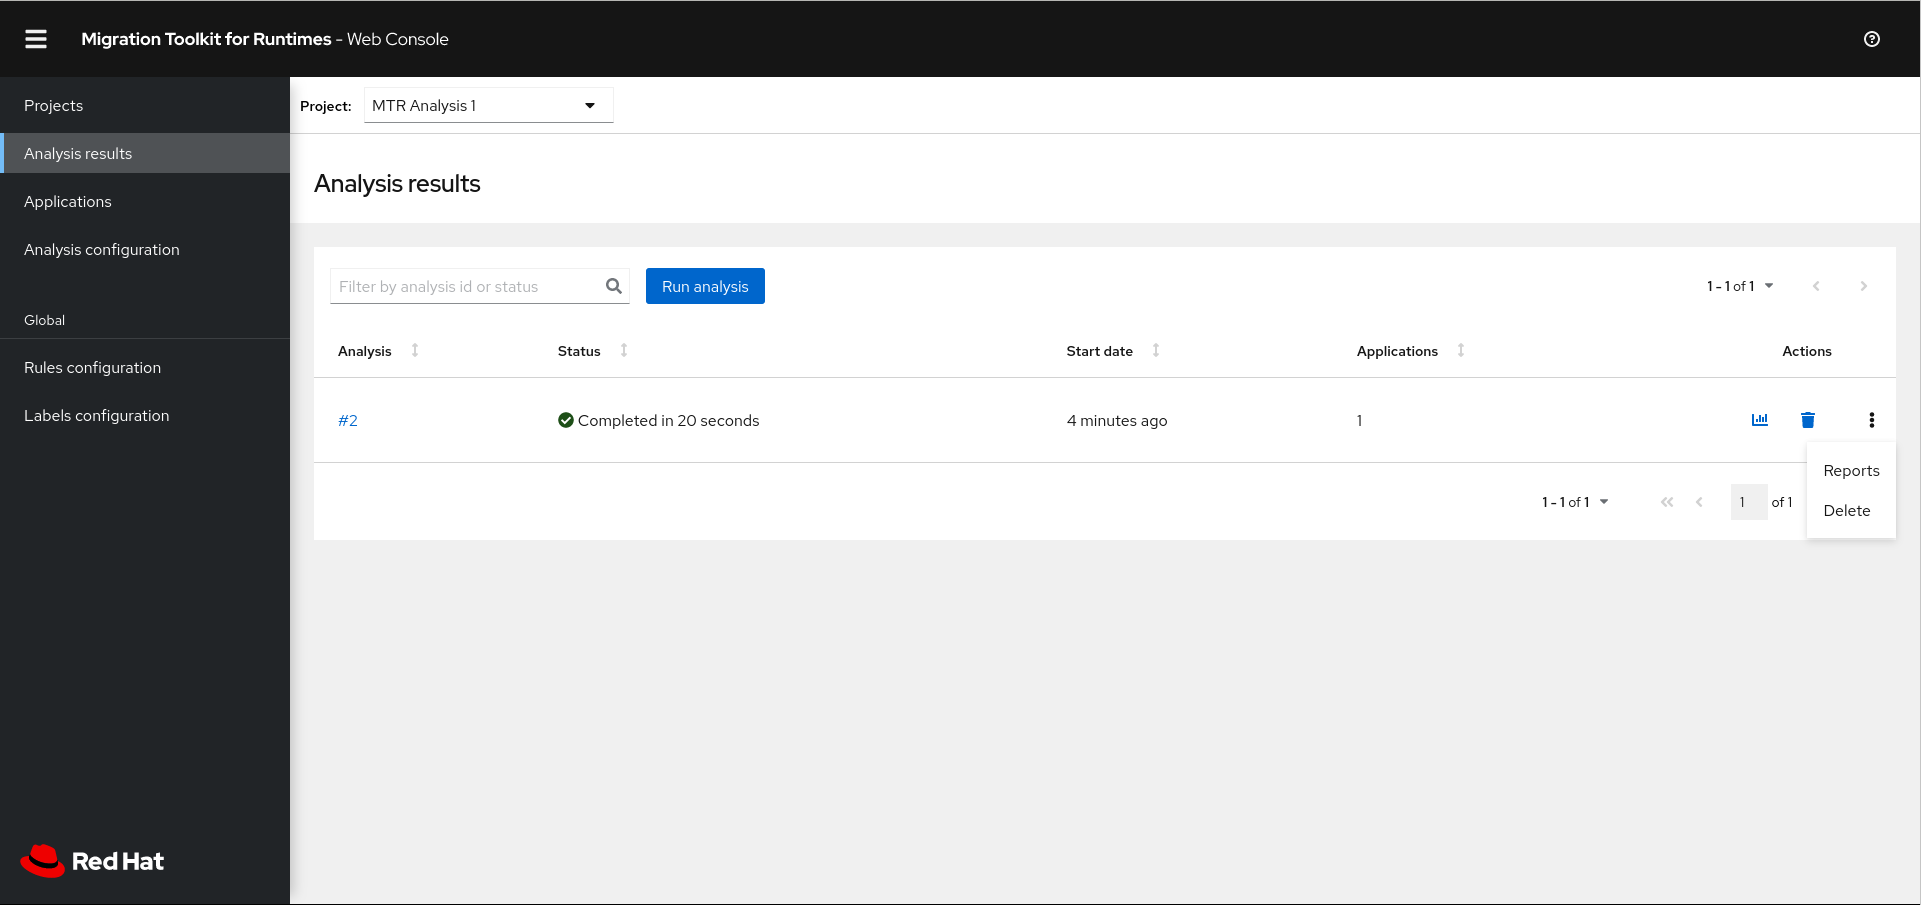
The Analysis Reports can be accessed via the Reports bar chart icon or by the Reports action on the right-hand side of the screen.
Click on the number of the analysis you want to review to see details of the analysis configuration settings and the analysis execution statistics.
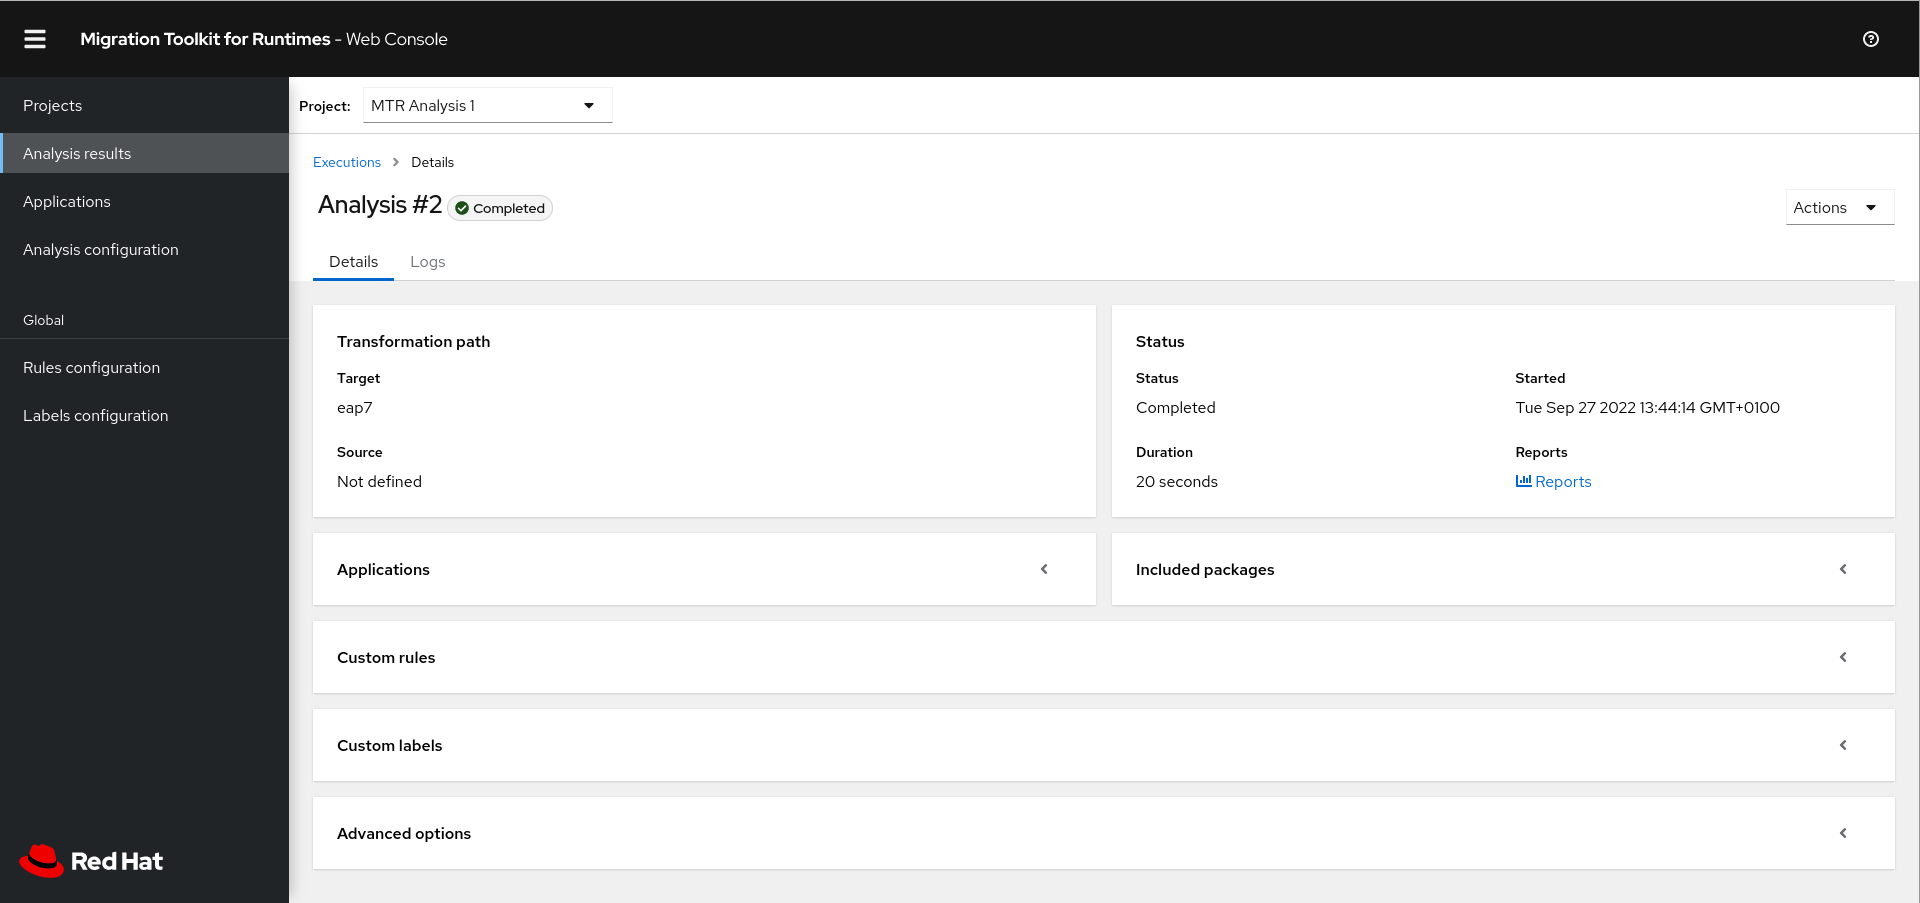
The results are displayed in the Results screen, which contains two tabs: Details and Logs.
The Details tab displays important details of the analysis, such as status, start date, duration, and configuration settings.
Figure 3.1. Analysis details screen
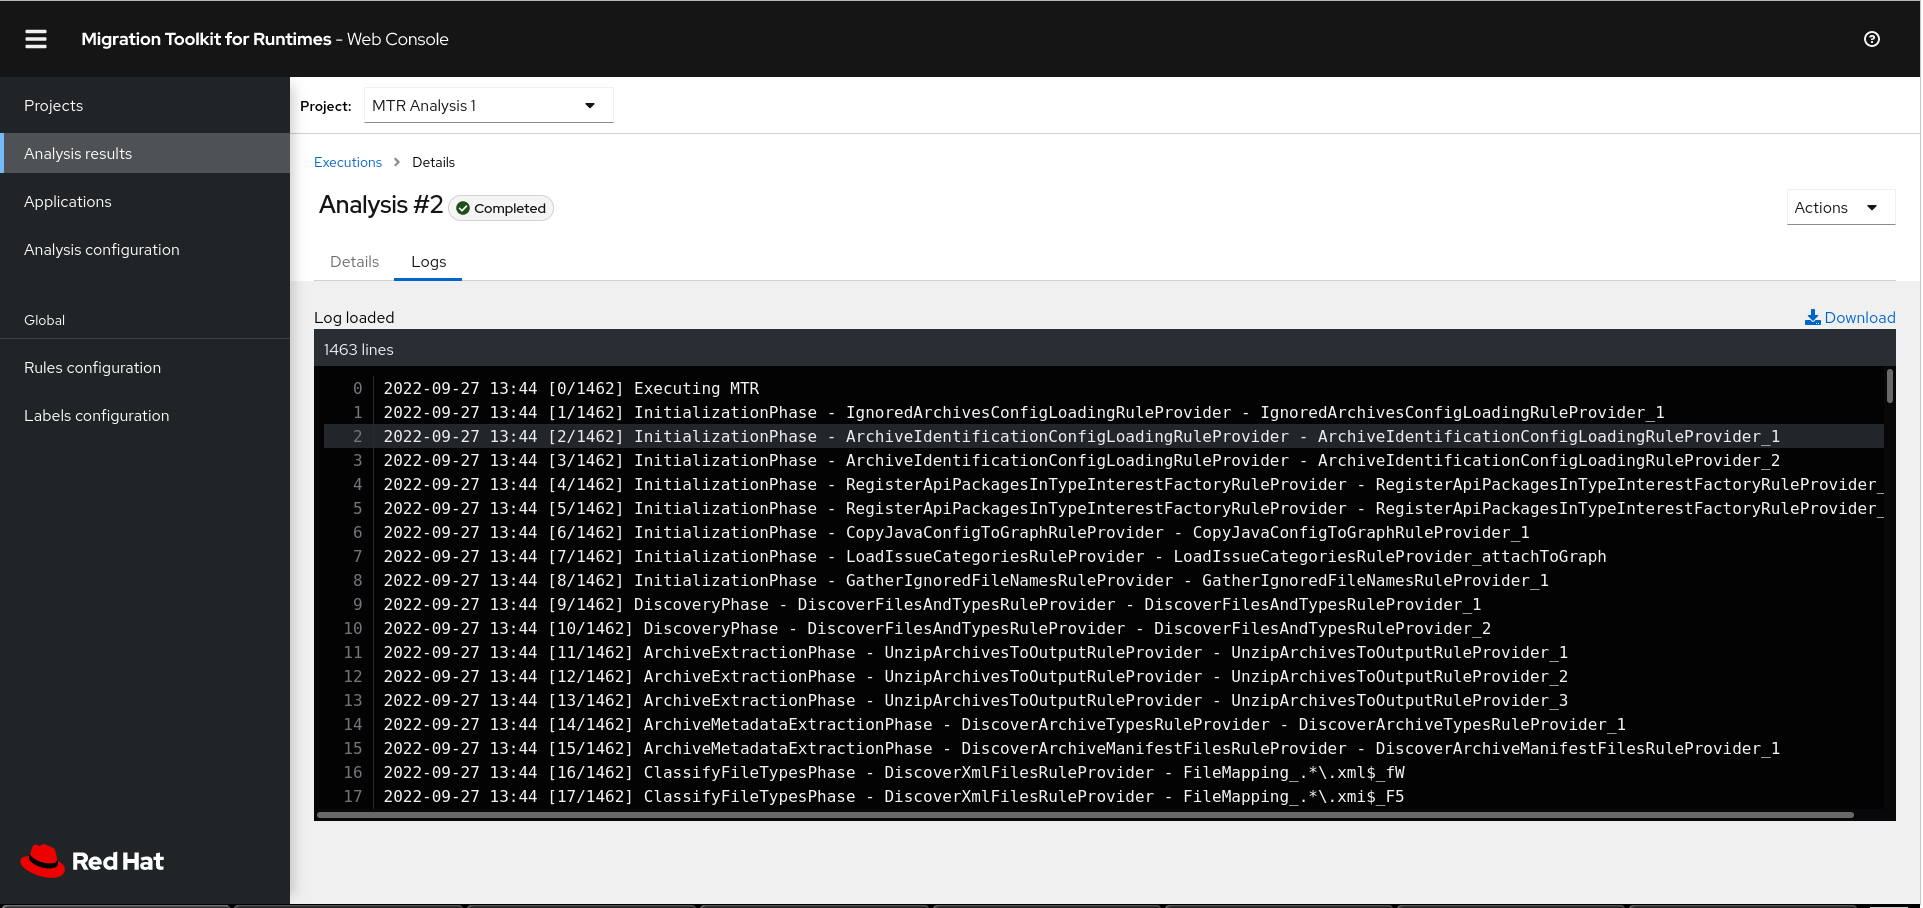
The Logs tab displays the logs generated during the analysis.
Figure 3.2. Analysis logs screen
3.4. Reviewing reports
The MTR web console provides a set of detailed reports that can help you decide if you need to make any changes to your applications. You access these reports from the Analysis results screen.
The reports are described in detail in Reviewing the reports in the CLI Guide.
Procedure
- In the web console, click Analysis results.
Click the Reports icon
 beside the analysis you want to investigate.
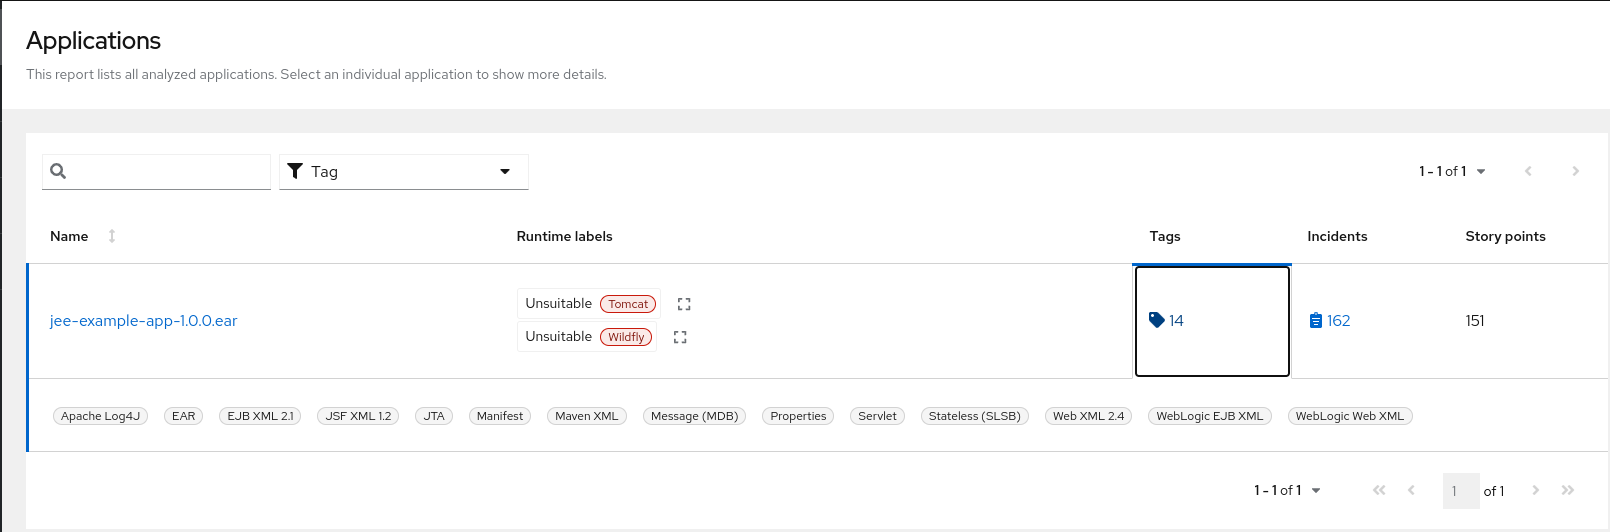
The All applications screen of the reports is displayed.
3.5. Updating an analysis configuration
You can update an analysis configuration, for example, with a different transformation target, advanced option, or a custom rule. Then you can run the updated analysis in your project.
Procedure
In the web console, click Analysis configuration.
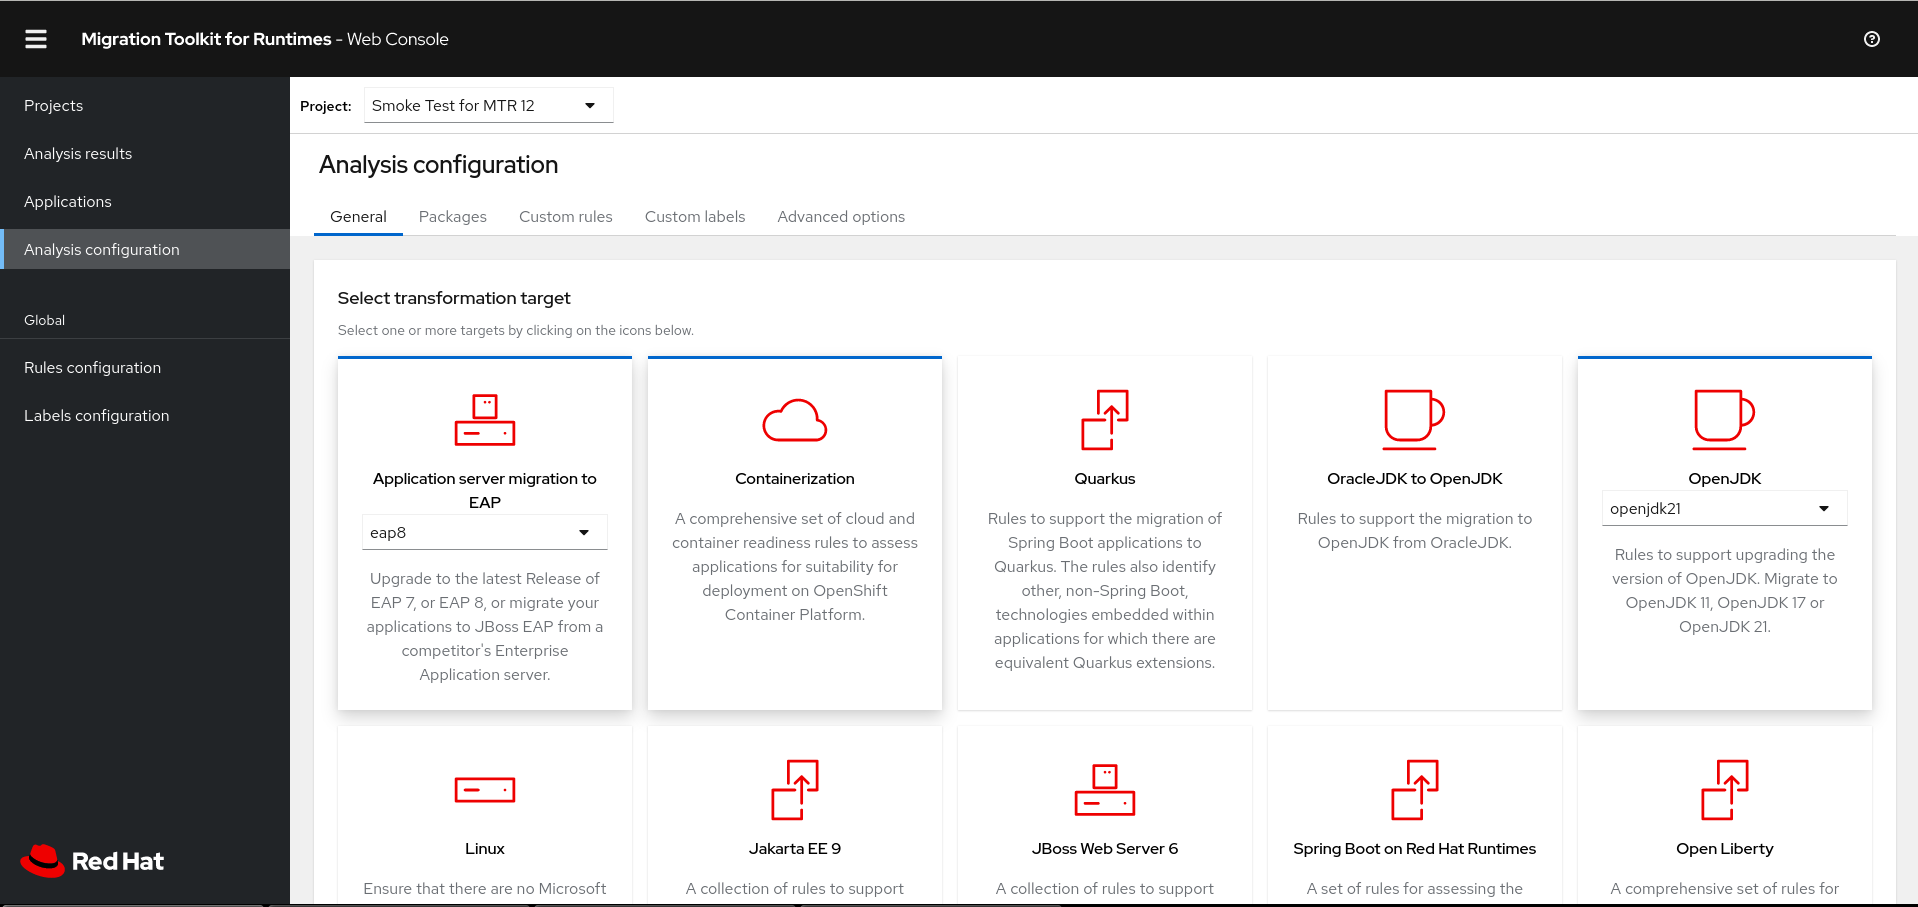
- Select a Project.
- Click the appropriate tabs and make your changes.
Click Save or Save and run.
The project is displayed in the Projects screen.
3.6. Adding global custom rules
MTR includes a preconfigured set of global rules, which apply to all projects.
You can define your own custom global rules.
For information on writing custom MTR rules, see the MTR Rule Development Guide.
Procedure
- In the web console, click Rules configuration.
- Click Add rules.
To upload a ruleset file, click the Upload tab, click Browse, select one or more files, and click Close.
A ruleset file must have a
.windup.xmlextension. The uploaded file is stored on the MTR server.To register the server path of a ruleset file, click the Server path tab, enter the Rules path, and click Save.
Registering the server path ensures that the MTR server always uses the latest version of the ruleset files.
The Custom rules list displays the rules.
3.7. Adding global custom labels
MTR includes a preconfigured set of global labels, which apply to all projects.
You can define your own custom global labels.
Procedure
- In the web console, click Labels configuration.
- Click Add label.
To upload a labelset file, click the Upload tab, click Browse, select one or more files, and click Close.
A labelset file must have a
.windup.label.xmlextension. The uploaded file is stored on the MTR server.To register the server path of a labelset file, click the Server path tab, enter the Labels path, and click Save.
Registering the server path ensures that the MTR server always uses the latest version of the labelset files.
The Custom labels list displays the labels.