Ce contenu n'est pas disponible dans la langue sélectionnée.
Chapter 3. JMC Agent Plugin
You can use the JMC Agent Plugin to add the JMC Agent implementation to Cryostat. You can then use the JMC Agent to add custom JFR events into a running target JVM application. This operation does not require you to restart your JVM application.
Additional resources
3.1. Adding custom events by using the JMC Agent Plugin
Cryostat in combination with the JMC Agent can provide you with more information when you need to diagnose issues with your running JVM application.
The JMC Agent JAR file must be in the same Red Hat OpenShift container as the target JVM application. Otherwise, Cryostat cannot use the JMC Agent functionality on the application.
From the Cryostat web console, you can upload probe templates and then insert these templates into the JVM application. You can remove these template probes at a later stage, if required. A probe template describes a set of objects that Cryostat can process, so that Cryostat can complete a sequence of JMC Agent operations on the JVM application.
When you start a target JVM application with the JMC Agent, Cryostat automatically detects if the application is running with the JMC Agent.
For RHEL, the JMC package is provided by the CodeReady Linux Builder (CRB), also known as Builder, repository. You must enable the CRB repository on RHEL, so that you can install JMC on RHEL. CRB packages are built with the Source Red Hat Package Manager (SRPM) as productized RHEL packages, so CRB packages regularly receive updates. See, Downloading and installing JDK Mission Control (JMC) (Using JDK Flight Recorder with Red Hat build of Cryostat)
Prerequisites
-
Downloaded and installed the
jmcpackage. - Downloaded the Adoptium Agent JAR file. See adoptium/jmc-build (GitHub).
-
Started your Java application with the
--add-opens=java.base/jdk.internal.misc=ALL-UNNAMEDflag. For example,./<your_application> --add-opens=java.base/jdk.internal.misc=ALL-UNNAMED. - Started the JMC Agent for your Java application. See Starting a JDK Mission Control (JMC) Agent (Using JDK Flight Recorder with Red Hat build of Cryostat).
Procedure
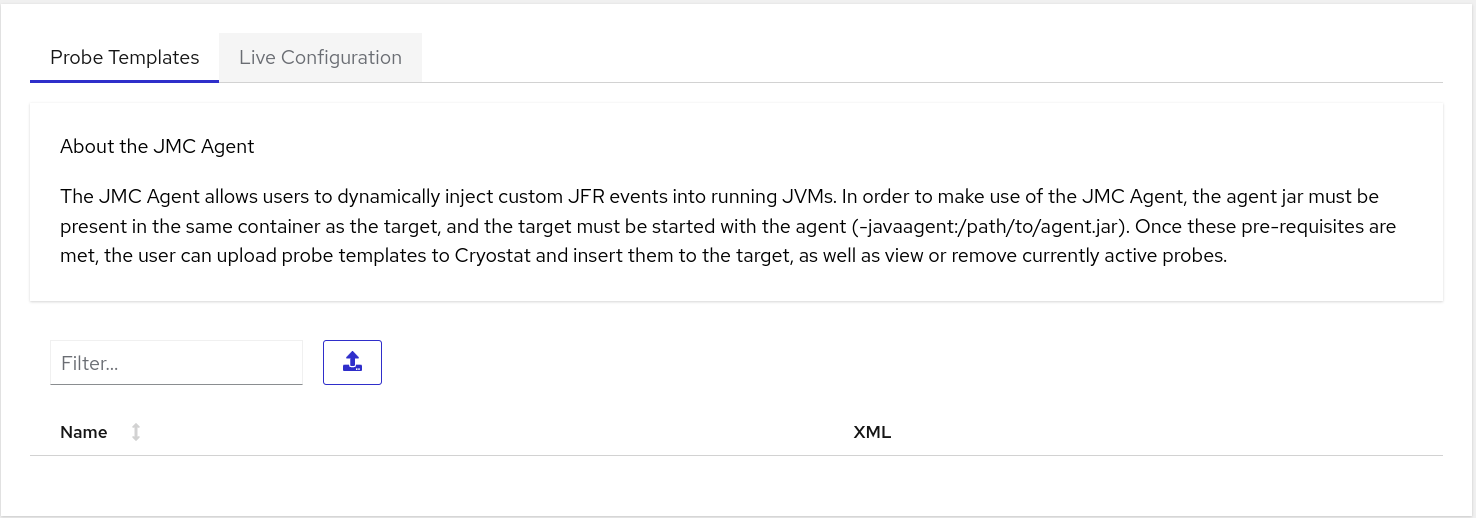
From your Cryostat web console, go to the Events menu. If the JMC Agent was successfully added to your Cryostat instance then a Probe Templates pane opens under the Event Templates pane.
Figure 3.1. The Probe Templates tab on the Cryostat web console
 Note
NoteAn Authentication Required dialog box might open on your web console. If prompted, enter your Username and Password in the Authentication Required dialog box, and click Save to provide your JMX credentials to the target JVM.
Use your preferred text editor to create an XML configuration file. Populate the file with JFR event information, such as what events Cryostat must perform on the application.
The following example shows a custom probe template XML file that contains JFR event information. When this file is uploaded to Cryostat, Cryostat can add a custom JFR event, called Cryostat Agent Plugin Demo Event, to an application. Cryostat starts the JFR event when the
retrieveEventProbesmethod of the JMC Agent is called.<jfragent> <!-- Global configuration options --> <config> <classprefix>__JFREvent</classprefix> <allowtostring>true</allowtostring>\ <allowconverter>true</allowconverter> </config> <events> <event id="cryostat.demo.jfr.event9"> <label>Cryostat Agent Plugin Demo Event</label> <description>Event for the agent plugin demo</description> <path>io/cryostat/demo/events</path> <stacktrace>true</stacktrace> <class>io.cryostat.core.agent.AgentJMXHelper</class> <method> <name>retrieveEventProbes</name> <descriptor>()Ljava/lang/String;</descriptor> </method> <location>WRAP</location> </event> </events> </jfragent>Click the Upload button to add a custom event template to Cryostat. A Create Custom Probe Template opens on your Cryostat web console.
Figure 3.2. The Create Custom Probe Template window on the Cryostat web console
 Tip
TipClick the Clear button if you want to remove the uploaded file from this Template XML field.
- Click the Browse button to locate your XML file.
- After you upload the file, click Submit. Your custom probe template file opens in the Probe Templates table.
- Click the overflow menu that is next to your probe template.
- Click Insert Probes. The probes display in the table under the Probe Templates tab and the table under the Live Configuration tab.
- Optional: Go to the Live Configuration tab, where you can view information, such as Name, Class, and so on, for each active probe.
- Optional: From the Live Configuration tab, you can click Remove All Probes to delete probes that are listed in the table.
Verification
- From the Events menu, click the Event Types tab.
-
Check that the named JFR event from your XML configuration is listed in the table. For the example used in this procedure,
Cryostat Agent Plugin Demo Eventdisplays in the table.
Additional resources
Revised on 2023-12-12 18:07:31 UTC