Ce contenu n'est pas disponible dans la langue sélectionnée.
Chapter 2. Installing Cryostat on Red Hat OpenShift by using a Red Hat build of Cryostat Operator
You can use the Operator Lifecycle Manager (OLM) to install the Red Hat build of Cryostat Operator in a project on your Red Hat OpenShift cluster. You can use the Red Hat build of Cryostat Operator to create single namespace or multi-namespace Cryostat instances. You can control these instances by using a GUI that is accessible from the Red Hat OpenShift web console.
If you need to upgrade your Red Hat build of Cryostat Operator subscription from Cryostat 2.0 to Cryostat 2.4, you must change the update channel from stable-2.0 to stable.
Prerequisites
- Created an OpenShift Container Platform 4.11 or later cluster.
- Created a Red Hat OpenShift user account with permissions to install Red Hat build of Cryostat Operator in a project.
- Installed Operator Lifecycle Manager (OLM) on your cluster.
Installed cert-manager with the cert-manager Operator for Red Hat OpenShift.
- If you are using OpenShift Container Platform 4.11 or later, you can install the cert-manager Operator for Red Hat OpenShift. For more information, see cert-manager Operator for Red Hat OpenShift (OpenShift Container Platform).
- Logged in to Red Hat OpenShift by using the Red Hat OpenShift web console.
Procedure
- In your browser, navigate to Home > Projects by using the web console.
- Select the name of the project in which you want to install the Red Hat build of Cryostat Operator.
Install the Red Hat build of Cryostat Operator:
- In the navigation menu of your web console, navigate to Operators > OperatorHub.
- Select the Red Hat build of Cryostat Operator from the list. You can use the search box in the upper part of the screen to find the Red Hat build of Cryostat Operator.
To install the Red Hat build of Cryostat Operator in your project, click Install.
The Red Hat OpenShift web console prompts you to create a Cryostat custom resource (CR).
NoteIf you are installing a Cryostat instance that is enabled for multiple namespaces, in the Installation mode area, click the All namespaces on the cluster (default) radio button.
You can create the CR either manually or automatically. If you want to create the CR manually, see step 4. If you want to create the CR automatically, see step 5.
If you want to create the CR manually, complete the following steps:
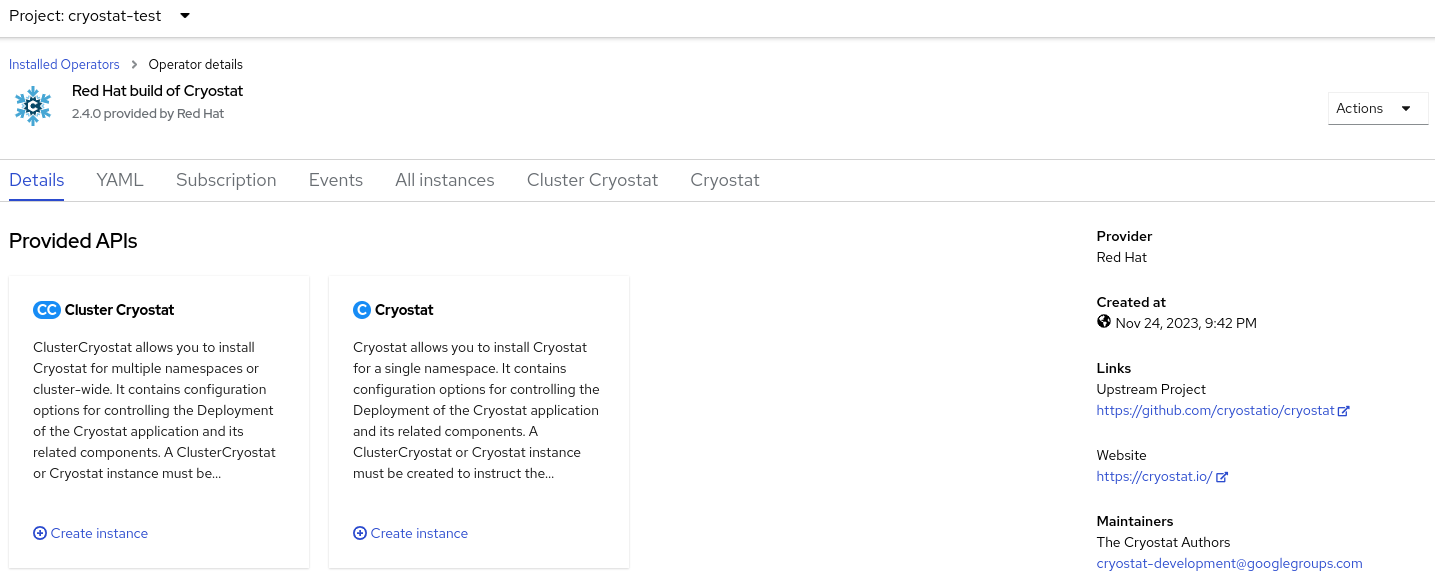
Navigate to Operators > Installed Operators by using the web console and select Red Hat build of Cryostat Operator from the list of installed operators:
Figure 2.1. Viewing the Red Hat build of Cryostat operator in the list of installed operators

- Click the Details tab.
To create a single-namespace Cryostat instance, go to the Provided APIs section. Then, under Cryostat, click Create instance.
NoteIf you want to create a Cryostat instance that is enabled for multiple namespaces, in the Provided APIs section, select Cluster Cryostat and click Create instance. The Cluster Cryostat API has configuration options that control the deployment of the Cryostat application and its related components. For more information, see Creating Cryostat on multiple namespaces.
Figure 2.2. Selecting the Cryostat API that is provided by the Red Hat build of Cryostat Operator
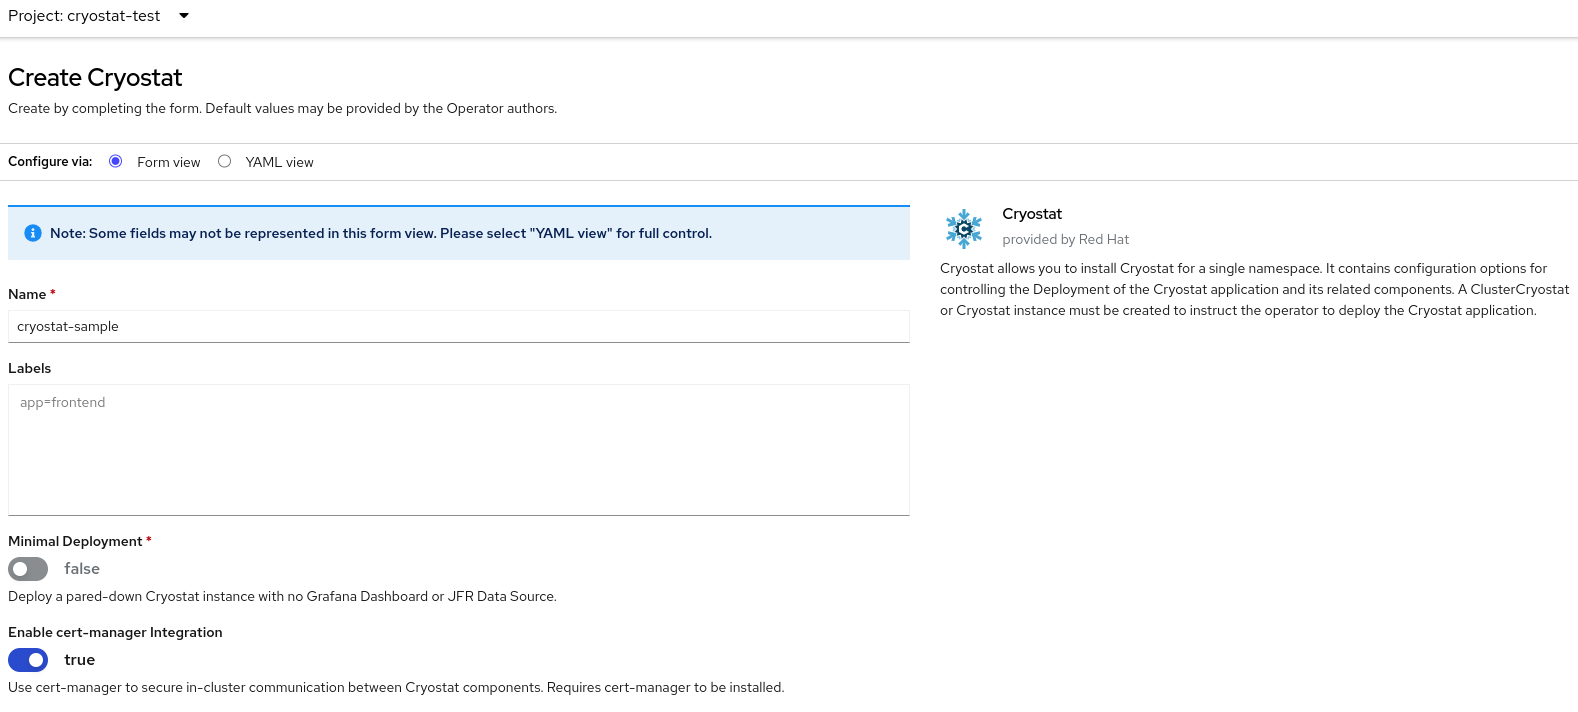
- Click either the Form view radio button or the YAML view radio button. If you want to enter your information in the YAML configuration file, click YAML view .
- Specify a name for the instance of Cryostat that you want to create.
Optional: In the Labels field, specify a label or annotation for the Operand workload you want to deploy.
You can also specify additional configuration options for your deployment:
Figure 2.3. Creating an instance of Cryostat by using a form in the web console
Alternatively, you can use a YAML template to create your instance and specify additional configuration options instead of using the form:
Figure 2.4. Creating an instance of Cryostat by using a YAML template in the web console

If you want to create the CR by using the automatic prompt option, follow the prompt’s instructions and then complete the following steps:
- Click either the Form view radio button or the YAML view radio button. If you want to enter your information in the YAML configuration file, click YAML view.
- Specify a name for the instance of Cryostat that you want to create.
Optional: In the Labels field, specify a label or annotation for the Operand workload you want to deploy.
You can also specify additional configuration options for your deployment:
Figure 2.5. Creating an instance of Cryostat by using a form in the web console
Alternatively, you can use a YAML template to create your instance and specify additional configuration options instead of using the form:
Figure 2.6. Creating an instance of Cryostat by using a YAML template in the web console
To start the creation process for your Cryostat instance, click Create.
You must wait for all resources of your Cryostat instance to be ready before you can access it.
Verification
- In the navigation menu of the web console, click Operators, then click Installed Operators.
- From the table of installed operators, select Red Hat build of Cryostat Operator.
Select the Cryostat tab.
Your Cryostat instance opens in the table of instances and lists the following conditions:
-
TLSSetupCompleteis set totrue. -
MainDeploymentAvailableis set totrue. Optional: If you enabled the reports generator service then
ReportsDeploymentAvailableis shown and set totrue.Figure 2.7. Example of conditions set to True under the Status column for a Cryostat instance on OpenShift

-
Optional: Select your Cryostat instance from the Cryostat table. Go to the Cryostat Conditions table, where you can see more information for each condition.
Figure 2.8. Example of a Cryostat Conditions table that lists each condition and its criteria

Next Steps
2.1. Creating Cryostat on multiple namespaces
The Red Hat build of Cryostat Operator provides the Cluster Cryostat API, which you can use to create Cryostat instances that work across multiple namespaces.
Prerequisites
- Created an OpenShift Container Platform 4.11 or later cluster.
- Created a Red Hat OpenShift user account with permissions to install Red Hat build of Cryostat Operator in a project.
- Installed the Operator Lifecycle Manager (OLM) on your cluster.
Installed cert-manager by using the cert-manager Operator for Red Hat OpenShift.
- If you are using OpenShift Container Platform 4.11 or later, you can install the cert-manager Operator for Red Hat OpenShift.For more information, see cert-manager Operator for Red Hat OpenShift (OpenShift Container Platform).
- Logged in to Red Hat OpenShift by using the Red Hat OpenShift web console.
Procedure
- In your browser, navigate to Home > Projects by using the web console.
- Select the name of the project where you want to install the Red Hat build of Cryostat Operator.
Install the Red Hat build of Cryostat Operator.
The Red Hat OpenShift web console prompts you to create a Cryostat custom resource (CR).
To create the CR, complete the following steps:
Navigate to Operators > Installed Operators by using the web console and select Red Hat build of Cryostat Operator from the list of installed operators:
Figure 2.9. Viewing the Red Hat build of Cryostat Operator in the list of installed operators

- Click the Details tab.
To create a multi-namespace instance of Cryostat, go to the Provided APIs section. Then, under Cluster Cryostat, click Create instance.
Figure 2.10. Selecting the Cluster Cryostat API that is provided by the Red Hat build of Cryostat Operator

- Click either the Form view radio button or the YAML view radio button. If you want to enter your information in the YAML configuration file, click YAML view.
Specify a unique name for the Cluster Cryostat instance that you want to create.
NoteEnsure that the name you specify for your Cluster Cryostat instance is unique and does not conflict with the name of any single-namespace Cryostat instances that might already be created in the install namespace or target namespaces of the Cluster Cryostat instance.
Optional: In the Labels field, specify a label or annotation for the Operand workload you want to deploy.
You can also specify additional configuration options for your deployment:
Figure 2.11. Creating a Cluster Cryostat instance by using a form in the web console
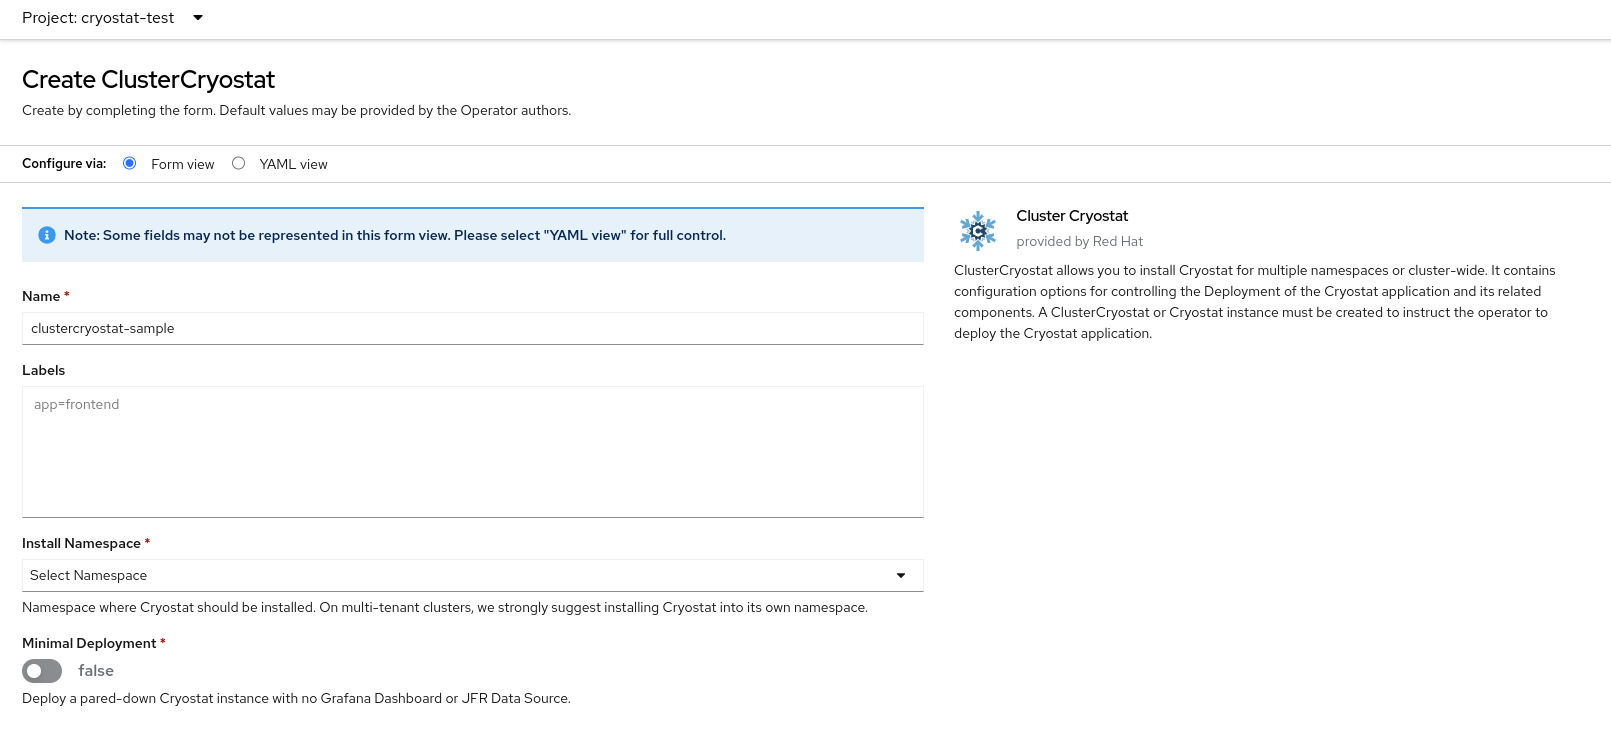
In the Install Namespace field, select a namespace where you want to install this instance of Cryostat.
TipThe Red Hat build of Cryostat Operator uses a larger set of permissions compared to the Cryostat application, and Cryostat might have more permissions than your target workloads. Therefore, for optimal security, install the Cryostat instance into a different namespace from where the Red Hat build of Cryostat Operator operator is installed and from where your target workloads are located.
In the Target Namespaces field, select namespaces whose workloads you want to permit this instance of Cryostat to access and work with. Optionally, you can select the same namespace where you installed Cryostat or you can choose a different namespace. To add additional namespaces, click +Add Target Namespace.
ImportantUsers who can access the Cryostat instance have access to all target applications in any namespace that is visible to that Cryostat instance. Therefore, when you deploy a multi-namespace Cryostat instance, you must consider which namespaces to select for monitoring, which namespace to install Cryostat into, and which users you want to grant access to.
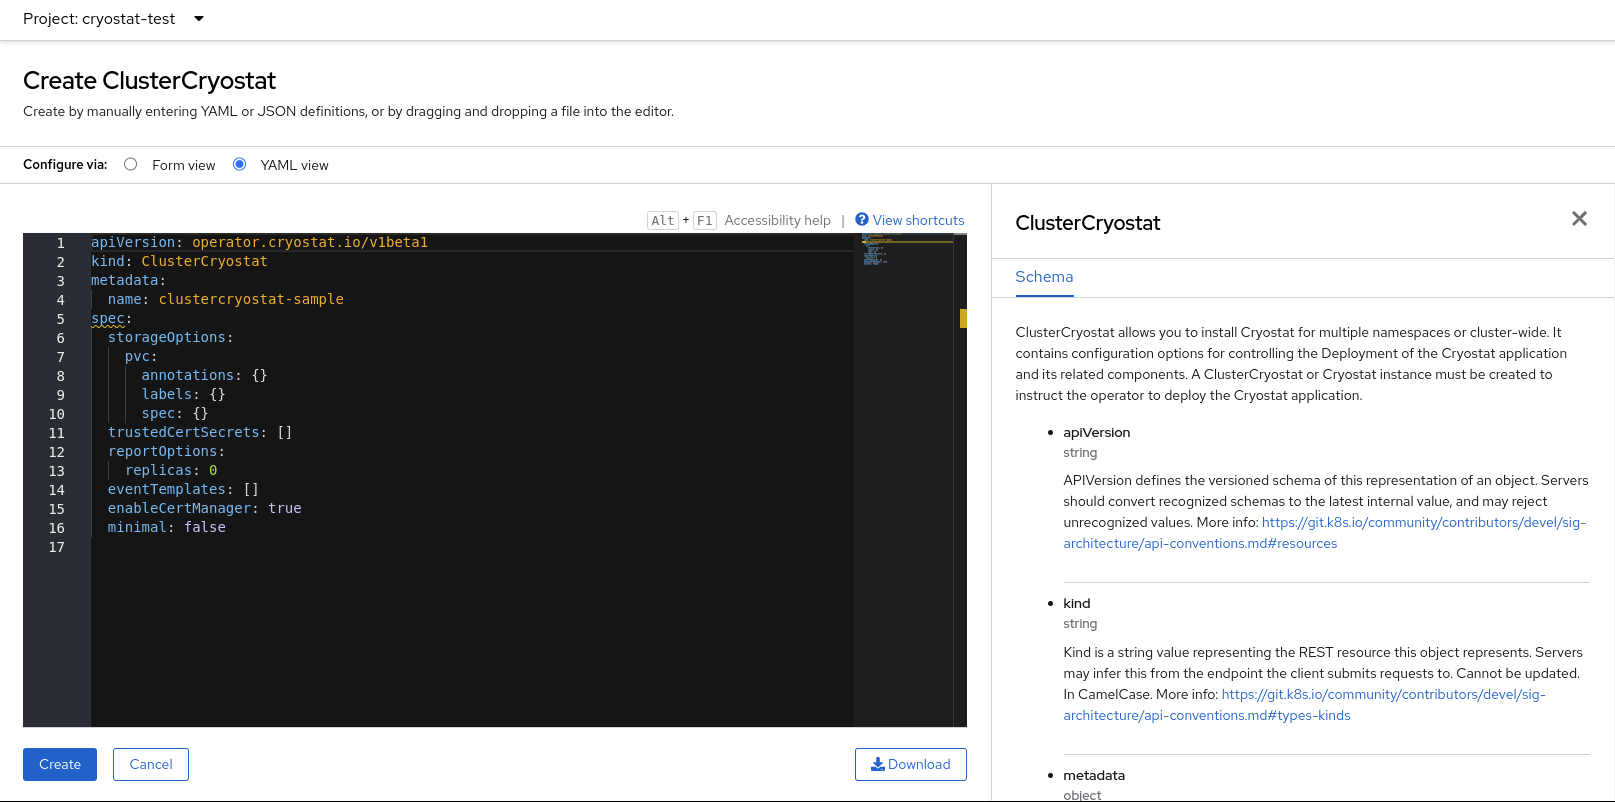
Alternatively, you can use a YAML template to create your instance and specify additional configuration options instead of using the form:
Figure 2.12. Creating a Cluster Cryostat instance by using a YAML template in the web console
Click Create to start the creation process for your Cryostat multi-namespace instance.
You must wait for all resources of your Cluster Cryostat instance to be ready before you can access the instance.
Verification
- In the navigation menu of the web console, navigate to Operators > OperatorHub.
- From the table of installed operators, select Red Hat build of Cryostat Operator.
Click the Cluster Cryostat tab.
Your Cryostat instance opens in the table of instances and lists the following conditions:
-
TLSSetupCompleteis set totrue. -
MainDeploymentAvailableis set totrue. Optional: If you enabled the reports generator service,
ReportsDeploymentAvailableis shown and set totrue.Figure 2.13. Example of conditions set to True under the Status column for a Cluster Cryostat instance on OpenShift

-
Optional: From the Cluster Cryostat table, select your Cryostat instance. Go to the Conditions table to view more information for each condition.
Figure 2.14. Example of a Cryostat Conditions table that lists each condition and its criteria
Additional resources