Ce contenu n'est pas disponible dans la langue sélectionnée.
Chapter 8. Managing pools on the Ceph dashboard
As a storage administrator, you can create, edit, and delete pools on the Red Hat Ceph Storage dashboard.
This section covers the following administrative tasks:
8.1. Creating pools on the Ceph dashboard
When you deploy a storage cluster without creating a pool, Ceph uses the default pools for storing data. You can create pools to logically partition your storage objects on the Red Hat Ceph Storage dashboard.
Prerequisites
- A running Red Hat Ceph Storage cluster.
- Dashboard is installed.
Procedure
- From the dashboard navigation, go to Cluster→Pools.
- Click Create.
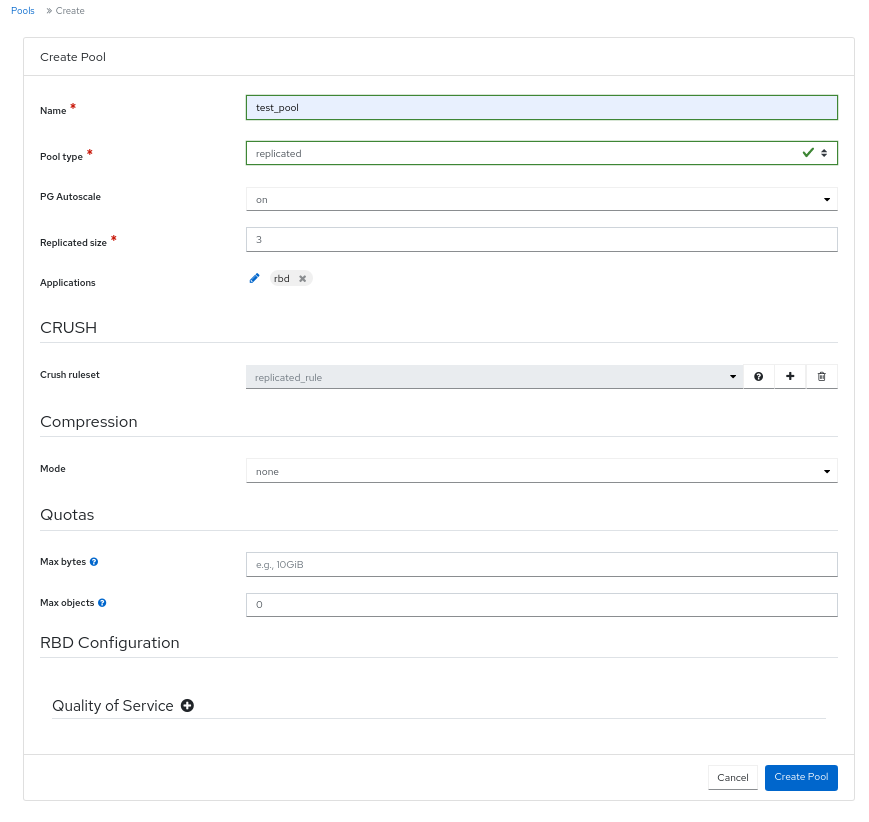
Fill out the Create Pool form.
Figure 8.1. Creating pools
 Note
NoteThe form changes based off of selection. Not all fields are mandatory.
- Set the name of the pool and select the pool type.
-
Select the Pool type, either
replicatedorerasure. Erasure is referred to as Erasure Coded (EC). -
Optional: Select if the PG Autoscale is
on,off, orwarn. - Optional: If using a replicated pool type, set the replicated size.
- Optional: If using an EC pool type configure the following additional settings.
- Optional: To see the settings for the currently selected EC profile, click the question mark.
- Optional: Add a new EC profile by clicking the plus symbol.
- Optional: Click the pencil symbol to select an application for the pool.
- Optional: Set the CRUSH rule, if applicable.
- Optional: If compression is required, select passive, aggressive, or force.
- Optional: Set the Quotas.
- Optional: Set the Quality of Service configuration.
To save the changes and complete creating the pool, click Create Pool.
A notification displays that the pool was created successfully.
8.2. Editing pools on the Ceph dashboard
You can edit the pools on the Red Hat Ceph Storage Dashboard.
Prerequisites
- A running Red Hat Ceph Storage cluster.
- Dashboard is installed.
- A pool is created.
Procedure
- From the dashboard navigation, go to Cluster→Pools.
- To edit the pool, select the pool row and click Edit.
- In the Edit Pool form, edit the required parameters.
Save changes, by clicking Edit Pool.
A notification displays that the pool was updated successfully.
8.3. Deleting pools on the Ceph dashboard
You can delete the pools on the Red Hat Ceph Storage Dashboard. Ensure that value of mon_allow_pool_delete is set to True in Manager modules.
Prerequisites
- A running Red Hat Ceph Storage cluster.
- Dashboard is installed.
- A pool is created.
Procedure
- From the dashboard navigation, go to Administration→Configuration.
From the Configuration table, select
mon_allow_pool_delete, and click Edit.NoteIf needed, clear filters and search for the configuration.
- From the Edit mon_allow_pool_delete form, in Values, set all values to true.
Click Update.
A notification displays that the configuration was updated successfully.
- Go to Cluster→Pools.
- Select the pool to be deleted, and click Delete from the action drop-down.
In the Delete Pool dialog, select Yes, I am sure. and complete, by clicking Delete Pool.
A notification displays that the pool was deleted successfully.