Ce contenu n'est pas disponible dans la langue sélectionnée.
10.6. Configuring Fonts
fontconfig utility for font management and customization. fontconfig simplifies font management and provides display features, such as anti-aliasing. This section describes the following font management tasks:
- adding new fonts (both for one user and for all users)
- specifying fonts to use in place of missing fonts
- configuring font aliases
- defining font preferences per language
- customizing font properties
fontconfig searches directories that are by default listed in the /etc/fonts/fonts.conf configuration file.
fontconfig, you can use the fc-list command:
fc-list : file
$ fc-list : filefc-list, see the fc-list(1) man page.
fontconfig and its configuration, see the fonts-conf(5) man page.
10.6.1. Adding Extra Fonts for All Users
fontconfig for font handling.
Procedure 10.12. Installing an Extra Font
- As the
rootuser, create the/usr/local/share/fonts/directory and copy the font into it.Create a subdirectory for each font-family you are installing as some fonts have multiple files for bold, italic, and so on. - Make sure that the font cache is updated by running the following command:
fc-cache /usr/local/share/fonts/
# fc-cache /usr/local/share/fonts/Copy to Clipboard Copied! Toggle word wrap Toggle overflow
Important
fontconfig will detect the new fonts and make them available. Unlike user sessions, some applications might need to be restarted before they will allow you to use the new fonts, though.
10.6.2. Adding Extra Fonts for All Users Using Alternative Directories
/usr/local/share/fonts/ if that directory is listed in the /etc/fonts/fonts.conf file.
/etc/fonts/fonts.conf file, you need to create your own machine-wide configuration file in /etc/fonts/local.conf.
Important
/etc/fonts/fonts.conf file because it will be replaced when the fontconfig library is updated.
Procedure 10.13. Installing an Extra Font
- As the
rootuser, create your own machine-wide/etc/fonts/local.confconfiguration file including the directory with fonts.Copy to Clipboard Copied! Toggle word wrap Toggle overflow - Ensure the permissions for your directory are set to
755.chmod -R 755 /PATH/TO/YOUR/DIRECTORY_NAME
# chmod -R 755 /PATH/TO/YOUR/DIRECTORY_NAMECopy to Clipboard Copied! Toggle word wrap Toggle overflow - Specify the directory name when updating the font cache with the
fc-cachecommand.fc-cache DIRECTORY_NAME
# fc-cache DIRECTORY_NAMECopy to Clipboard Copied! Toggle word wrap Toggle overflow
10.6.3. Adding Extra Fonts for Individual Users
fontconfig for font handling.
Procedure 10.14. Installing an Extra Font
- Copy the font to the
~/.local/share/fonts/directory to install it. - Make sure that the font cache is updated by running the following command:
fc-cache ~/.local/share/fonts
$ fc-cache ~/.local/share/fontsCopy to Clipboard Copied! Toggle word wrap Toggle overflow
Important
fontconfig will detect the new fonts and make them available. You may need to restart running applications to see the changes. User sessions do not need to be restarted.
10.6.4. Substituting Fonts
fontconfig reads the /etc/fonts/fonts.conf configuration file to determine the most similar available font to substitute for the requested font. Individual characters can also be substituted if they are not present in the requested font.
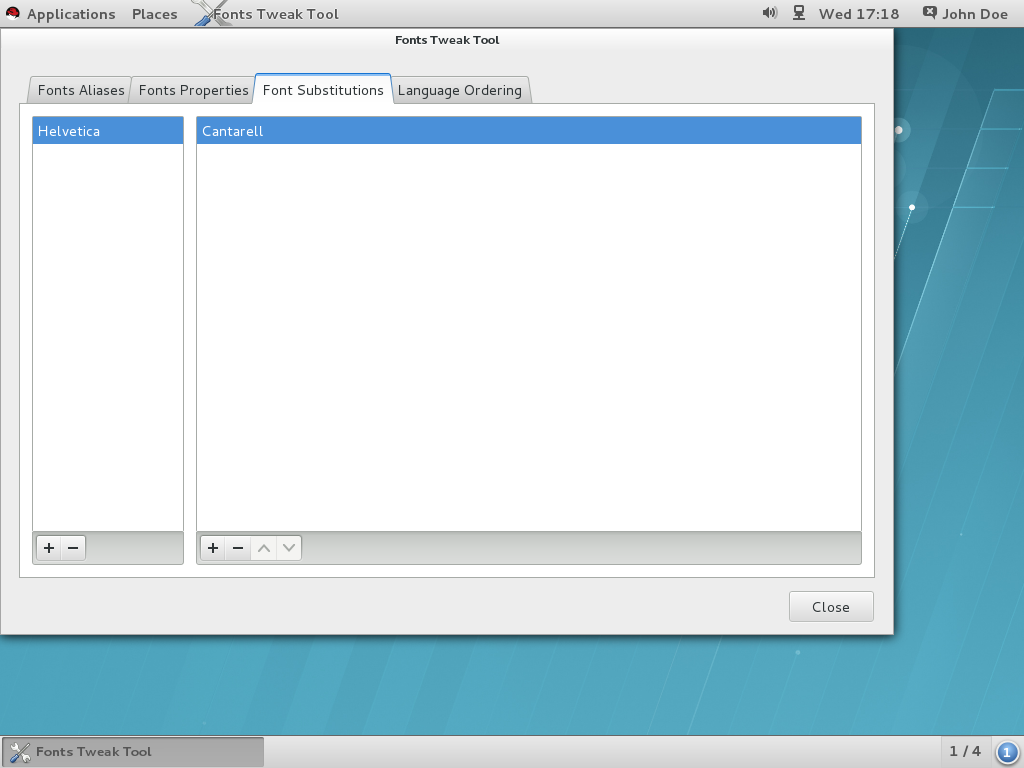
Figure 10.1. Substituting Fonts with Fonts Tweak Tool
yum install fonts-tweak-tool
# yum install fonts-tweak-toolProcedure 10.15. Substituting a Font
- Start the Fonts Tweak Tool by pressing the Super key to enter the
Activities Overview, typeFonts Tweak Tool, and then press Enter. - Click the Font Substitutions tab.
- Click the button at the bottom left of the left pane, select or type the name of the font you want to substitute, and then click .
- Click the button at the bottom left of the right pane, select the name of the font you want to use to substitute for the first font, and then click .
- Click .
10.6.5. Configuring Font Aliases
- Sans Serif,
- Serif,
- Monospace,
- Cursive, and
- Fantasy.
yum install fonts-tweak-tool
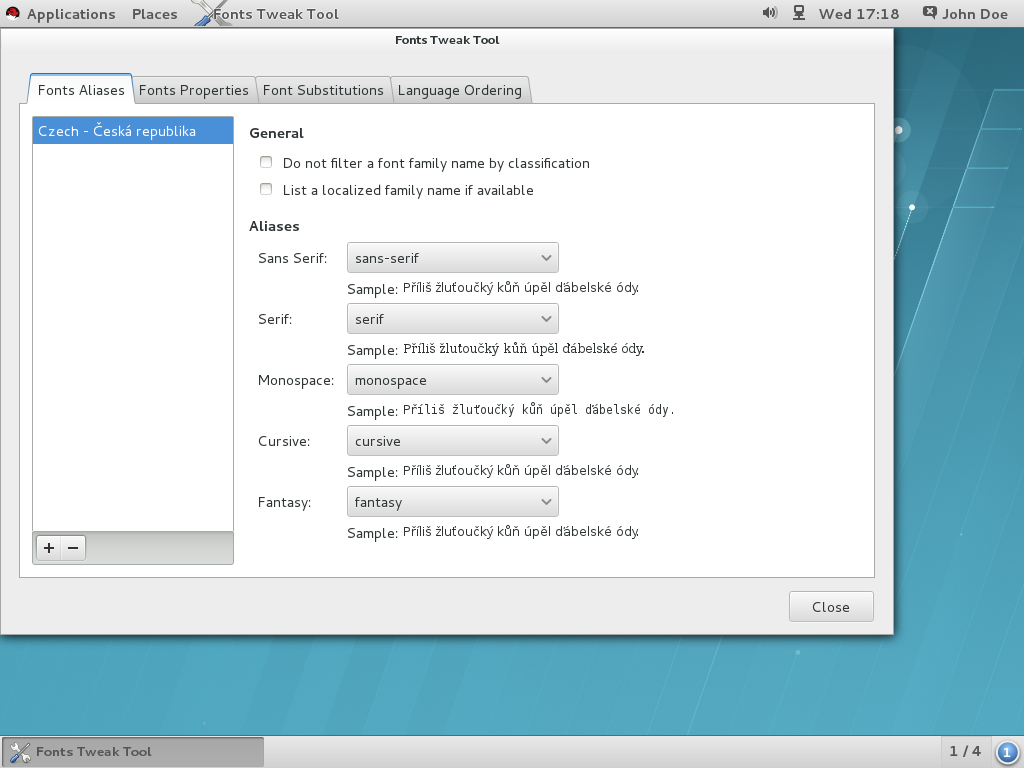
# yum install fonts-tweak-toolFigure 10.2. Configuring a Font Alias with Fonts Tweak Tool
Procedure 10.16. Configuring a Font Alias
- Start the Fonts Tweak Tool by pressing the Super key to enter the
Activities Overview, typeFonts Tweak Tool, and then press Enter. - Click the Font Aliases tab.
- Click the button at the bottom left of the left pane, select or type the name of the locale you want to configure the font aliases for, and then click .To configure default font aliases regardless of the used locale, select Default from the list of locales.
- At the right pane, locate the font alias you want to override the system defaults for, and select the custom font from the drop-down list.
- Click .
10.6.6. Multiple Language Ordering
yum install fonts-tweak-tool
# yum install fonts-tweak-toolProcedure 10.17. Configuring Multiple Languages
- Start the Fonts Tweak Tool by pressing the Super key to enter the
Activities Overview, typeFonts Tweak Tool, and then press Enter. - Click the Language Ordering tab.
- Click the button at the bottom left of the window, select or type the name of the language you want to configure as primary, and then click .
- To add another language, click the button at the bottom left of the window, select the name of the language you want to configure as secondary, and then click .Repeat this step to add more languages.
- Click .
Important
Xft applications) may not display all characters for the user's languages properly. This is due to the lack of support for fallback fonts in those applications, or in the rendering libraries the applications are using.
10.6.7. Configuring Font Properties
yum install fonts-tweak-tool
# yum install fonts-tweak-toolProcedure 10.18. Changing the Font Properties
- Start the Fonts Tweak Tool by pressing the Super key to enter the
Activities Overview, typeFonts Tweak Tool, and then press Enter. - Click the Fonts Properties tab.
- Click the button at the bottom left of the window, select or type the name of the font you want to change the properties for, and then click .Repeat this step to add more fonts.
- Change the font properties as needed.
- Click .
- Use the embedded bitmap font if available.
- This is useful for users who prefer bitmap fonts over outline fonts. To use the embedded bitmap font, add a suitable font and click Use embedded bitmap font if any.
- Use the JIS X 2013:2004 glyphs.
- To use Japanese glyphs from the JIS X 2013:2004 standard, rather than from JIS X 2013:2000 or older, add a font that supports JIS X 2013:2004, and then click on in the Features list.

