Ce contenu n'est pas disponible dans la langue sélectionnée.
4.2. Creating an Image Builder blueprint in the web console interface
To describe the customized system image, create a blueprint first.
Prerequisites
- You have opened the Image Builder interface of the RHEL 7 web console in a browser.
Procedure
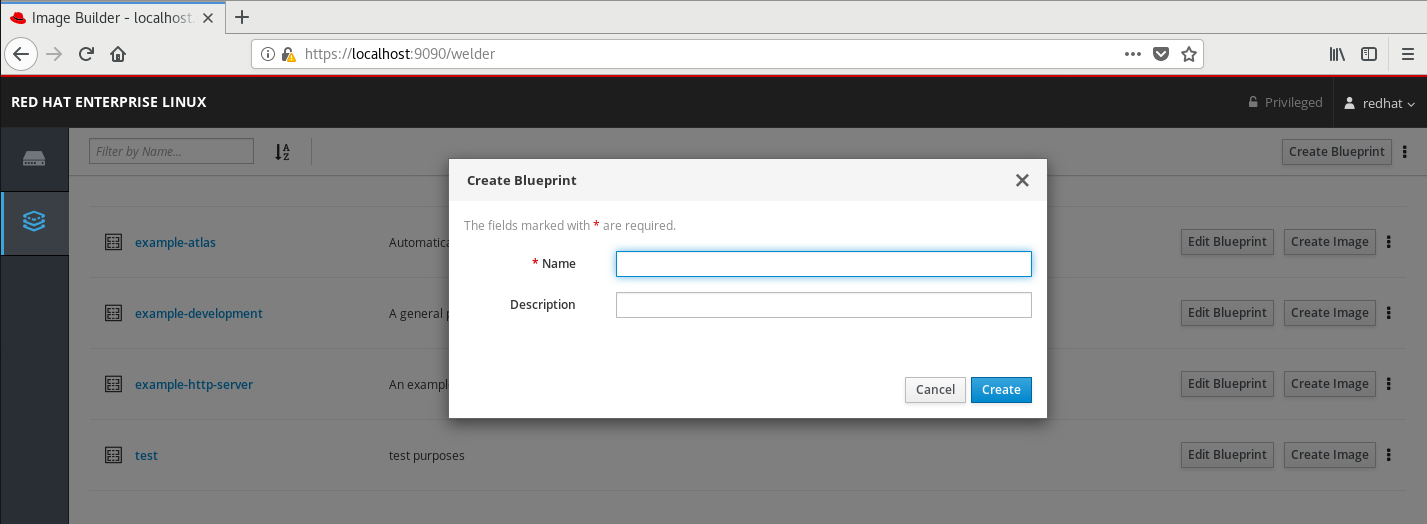
1. Click Create Blueprint in the top right corner.
Figure 4.3. Creating a Blueprint
A pop-up appears with fields for the blueprint name and description.
2. Fill in the name of the blueprint, its description, then click Create.
The screen changes to blueprint editing mode.
3. Add components that you want to include in the system image:
- i. On the left, enter all or part of the component name in the Available Components field and press Enter.
Figure 4.4. Searching for Available Componentes
The search is added to the list of filters under the text entry field, and the list of components below is reduced to these that match the search.If the list of components is too long, add further search terms in the same way. - ii. The list of components is paged. To move to other result pages, use the arrows and entry field above the component list.
- iii. Click on name of the component you intend to use to display its details. The right pane fills with details of the components, such as its version and dependencies.
- iv. Select the version you want to use in the Component Options box, with the Version Release dropdown.
- v. Click Add in the top left.
- vi. If you added a component by mistake, remove it by clicking the … button at the far right of its entry in the right pane, and select Remove in the menu.
Note
If you do not intend to select version for some components, you can skip the component details screen and version selection by clicking the + buttons on the right side of the component list.
4. To save the blueprint, click Commit in the top right. A dialog with a summary of the changes pops up. Click Commit.
A small pop-up on the right informs you of the saving progress and then the result.
5. To exit the editing screen, click Back to Blueprints in the top left.
The Image Builder view opens, listing existing blueprints.

