Fuse 6 is no longer supported
As of February 2025, Red Hat Fuse 6 is no longer supported. If you are using Fuse 6, please upgrade to Red Hat build of Apache Camel.Ce contenu n'est pas disponible dans la langue sélectionnée.
Chapter 5. Creating a new Apache Camel JUnit test case
Overview
Copier lienLien copié sur presse-papiers!
A common way of testing routes is to use JUnit. The design time tooling includes a wizard that simplifies creating a JUnit test case for your routes. The wizard uses the endpoints you specify to generate the starting point code and configuration for the test.
Note
After you create the boilerplate JUnit test case, you need to modify it to add expectations and assertions specific to the route that you've created or modified, so the test is valid for the route.
Procedure
Copier lienLien copié sur presse-papiers!
To create a new JUnit test case for your route:
- In Project Explorer, select the camel-context.xml file in your routing project.
- Right-click it to open the context menu, and then select
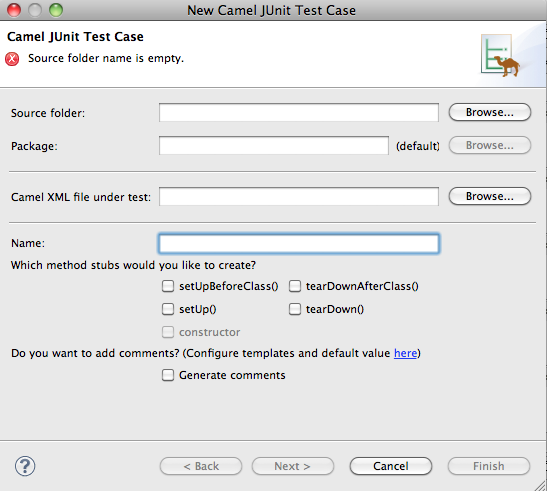
to open the New Camel JUnit Test Case wizard, as shown in Figure 5.1, “New Camel JUnit Test Case wizard”. Figure 5.1. New Camel JUnit Test Case wizard
Alternatively, you can open the wizard by selectingfrom the menu bar. - In Source folder, accept the default location of the source code for the test case, or enter another location.You can click
 to search for a location.
- In Package, accept the default package name for the generated test code, or enter another package name.You can click
to search for a package.
- In Camel XML file under test, accept the default pathname of the routing context file that contains the route you want to test, or enter another pathname.You can click
to search for a context file.
- In Name, accept the default name for the generated test class, or enter another name.
- Select the method stubs you want to include in the generated code.
- If you want to include the default generated comments in the generated code, check the Generate comments box.
- Click
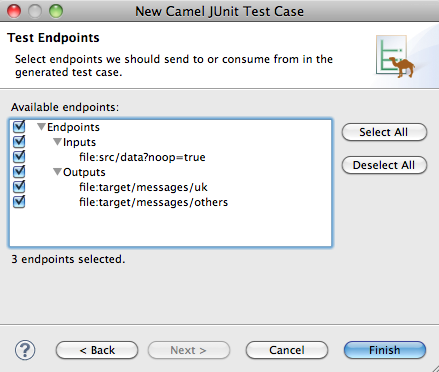
 to open the Test Endpoints page. For example, Figure 5.2, “New Camel JUnit Test Case page” shows a route's input and output file endpoints selected.
Figure 5.2. New Camel JUnit Test Case page
- Under Available endpoints, select the endpoints you want to test. Click the checkbox next to any selected endpoint to deselect it.
- Click
 .
NoteIf prompted, add JUnit to the build path.
.
NoteIf prompted, add JUnit to the build path.
The artifacts for the test are added to your project and appear in Project Explorer under
src/test/java. The class implementing the test case opens in the Java editor.
Related topics
Copier lienLien copié sur presse-papiers!
| New Camel JUnit Test Case |
| Test Endpoints |
| Testing a Route with JUnit in the Red Hat JBoss Fuse ToolingTutorials guide at https://access.redhat.com/site/documentation/JBoss_Fuse/. |