Questo contenuto non è disponibile nella lingua selezionata.
Chapter 5. Developing Operators
5.1. About the Operator SDK
The Operator Framework is an open source toolkit to manage Kubernetes native applications, called Operators, in an effective, automated, and scalable way. Operators take advantage of Kubernetes extensibility to deliver the automation advantages of cloud services, like provisioning, scaling, and backup and restore, while being able to run anywhere that Kubernetes can run.
Operators make it easy to manage complex, stateful applications on top of Kubernetes. However, writing an Operator today can be difficult because of challenges such as using low-level APIs, writing boilerplate, and a lack of modularity, which leads to duplication.
The Operator SDK, a component of the Operator Framework, provides a command-line interface (CLI) tool that Operator developers can use to build, test, and deploy an Operator.
Why use the Operator SDK?
The Operator SDK simplifies this process of building Kubernetes-native applications, which can require deep, application-specific operational knowledge. The Operator SDK not only lowers that barrier, but it also helps reduce the amount of boilerplate code required for many common management capabilities, such as metering or monitoring.
The Operator SDK is a framework that uses the controller-runtime library to make writing Operators easier by providing the following features:
- High-level APIs and abstractions to write the operational logic more intuitively
- Tools for scaffolding and code generation to quickly bootstrap a new project
- Integration with Operator Lifecycle Manager (OLM) to streamline packaging, installing, and running Operators on a cluster
- Extensions to cover common Operator use cases
- Metrics set up automatically in any generated Go-based Operator for use on clusters where the Prometheus Operator is deployed
Operator authors with cluster administrator access to a Kubernetes-based cluster (such as OpenShift Container Platform) can use the Operator SDK CLI to develop their own Operators based on Go, Ansible, or Helm. Kubebuilder is embedded into the Operator SDK as the scaffolding solution for Go-based Operators, which means existing Kubebuilder projects can be used as is with the Operator SDK and continue to work.
OpenShift Container Platform 4.7 supports Operator SDK v1.3.0 or later.
5.1.1. What are Operators?
For an overview about basic Operator concepts and terminology, see Understanding Operators.
5.1.2. Development workflow
The Operator SDK provides the following workflow to develop a new Operator:
- Create an Operator project by using the Operator SDK command-line interface (CLI).
- Define new resource APIs by adding custom resource definitions (CRDs).
- Specify resources to watch by using the Operator SDK API.
- Define the Operator reconciling logic in a designated handler and use the Operator SDK API to interact with resources.
- Use the Operator SDK CLI to build and generate the Operator deployment manifests.
Figure 5.1. Operator SDK workflow
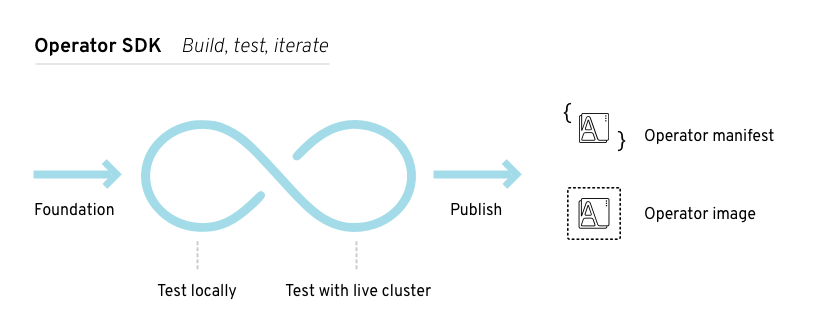
At a high level, an Operator that uses the Operator SDK processes events for watched resources in an Operator author-defined handler and takes actions to reconcile the state of the application.
5.2. Installing the Operator SDK CLI
The Operator SDK provides a command-line interface (CLI) tool that Operator developers can use to build, test, and deploy an Operator. You can install the Operator SDK CLI on your workstation so that you are prepared to start authoring your own Operators.
OpenShift Container Platform 4.7 supports Operator SDK v1.3.0.
5.2.1. Installing the Operator SDK CLI
You can install the OpenShift SDK CLI tool on Linux.
Prerequisites
- Go v1.13+
-
dockerv17.03+,podmanv1.9.3+, orbuildahv1.7+
Procedure
- Navigate to the OpenShift mirror site.
-
From the
4.7.23directory, download the latest version of the tarball for Linux. Unpack the archive:
$ tar xvf operator-sdk-v1.3.0-ocp-linux-x86_64.tar.gzMake the file executable:
$ chmod +x operator-sdkMove the extracted
operator-sdkbinary to a directory that is on yourPATH.TipTo check your
PATH:$ echo $PATH$ sudo mv ./operator-sdk /usr/local/bin/operator-sdk
Verification
After you install the Operator SDK CLI, verify that it is available:
$ operator-sdk versionExample output
operator-sdk version: "v1.3.0-ocp", ...
5.3. Go-based Operators
5.3.1. Getting started with Operator SDK for Go-based Operators
To demonstrate the basics of setting up and running a Go-based Operator using tools and libraries provided by the Operator SDK, Operator developers can build an example Go-based Operator for Memcached, a distributed key-value store, and deploy it to a cluster.
5.3.1.1. Prerequisites
- Operator SDK CLI installed
-
OpenShift CLI (
oc) v4.7+ installed -
Logged into an OpenShift Container Platform 4.7 cluster with
ocwith an account that hascluster-adminpermissions - To allow the cluster pull the image, the repository where you push your image must be set as public, or you must configure an image pull secret.
5.3.1.2. Creating and deploying Go-based Operators
You can build and deploy a simple Go-based Operator for Memcached by using the Operator SDK.
Procedure
Create a project.
Create your project directory:
$ mkdir memcached-operatorChange into the project directory:
$ cd memcached-operatorRun the
operator-sdk initcommand to initialize the project:$ operator-sdk init \ --domain=example.com \ --repo=github.com/example-inc/memcached-operatorThe command uses the Go plug-in by default.
To enable your Go-based Operator to run on OpenShift Container Platform, edit the
config/manager/manager.yamlfile and replace the following line:runAsUser: 65532with:
runAsNonRoot: trueNoteThis step is a temporary workaround required for Go-based Operators only. For more information, see BZ#1914406.
Create an API.
Create a simple Memcached API:
$ operator-sdk create api \
    --resource=true \
    --controller=true \
    --group cache \
    --version v1 \
    --kind Memcached
Build and push the Operator image.
Use the default
Makefiletargets to build and push your Operator. SetIMGwith a pull spec for your image that uses a registry you can push to:$ make docker-build docker-push IMG=<registry>/<user>/<image_name>:<tag>Run the Operator.
Install the CRD:
$ make installDeploy the project to the cluster. Set
IMGto the image that you pushed:$ make deploy IMG=<registry>/<user>/<image_name>:<tag>
Create a sample custom resource (CR).
Create a sample CR:
$ oc apply -f config/samples/cache_v1_memcached.yaml \
    -n memcached-operator-system
Watch for the CR to reconcile the Operator:
$ oc logs deployment.apps/memcached-operator-controller-manager \
    -c manager \
    -n memcached-operator-system
Clean up.
Run the following command to clean up the resources that have been created as part of this procedure:
$ make undeploy
5.3.1.3. Next steps
- See Operator SDK tutorial for Go-based Operators for a more in-depth walkthrough on building a Go-based Operator.
5.3.2. Operator SDK tutorial for Go-based Operators
Operator developers can take advantage of Go programming language support in the Operator SDK to build an example Go-based Operator for Memcached, a distributed key-value store, and manage its lifecycle.
This process is accomplished using two centerpieces of the Operator Framework:
- Operator SDK
-
The
operator-sdkCLI tool andcontroller-runtimelibrary API - Operator Lifecycle Manager (OLM)
- Installation, upgrade, and role-based access control (RBAC) of Operators on a cluster
This tutorial goes into greater detail than Getting started with Operator SDK for Go-based Operators.
5.3.2.1. Prerequisites
- Operator SDK CLI installed
-
OpenShift CLI (
oc) v4.7+ installed -
Logged into an OpenShift Container Platform 4.7 cluster with
ocwith an account that hascluster-adminpermissions - To allow the cluster pull the image, the repository where you push your image must be set as public, or you must configure an image pull secret.
5.3.2.2. Creating a project
Use the Operator SDK CLI to create a project called memcached-operator.
Procedure
Create a directory for the project:
$ mkdir -p $HOME/projects/memcached-operatorChange to the directory:
$ cd $HOME/projects/memcached-operatorActivate support for Go modules:
$ export GO111MODULE=onRun the
operator-sdk initcommand to initialize the project:$ operator-sdk init \ --domain=example.com \ --repo=github.com/example-inc/memcached-operatorNoteThe
operator-sdk initcommand uses the Go plug-in by default.The
operator-sdk initcommand generates ago.modfile to be used with Go modules. The--repoflag is required when creating a project outside of$GOPATH/src/, because generated files require a valid module path.To enable your Go-based Operator to run on OpenShift Container Platform, edit the
config/manager/manager.yamlfile and replace the following line:runAsUser: 65532with:
runAsNonRoot: trueNoteThis step is a temporary workaround required for Go-based Operators only. For more information, see BZ#1914406.
5.3.2.2.1. PROJECT file
Among the files generated by the operator-sdk init command is a Kubebuilder PROJECT file. Subsequent operator-sdk commands, as well as help output, that are run from the project root read this file and are aware that the project type is Go. For example:
domain: example.com
layout: go.kubebuilder.io/v3
projectName: memcached-operator
repo: github.com/example-inc/memcached-operator
version: 3-alpha
plugins:
  manifests.sdk.operatorframework.io/v2: {}
  scorecard.sdk.operatorframework.io/v2: {}
5.3.2.2.2. About the Manager
The main program for the Operator is the main.go file, which initializes and runs the Manager. The Manager automatically registers the Scheme for all custom resource (CR) API definitions and sets up and runs controllers and webhooks.
The Manager can restrict the namespace that all controllers watch for resources:
mgr, err := ctrl.NewManager(cfg, manager.Options{Namespace: namespace})
By default, the Manager watches the namespace where the Operator runs. To watch all namespaces, you can leave the namespace option empty:
mgr, err := ctrl.NewManager(cfg, manager.Options{Namespace: ""})
You can also use the MultiNamespacedCacheBuilder function to watch a specific set of namespaces:
var namespaces []string
mgr, err := ctrl.NewManager(cfg, manager.Options{
   NewCache: cache.MultiNamespacedCacheBuilder(namespaces),
})5.3.2.2.3. About multi-group APIs
Before you create an API and controller, consider whether your Operator requires multiple API groups. This tutorial covers the default case of a single group API, but to change the layout of your project to support multi-group APIs, you can run the following command:
$ operator-sdk edit --multigroup=true
This command updates the PROJECT file, which should look like the following example:
domain: example.com
layout: go.kubebuilder.io/v3
multigroup: true
...
For multi-group projects, the API Go type files are created in the apis/<group>/<version>/ directory, and the controllers are created in the controllers/<group>/ directory. The Dockerfile is then updated accordingly.
5.3.2.3. Creating an API and controller
Use the Operator SDK CLI to create a custom resource definition (CRD) API and controller.
Procedure
Run the following command to create an API with group
cache, version,v1, and kindMemcached:$ operator-sdk create api \ --group=cache \ --version=v1 \ --kind=MemcachedWhen prompted, enter
yfor creating both the resource and controller:Create Resource [y/n] y Create Controller [y/n] yExample output
Writing scaffold for you to edit...
api/v1/memcached_types.go
controllers/memcached_controller.go
...
This process generates the Memcached resource API at api/v1/memcached_types.go and the controller at controllers/memcached_controller.go.
5.3.2.3.1. Defining the API
Define the API for the Memcached custom resource (CR).
Procedure
Modify the Go type definitions at
api/v1/memcached_types.goto have the followingspecandstatus:// MemcachedSpec defines the desired state of Memcached type MemcachedSpec struct { // +kubebuilder:validation:Minimum=0 // Size is the size of the memcached deployment Size int32 `json:"size"` } // MemcachedStatus defines the observed state of Memcached type MemcachedStatus struct { // Nodes are the names of the memcached pods Nodes []string `json:"nodes"` }Update the generated code for the resource type:
$ make generateTipAfter you modify a
*_types.gofile, you must run themake generatecommand to update the generated code for that resource type.The above Makefile target invokes the
controller-genutility to update theapi/v1/zz_generated.deepcopy.gofile. This ensures your API Go type definitions implement theruntime.Objectinterface that all Kind types must implement.
5.3.2.3.2. Generating CRD manifests
After the API is defined with spec and status fields and custom resource definition (CRD) validation markers, you can generate CRD manifests.
Procedure
Run the following command to generate and update CRD manifests:
$ make manifestsThis Makefile target invokes the
controller-genutility to generate the CRD manifests in theconfig/crd/bases/cache.example.com_memcacheds.yamlfile.
5.3.2.3.2.1. About OpenAPI validation
OpenAPIv3 schemas are added to CRD manifests in the spec.validation block when the manifests are generated. This validation block allows Kubernetes to validate the properties in a Memcached custom resource (CR) when it is created or updated.
Markers, or annotations, are available to configure validations for your API. These markers always have a +kubebuilder:validation prefix.
5.3.2.4. Implementing the controller
After creating a new API and controller, you can implement the controller logic.
Procedure
For this example, replace the generated controller file
controllers/memcached_controller.gowith following example implementation:Example 5.1. Example
memcached_controller.go/* Copyright 2020. Licensed under the Apache License, Version 2.0 (the "License"); you may not use this file except in compliance with the License. You may obtain a copy of the License at http://www.apache.org/licenses/LICENSE-2.0 Unless required by applicable law or agreed to in writing, software distributed under the License is distributed on an "AS IS" BASIS, WITHOUT WARRANTIES OR CONDITIONS OF ANY KIND, either express or implied. See the License for the specific language governing permissions and limitations under the License. */ package controllers import ( appsv1 "k8s.io/api/apps/v1" corev1 "k8s.io/api/core/v1" "k8s.io/apimachinery/pkg/api/errors" metav1 "k8s.io/apimachinery/pkg/apis/meta/v1" "k8s.io/apimachinery/pkg/types" "reflect" "context" "github.com/go-logr/logr" "k8s.io/apimachinery/pkg/runtime" ctrl "sigs.k8s.io/controller-runtime" "sigs.k8s.io/controller-runtime/pkg/client" cachev1alpha1 "github.com/example/memcached-operator/api/v1alpha1" ) // MemcachedReconciler reconciles a Memcached object type MemcachedReconciler struct { client.Client Log logr.Logger Scheme *runtime.Scheme } // +kubebuilder:rbac:groups=cache.example.com,resources=memcacheds,verbs=get;list;watch;create;update;patch;delete // +kubebuilder:rbac:groups=cache.example.com,resources=memcacheds/status,verbs=get;update;patch // +kubebuilder:rbac:groups=cache.example.com,resources=memcacheds/finalizers,verbs=update // +kubebuilder:rbac:groups=apps,resources=deployments,verbs=get;list;watch;create;update;patch;delete // +kubebuilder:rbac:groups=core,resources=pods,verbs=get;list; // Reconcile is part of the main kubernetes reconciliation loop which aims to // move the current state of the cluster closer to the desired state. // TODO(user): Modify the Reconcile function to compare the state specified by // the Memcached object against the actual cluster state, and then // perform operations to make the cluster state reflect the state specified by // the user. // // For more details, check Reconcile and its Result here: // - https://pkg.go.dev/sigs.k8s.io/controller-runtime@v0.7.0/pkg/reconcile func (r *MemcachedReconciler) Reconcile(ctx context.Context, req ctrl.Request) (ctrl.Result, error) { log := r.Log.WithValues("memcached", req.NamespacedName) // Fetch the Memcached instance memcached := &cachev1alpha1.Memcached{} err := r.Get(ctx, req.NamespacedName, memcached) if err != nil { if errors.IsNotFound(err) { // Request object not found, could have been deleted after reconcile request. // Owned objects are automatically garbage collected. For additional cleanup logic use finalizers. // Return and don't requeue log.Info("Memcached resource not found. Ignoring since object must be deleted") return ctrl.Result{}, nil } // Error reading the object - requeue the request. log.Error(err, "Failed to get Memcached") return ctrl.Result{}, err } // Check if the deployment already exists, if not create a new one found := &appsv1.Deployment{} err = r.Get(ctx, types.NamespacedName{Name: memcached.Name, Namespace: memcached.Namespace}, found) if err != nil && errors.IsNotFound(err) { // Define a new deployment dep := r.deploymentForMemcached(memcached) log.Info("Creating a new Deployment", "Deployment.Namespace", dep.Namespace, "Deployment.Name", dep.Name) err = r.Create(ctx, dep) if err != nil { log.Error(err, "Failed to create new Deployment", "Deployment.Namespace", dep.Namespace, "Deployment.Name", dep.Name) return ctrl.Result{}, err } // Deployment created successfully - return and requeue return ctrl.Result{Requeue: true}, nil } else if err != nil { log.Error(err, "Failed to get Deployment") return ctrl.Result{}, err } // Ensure the deployment size is the same as the spec size := memcached.Spec.Size if *found.Spec.Replicas != size { found.Spec.Replicas = &size err = r.Update(ctx, found) if err != nil { log.Error(err, "Failed to update Deployment", "Deployment.Namespace", found.Namespace, "Deployment.Name", found.Name) return ctrl.Result{}, err } // Spec updated - return and requeue return ctrl.Result{Requeue: true}, nil } // Update the Memcached status with the pod names // List the pods for this memcached's deployment podList := &corev1.PodList{} listOpts := []client.ListOption{ client.InNamespace(memcached.Namespace), client.MatchingLabels(labelsForMemcached(memcached.Name)), } if err = r.List(ctx, podList, listOpts...); err != nil { log.Error(err, "Failed to list pods", "Memcached.Namespace", memcached.Namespace, "Memcached.Name", memcached.Name) return ctrl.Result{}, err } podNames := getPodNames(podList.Items) // Update status.Nodes if needed if !reflect.DeepEqual(podNames, memcached.Status.Nodes) { memcached.Status.Nodes = podNames err := r.Status().Update(ctx, memcached) if err != nil { log.Error(err, "Failed to update Memcached status") return ctrl.Result{}, err } } return ctrl.Result{}, nil } // deploymentForMemcached returns a memcached Deployment object func (r *MemcachedReconciler) deploymentForMemcached(m *cachev1alpha1.Memcached) *appsv1.Deployment { ls := labelsForMemcached(m.Name) replicas := m.Spec.Size dep := &appsv1.Deployment{ ObjectMeta: metav1.ObjectMeta{ Name: m.Name, Namespace: m.Namespace, }, Spec: appsv1.DeploymentSpec{ Replicas: &replicas, Selector: &metav1.LabelSelector{ MatchLabels: ls, }, Template: corev1.PodTemplateSpec{ ObjectMeta: metav1.ObjectMeta{ Labels: ls, }, Spec: corev1.PodSpec{ Containers: []corev1.Container{{ Image: "memcached:1.4.36-alpine", Name: "memcached", Command: []string{"memcached", "-m=64", "-o", "modern", "-v"}, Ports: []corev1.ContainerPort{{ ContainerPort: 11211, Name: "memcached", }}, }}, }, }, }, } // Set Memcached instance as the owner and controller ctrl.SetControllerReference(m, dep, r.Scheme) return dep } // labelsForMemcached returns the labels for selecting the resources // belonging to the given memcached CR name. func labelsForMemcached(name string) map[string]string { return map[string]string{"app": "memcached", "memcached_cr": name} } // getPodNames returns the pod names of the array of pods passed in func getPodNames(pods []corev1.Pod) []string { var podNames []string for _, pod := range pods { podNames = append(podNames, pod.Name) } return podNames } // SetupWithManager sets up the controller with the Manager. func (r *MemcachedReconciler) SetupWithManager(mgr ctrl.Manager) error { return ctrl.NewControllerManagedBy(mgr). For(&cachev1alpha1.Memcached{}). Owns(&appsv1.Deployment{}). Complete(r) }The example controller runs the following reconciliation logic for each
Memcachedcustom resource (CR):- Create a Memcached deployment if it does not exist.
-
Ensure that the deployment size is the same as specified by the
MemcachedCR spec. -
Update the
MemcachedCR status with the names of thememcachedpods.
The next subsections explain how the controller in the example implementation watches resources and how the reconcile loop is triggered. You can skip these subsections to go directly to Running the Operator.
5.3.2.4.1. Resources watched by the controller
The SetupWithManager() function in controllers/memcached_controller.go specifies how the controller is built to watch a CR and other resources that are owned and managed by that controller.
import (
	...
	appsv1 "k8s.io/api/apps/v1"
	...
)

func (r *MemcachedReconciler) SetupWithManager(mgr ctrl.Manager) error {
	return ctrl.NewControllerManagedBy(mgr).
		For(&cachev1.Memcached{}).
		Owns(&appsv1.Deployment{}).
		Complete(r)
}
NewControllerManagedBy() provides a controller builder that allows various controller configurations.
For(&cachev1.Memcached{}) specifies the Memcached type as the primary resource to watch. For each Add, Update, or Delete event for a Memcached type, the reconcile loop is sent a reconcile Request argument, which consists of a namespace and name key, for that Memcached object.
Owns(&appsv1.Deployment{}) specifies the Deployment type as the secondary resource to watch. For each Deployment type Add, Update, or Delete event, the event handler maps each event to a reconcile request for the owner of the deployment. In this case, the owner is the Memcached object for which the deployment was created.
5.3.2.4.2. Controller configurations
You can initialize a controller by using many other useful configurations. For example:
Set the maximum number of concurrent reconciles for the controller by using the
MaxConcurrentReconcilesoption, which defaults to1:func (r *MemcachedReconciler) SetupWithManager(mgr ctrl.Manager) error { return ctrl.NewControllerManagedBy(mgr). For(&cachev1.Memcached{}). Owns(&appsv1.Deployment{}). WithOptions(controller.Options{ MaxConcurrentReconciles: 2, }). Complete(r) }- Filter watch events using predicates.
-
Choose the type of EventHandler to change how a watch event translates to reconcile requests for the reconcile loop. For Operator relationships that are more complex than primary and secondary resources, you can use the
EnqueueRequestsFromMapFunchandler to transform a watch event into an arbitrary set of reconcile requests.
For more details on these and other configurations, see the upstream Builder and Controller GoDocs.
5.3.2.4.3. Reconcile loop
Every controller has a reconciler object with a Reconcile() method that implements the reconcile loop. The reconcile loop is passed the Request argument, which is a namespace and name key used to find the primary resource object, Memcached, from the cache:
import (
	ctrl "sigs.k8s.io/controller-runtime"

	cachev1 "github.com/example-inc/memcached-operator/api/v1"
	...
)

func (r *MemcachedReconciler) Reconcile(ctx context.Context, req ctrl.Request) (ctrl.Result, error) {
  // Lookup the Memcached instance for this reconcile request
  memcached := &cachev1.Memcached{}
  err := r.Get(ctx, req.NamespacedName, memcached)
  ...
}
Based on the return values, result, and error, the request might be requeued and the reconcile loop might be triggered again:
// Reconcile successful - don't requeue
return ctrl.Result{}, nil
// Reconcile failed due to error - requeue
return ctrl.Result{}, err
// Requeue for any reason other than an error
return ctrl.Result{Requeue: true}, nil
You can set the Result.RequeueAfter to requeue the request after a grace period as well:
import "time"

// Reconcile for any reason other than an error after 5 seconds
return ctrl.Result{RequeueAfter: time.Second*5}, nil
You can return Result with RequeueAfter set to periodically reconcile a CR.
For more on reconcilers, clients, and interacting with resource events, see the Controller Runtime Client API documentation.
5.3.2.4.4. Permissions and RBAC manifests
The controller requires certain RBAC permissions to interact with the resources it manages. These are specified using RBAC markers, such as the following:
// +kubebuilder:rbac:groups=cache.example.com,resources=memcacheds,verbs=get;list;watch;create;update;patch;delete
// +kubebuilder:rbac:groups=cache.example.com,resources=memcacheds/status,verbs=get;update;patch
// +kubebuilder:rbac:groups=cache.example.com,resources=memcacheds/finalizers,verbs=update
// +kubebuilder:rbac:groups=apps,resources=deployments,verbs=get;list;watch;create;update;patch;delete
// +kubebuilder:rbac:groups=core,resources=pods,verbs=get;list;

func (r *MemcachedReconciler) Reconcile(ctx context.Context, req ctrl.Request) (ctrl.Result, error) {
  ...
}
The ClusterRole object manifest at config/rbac/role.yaml is generated from the previous markers by using the controller-gen utility whenever the make manifests command is run.
5.3.2.5. Running the Operator
There are three ways you can use the Operator SDK CLI to build and run your Operator:
- Run locally outside the cluster as a Go program.
- Run as a deployment on the cluster.
- Bundle your Operator and use Operator Lifecycle Manager (OLM) to deploy on the cluster.
Before running your Go-based Operator as either a deployment on OpenShift Container Platform or as a bundle that uses OLM, ensure that your project has been updated to use supported images.
5.3.2.5.1. Running locally outside the cluster
You can run your Operator project as a Go program outside of the cluster. This is useful for development purposes to speed up deployment and testing.
Procedure
Run the following command to install the custom resource definitions (CRDs) in the cluster configured in your
~/.kube/configfile and run the Operator locally:$ make install runExample output
...
2021-01-10T21:09:29.016-0700	INFO	controller-runtime.metrics	metrics server is starting to listen	{"addr": ":8080"}
2021-01-10T21:09:29.017-0700	INFO	setup	starting manager
2021-01-10T21:09:29.017-0700	INFO	controller-runtime.manager	starting metrics server	{"path": "/metrics"}
2021-01-10T21:09:29.018-0700	INFO	controller-runtime.manager.controller.memcached	Starting EventSource	{"reconciler group": "cache.example.com", "reconciler kind": "Memcached", "source": "kind source: /, Kind="}
2021-01-10T21:09:29.218-0700	INFO	controller-runtime.manager.controller.memcached	Starting Controller	{"reconciler group": "cache.example.com", "reconciler kind": "Memcached"}
2021-01-10T21:09:29.218-0700	INFO	controller-runtime.manager.controller.memcached	Starting workers	{"reconciler group": "cache.example.com", "reconciler kind": "Memcached", "worker count": 1}
5.3.2.5.2. Preparing your Operator to use supported images
Before running your Go-based Operator on OpenShift Container Platform, update your project to use supported images.
Procedure
Update the project root-level Dockerfile to use supported images. Change the default runner image reference from:
FROM gcr.io/distroless/static:nonrootto:
FROM registry.access.redhat.com/ubi8/ubi-minimal:latest-
Depending on the Go project version, your Dockerfile might contain a
USER 65532:65532orUSER nonroot:nonrootdirective. In either case, remove the line, as it is not required by the supported runner image. In the
config/default/manager_auth_proxy_patch.yamlfile, change theimagevalue from:gcr.io/kubebuilder/kube-rbac-proxy:<tag>to use the supported image:
registry.redhat.io/openshift4/ose-kube-rbac-proxy:v4.7
5.3.2.5.3. Running as a deployment on the cluster
You can run your Operator project as a deployment on your cluster.
Prerequisites
- Prepared your Go-based Operator to run on OpenShift Container Platform by updating the project to use supported images
Procedure
Run the following
makecommands to build and push the Operator image. Modify theIMGargument in the following steps to reference a repository that you have access to. You can obtain an account for storing containers at repository sites such as Quay.io.Build the image:
$ make docker-build IMG=<registry>/<user>/<image_name>:<tag>NoteThe Dockerfile generated by the SDK for the Operator explicitly references
GOARCH=amd64forgo build. This can be amended toGOARCH=$TARGETARCHfor non-AMD64 architectures. Docker will automatically set the environment variable to the value specified by–platform. With Buildah, the–build-argwill need to be used for the purpose. For more information, see Multiple Architectures.Push the image to a repository:
$ make docker-push IMG=<registry>/<user>/<image_name>:<tag>NoteThe name and tag of the image, for example
IMG=<registry>/<user>/<image_name>:<tag>, in both the commands can also be set in your Makefile. Modify theIMG ?= controller:latestvalue to set your default image name.
Run the following command to deploy the Operator:
$ make deploy IMG=<registry>/<user>/<image_name>:<tag>By default, this command creates a namespace with the name of your Operator project in the form
<project_name>-systemand is used for the deployment. This command also installs the RBAC manifests fromconfig/rbac.Verify that the Operator is running:
$ oc get deployment -n <project_name>-systemExample output
NAME                                    READY   UP-TO-DATE   AVAILABLE   AGE
<project_name>-controller-manager       1/1     1            1           8m
5.3.2.5.4. Bundling an Operator and deploying with Operator Lifecycle Manager
Operator Lifecycle Manager (OLM) helps you to install, update, and generally manage the lifecycle of Operators and their associated services on a Kubernetes cluster. OLM is installed by default on OpenShift Container Platform and runs as a Kubernetes extension so that you can use the web console and the OpenShift CLI (oc) for all Operator lifecycle management functions without any additional tools.
The Operator Bundle Format is the default packaging method for Operator SDK and OLM. You can get your Operator ready for OLM by using the Operator SDK to build, push, validate, and run a bundle image with OLM.
Prerequisites
- Operator SDK CLI installed on a development workstation
-
OpenShift CLI (
oc) v4.7+ installed -
Operator Lifecycle Manager (OLM) installed on a Kubernetes-based cluster (v1.16.0 or later if you use
apiextensions.k8s.io/v1CRDs, for example OpenShift Container Platform 4.7) -
Logged into the cluster with
ocusing an account withcluster-adminpermissions - Operator project initialized by using the Operator SDK
- If your Operator is Go-based, your project must have been updated to use supported images for running on OpenShift Container Platform
Procedure
Run the following
makecommands in your Operator project directory to build and push your Operator image. Modify theIMGargument in the following steps to reference a repository that you have access to. You can obtain an account for storing containers at repository sites such as Quay.io.Build the image:
$ make docker-build IMG=<registry>/<user>/<operator_image_name>:<tag>NoteThe Dockerfile generated by the SDK for the Operator explicitly references
GOARCH=amd64forgo build. This can be amended toGOARCH=$TARGETARCHfor non-AMD64 architectures. Docker will automatically set the environment variable to the value specified by–platform. With Buildah, the–build-argwill need to be used for the purpose. For more information, see Multiple Architectures.Push the image to a repository:
$ make docker-push IMG=<registry>/<user>/<operator_image_name>:<tag>
Create your Operator bundle manifest by running the
make bundlecommand, which invokes several commands, including the Operator SDKgenerate bundleandbundle validatesubcommands:$ make bundle IMG=<registry>/<user>/<operator_image_name>:<tag>Bundle manifests for an Operator describe how to display, create, and manage an application. The
make bundlecommand creates the following files and directories in your Operator project:-
A bundle manifests directory named
bundle/manifeststhat contains aClusterServiceVersionobject -
A bundle metadata directory named
bundle/metadata -
All custom resource definitions (CRDs) in a
config/crddirectory -
A Dockerfile
bundle.Dockerfile
These files are then automatically validated by using
operator-sdk bundle validateto ensure the on-disk bundle representation is correct.-
A bundle manifests directory named
Build and push your bundle image by running the following commands. OLM consumes Operator bundles using an index image, which reference one or more bundle images.
Build the bundle image. Set
BUNDLE_IMAGEwith the details for the registry, user namespace, and image tag where you intend to push the image:$ make bundle-build BUNDLE_IMG=<registry>/<user>/<bundle_image_name>:<tag>Push the bundle image:
$ docker push <registry>/<user>/<bundle_image_name>:<tag>
Check the status of OLM on your cluster by using the following Operator SDK command:
$ operator-sdk olm status \
    --olm-namespace=openshift-operator-lifecycle-manager
Run the Operator on your cluster by using the OLM integration in Operator SDK:
$ operator-sdk run bundle \
    [-n <namespace>] \
1 <registry>/<user>/<bundle_image_name>:<tag>- 1
- By default, the command installs the Operator in the currently active project in your
~/.kube/configfile. You can add the-nflag to set a different namespace scope for the installation.
This command performs the following actions:
- Create an index image with your bundle image injected.
- Create a catalog source that points to your new index image, which enables OperatorHub to discover your Operator.
- Deploy your Operator to your cluster by creating an Operator group, subscription, install plan, and all other required objects, including RBAC.
5.3.2.6. Creating a custom resource
After your Operator is installed, you can test it by creating a custom resource (CR) that is now provided on the cluster by the Operator.
Prerequisites
-
Example Memcached Operator, which provides the
MemcachedCR, installed on a cluster
Procedure
Change to the namespace where your Operator is installed. For example, if you deployed the Operator using the
make deploycommand:$ oc project memcached-operator-systemEdit the sample
MemcachedCR manifest atconfig/samples/cache_v1_memcached.yamlto contain the following specification:apiVersion: cache.example.com/v1 kind: Memcached metadata: name: memcached-sample ... spec: ... size: 3Create the CR:
$ oc apply -f config/samples/cache_v1_memcached.yamlEnsure that the
MemcachedOperator creates the deployment for the sample CR with the correct size:$ oc get deploymentsExample output
NAME                                    READY   UP-TO-DATE   AVAILABLE   AGE
memcached-operator-controller-manager   1/1     1            1           8m
memcached-sample                        3/3     3            3           1m
Check the pods and CR status to confirm the status is updated with the Memcached pod names.
Check the pods:
$ oc get podsExample output
NAME                                  READY     STATUS    RESTARTS   AGE
memcached-sample-6fd7c98d8-7dqdr      1/1       Running   0          1m
memcached-sample-6fd7c98d8-g5k7v      1/1       Running   0          1m
memcached-sample-6fd7c98d8-m7vn7      1/1       Running   0          1m
Check the CR status:
$ oc get memcached/memcached-sample -o yamlExample output
apiVersion: cache.example.com/v1
kind: Memcached
metadata:
...
  name: memcached-sample
...
spec:
  size: 3
status:
  nodes:
  - memcached-sample-6fd7c98d8-7dqdr
  - memcached-sample-6fd7c98d8-g5k7v
  - memcached-sample-6fd7c98d8-m7vn7
Update the deployment size.
Update
config/samples/cache_v1_memcached.yamlfile to change thespec.sizefield in theMemcachedCR from3to5:$ oc patch memcached memcached-sample \ -p '{"spec":{"size": 5}}' \ --type=mergeConfirm that the Operator changes the deployment size:
$ oc get deploymentsExample output
NAME                                    READY   UP-TO-DATE   AVAILABLE   AGE
memcached-operator-controller-manager   1/1     1            1           10m
memcached-sample                        5/5     5            5           3m
Clean up the resources that have been created as part of this tutorial.
If you used the
make deploycommand to test the Operator, run the following command:$ make undeployIf you used the
operator-sdk run bundlecommand to test the Operator, run the following command:$ operator-sdk cleanup <project_name>
5.3.3. Project layout for Go-based Operators
The operator-sdk CLI can generate, or scaffold, a number of packages and files for each Operator project.
5.3.3.1. Go-based project layout
Go-based Operator projects, the default type, generated using the operator-sdk init command contain the following files and directories:
| File or directory | Purpose |
|---|---|
|
|
Main program of the Operator. This instantiates a new manager that registers all custom resource definitions (CRDs) in the |
|
|
Directory tree that defines the APIs of the CRDs. You must edit the |
|
|
Controller implementations. Edit the |
|
| Kubernetes manifests used to deploy your controller on a cluster, including CRDs, RBAC, and certificates. |
|
| Targets used to build and deploy your controller. |
|
| Instructions used by a container engine to build your Operator. |
|
| Kubernetes manifests for registering CRDs, setting up RBAC, and deploying the Operator as a deployment. |
5.4. Ansible-based Operators
5.4.1. Getting started with Operator SDK for Ansible-based Operators
The Operator SDK includes options for generating an Operator project that leverages existing Ansible playbooks and modules to deploy Kubernetes resources as a unified application, without having to write any Go code.
To demonstrate the basics of setting up and running an Ansible-based Operator using tools and libraries provided by the Operator SDK, Operator developers can build an example Ansible-based Operator for Memcached, a distributed key-value store, and deploy it to a cluster.
5.4.1.1. Prerequisites
- Operator SDK CLI installed
-
OpenShift CLI (
oc) v4.7+ installed - Ansible version v2.9.0
- Ansible Runner version v1.1.0+
- Ansible Runner HTTP Event Emitter plug-in version v1.0.0+
- OpenShift Python client version v0.11.2+
-
Logged into an OpenShift Container Platform 4.7 cluster with
ocwith an account that hascluster-adminpermissions - To allow the cluster pull the image, the repository where you push your image must be set as public, or you must configure an image pull secret.
5.4.1.2. Creating and deploying Ansible-based Operators
You can build and deploy a simple Ansible-based Operator for Memcached by using the Operator SDK.
Procedure
Create a project.
Create your project directory:
$ mkdir memcached-operatorChange into the project directory:
$ cd memcached-operatorRun the
operator-sdk initcommand with theansibleplug-in to initialize the project:$ operator-sdk init \ --plugins=ansible \ --domain=example.com
Create an API.
Create a simple Memcached API:
$ operator-sdk create api \
    --group cache \
    --version v1 \
    --kind Memcached \
    --generate-role
1 - 1
- Generates an Ansible role for the API.
Build and push the Operator image.
Use the default
Makefiletargets to build and push your Operator. SetIMGwith a pull spec for your image that uses a registry you can push to:$ make docker-build docker-push IMG=<registry>/<user>/<image_name>:<tag>Run the Operator.
Install the CRD:
$ make installDeploy the project to the cluster. Set
IMGto the image that you pushed:$ make deploy IMG=<registry>/<user>/<image_name>:<tag>
Create a sample custom resource (CR).
Create a sample CR:
$ oc apply -f config/samples/cache_v1_memcached.yaml \
    -n memcached-operator-system
Watch for the CR to reconcile the Operator:
$ oc logs deployment.apps/memcached-operator-controller-manager \
    -c manager \
    -n memcached-operator-system
Example output
...
I0205 17:48:45.881666       7 leaderelection.go:253] successfully acquired lease memcached-operator-system/memcached-operator
{"level":"info","ts":1612547325.8819902,"logger":"controller-runtime.manager.controller.memcached-controller","msg":"Starting EventSource","source":"kind source: cache.example.com/v1, Kind=Memcached"}
{"level":"info","ts":1612547325.98242,"logger":"controller-runtime.manager.controller.memcached-controller","msg":"Starting Controller"}
{"level":"info","ts":1612547325.9824686,"logger":"controller-runtime.manager.controller.memcached-controller","msg":"Starting workers","worker count":4}
{"level":"info","ts":1612547348.8311093,"logger":"runner","msg":"Ansible-runner exited successfully","job":"4037200794235010051","name":"memcached-sample","namespace":"memcached-operator-system"}
Clean up.
Run the following command to clean up the resources that have been created as part of this procedure:
$ make undeploy
5.4.1.3. Next steps
- See Operator SDK tutorial for Ansible-based Operators for a more in-depth walkthrough on building an Ansible-based Operator.
5.4.2. Operator SDK tutorial for Ansible-based Operators
Operator developers can take advantage of Ansible support in the Operator SDK to build an example Ansible-based Operator for Memcached, a distributed key-value store, and manage its lifecycle. This tutorial walks through the following process:
- Create a Memcached deployment
-
Ensure that the deployment size is the same as specified by the
Memcachedcustom resource (CR) spec -
Update the
MemcachedCR status using the status writer with the names of thememcachedpods
This process is accomplished by using two centerpieces of the Operator Framework:
- Operator SDK
-
The
operator-sdkCLI tool andcontroller-runtimelibrary API - Operator Lifecycle Manager (OLM)
- Installation, upgrade, and role-based access control (RBAC) of Operators on a cluster
This tutorial goes into greater detail than Getting started with Operator SDK for Ansible-based Operators.
5.4.2.1. Prerequisites
- Operator SDK CLI installed
-
OpenShift CLI (
oc) v4.7+ installed - Ansible version v2.9.0
- Ansible Runner version v1.1.0+
- Ansible Runner HTTP Event Emitter plug-in version v1.0.0+
- OpenShift Python client version v0.11.2+
-
Logged into an OpenShift Container Platform 4.7 cluster with
ocwith an account that hascluster-adminpermissions - To allow the cluster pull the image, the repository where you push your image must be set as public, or you must configure an image pull secret.
5.4.2.2. Creating a project
Use the Operator SDK CLI to create a project called memcached-operator.
Procedure
Create a directory for the project:
$ mkdir -p $HOME/projects/memcached-operatorChange to the directory:
$ cd $HOME/projects/memcached-operatorRun the
operator-sdk initcommand with theansibleplug-in to initialize the project:$ operator-sdk init \ --plugins=ansible \ --domain=example.com
5.4.2.2.1. PROJECT file
Among the files generated by the operator-sdk init command is a Kubebuilder PROJECT file. Subsequent operator-sdk commands, as well as help output, that are run from the project root read this file and are aware that the project type is Ansible. For example:
domain: example.com
layout: ansible.sdk.operatorframework.io/v1
projectName: memcached-operator
version: 3-alpha
5.4.2.3. Creating an API
Use the Operator SDK CLI to create a Memcached API.
Procedure
Run the following command to create an API with group
cache, version,v1, and kindMemcached:$ operator-sdk create api \ --group cache \ --version v1 \ --kind Memcached \ --generate-role1 - 1
- Generates an Ansible role for the API.
After creating the API, your Operator project updates with the following structure:
- Memcached CRD
-
Includes a sample
Memcachedresource - Manager
Program that reconciles the state of the cluster to the desired state by using:
- A reconciler, either an Ansible role or playbook
-
A
watches.yamlfile, which connects theMemcachedresource to thememcachedAnsible role
5.4.2.4. Modifying the manager
Update your Operator project to provide the reconcile logic, in the form of an Ansible role, which runs every time a Memcached resource is created, updated, or deleted.
Procedure
Update the
roles/memcached/tasks/main.ymlfile with the following structure:--- - name: start memcached community.kubernetes.k8s: definition: kind: Deployment apiVersion: apps/v1 metadata: name: '{{ ansible_operator_meta.name }}-memcached' namespace: '{{ ansible_operator_meta.namespace }}' spec: replicas: "{{size}}" selector: matchLabels: app: memcached template: metadata: labels: app: memcached spec: containers: - name: memcached command: - memcached - -m=64 - -o - modern - -v image: "docker.io/memcached:1.4.36-alpine" ports: - containerPort: 11211This
memcachedrole ensures amemcacheddeployment exist and sets the deployment size.Set default values for variables used in your Ansible role by editing the
roles/memcached/defaults/main.ymlfile:--- # defaults file for Memcached size: 1Update the
Memcachedsample resource in theconfig/samples/cache_v1_memcached.yamlfile with the following structure:apiVersion: cache.example.com/v1 kind: Memcached metadata: name: memcached-sample spec: size: 3The key-value pairs in the custom resource (CR) spec are passed to Ansible as extra variables.
The names of all variables in the spec field are converted to snake case, meaning lowercase with an underscore, by the Operator before running Ansible. For example, serviceAccount in the spec becomes service_account in Ansible.
You can disable this case conversion by setting the snakeCaseParameters option to false in your watches.yaml file. It is recommended that you perform some type validation in Ansible on the variables to ensure that your application is receiving expected input.
5.4.2.5. Running the Operator
There are three ways you can use the Operator SDK CLI to build and run your Operator:
- Run locally outside the cluster as a Go program.
- Run as a deployment on the cluster.
- Bundle your Operator and use Operator Lifecycle Manager (OLM) to deploy on the cluster.
5.4.2.5.1. Running locally outside the cluster
You can run your Operator project as a Go program outside of the cluster. This is useful for development purposes to speed up deployment and testing.
Procedure
Run the following command to install the custom resource definitions (CRDs) in the cluster configured in your
~/.kube/configfile and run the Operator locally:$ make install runExample output
...
{"level":"info","ts":1612589622.7888272,"logger":"ansible-controller","msg":"Watching resource","Options.Group":"cache.example.com","Options.Version":"v1","Options.Kind":"Memcached"}
{"level":"info","ts":1612589622.7897573,"logger":"proxy","msg":"Starting to serve","Address":"127.0.0.1:8888"}
{"level":"info","ts":1612589622.789971,"logger":"controller-runtime.manager","msg":"starting metrics server","path":"/metrics"}
{"level":"info","ts":1612589622.7899997,"logger":"controller-runtime.manager.controller.memcached-controller","msg":"Starting EventSource","source":"kind source: cache.example.com/v1, Kind=Memcached"}
{"level":"info","ts":1612589622.8904517,"logger":"controller-runtime.manager.controller.memcached-controller","msg":"Starting Controller"}
{"level":"info","ts":1612589622.8905244,"logger":"controller-runtime.manager.controller.memcached-controller","msg":"Starting workers","worker count":8}
5.4.2.5.2. Preparing your Operator to use supported images
Before running your Ansible-based Operator on OpenShift Container Platform, update your project to use supported images.
Procedure
Update the project root-level Dockerfile to use supported images. Change the default builder image reference from:
FROM quay.io/operator-framework/ansible-operator:v1.3.0to:
FROM registry.redhat.io/openshift4/ose-ansible-operator:v4.7ImportantUse the builder image version that matches your Operator SDK version. Failure to do so can result in problems due to project layout, or scaffolding, differences, particularly when mixing newer upstream versions of the Operator SDK with downstream OpenShift Container Platform builder images.
In the
config/default/manager_auth_proxy_patch.yamlfile, change theimagevalue from:gcr.io/kubebuilder/kube-rbac-proxy:<tag>to use the supported image:
registry.redhat.io/openshift4/ose-kube-rbac-proxy:v4.7
5.4.2.5.3. Running as a deployment on the cluster
You can run your Operator project as a deployment on your cluster.
Procedure
Run the following
makecommands to build and push the Operator image. Modify theIMGargument in the following steps to reference a repository that you have access to. You can obtain an account for storing containers at repository sites such as Quay.io.Build the image:
$ make docker-build IMG=<registry>/<user>/<image_name>:<tag>NoteThe Dockerfile generated by the SDK for the Operator explicitly references
GOARCH=amd64forgo build. This can be amended toGOARCH=$TARGETARCHfor non-AMD64 architectures. Docker will automatically set the environment variable to the value specified by–platform. With Buildah, the–build-argwill need to be used for the purpose. For more information, see Multiple Architectures.Push the image to a repository:
$ make docker-push IMG=<registry>/<user>/<image_name>:<tag>NoteThe name and tag of the image, for example
IMG=<registry>/<user>/<image_name>:<tag>, in both the commands can also be set in your Makefile. Modify theIMG ?= controller:latestvalue to set your default image name.
Run the following command to deploy the Operator:
$ make deploy IMG=<registry>/<user>/<image_name>:<tag>By default, this command creates a namespace with the name of your Operator project in the form
<project_name>-systemand is used for the deployment. This command also installs the RBAC manifests fromconfig/rbac.Verify that the Operator is running:
$ oc get deployment -n <project_name>-systemExample output
NAME                                    READY   UP-TO-DATE   AVAILABLE   AGE
<project_name>-controller-manager       1/1     1            1           8m
5.4.2.5.4. Bundling an Operator and deploying with Operator Lifecycle Manager
Operator Lifecycle Manager (OLM) helps you to install, update, and generally manage the lifecycle of Operators and their associated services on a Kubernetes cluster. OLM is installed by default on OpenShift Container Platform and runs as a Kubernetes extension so that you can use the web console and the OpenShift CLI (oc) for all Operator lifecycle management functions without any additional tools.
The Operator Bundle Format is the default packaging method for Operator SDK and OLM. You can get your Operator ready for OLM by using the Operator SDK to build, push, validate, and run a bundle image with OLM.
Prerequisites
- Operator SDK CLI installed on a development workstation
-
OpenShift CLI (
oc) v4.7+ installed -
Operator Lifecycle Manager (OLM) installed on a Kubernetes-based cluster (v1.16.0 or later if you use
apiextensions.k8s.io/v1CRDs, for example OpenShift Container Platform 4.7) -
Logged into the cluster with
ocusing an account withcluster-adminpermissions - Operator project initialized by using the Operator SDK
Procedure
Run the following
makecommands in your Operator project directory to build and push your Operator image. Modify theIMGargument in the following steps to reference a repository that you have access to. You can obtain an account for storing containers at repository sites such as Quay.io.Build the image:
$ make docker-build IMG=<registry>/<user>/<operator_image_name>:<tag>NoteThe Dockerfile generated by the SDK for the Operator explicitly references
GOARCH=amd64forgo build. This can be amended toGOARCH=$TARGETARCHfor non-AMD64 architectures. Docker will automatically set the environment variable to the value specified by–platform. With Buildah, the–build-argwill need to be used for the purpose. For more information, see Multiple Architectures.Push the image to a repository:
$ make docker-push IMG=<registry>/<user>/<operator_image_name>:<tag>
Create your Operator bundle manifest by running the
make bundlecommand, which invokes several commands, including the Operator SDKgenerate bundleandbundle validatesubcommands:$ make bundle IMG=<registry>/<user>/<operator_image_name>:<tag>Bundle manifests for an Operator describe how to display, create, and manage an application. The
make bundlecommand creates the following files and directories in your Operator project:-
A bundle manifests directory named
bundle/manifeststhat contains aClusterServiceVersionobject -
A bundle metadata directory named
bundle/metadata -
All custom resource definitions (CRDs) in a
config/crddirectory -
A Dockerfile
bundle.Dockerfile
These files are then automatically validated by using
operator-sdk bundle validateto ensure the on-disk bundle representation is correct.-
A bundle manifests directory named
Build and push your bundle image by running the following commands. OLM consumes Operator bundles using an index image, which reference one or more bundle images.
Build the bundle image. Set
BUNDLE_IMAGEwith the details for the registry, user namespace, and image tag where you intend to push the image:$ make bundle-build BUNDLE_IMG=<registry>/<user>/<bundle_image_name>:<tag>Push the bundle image:
$ docker push <registry>/<user>/<bundle_image_name>:<tag>
Check the status of OLM on your cluster by using the following Operator SDK command:
$ operator-sdk olm status \
    --olm-namespace=openshift-operator-lifecycle-manager
Run the Operator on your cluster by using the OLM integration in Operator SDK:
$ operator-sdk run bundle \
    [-n <namespace>] \
1 <registry>/<user>/<bundle_image_name>:<tag>- 1
- By default, the command installs the Operator in the currently active project in your
~/.kube/configfile. You can add the-nflag to set a different namespace scope for the installation.
This command performs the following actions:
- Create an index image with your bundle image injected.
- Create a catalog source that points to your new index image, which enables OperatorHub to discover your Operator.
- Deploy your Operator to your cluster by creating an Operator group, subscription, install plan, and all other required objects, including RBAC.
5.4.2.6. Creating a custom resource
After your Operator is installed, you can test it by creating a custom resource (CR) that is now provided on the cluster by the Operator.
Prerequisites
-
Example Memcached Operator, which provides the
MemcachedCR, installed on a cluster
Procedure
Change to the namespace where your Operator is installed. For example, if you deployed the Operator using the
make deploycommand:$ oc project memcached-operator-systemEdit the sample
MemcachedCR manifest atconfig/samples/cache_v1_memcached.yamlto contain the following specification:apiVersion: cache.example.com/v1 kind: Memcached metadata: name: memcached-sample ... spec: ... size: 3Create the CR:
$ oc apply -f config/samples/cache_v1_memcached.yamlEnsure that the
MemcachedOperator creates the deployment for the sample CR with the correct size:$ oc get deploymentsExample output
NAME                                    READY   UP-TO-DATE   AVAILABLE   AGE
memcached-operator-controller-manager   1/1     1            1           8m
memcached-sample                        3/3     3            3           1m
Check the pods and CR status to confirm the status is updated with the Memcached pod names.
Check the pods:
$ oc get podsExample output
NAME                                  READY     STATUS    RESTARTS   AGE
memcached-sample-6fd7c98d8-7dqdr      1/1       Running   0          1m
memcached-sample-6fd7c98d8-g5k7v      1/1       Running   0          1m
memcached-sample-6fd7c98d8-m7vn7      1/1       Running   0          1m
Check the CR status:
$ oc get memcached/memcached-sample -o yamlExample output
apiVersion: cache.example.com/v1
kind: Memcached
metadata:
...
  name: memcached-sample
...
spec:
  size: 3
status:
  nodes:
  - memcached-sample-6fd7c98d8-7dqdr
  - memcached-sample-6fd7c98d8-g5k7v
  - memcached-sample-6fd7c98d8-m7vn7
Update the deployment size.
Update
config/samples/cache_v1_memcached.yamlfile to change thespec.sizefield in theMemcachedCR from3to5:$ oc patch memcached memcached-sample \ -p '{"spec":{"size": 5}}' \ --type=mergeConfirm that the Operator changes the deployment size:
$ oc get deploymentsExample output
NAME                                    READY   UP-TO-DATE   AVAILABLE   AGE
memcached-operator-controller-manager   1/1     1            1           10m
memcached-sample                        5/5     5            5           3m
Clean up the resources that have been created as part of this tutorial.
If you used the
make deploycommand to test the Operator, run the following command:$ make undeployIf you used the
operator-sdk run bundlecommand to test the Operator, run the following command:$ operator-sdk cleanup <project_name>
5.4.3. Project layout for Ansible-based Operators
The operator-sdk CLI can generate, or scaffold, a number of packages and files for each Operator project.
5.4.3.1. Ansible-based project layout
Ansible-based Operator projects generated using the operator-sdk init --plugins ansible command contain the following directories and files:
| File or directory | Purpose |
|---|---|
|
| Dockerfile for building the container image for the Operator. |
|
| Targets for building, publishing, deploying the container image that wraps the Operator binary, and targets for installing and uninstalling the custom resource definition (CRD). |
|
| YAML file containing metadata information for the Operator. |
|
|
Base CRD files and the |
|
|
Collects all Operator manifests for deployment. Use by the |
|
| Controller manager deployment. |
|
|
|
|
| Role and role binding for leader election and authentication proxy. |
|
| Sample resources created for the CRDs. |
|
| Sample configurations for testing. |
|
| A subdirectory for the playbooks to run. |
|
| Subdirectory for the roles tree to run. |
|
|
Group/version/kind (GVK) of the resources to watch, and the Ansible invocation method. New entries are added by using the |
|
| YAML file containing the Ansible collections and role dependencies to install during a build. |
|
| Molecule scenarios for end-to-end testing of your role and Operator. |
5.4.4. Ansible support in Operator SDK
5.4.4.1. Custom resource files
Operators use the Kubernetes extension mechanism, custom resource definitions (CRDs), so your custom resource (CR) looks and acts just like the built-in, native Kubernetes objects.
The CR file format is a Kubernetes resource file. The object has mandatory and optional fields:
| Field | Description |
|---|---|
|
| Version of the CR to be created. |
|
| Kind of the CR to be created. |
|
| Kubernetes-specific metadata to be created. |
|
| Key-value list of variables which are passed to Ansible. This field is empty by default. |
|
|
Summarizes the current state of the object. For Ansible-based Operators, the |
|
| Kubernetes-specific annotations to be appended to the CR. |
The following list of CR annotations modify the behavior of the Operator:
| Annotation | Description |
|---|---|
|
|
Specifies the reconciliation interval for the CR. This value is parsed using the standard Golang package |
Example Ansible-based Operator annotation
apiVersion: "test1.example.com/v1alpha1"
kind: "Test1"
metadata:
  name: "example"
annotations:
  ansible.operator-sdk/reconcile-period: "30s"
5.4.4.2. watches.yaml file
A group/version/kind (GVK) is a unique identifier for a Kubernetes API. The watches.yaml file contains a list of mappings from custom resources (CRs), identified by its GVK, to an Ansible role or playbook. The Operator expects this mapping file in a predefined location at /opt/ansible/watches.yaml.
| Field | Description |
|---|---|
|
| Group of CR to watch. |
|
| Version of CR to watch. |
|
| Kind of CR to watch |
|
|
Path to the Ansible role added to the container. For example, if your |
|
|
Path to the Ansible playbook added to the container. This playbook is expected to be a way to call roles. This field is mutually exclusive with the |
|
| The reconciliation interval, how often the role or playbook is run, for a given CR. |
|
|
When set to |
Example watches.yaml file
- version: v1alpha1
  group: test1.example.com
  kind: Test1
  role: /opt/ansible/roles/Test1

- version: v1alpha1
  group: test2.example.com
  kind: Test2
  playbook: /opt/ansible/playbook.yml

- version: v1alpha1
  group: test3.example.com
  kind: Test3
  playbook: /opt/ansible/test3.yml
  reconcilePeriod: 0
manageStatus: false5.4.4.2.1. Advanced options
Advanced features can be enabled by adding them to your watches.yaml file per GVK. They can go below the group, version, kind and playbook or role fields.
Some features can be overridden per resource using an annotation on that CR. The options that can be overridden have the annotation specified below.
| Feature | YAML key | Description | Annotation for override | Default value |
|---|---|---|---|---|
| Reconcile period |
| Time between reconcile runs for a particular CR. |
|
|
| Manage status |
|
Allows the Operator to manage the |
| |
| Watch dependent resources |
| Allows the Operator to dynamically watch resources that are created by Ansible. |
| |
| Watch cluster-scoped resources |
| Allows the Operator to watch cluster-scoped resources that are created by Ansible. |
| |
| Max runner artifacts |
| Manages the number of artifact directories that Ansible Runner keeps in the Operator container for each individual resource. |
|
|
Example watches.yml file with advanced options
- version: v1alpha1
  group: app.example.com
  kind: AppService
  playbook: /opt/ansible/playbook.yml
  maxRunnerArtifacts: 30
  reconcilePeriod: 5s
  manageStatus: False
  watchDependentResources: False
5.4.4.3. Extra variables sent to Ansible
Extra variables can be sent to Ansible, which are then managed by the Operator. The spec section of the custom resource (CR) passes along the key-value pairs as extra variables. This is equivalent to extra variables passed in to the ansible-playbook command.
The Operator also passes along additional variables under the meta field for the name of the CR and the namespace of the CR.
For the following CR example:
apiVersion: "app.example.com/v1alpha1"
kind: "Database"
metadata:
  name: "example"
spec:
  message: "Hello world 2"
  newParameter: "newParam"
The structure passed to Ansible as extra variables is:
{ "meta": {
        "name": "<cr_name>",
        "namespace": "<cr_namespace>",
  },
  "message": "Hello world 2",
  "new_parameter": "newParam",
  "_app_example_com_database": {
     <full_crd>
   },
}
The message and newParameter fields are set in the top level as extra variables, and meta provides the relevant metadata for the CR as defined in the Operator. The meta fields can be accessed using dot notation in Ansible, for example:
---
- debug:
    msg: "name: {{ ansible_operator_meta.name }}, {{ ansible_operator_meta.namespace }}"
5.4.4.4. Ansible Runner directory
Ansible Runner keeps information about Ansible runs in the container. This is located at /tmp/ansible-operator/runner/<group>/<version>/<kind>/<namespace>/<name>.
5.4.5. Kubernetes Collection for Ansible
To manage the lifecycle of your application on Kubernetes using Ansible, you can use the Kubernetes Collection for Ansible. This collection of Ansible modules allows a developer to either leverage their existing Kubernetes resource files written in YAML or express the lifecycle management in native Ansible.
One of the biggest benefits of using Ansible in conjunction with existing Kubernetes resource files is the ability to use Jinja templating so that you can customize resources with the simplicity of a few variables in Ansible.
This section goes into detail on usage of the Kubernetes Collection. To get started, install the collection on your local workstation and test it using a playbook before moving on to using it within an Operator.
5.4.5.1. Installing the Kubernetes Collection for Ansible
You can install the Kubernetes Collection for Ansible on your local workstation.
Procedure
Install Ansible 2.9+:
$ sudo dnf install ansibleInstall the OpenShift python client package:
$ pip3 install openshiftInstall the Kubernetes Collection using one of the following methods:
You can install the collection directly from Ansible Galaxy:
$ ansible-galaxy collection install community.kubernetesIf you have already initialized your Operator, you might have a
requirements.ymlfile at the top level of your project. This file specifies Ansible dependencies that must be installed for your Operator to function. By default, this file installs thecommunity.kubernetescollection as well as theoperator_sdk.utilcollection, which provides modules and plug-ins for Operator-specific fuctions.To install the dependent modules from the
requirements.ymlfile:$ ansible-galaxy collection install -r requirements.yml
5.4.5.2. Testing the Kubernetes Collection locally
Operator developers can run the Ansible code from their local machine as opposed to running and rebuilding the Operator each time.
Prerequisites
- Initialize an Ansible-based Operator project and create an API that has a generated Ansible role by using the Operator SDK
- Install the Kubernetes Collection for Ansible
Procedure
In your Ansible-based Operator project directory, modify the
roles/<kind>/tasks/main.ymlfile with the Ansible logic that you want. Theroles/<kind>/directory is created when you use the--generate-roleflag while creating an API. The<kind>replaceable matches the kind that you specified for the API.The following example creates and deletes a config map based on the value of a variable named
state:--- - name: set ConfigMap example-config to {{ state }} community.kubernetes.k8s: api_version: v1 kind: ConfigMap name: example-config namespace: default1 state: "{{ state }}" ignore_errors: true2 Modify the
roles/<kind>/defaults/main.ymlfile to setstatetopresentby default:--- state: presentCreate an Ansible playbook by creating a
playbook.ymlfile in the top-level of your project directory, and include your<kind>role:--- - hosts: localhost roles: - <kind>Run the playbook:
$ ansible-playbook playbook.ymlExample output
[WARNING]: provided hosts list is empty, only localhost is available. Note that the implicit localhost does not match 'all'

PLAY [localhost] ********************************************************************************

TASK [Gathering Facts] ********************************************************************************
ok: [localhost]

TASK [memcached : set ConfigMap example-config to present] ********************************************************************************
changed: [localhost]

PLAY RECAP ********************************************************************************
localhost                  : ok=2    changed=1    unreachable=0    failed=0    skipped=0    rescued=0    ignored=0
Verify that the config map was created:
$ oc get configmapsExample output
NAME               DATA   AGE
example-config     0      2m1s
Rerun the playbook setting
statetoabsent:$ ansible-playbook playbook.yml --extra-vars state=absentExample output
[WARNING]: provided hosts list is empty, only localhost is available. Note that the implicit localhost does not match 'all'

PLAY [localhost] ********************************************************************************

TASK [Gathering Facts] ********************************************************************************
ok: [localhost]

TASK [memcached : set ConfigMap example-config to absent] ********************************************************************************
changed: [localhost]

PLAY RECAP ********************************************************************************
localhost                  : ok=2    changed=1    unreachable=0    failed=0    skipped=0    rescued=0    ignored=0
Verify that the config map was deleted:
$ oc get configmaps
5.4.5.3. Next steps
- See Using Ansible inside an Operator for details on triggering your custom Ansible logic inside of an Operator when a custom resource (CR) changes.
5.4.6. Using Ansible inside an Operator
After you are familiar with using the Kubernetes Collection for Ansible locally, you can trigger the same Ansible logic inside of an Operator when a custom resource (CR) changes. This example maps an Ansible role to a specific Kubernetes resource that the Operator watches. This mapping is done in the watches.yaml file.
5.4.6.1. Custom resource files
Operators use the Kubernetes extension mechanism, custom resource definitions (CRDs), so your custom resource (CR) looks and acts just like the built-in, native Kubernetes objects.
The CR file format is a Kubernetes resource file. The object has mandatory and optional fields:
| Field | Description |
|---|---|
|
| Version of the CR to be created. |
|
| Kind of the CR to be created. |
|
| Kubernetes-specific metadata to be created. |
|
| Key-value list of variables which are passed to Ansible. This field is empty by default. |
|
|
Summarizes the current state of the object. For Ansible-based Operators, the |
|
| Kubernetes-specific annotations to be appended to the CR. |
The following list of CR annotations modify the behavior of the Operator:
| Annotation | Description |
|---|---|
|
|
Specifies the reconciliation interval for the CR. This value is parsed using the standard Golang package |
Example Ansible-based Operator annotation
apiVersion: "test1.example.com/v1alpha1"
kind: "Test1"
metadata:
  name: "example"
annotations:
  ansible.operator-sdk/reconcile-period: "30s"
5.4.6.2. Testing an Ansible-based Operator locally
You can test the logic inside of an Ansible-based Operator running locally by using the make run command from the top-level directory of your Operator project. The make run Makefile target runs the ansible-operator binary locally, which reads from the watches.yaml file and uses your ~/.kube/config file to communicate with a Kubernetes cluster just as the k8s modules do.
You can customize the roles path by setting the environment variable ANSIBLE_ROLES_PATH or by using the ansible-roles-path flag. If the role is not found in the ANSIBLE_ROLES_PATH value, the Operator looks for it in {{current directory}}/roles.
Prerequisites
- Ansible Runner version v1.1.0+
- Ansible Runner HTTP Event Emitter plug-in version v1.0.0+
- Performed the previous steps for testing the Kubernetes Collection locally
Procedure
Install your custom resource definition (CRD) and proper role-based access control (RBAC) definitions for your custom resource (CR):
$ make installExample output
/usr/bin/kustomize build config/crd | kubectl apply -f -
customresourcedefinition.apiextensions.k8s.io/memcacheds.cache.example.com created
Run the
make runcommand:$ make runExample output
/home/user/memcached-operator/bin/ansible-operator run
{"level":"info","ts":1612739145.2871568,"logger":"cmd","msg":"Version","Go Version":"go1.15.5","GOOS":"linux","GOARCH":"amd64","ansible-operator":"v1.3.0","commit":"1abf57985b43bf6a59dcd18147b3c574fa57d3f6"}
...
{"level":"info","ts":1612739148.347306,"logger":"controller-runtime.metrics","msg":"metrics server is starting to listen","addr":":8080"}
{"level":"info","ts":1612739148.3488882,"logger":"watches","msg":"Environment variable not set; using default value","envVar":"ANSIBLE_VERBOSITY_MEMCACHED_CACHE_EXAMPLE_COM","default":2}
{"level":"info","ts":1612739148.3490262,"logger":"cmd","msg":"Environment variable not set; using default value","Namespace":"","envVar":"ANSIBLE_DEBUG_LOGS","ANSIBLE_DEBUG_LOGS":false}
{"level":"info","ts":1612739148.3490646,"logger":"ansible-controller","msg":"Watching resource","Options.Group":"cache.example.com","Options.Version":"v1","Options.Kind":"Memcached"}
{"level":"info","ts":1612739148.350217,"logger":"proxy","msg":"Starting to serve","Address":"127.0.0.1:8888"}
{"level":"info","ts":1612739148.3506632,"logger":"controller-runtime.manager","msg":"starting metrics server","path":"/metrics"}
{"level":"info","ts":1612739148.350784,"logger":"controller-runtime.manager.controller.memcached-controller","msg":"Starting EventSource","source":"kind source: cache.example.com/v1, Kind=Memcached"}
{"level":"info","ts":1612739148.5511978,"logger":"controller-runtime.manager.controller.memcached-controller","msg":"Starting Controller"}
{"level":"info","ts":1612739148.5512562,"logger":"controller-runtime.manager.controller.memcached-controller","msg":"Starting workers","worker count":8}
With the Operator now watching your CR for events, the creation of a CR will trigger your Ansible role to run.
NoteConsider an example
config/samples/<gvk>.yamlCR manifest:apiVersion: <group>.example.com/v1alpha1 kind: <kind> metadata: name: "<kind>-sample"Because the
specfield is not set, Ansible is invoked with no extra variables. Passing extra variables from a CR to Ansible is covered in another section. It is important to set reasonable defaults for the Operator.Create an instance of your CR with the default variable
stateset topresent:$ oc apply -f config/samples/<gvk>.yamlCheck that the
example-configconfig map was created:$ oc get configmapsExample output
NAME                    STATUS    AGE
example-config          Active    3s
Modify your
config/samples/<gvk>.yamlfile to set thestatefield toabsent. For example:apiVersion: cache.example.com/v1 kind: Memcached metadata: name: memcached-sample spec: state: absentApply the changes:
$ oc apply -f config/samples/<gvk>.yamlConfirm that the config map is deleted:
$ oc get configmap
5.4.6.3. Testing an Ansible-based Operator on the cluster
After you have tested your custom Ansible logic locally inside of an Operator, you can test the Operator inside of a pod on an OpenShift Container Platform cluster, which is prefered for production use.
You can run your Operator project as a deployment on your cluster.
Procedure
Run the following
makecommands to build and push the Operator image. Modify theIMGargument in the following steps to reference a repository that you have access to. You can obtain an account for storing containers at repository sites such as Quay.io.Build the image:
$ make docker-build IMG=<registry>/<user>/<image_name>:<tag>NoteThe Dockerfile generated by the SDK for the Operator explicitly references
GOARCH=amd64forgo build. This can be amended toGOARCH=$TARGETARCHfor non-AMD64 architectures. Docker will automatically set the environment variable to the value specified by–platform. With Buildah, the–build-argwill need to be used for the purpose. For more information, see Multiple Architectures.Push the image to a repository:
$ make docker-push IMG=<registry>/<user>/<image_name>:<tag>NoteThe name and tag of the image, for example
IMG=<registry>/<user>/<image_name>:<tag>, in both the commands can also be set in your Makefile. Modify theIMG ?= controller:latestvalue to set your default image name.
Run the following command to deploy the Operator:
$ make deploy IMG=<registry>/<user>/<image_name>:<tag>By default, this command creates a namespace with the name of your Operator project in the form
<project_name>-systemand is used for the deployment. This command also installs the RBAC manifests fromconfig/rbac.Verify that the Operator is running:
$ oc get deployment -n <project_name>-systemExample output
NAME                                    READY   UP-TO-DATE   AVAILABLE   AGE
<project_name>-controller-manager       1/1     1            1           8m
5.4.6.4. Ansible logs
Ansible-based Operators provide logs about the Ansible run, which can be useful for debugging your Ansible tasks. The logs can also contain detailed information about the internals of the Operator and its interactions with Kubernetes.
5.4.6.4.1. Viewing Ansible logs
Prerequisites
- Ansible-based Operator running as a deployment on a cluster
Procedure
To view logs from an Ansible-based Operator, run the following command:
$ oc logs deployment/<project_name>-controller-manager \
    -c manager \
1 -n <namespace>2 Example output
{"level":"info","ts":1612732105.0579333,"logger":"cmd","msg":"Version","Go Version":"go1.15.5","GOOS":"linux","GOARCH":"amd64","ansible-operator":"v1.3.0","commit":"1abf57985b43bf6a59dcd18147b3c574fa57d3f6"}
{"level":"info","ts":1612732105.0587437,"logger":"cmd","msg":"WATCH_NAMESPACE environment variable not set. Watching all namespaces.","Namespace":""}
I0207 21:08:26.110949       7 request.go:645] Throttling request took 1.035521578s, request: GET:https://172.30.0.1:443/apis/flowcontrol.apiserver.k8s.io/v1alpha1?timeout=32s
{"level":"info","ts":1612732107.768025,"logger":"controller-runtime.metrics","msg":"metrics server is starting to listen","addr":"127.0.0.1:8080"}
{"level":"info","ts":1612732107.768796,"logger":"watches","msg":"Environment variable not set; using default value","envVar":"ANSIBLE_VERBOSITY_MEMCACHED_CACHE_EXAMPLE_COM","default":2}
{"level":"info","ts":1612732107.7688773,"logger":"cmd","msg":"Environment variable not set; using default value","Namespace":"","envVar":"ANSIBLE_DEBUG_LOGS","ANSIBLE_DEBUG_LOGS":false}
{"level":"info","ts":1612732107.7688901,"logger":"ansible-controller","msg":"Watching resource","Options.Group":"cache.example.com","Options.Version":"v1","Options.Kind":"Memcached"}
{"level":"info","ts":1612732107.770032,"logger":"proxy","msg":"Starting to serve","Address":"127.0.0.1:8888"}
I0207 21:08:27.770185       7 leaderelection.go:243] attempting to acquire leader lease  memcached-operator-system/memcached-operator...
{"level":"info","ts":1612732107.770202,"logger":"controller-runtime.manager","msg":"starting metrics server","path":"/metrics"}
I0207 21:08:27.784854       7 leaderelection.go:253] successfully acquired lease memcached-operator-system/memcached-operator
{"level":"info","ts":1612732107.7850506,"logger":"controller-runtime.manager.controller.memcached-controller","msg":"Starting EventSource","source":"kind source: cache.example.com/v1, Kind=Memcached"}
{"level":"info","ts":1612732107.8853772,"logger":"controller-runtime.manager.controller.memcached-controller","msg":"Starting Controller"}
{"level":"info","ts":1612732107.8854098,"logger":"controller-runtime.manager.controller.memcached-controller","msg":"Starting workers","worker count":4}
5.4.6.4.2. Enabling full Ansible results in logs
You can set the environment variable ANSIBLE_DEBUG_LOGS to True to enable checking the full Ansible result in logs, which can be helpful when debugging.
Procedure
Edit the
config/manager/manager.yamlandconfig/default/manager_auth_proxy_patch.yamlfiles to include the following configuration:containers: - name: manager env: - name: ANSIBLE_DEBUG_LOGS value: "True"
5.4.6.4.3. Enabling verbose debugging in logs
While developing an Ansible-based Operator, it can be helpful to enable additional debugging in logs.
Procedure
Add the
ansible.sdk.operatorframework.io/verbosityannotation to your custom resource to enable the verbosity level that you want. For example:apiVersion: "cache.example.com/v1alpha1" kind: "Memcached" metadata: name: "example-memcached" annotations: "ansible.sdk.operatorframework.io/verbosity": "4" spec: size: 4
5.4.7. Custom resource status management
5.4.7.1. About custom resource status in Ansible-based Operators
Ansible-based Operators automatically update custom resource (CR) status subresources with generic information about the previous Ansible run. This includes the number of successful and failed tasks and relevant error messages as shown:
status:
  conditions:
  - ansibleResult:
      changed: 3
      completion: 2018-12-03T13:45:57.13329
      failures: 1
      ok: 6
      skipped: 0
    lastTransitionTime: 2018-12-03T13:45:57Z
    message: 'Status code was -1 and not [200]: Request failed: <urlopen error [Errno
      113] No route to host>'
    reason: Failed
    status: "True"
    type: Failure
  - lastTransitionTime: 2018-12-03T13:46:13Z
    message: Running reconciliation
    reason: Running
    status: "True"
    type: Running
Ansible-based Operators also allow Operator authors to supply custom status values with the k8s_status Ansible module, which is included in the operator_sdk.util collection. This allows the author to update the status from within Ansible with any key-value pair as desired.
By default, Ansible-based Operators always include the generic Ansible run output as shown above. If you would prefer your application did not update the status with Ansible output, you can track the status manually from your application.
5.4.7.2. Tracking custom resource status manually
You can use the operator_sdk.util collection to modify your Ansible-based Operator to track custom resource (CR) status manually from your application.
Prerequisites
- Ansible-based Operator project created by using the Operator SDK
Procedure
Update the
watches.yamlfile with amanageStatusfield set tofalse:- version: v1 group: api.example.com kind: <kind> role: <role> manageStatus: falseUse the
operator_sdk.util.k8s_statusAnsible module to update the subresource. For example, to update with keytestand valuedata,operator_sdk.utilcan be used as shown:- operator_sdk.util.k8s_status: api_version: app.example.com/v1 kind: <kind> name: "{{ ansible_operator_meta.name }}" namespace: "{{ ansible_operator_meta.namespace }}" status: test: dataYou can declare collections in the
meta/main.ymlfile for the role, which is included for scaffolded Ansible-based Operators:collections: - operator_sdk.utilAfter declaring collections in the role meta, you can invoke the
k8s_statusmodule directly:k8s_status: ... status: key1: value1
5.5. Helm-based Operators
5.5.1. Getting started with Operator SDK for Helm-based Operators
The Operator SDK includes options for generating an Operator project that leverages existing Helm charts to deploy Kubernetes resources as a unified application, without having to write any Go code.
To demonstrate the basics of setting up and running an Helm-based Operator using tools and libraries provided by the Operator SDK, Operator developers can build an example Helm-based Operator for Nginx and deploy it to a cluster.
5.5.1.1. Prerequisites
- Operator SDK CLI installed
-
OpenShift CLI (
oc) v4.7+ installed -
Logged into an OpenShift Container Platform 4.7 cluster with
ocwith an account that hascluster-adminpermissions - To allow the cluster pull the image, the repository where you push your image must be set as public, or you must configure an image pull secret.
5.5.1.2. Creating and deploying Helm-based Operators
You can build and deploy a simple Helm-based Operator for Nginx by using the Operator SDK.
Procedure
Create a project.
Create your project directory:
$ mkdir nginx-operatorChange into the project directory:
$ cd nginx-operatorRun the
operator-sdk initcommand with thehelmplug-in to initialize the project:$ operator-sdk init \ --plugins=helm
Create an API.
Create a simple Nginx API:
$ operator-sdk create api \
    --group demo \
    --version v1 \
    --kind Nginx
This API uses the built-in Helm chart boilerplate from the
helm createcommand.Build and push the Operator image.
Use the default
Makefiletargets to build and push your Operator. SetIMGwith a pull spec for your image that uses a registry you can push to:$ make docker-build docker-push IMG=<registry>/<user>/<image_name>:<tag>Run the Operator.
Install the CRD:
$ make installDeploy the project to the cluster. Set
IMGto the image that you pushed:$ make deploy IMG=<registry>/<user>/<image_name>:<tag>
Add a security context constraint (SCC).
The Nginx service account requires privileged access to run in OpenShift Container Platform. Add the following SCC to the service account for the
nginx-samplepod:$ oc adm policy add-scc-to-user \ anyuid system:serviceaccount:nginx-operator-system:nginx-sampleCreate a sample custom resource (CR).
Create a sample CR:
$ oc apply -f config/samples/demo_v1_nginx.yaml \
    -n nginx-operator-system
Watch for the CR to reconcile the Operator:
$ oc logs deployment.apps/nginx-operator-controller-manager \
    -c manager \
    -n nginx-operator-system
Clean up.
Run the following command to clean up the resources that have been created as part of this procedure:
$ make undeploy
5.5.1.3. Next steps
- See Operator SDK tutorial for Helm-based Operators for a more in-depth walkthrough on building a Helm-based Operator.
5.5.2. Operator SDK tutorial for Helm-based Operators
Operator developers can take advantage of Helm support in the Operator SDK to build an example Helm-based Operator for Nginx and manage its lifecycle. This tutorial walks through the following process:
- Create a Nginx deployment
-
Ensure that the deployment size is the same as specified by the
Nginxcustom resource (CR) spec -
Update the
NginxCR status using the status writer with the names of thenginxpods
This process is accomplished using two centerpieces of the Operator Framework:
- Operator SDK
-
The
operator-sdkCLI tool andcontroller-runtimelibrary API - Operator Lifecycle Manager (OLM)
- Installation, upgrade, and role-based access control (RBAC) of Operators on a cluster
This tutorial goes into greater detail than Getting started with Operator SDK for Helm-based Operators.
5.5.2.1. Prerequisites
- Operator SDK CLI installed
-
OpenShift CLI (
oc) v4.7+ installed -
Logged into an OpenShift Container Platform 4.7 cluster with
ocwith an account that hascluster-adminpermissions - To allow the cluster pull the image, the repository where you push your image must be set as public, or you must configure an image pull secret.
5.5.2.2. Creating a project
Use the Operator SDK CLI to create a project called nginx-operator.
Procedure
Create a directory for the project:
$ mkdir -p $HOME/projects/nginx-operatorChange to the directory:
$ cd $HOME/projects/nginx-operatorRun the
operator-sdk initcommand with thehelmplug-in to initialize the project:$ operator-sdk init \ --plugins=helm \ --domain=example.com \ --group=demo \ --version=v1 \ --kind=NginxNoteBy default, the
helmplug-in initializes a project using a boilerplate Helm chart. You can use additional flags, such as the--helm-chartflag, to initialize a project using an existing Helm chart.The
initcommand creates thenginx-operatorproject specifically for watching a resource with API versionexample.com/v1and kindNginx.-
For Helm-based projects, the
initcommand generates the RBAC rules in theconfig/rbac/role.yamlfile based on the resources that would be deployed by the default manifest for the chart. Verify that the rules generated in this file meet the permission requirements of the Operator.
5.5.2.2.1. Existing Helm charts
Instead of creating your project with a boilerplate Helm chart, you can alternatively use an existing chart, either from your local file system or a remote chart repository, by using the following flags:
-
--helm-chart -
--helm-chart-repo -
--helm-chart-version
If the --helm-chart flag is specified, the --group, --version, and --kind flags become optional. If left unset, the following default values are used:
| Flag | Value |
|---|---|
|
|
|
|
|
|
|
|
|
|
| Deduced from the specified chart |
If the --helm-chart flag specifies a local chart archive, for example example-chart-1.2.0.tgz, or directory, the chart is validated and unpacked or copied into the project. Otherwise, the Operator SDK attempts to fetch the chart from a remote repository.
If a custom repository URL is not specified by the --helm-chart-repo flag, the following chart reference formats are supported:
| Format | Description |
|---|---|
|
|
Fetch the Helm chart named |
|
| Fetch the Helm chart archive at the specified URL. |
If a custom repository URL is specified by --helm-chart-repo, the following chart reference format is supported:
| Format | Description |
|---|---|
|
|
Fetch the Helm chart named |
If the --helm-chart-version flag is unset, the Operator SDK fetches the latest available version of the Helm chart. Otherwise, it fetches the specified version. The optional --helm-chart-version flag is not used when the chart specified with the --helm-chart flag refers to a specific version, for example when it is a local path or a URL.
For more details and examples, run:
$ operator-sdk init --plugins helm --help5.5.2.2.2. PROJECT file
Among the files generated by the operator-sdk init command is a Kubebuilder PROJECT file. Subsequent operator-sdk commands, as well as help output, that are run from the project root read this file and are aware that the project type is Helm. For example:
domain: example.com
layout: helm.sdk.operatorframework.io/v1
projectName: helm-operator
resources:
- group: demo
  kind: Nginx
  version: v1
version: 3-alpha
5.5.2.3. Understanding the Operator logic
For this example, the nginx-operator project executes the following reconciliation logic for each Nginx custom resource (CR):
- Create an Nginx deployment if it does not exist.
- Create an Nginx service if it does not exist.
- Create an Nginx ingress if it is enabled and does not exist.
-
Ensure that the deployment, service, and optional ingress match the desired configuration as specified by the
NginxCR, for example the replica count, image, and service type.
By default, the nginx-operator project watches Nginx resource events as shown in the watches.yaml file and executes Helm releases using the specified chart:
# Use the 'create api' subcommand to add watches to this file.
- group: demo
  version: v1
  kind: Nginx
  chart: helm-charts/nginx
# +kubebuilder:scaffold:watch
5.5.2.3.1. Sample Helm chart
When a Helm Operator project is created, the Operator SDK creates a sample Helm chart that contains a set of templates for a simple Nginx release.
For this example, templates are available for deployment, service, and ingress resources, along with a NOTES.txt template, which Helm chart developers use to convey helpful information about a release.
If you are not already familiar with Helm charts, review the Helm developer documentation.
5.5.2.3.2. Modifying the custom resource spec
Helm uses a concept called values to provide customizations to the defaults of a Helm chart, which are defined in the values.yaml file.
You can override these defaults by setting the desired values in the custom resource (CR) spec. You can use the number of replicas as an example.
Procedure
The
helm-charts/nginx/values.yamlfile has a value calledreplicaCountset to1by default. To have two Nginx instances in your deployment, your CR spec must containreplicaCount: 2.Edit the
config/samples/demo_v1_nginx.yamlfile to setreplicaCount: 2:apiVersion: demo.example.com/v1 kind: Nginx metadata: name: nginx-sample ... spec: ... replicaCount: 2Similarly, the default service port is set to
80. To use8080, edit theconfig/samples/demo_v1_nginx.yamlfile to setspec.port: 8080,which adds the service port override:apiVersion: demo.example.com/v1 kind: Nginx metadata: name: nginx-sample spec: replicaCount: 2 service: port: 8080
The Helm Operator applies the entire spec as if it was the contents of a values file, just like the helm install -f ./overrides.yaml command.
5.5.2.4. Running the Operator
There are three ways you can use the Operator SDK CLI to build and run your Operator:
- Run locally outside the cluster as a Go program.
- Run as a deployment on the cluster.
- Bundle your Operator and use Operator Lifecycle Manager (OLM) to deploy on the cluster.
5.5.2.4.1. Running locally outside the cluster
You can run your Operator project as a Go program outside of the cluster. This is useful for development purposes to speed up deployment and testing.
Procedure
Run the following command to install the custom resource definitions (CRDs) in the cluster configured in your
~/.kube/configfile and run the Operator locally:$ make install runExample output
...
{"level":"info","ts":1612652419.9289865,"logger":"controller-runtime.metrics","msg":"metrics server is starting to listen","addr":":8080"}
{"level":"info","ts":1612652419.9296563,"logger":"helm.controller","msg":"Watching resource","apiVersion":"demo.example.com/v1","kind":"Nginx","namespace":"","reconcilePeriod":"1m0s"}
{"level":"info","ts":1612652419.929983,"logger":"controller-runtime.manager","msg":"starting metrics server","path":"/metrics"}
{"level":"info","ts":1612652419.930015,"logger":"controller-runtime.manager.controller.nginx-controller","msg":"Starting EventSource","source":"kind source: demo.example.com/v1, Kind=Nginx"}
{"level":"info","ts":1612652420.2307851,"logger":"controller-runtime.manager.controller.nginx-controller","msg":"Starting Controller"}
{"level":"info","ts":1612652420.2309358,"logger":"controller-runtime.manager.controller.nginx-controller","msg":"Starting workers","worker count":8}
5.5.2.4.2. Preparing your Operator to use supported images
Before running your Helm-based Operator on OpenShift Container Platform, update your project to use supported images.
Procedure
Update the project root-level Dockerfile to use supported images. Change the default builder image reference from:
FROM quay.io/operator-framework/helm-operator:v1.3.0to:
FROM registry.redhat.io/openshift4/ose-helm-operator:v4.7ImportantUse the builder image version that matches your Operator SDK version. Failure to do so can result in problems due to project layout, or scaffolding, differences, particularly when mixing newer upstream versions of the Operator SDK with downstream OpenShift Container Platform builder images.
In the
config/default/manager_auth_proxy_patch.yamlfile, change theimagevalue from:gcr.io/kubebuilder/kube-rbac-proxy:<tag>to use the supported image:
registry.redhat.io/openshift4/ose-kube-rbac-proxy:v4.7
5.5.2.4.3. Running as a deployment on the cluster
You can run your Operator project as a deployment on your cluster.
Procedure
Run the following
makecommands to build and push the Operator image. Modify theIMGargument in the following steps to reference a repository that you have access to. You can obtain an account for storing containers at repository sites such as Quay.io.Build the image:
$ make docker-build IMG=<registry>/<user>/<image_name>:<tag>NoteThe Dockerfile generated by the SDK for the Operator explicitly references
GOARCH=amd64forgo build. This can be amended toGOARCH=$TARGETARCHfor non-AMD64 architectures. Docker will automatically set the environment variable to the value specified by–platform. With Buildah, the–build-argwill need to be used for the purpose. For more information, see Multiple Architectures.Push the image to a repository:
$ make docker-push IMG=<registry>/<user>/<image_name>:<tag>NoteThe name and tag of the image, for example
IMG=<registry>/<user>/<image_name>:<tag>, in both the commands can also be set in your Makefile. Modify theIMG ?= controller:latestvalue to set your default image name.
Run the following command to deploy the Operator:
$ make deploy IMG=<registry>/<user>/<image_name>:<tag>By default, this command creates a namespace with the name of your Operator project in the form
<project_name>-systemand is used for the deployment. This command also installs the RBAC manifests fromconfig/rbac.Verify that the Operator is running:
$ oc get deployment -n <project_name>-systemExample output
NAME                                    READY   UP-TO-DATE   AVAILABLE   AGE
<project_name>-controller-manager       1/1     1            1           8m
5.5.2.4.4. Bundling an Operator and deploying with Operator Lifecycle Manager
Operator Lifecycle Manager (OLM) helps you to install, update, and generally manage the lifecycle of Operators and their associated services on a Kubernetes cluster. OLM is installed by default on OpenShift Container Platform and runs as a Kubernetes extension so that you can use the web console and the OpenShift CLI (oc) for all Operator lifecycle management functions without any additional tools.
The Operator Bundle Format is the default packaging method for Operator SDK and OLM. You can get your Operator ready for OLM by using the Operator SDK to build, push, validate, and run a bundle image with OLM.
Prerequisites
- Operator SDK CLI installed on a development workstation
-
OpenShift CLI (
oc) v4.7+ installed -
Operator Lifecycle Manager (OLM) installed on a Kubernetes-based cluster (v1.16.0 or later if you use
apiextensions.k8s.io/v1CRDs, for example OpenShift Container Platform 4.7) -
Logged into the cluster with
ocusing an account withcluster-adminpermissions - Operator project initialized by using the Operator SDK
Procedure
Run the following
makecommands in your Operator project directory to build and push your Operator image. Modify theIMGargument in the following steps to reference a repository that you have access to. You can obtain an account for storing containers at repository sites such as Quay.io.Build the image:
$ make docker-build IMG=<registry>/<user>/<operator_image_name>:<tag>NoteThe Dockerfile generated by the SDK for the Operator explicitly references
GOARCH=amd64forgo build. This can be amended toGOARCH=$TARGETARCHfor non-AMD64 architectures. Docker will automatically set the environment variable to the value specified by–platform. With Buildah, the–build-argwill need to be used for the purpose. For more information, see Multiple Architectures.Push the image to a repository:
$ make docker-push IMG=<registry>/<user>/<operator_image_name>:<tag>
Create your Operator bundle manifest by running the
make bundlecommand, which invokes several commands, including the Operator SDKgenerate bundleandbundle validatesubcommands:$ make bundle IMG=<registry>/<user>/<operator_image_name>:<tag>Bundle manifests for an Operator describe how to display, create, and manage an application. The
make bundlecommand creates the following files and directories in your Operator project:-
A bundle manifests directory named
bundle/manifeststhat contains aClusterServiceVersionobject -
A bundle metadata directory named
bundle/metadata -
All custom resource definitions (CRDs) in a
config/crddirectory -
A Dockerfile
bundle.Dockerfile
These files are then automatically validated by using
operator-sdk bundle validateto ensure the on-disk bundle representation is correct.-
A bundle manifests directory named
Build and push your bundle image by running the following commands. OLM consumes Operator bundles using an index image, which reference one or more bundle images.
Build the bundle image. Set
BUNDLE_IMAGEwith the details for the registry, user namespace, and image tag where you intend to push the image:$ make bundle-build BUNDLE_IMG=<registry>/<user>/<bundle_image_name>:<tag>Push the bundle image:
$ docker push <registry>/<user>/<bundle_image_name>:<tag>
Check the status of OLM on your cluster by using the following Operator SDK command:
$ operator-sdk olm status \
    --olm-namespace=openshift-operator-lifecycle-manager
Run the Operator on your cluster by using the OLM integration in Operator SDK:
$ operator-sdk run bundle \
    [-n <namespace>] \
1 <registry>/<user>/<bundle_image_name>:<tag>- 1
- By default, the command installs the Operator in the currently active project in your
~/.kube/configfile. You can add the-nflag to set a different namespace scope for the installation.
This command performs the following actions:
- Create an index image with your bundle image injected.
- Create a catalog source that points to your new index image, which enables OperatorHub to discover your Operator.
- Deploy your Operator to your cluster by creating an Operator group, subscription, install plan, and all other required objects, including RBAC.
5.5.2.5. Creating a custom resource
After your Operator is installed, you can test it by creating a custom resource (CR) that is now provided on the cluster by the Operator.
Prerequisites
-
Example Nginx Operator, which provides the
NginxCR, installed on a cluster
Procedure
Change to the namespace where your Operator is installed. For example, if you deployed the Operator using the
make deploycommand:$ oc project nginx-operator-systemEdit the sample
NginxCR manifest atconfig/samples/demo_v1_nginx.yamlto contain the following specification:apiVersion: demo.example.com/v1 kind: Nginx metadata: name: nginx-sample ... spec: ... replicaCount: 3The Nginx service account requires privileged access to run in OpenShift Container Platform. Add the following security context constraint (SCC) to the service account for the
nginx-samplepod:$ oc adm policy add-scc-to-user \ anyuid system:serviceaccount:nginx-operator-system:nginx-sampleCreate the CR:
$ oc apply -f config/samples/demo_v1_nginx.yamlEnsure that the
NginxOperator creates the deployment for the sample CR with the correct size:$ oc get deploymentsExample output
NAME                                    READY   UP-TO-DATE   AVAILABLE   AGE
nginx-operator-controller-manager       1/1     1            1           8m
nginx-sample                            3/3     3            3           1m
Check the pods and CR status to confirm the status is updated with the Nginx pod names.
Check the pods:
$ oc get podsExample output
NAME                                  READY     STATUS    RESTARTS   AGE
nginx-sample-6fd7c98d8-7dqdr          1/1       Running   0          1m
nginx-sample-6fd7c98d8-g5k7v          1/1       Running   0          1m
nginx-sample-6fd7c98d8-m7vn7          1/1       Running   0          1m
Check the CR status:
$ oc get nginx/nginx-sample -o yamlExample output
apiVersion: demo.example.com/v1
kind: Nginx
metadata:
...
  name: nginx-sample
...
spec:
  replicaCount: 3
status:
  nodes:
  - nginx-sample-6fd7c98d8-7dqdr
  - nginx-sample-6fd7c98d8-g5k7v
  - nginx-sample-6fd7c98d8-m7vn7
Update the deployment size.
Update
config/samples/demo_v1_nginx.yamlfile to change thespec.sizefield in theNginxCR from3to5:$ oc patch nginx nginx-sample \ -p '{"spec":{"replicaCount": 5}}' \ --type=mergeConfirm that the Operator changes the deployment size:
$ oc get deploymentsExample output
NAME                                    READY   UP-TO-DATE   AVAILABLE   AGE
nginx-operator-controller-manager       1/1     1            1           10m
nginx-sample                            5/5     5            5           3m
Clean up the resources that have been created as part of this tutorial.
If you used the
make deploycommand to test the Operator, run the following command:$ make undeployIf you used the
operator-sdk run bundlecommand to test the Operator, run the following command:$ operator-sdk cleanup <project_name>
5.5.3. Project layout for Helm-based Operators
The operator-sdk CLI can generate, or scaffold, a number of packages and files for each Operator project.
5.5.3.1. Helm-based project layout
Helm-based Operator projects generated using the operator-sdk init --plugins helm command contain the following directories and files:
| File/folders | Purpose |
|---|---|
|
| Kustomize manifests for deploying the Operator on a Kubernetes cluster. |
|
|
Helm chart initialized with the |
|
|
Used to build the Operator image with the |
|
| Group/version/kind (GVK) and Helm chart location. |
|
| Targets used to manage the project. |
|
| YAML file containing metadata information for the Operator. |
5.5.4. Helm support in Operator SDK
5.5.4.1. Helm charts
One of the Operator SDK options for generating an Operator project includes leveraging an existing Helm chart to deploy Kubernetes resources as a unified application, without having to write any Go code. Such Helm-based Operators are designed to excel at stateless applications that require very little logic when rolled out, because changes should be applied to the Kubernetes objects that are generated as part of the chart. This may sound limiting, but can be sufficient for a surprising amount of use-cases as shown by the proliferation of Helm charts built by the Kubernetes community.
The main function of an Operator is to read from a custom object that represents your application instance and have its desired state match what is running. In the case of a Helm-based Operator, the spec field of the object is a list of configuration options that are typically described in the Helm values.yaml file. Instead of setting these values with flags using the Helm CLI (for example, helm install -f values.yaml), you can express them within a custom resource (CR), which, as a native Kubernetes object, enables the benefits of RBAC applied to it and an audit trail.
For an example of a simple CR called Tomcat:
apiVersion: apache.org/v1alpha1
kind: Tomcat
metadata:
  name: example-app
spec:
  replicaCount: 2
The replicaCount value, 2 in this case, is propagated into the template of the chart where the following is used:
{{ .Values.replicaCount }}
After an Operator is built and deployed, you can deploy a new instance of an app by creating a new instance of a CR, or list the different instances running in all environments using the oc command:
$ oc get Tomcats --all-namespacesThere is no requirement use the Helm CLI or install Tiller; Helm-based Operators import code from the Helm project. All you have to do is have an instance of the Operator running and register the CR with a custom resource definition (CRD). Because it obeys RBAC, you can more easily prevent production changes.
5.6. Defining cluster service versions (CSVs)
A cluster service version (CSV), defined by a ClusterServiceVersion object, is a YAML manifest created from Operator metadata that assists Operator Lifecycle Manager (OLM) in running the Operator in a cluster. It is the metadata that accompanies an Operator container image, used to populate user interfaces with information such as its logo, description, and version. It is also a source of technical information that is required to run the Operator, like the RBAC rules it requires and which custom resources (CRs) it manages or depends on.
The Operator SDK includes the CSV generator to generate a CSV for the current Operator project, customized using information contained in YAML manifests and Operator source files.
A CSV-generating command removes the responsibility of Operator authors having in-depth OLM knowledge in order for their Operator to interact with OLM or publish metadata to the Catalog Registry. Further, because the CSV spec will likely change over time as new Kubernetes and OLM features are implemented, the Operator SDK is equipped to easily extend its update system to handle new CSV features going forward.
5.6.1. How CSV generation works
Operator bundle manifests, which include cluster service versions (CSVs), describe how to display, create, and manage an application with Operator Lifecycle Manager (OLM). The CSV generator in the Operator SDK, called by the generate bundle subcommand, is the first step towards publishing your Operator to a catalog and deploying it with OLM. The subcommand requires certain input manifests to construct a CSV manifest; all inputs are read when the command is invoked, along with a CSV base, to idempotently generate or regenerate a CSV.
Typically, the generate kustomize manifests subcommand would be run first to generate the input Kustomize bases that are consumed by the generate bundle subcommand. However, the Operator SDK provides the make bundle command, which automates several tasks, including running the following subcommands in order:
-
generate kustomize manifests -
generate bundle -
bundle validate
5.6.1.1. Generated files and resources
The make bundle command creates the following files and directories in your Operator project:
-
A bundle manifests directory named
bundle/manifeststhat contains aClusterServiceVersion(CSV) object -
A bundle metadata directory named
bundle/metadata -
All custom resource definitions (CRDs) in a
config/crddirectory -
A Dockerfile
bundle.Dockerfile
The following resources are typically included in a CSV:
- Role
- Defines Operator permissions within a namespace.
- ClusterRole
- Defines cluster-wide Operator permissions.
- Deployment
- Defines how an Operand of an Operator is run in pods.
- CustomResourceDefinition (CRD)
- Defines custom resources that your Operator reconciles.
- Custom resource examples
- Examples of resources adhering to the spec of a particular CRD.
5.6.1.2. Version management
The --version flag for the generate bundle subcommand supplies a semantic version for your bundle when creating one for the first time and when upgrading an existing one.
By setting the VERSION variable in your Makefile, the --version flag is automatically invoked using that value when the generate bundle subcommand is run by the make bundle command. The CSV version is the same as the Operator version, and a new CSV is generated when upgrading Operator versions.
5.6.2. Manually-defined CSV fields
Many CSV fields cannot be populated using generated, generic manifests that are not specific to Operator SDK. These fields are mostly human-written metadata about the Operator and various custom resource definitions (CRDs).
Operator authors must directly modify their cluster service version (CSV) YAML file, adding personalized data to the following required fields. The Operator SDK gives a warning during CSV generation when a lack of data in any of the required fields is detected.
The following tables detail which manually-defined CSV fields are required and which are optional.
| Field | Description |
|---|---|
|
|
A unique name for this CSV. Operator version should be included in the name to ensure uniqueness, for example |
|
|
The capability level according to the Operator maturity model. Options include |
|
| A public name to identify the Operator. |
|
| A short description of the functionality of the Operator. |
|
| Keywords describing the Operator. |
|
|
Human or organizational entities maintaining the Operator, with a |
|
|
The provider of the Operator (usually an organization), with a |
|
| Key-value pairs to be used by Operator internals. |
|
|
Semantic version of the Operator, for example |
|
|
Any CRDs the Operator uses. This field is populated automatically by the Operator SDK if any CRD YAML files are present in
|
| Field | Description |
|---|---|
|
| The name of the CSV being replaced by this CSV. |
|
|
URLs (for example, websites and documentation) pertaining to the Operator or application being managed, each with a |
|
| Selectors by which the Operator can pair resources in a cluster. |
|
|
A base64-encoded icon unique to the Operator, set in a |
|
|
The level of maturity the software has achieved at this version. Options include |
Further details on what data each field above should hold are found in the CSV spec.
Several YAML fields currently requiring user intervention can potentially be parsed from Operator code.
5.6.2.1. Operator metadata annotations
Operator developers can manually define certain annotations in the metadata of a cluster service version (CSV) to enable features or highlight capabilities in user interfaces (UIs), such as OperatorHub.
The following table lists Operator metadata annotations that can be manually defined using metadata.annotations fields.
| Field | Description |
|---|---|
|
| Provide custom resource definition (CRD) templates with a minimum set of configuration. Compatible UIs pre-fill this template for users to further customize. |
|
| Specify a single required custom resource that must be created at the time that the Operator is installed. Must include a template that contains a complete YAML definition. |
|
| Set a suggested namespace where the Operator should be deployed. |
|
| Infrastructure features supported by the Operator. Users can view and filter by these features when discovering Operators through OperatorHub in the web console. Valid, case-sensitive values:
Important
The use of FIPS Validated / Modules in Process cryptographic libraries is only supported on OpenShift Container Platform deployments on the
|
|
|
Free-form array for listing any specific subscriptions that are required to use the Operator. For example, |
|
| Hides CRDs in the UI that are not meant for user manipulation. |
Example use cases
Operator supports disconnected and proxy-aware
operators.openshift.io/infrastructure-features: '["disconnected", "proxy-aware"]'Operator requires an OpenShift Container Platform license
operators.openshift.io/valid-subscription: '["OpenShift Container Platform"]'Operator requires a 3scale license
operators.openshift.io/valid-subscription: '["3Scale Commercial License", "Red Hat Managed Integration"]'Operator supports disconnected and proxy-aware, and requires an OpenShift Container Platform license
operators.openshift.io/infrastructure-features: '["disconnected", "proxy-aware"]'
operators.openshift.io/valid-subscription: '["OpenShift Container Platform"]'5.6.3. Enabling your Operator for restricted network environments
As an Operator author, your Operator must meet additional requirements to run properly in a restricted network, or disconnected, environment.
Operator requirements for supporting disconnected mode
In the cluster service version (CSV) of your Operator:
- List any related images, or other container images that your Operator might require to perform their functions.
- Reference all specified images by a digest (SHA) and not by a tag.
- All dependencies of your Operator must also support running in a disconnected mode.
- Your Operator must not require any off-cluster resources.
For the CSV requirements, you can make the following changes as the Operator author.
Prerequisites
- An Operator project with a CSV.
Procedure
Use SHA references to related images in two places in the CSV for your Operator:
Update
spec.relatedImages:... spec: relatedImages:1 - name: etcd-operator2 image: quay.io/etcd-operator/operator@sha256:d134a9865524c29fcf75bbc4469013bc38d8a15cb5f41acfddb6b9e492f556e43 - name: etcd-image image: quay.io/etcd-operator/etcd@sha256:13348c15263bd8838ec1d5fc4550ede9860fcbb0f843e48cbccec07810eebb68 ...Update the
envsection in the deployment when declaring environment variables that inject the image that the Operator should use:spec: install: spec: deployments: - name: etcd-operator-v3.1.1 spec: replicas: 1 selector: matchLabels: name: etcd-operator strategy: type: Recreate template: metadata: labels: name: etcd-operator spec: containers: - args: - /opt/etcd/bin/etcd_operator_run.sh env: - name: WATCH_NAMESPACE valueFrom: fieldRef: fieldPath: metadata.annotations['olm.targetNamespaces'] - name: ETCD_OPERATOR_DEFAULT_ETCD_IMAGE1 value: quay.io/etcd-operator/etcd@sha256:13348c15263bd8838ec1d5fc4550ede9860fcbb0f843e48cbccec07810eebb682 - name: ETCD_LOG_LEVEL value: INFO image: quay.io/etcd-operator/operator@sha256:d134a9865524c29fcf75bbc4469013bc38d8a15cb5f41acfddb6b9e492f556e43 imagePullPolicy: IfNotPresent livenessProbe: httpGet: path: /healthy port: 8080 initialDelaySeconds: 10 periodSeconds: 30 name: etcd-operator readinessProbe: httpGet: path: /ready port: 8080 initialDelaySeconds: 10 periodSeconds: 30 resources: {} serviceAccountName: etcd-operator strategy: deploymentNoteWhen configuring probes, the
timeoutSecondsvalue must be lower than theperiodSecondsvalue. ThetimeoutSecondsdefault value is1. TheperiodSecondsdefault value is10.
Add the
disconnectedannotation, which indicates that the Operator works in a disconnected environment:metadata: annotations: operators.openshift.io/infrastructure-features: '["disconnected"]'Operators can be filtered in OperatorHub by this infrastructure feature.
5.6.4. Enabling your Operator for multiple architectures and operating systems
Operator Lifecycle Manager (OLM) assumes that all Operators run on Linux hosts. However, as an Operator author, you can specify whether your Operator supports managing workloads on other architectures, if worker nodes are available in the OpenShift Container Platform cluster.
If your Operator supports variants other than AMD64 and Linux, you can add labels to the cluster service version (CSV) that provides the Operator to list the supported variants. Labels indicating supported architectures and operating systems are defined by the following:
labels:
    operatorframework.io/arch.<arch>: supported
operatorframework.io/os.<os>: supported
Only the labels on the channel head of the default channel are considered for filtering package manifests by label. This means, for example, that providing an additional architecture for an Operator in the non-default channel is possible, but that architecture is not available for filtering in the PackageManifest API.
If a CSV does not include an os label, it is treated as if it has the following Linux support label by default:
labels:
    operatorframework.io/os.linux: supported
If a CSV does not include an arch label, it is treated as if it has the following AMD64 support label by default:
labels:
    operatorframework.io/arch.amd64: supported
If an Operator supports multiple node architectures or operating systems, you can add multiple labels, as well.
Prerequisites
- An Operator project with a CSV.
- To support listing multiple architectures and operating systems, your Operator image referenced in the CSV must be a manifest list image.
- For the Operator to work properly in restricted network, or disconnected, environments, the image referenced must also be specified using a digest (SHA) and not by a tag.
Procedure
Add a label in the
metadata.labelsof your CSV for each supported architecture and operating system that your Operator supports:labels: operatorframework.io/arch.s390x: supported operatorframework.io/os.zos: supported operatorframework.io/os.linux: supported1 operatorframework.io/arch.amd64: supported2
5.6.4.1. Architecture and operating system support for Operators
The following strings are supported in Operator Lifecycle Manager (OLM) on OpenShift Container Platform when labeling or filtering Operators that support multiple architectures and operating systems:
| Architecture | String |
|---|---|
| AMD64 |
|
| 64-bit PowerPC little-endian |
|
| IBM Z |
|
| Operating system | String |
|---|---|
| Linux |
|
| z/OS |
|
Different versions of OpenShift Container Platform and other Kubernetes-based distributions might support a different set of architectures and operating systems.
5.6.5. Setting a suggested namespace
Some Operators must be deployed in a specific namespace, or with ancillary resources in specific namespaces, to work properly. If resolved from a subscription, Operator Lifecycle Manager (OLM) defaults the namespaced resources of an Operator to the namespace of its subscription.
As an Operator author, you can instead express a desired target namespace as part of your cluster service version (CSV) to maintain control over the final namespaces of the resources installed for their Operators. When adding the Operator to a cluster using OperatorHub, this enables the web console to autopopulate the suggested namespace for the cluster administrator during the installation process.
Procedure
In your CSV, set the
operatorframework.io/suggested-namespaceannotation to your suggested namespace:metadata: annotations: operatorframework.io/suggested-namespace: <namespace>1 - 1
- Set your suggested namespace.
5.6.6. Enabling Operator conditions
Operator Lifecycle Manager (OLM) provides Operators with a channel to communicate complex states that influence OLM behavior while managing the Operator. By default, OLM creates an OperatorCondition custom resource definition (CRD) when it installs an Operator. Based on the conditions set in the OperatorCondition custom resource (CR), the behavior of OLM changes accordingly.
To support Operator conditions, an Operator must be able to read the OperatorCondition CR created by OLM and have the ability to complete the following tasks:
- Get the specific condition.
- Set the status of a specific condition.
This can be accomplished by using the operator-lib library. An Operator author can provide a controller-runtime client in their Operator for the library to access the OperatorCondition CR owned by the Operator in the cluster.
The library provides a generic Conditions interface, which has the following methods to Get and Set a conditionType in the OperatorCondition CR:
Get-
To get the specific condition, the library uses the
client.Getfunction fromcontroller-runtime, which requires anObjectKeyof typetypes.NamespacedNamepresent inconditionAccessor. Set-
To update the status of the specific condition, the library uses the
client.Updatefunction fromcontroller-runtime. An error occurs if theconditionTypeis not present in the CRD.
The Operator is allowed to modify only the status subresource of the CR. Operators can either delete or update the status.conditions array to include the condition. For more details on the format and description of the fields present in the conditions, see the upstream Condition GoDocs.
Operator SDK v1.3.0 supports operator-lib v0.3.0.
Prerequisites
- An Operator project generated using the Operator SDK.
Procedure
To enable Operator conditions in your Operator project:
In the
go.modfile of your Operator project, addoperator-framework/operator-libas a required library:module github.com/example-inc/memcached-operator go 1.15 require ( k8s.io/apimachinery v0.19.2 k8s.io/client-go v0.19.2 sigs.k8s.io/controller-runtime v0.7.0 operator-framework/operator-lib v0.3.0 )Write your own constructor in your Operator logic that will result in the following outcomes:
-
Accepts a
controller-runtimeclient. -
Accepts a
conditionType. -
Returns a
Conditioninterface to update or add conditions.
Because OLM currently supports the
Upgradeablecondition, you can create an interface that has methods to access theUpgradeablecondition. For example:import ( ... apiv1 "github.com/operator-framework/api/pkg/operators/v1" ) func NewUpgradeable(cl client.Client) (Condition, error) { return NewCondition(cl, "apiv1.OperatorUpgradeable") } cond, err := NewUpgradeable(cl);In this example, the
NewUpgradeableconstructor is further used to create a variablecondof typeCondition. Thecondvariable would in turn haveGetandSetmethods, which can be used for handling the OLMUpgradeablecondition.-
Accepts a
5.6.7. Defining webhooks
Webhooks allow Operator authors to intercept, modify, and accept or reject resources before they are saved to the object store and handled by the Operator controller. Operator Lifecycle Manager (OLM) can manage the lifecycle of these webhooks when they are shipped alongside your Operator.
The cluster service version (CSV) resource of an Operator can include a webhookdefinitions section to define the following types of webhooks:
- Admission webhooks (validating and mutating)
- Conversion webhooks
Procedure
Add a
webhookdefinitionssection to thespecsection of the CSV of your Operator and include any webhook definitions using atypeofValidatingAdmissionWebhook,MutatingAdmissionWebhook, orConversionWebhook. The following example contains all three types of webhooks:CSV containing webhooks
  apiVersion: operators.coreos.com/v1alpha1
  kind: ClusterServiceVersion
  metadata:
    name: webhook-operator.v0.0.1
  spec:
    customresourcedefinitions:
      owned:
      - kind: WebhookTest
        name: webhooktests.webhook.operators.coreos.io
1 version: v1 install: spec: deployments: - name: webhook-operator-webhook ... ... ... strategy: deployment installModes: - supported: false type: OwnNamespace - supported: false type: SingleNamespace - supported: false type: MultiNamespace - supported: true type: AllNamespaces webhookdefinitions: - type: ValidatingAdmissionWebhook2 admissionReviewVersions: - v1beta1 - v1 containerPort: 443 targetPort: 4343 deploymentName: webhook-operator-webhook failurePolicy: Fail generateName: vwebhooktest.kb.io rules: - apiGroups: - webhook.operators.coreos.io apiVersions: - v1 operations: - CREATE - UPDATE resources: - webhooktests sideEffects: None webhookPath: /validate-webhook-operators-coreos-io-v1-webhooktest - type: MutatingAdmissionWebhook3 admissionReviewVersions: - v1beta1 - v1 containerPort: 443 targetPort: 4343 deploymentName: webhook-operator-webhook failurePolicy: Fail generateName: mwebhooktest.kb.io rules: - apiGroups: - webhook.operators.coreos.io apiVersions: - v1 operations: - CREATE - UPDATE resources: - webhooktests sideEffects: None webhookPath: /mutate-webhook-operators-coreos-io-v1-webhooktest - type: ConversionWebhook4 admissionReviewVersions: - v1beta1 - v1 containerPort: 443 targetPort: 4343 deploymentName: webhook-operator-webhook generateName: cwebhooktest.kb.io sideEffects: None webhookPath: /convert conversionCRDs: - webhooktests.webhook.operators.coreos.io5 ...
5.6.7.1. Webhook considerations for OLM
When deploying an Operator with webhooks using Operator Lifecycle Manager (OLM), you must define the following:
-
The
typefield must be set to eitherValidatingAdmissionWebhook,MutatingAdmissionWebhook, orConversionWebhook, or the CSV will be placed in a failed phase. -
The CSV must contain a deployment whose name is equivalent to the value supplied in the
deploymentNamefield of thewebhookdefinition.
When the webhook is created, OLM ensures that the webhook only acts upon namespaces that match the Operator group that the Operator is deployed in.
Certificate authority constraints
OLM is configured to provide each deployment with a single certificate authority (CA). The logic that generates and mounts the CA into the deployment was originally used by the API service lifecycle logic. As a result:
-
The TLS certificate file is mounted to the deployment at
/apiserver.local.config/certificates/apiserver.crt. -
The TLS key file is mounted to the deployment at
/apiserver.local.config/certificates/apiserver.key.
Admission webhook rules constraints
To prevent an Operator from configuring the cluster into an unrecoverable state, OLM places the CSV in the failed phase if the rules defined in an admission webhook intercept any of the following requests:
- Requests that target all groups
-
Requests that target the
operators.coreos.comgroup -
Requests that target the
ValidatingWebhookConfigurationsorMutatingWebhookConfigurationsresources
Conversion webhook constraints
OLM places the CSV in the failed phase if a conversion webhook definition does not adhere to the following constraints:
-
CSVs featuring a conversion webhook can only support the
AllNamespacesinstall mode. -
The CRD targeted by the conversion webhook must have its
spec.preserveUnknownFieldsfield set tofalseornil. - The conversion webhook defined in the CSV must target an owned CRD.
- There can only be one conversion webhook on the entire cluster for a given CRD.
5.6.8. Understanding your custom resource definitions (CRDs)
There are two types of custom resource definitions (CRDs) that your Operator can use: ones that are owned by it and ones that it depends on, which are required.
5.6.8.1. Owned CRDs
The custom resource definitions (CRDs) owned by your Operator are the most important part of your CSV. This establishes the link between your Operator and the required RBAC rules, dependency management, and other Kubernetes concepts.
It is common for your Operator to use multiple CRDs to link together concepts, such as top-level database configuration in one object and a representation of replica sets in another. Each one should be listed out in the CSV file.
| Field | Description | Required/optional |
|---|---|---|
|
| The full name of your CRD. | Required |
|
| The version of that object API. | Required |
|
| The machine readable name of your CRD. | Required |
|
|
A human readable version of your CRD name, for example | Required |
|
| A short description of how this CRD is used by the Operator or a description of the functionality provided by the CRD. | Required |
|
|
The API group that this CRD belongs to, for example | Optional |
|
|
Your CRDs own one or more types of Kubernetes objects. These are listed in the It is recommended to only list out the objects that are important to a human, not an exhaustive list of everything you orchestrate. For example, do not list config maps that store internal state that are not meant to be modified by a user. | Optional |
|
| These descriptors are a way to hint UIs with certain inputs or outputs of your Operator that are most important to an end user. If your CRD contains the name of a secret or config map that the user must provide, you can specify that here. These items are linked and highlighted in compatible UIs. There are three types of descriptors:
All descriptors accept the following fields:
Also see the openshift/console project for more information on Descriptors in general. | Optional |
The following example depicts a MongoDB Standalone CRD that requires some user input in the form of a secret and config map, and orchestrates services, stateful sets, pods and config maps:
Example owned CRD
      - displayName: MongoDB Standalone
        group: mongodb.com
        kind: MongoDbStandalone
        name: mongodbstandalones.mongodb.com
        resources:
          - kind: Service
            name: ''
            version: v1
          - kind: StatefulSet
            name: ''
            version: v1beta2
          - kind: Pod
            name: ''
            version: v1
          - kind: ConfigMap
            name: ''
            version: v1
        specDescriptors:
          - description: Credentials for Ops Manager or Cloud Manager.
            displayName: Credentials
            path: credentials
            x-descriptors:
              - 'urn:alm:descriptor:com.tectonic.ui:selector:core:v1:Secret'
          - description: Project this deployment belongs to.
            displayName: Project
            path: project
            x-descriptors:
              - 'urn:alm:descriptor:com.tectonic.ui:selector:core:v1:ConfigMap'
          - description: MongoDB version to be installed.
            displayName: Version
            path: version
            x-descriptors:
              - 'urn:alm:descriptor:com.tectonic.ui:label'
        statusDescriptors:
          - description: The status of each of the pods for the MongoDB cluster.
            displayName: Pod Status
            path: pods
            x-descriptors:
              - 'urn:alm:descriptor:com.tectonic.ui:podStatuses'
        version: v1
        description: >-
          MongoDB Deployment consisting of only one host. No replication of
          data.
5.6.8.2. Required CRDs
Relying on other required CRDs is completely optional and only exists to reduce the scope of individual Operators and provide a way to compose multiple Operators together to solve an end-to-end use case.
An example of this is an Operator that might set up an application and install an etcd cluster (from an etcd Operator) to use for distributed locking and a Postgres database (from a Postgres Operator) for data storage.
Operator Lifecycle Manager (OLM) checks against the available CRDs and Operators in the cluster to fulfill these requirements. If suitable versions are found, the Operators are started within the desired namespace and a service account created for each Operator to create, watch, and modify the Kubernetes resources required.
| Field | Description | Required/optional |
|---|---|---|
|
| The full name of the CRD you require. | Required |
|
| The version of that object API. | Required |
|
| The Kubernetes object kind. | Required |
|
| A human readable version of the CRD. | Required |
|
| A summary of how the component fits in your larger architecture. | Required |
Example required CRD
    required:
    - name: etcdclusters.etcd.database.coreos.com
      version: v1beta2
      kind: EtcdCluster
      displayName: etcd Cluster
      description: Represents a cluster of etcd nodes.
5.6.8.3. CRD upgrades
OLM upgrades a custom resource definition (CRD) immediately if it is owned by a singular cluster service version (CSV). If a CRD is owned by multiple CSVs, then the CRD is upgraded when it has satisfied all of the following backward compatible conditions:
- All existing serving versions in the current CRD are present in the new CRD.
- All existing instances, or custom resources, that are associated with the serving versions of the CRD are valid when validated against the validation schema of the new CRD.
5.6.8.3.1. Adding a new CRD version
Procedure
To add a new version of a CRD to your Operator:
Add a new entry in the CRD resource under the
versionssection of your CSV.For example, if the current CRD has a version
v1alpha1and you want to add a new versionv1beta1and mark it as the new storage version, add a new entry forv1beta1:versions: - name: v1alpha1 served: true storage: false - name: v1beta11 served: true storage: true- 1
- New entry.
Ensure the referencing version of the CRD in the
ownedsection of your CSV is updated if the CSV intends to use the new version:customresourcedefinitions: owned: - name: cluster.example.com version: v1beta11 kind: cluster displayName: Cluster- 1
- Update the
version.
- Push the updated CRD and CSV to your bundle.
5.6.8.3.2. Deprecating or removing a CRD version
Operator Lifecycle Manager (OLM) does not allow a serving version of a custom resource definition (CRD) to be removed right away. Instead, a deprecated version of the CRD must be first disabled by setting the served field in the CRD to false. Then, the non-serving version can be removed on the subsequent CRD upgrade.
Procedure
To deprecate and remove a specific version of a CRD:
Mark the deprecated version as non-serving to indicate this version is no longer in use and may be removed in a subsequent upgrade. For example:
versions:
  - name: v1alpha1
    served: false
1 storage: true- 1
- Set to
false.
Switch the
storageversion to a serving version if the version to be deprecated is currently thestorageversion. For example:versions: - name: v1alpha1 served: false storage: false1 - name: v1beta1 served: true storage: true2 NoteTo remove a specific version that is or was the
storageversion from a CRD, that version must be removed from thestoredVersionin the status of the CRD. OLM will attempt to do this for you if it detects a stored version no longer exists in the new CRD.- Upgrade the CRD with the above changes.
In subsequent upgrade cycles, the non-serving version can be removed completely from the CRD. For example:
versions: - name: v1beta1 served: true storage: true-
Ensure the referencing CRD version in the
ownedsection of your CSV is updated accordingly if that version is removed from the CRD.
5.6.8.4. CRD templates
Users of your Operator must be made aware of which options are required versus optional. You can provide templates for each of your custom resource definitions (CRDs) with a minimum set of configuration as an annotation named alm-examples. Compatible UIs will pre-fill this template for users to further customize.
The annotation consists of a list of the kind, for example, the CRD name and the corresponding metadata and spec of the Kubernetes object.
The following full example provides templates for EtcdCluster, EtcdBackup and EtcdRestore:
metadata:
  annotations:
    alm-examples: >-
      [{"apiVersion":"etcd.database.coreos.com/v1beta2","kind":"EtcdCluster","metadata":{"name":"example","namespace":"default"},"spec":{"size":3,"version":"3.2.13"}},{"apiVersion":"etcd.database.coreos.com/v1beta2","kind":"EtcdRestore","metadata":{"name":"example-etcd-cluster"},"spec":{"etcdCluster":{"name":"example-etcd-cluster"},"backupStorageType":"S3","s3":{"path":"<full-s3-path>","awsSecret":"<aws-secret>"}}},{"apiVersion":"etcd.database.coreos.com/v1beta2","kind":"EtcdBackup","metadata":{"name":"example-etcd-cluster-backup"},"spec":{"etcdEndpoints":["<etcd-cluster-endpoints>"],"storageType":"S3","s3":{"path":"<full-s3-path>","awsSecret":"<aws-secret>"}}}]
5.6.8.5. Hiding internal objects
It is common practice for Operators to use custom resource definitions (CRDs) internally to accomplish a task. These objects are not meant for users to manipulate and can be confusing to users of the Operator. For example, a database Operator might have a Replication CRD that is created whenever a user creates a Database object with replication: true.
As an Operator author, you can hide any CRDs in the user interface that are not meant for user manipulation by adding the operators.operatorframework.io/internal-objects annotation to the cluster service version (CSV) of your Operator.
Procedure
-
Before marking one of your CRDs as internal, ensure that any debugging information or configuration that might be required to manage the application is reflected on the status or
specblock of your CR, if applicable to your Operator. Add the
operators.operatorframework.io/internal-objectsannotation to the CSV of your Operator to specify any internal objects to hide in the user interface:Internal object annotation
apiVersion: operators.coreos.com/v1alpha1
kind: ClusterServiceVersion
metadata:
  name: my-operator-v1.2.3
  annotations:
    operators.operatorframework.io/internal-objects: '["my.internal.crd1.io","my.internal.crd2.io"]'
1 ...- 1
- Set any internal CRDs as an array of strings.
5.6.8.6. Initializing required custom resources
An Operator might require the user to instantiate a custom resource before the Operator can be fully functional. However, it can be challenging for a user to determine what is required or how to define the resource.
As an Operator developer, you can specify a single required custom resource that must be created at the time that the Operator is installed by adding the operatorframework.io/initialization-resource annotation to the cluster service version (CSV). The annotation must include a template that contains a complete YAML definition that is required to initialize the resource during installation.
If this annotation is defined, after installing the Operator from the OpenShift Container Platform web console, the user is prompted to create the resource using the template provided in the CSV.
Procedure
Add the
operatorframework.io/initialization-resourceannotation to the CSV of your Operator to specify a required custom resource. For example, the following annotation requires the creation of aStorageClusterresource and provides a full YAML definition:Initialization resource annotation
apiVersion: operators.coreos.com/v1alpha1
kind: ClusterServiceVersion
metadata:
  name: my-operator-v1.2.3
  annotations:
    operatorframework.io/initialization-resource: |-
        {
            "apiVersion": "ocs.openshift.io/v1",
            "kind": "StorageCluster",
            "metadata": {
                "name": "example-storagecluster"
            },
            "spec": {
                "manageNodes": false,
                "monPVCTemplate": {
                    "spec": {
                        "accessModes": [
                            "ReadWriteOnce"
                        ],
                        "resources": {
                            "requests": {
                                "storage": "10Gi"
                            }
                        },
                        "storageClassName": "gp2"
                    }
                },
                "storageDeviceSets": [
                    {
                        "count": 3,
                        "dataPVCTemplate": {
                            "spec": {
                                "accessModes": [
                                    "ReadWriteOnce"
                                ],
                                "resources": {
                                    "requests": {
                                        "storage": "1Ti"
                                    }
                                },
                                "storageClassName": "gp2",
                                "volumeMode": "Block"
                            }
                        },
                        "name": "example-deviceset",
                        "placement": {},
                        "portable": true,
                        "resources": {}
                    }
                ]
            }
        }
...
5.6.9. Understanding your API services
As with CRDs, there are two types of API services that your Operator may use: owned and required.
5.6.9.1. Owned API services
When a CSV owns an API service, it is responsible for describing the deployment of the extension api-server that backs it and the group/version/kind (GVK) it provides.
An API service is uniquely identified by the group/version it provides and can be listed multiple times to denote the different kinds it is expected to provide.
| Field | Description | Required/optional |
|---|---|---|
|
|
Group that the API service provides, for example | Required |
|
|
Version of the API service, for example | Required |
|
| A kind that the API service is expected to provide. | Required |
|
| The plural name for the API service provided. | Required |
|
|
Name of the deployment defined by your CSV that corresponds to your API service (required for owned API services). During the CSV pending phase, the OLM Operator searches the | Required |
|
|
A human readable version of your API service name, for example | Required |
|
| A short description of how this API service is used by the Operator or a description of the functionality provided by the API service. | Required |
|
| Your API services own one or more types of Kubernetes objects. These are listed in the resources section to inform your users of the objects they might need to troubleshoot or how to connect to the application, such as the service or ingress rule that exposes a database. It is recommended to only list out the objects that are important to a human, not an exhaustive list of everything you orchestrate. For example, do not list config maps that store internal state that are not meant to be modified by a user. | Optional |
|
| Essentially the same as for owned CRDs. | Optional |
5.6.9.1.1. API service resource creation
Operator Lifecycle Manager (OLM) is responsible for creating or replacing the service and API service resources for each unique owned API service:
-
Service pod selectors are copied from the CSV deployment matching the
DeploymentNamefield of the API service description. - A new CA key/certificate pair is generated for each installation and the base64-encoded CA bundle is embedded in the respective API service resource.
5.6.9.1.2. API service serving certificates
OLM handles generating a serving key/certificate pair whenever an owned API service is being installed. The serving certificate has a common name (CN) containing the hostname of the generated Service resource and is signed by the private key of the CA bundle embedded in the corresponding API service resource.
The certificate is stored as a type kubernetes.io/tls secret in the deployment namespace, and a volume named apiservice-cert is automatically appended to the volumes section of the deployment in the CSV matching the DeploymentName field of the API service description.
If one does not already exist, a volume mount with a matching name is also appended to all containers of that deployment. This allows users to define a volume mount with the expected name to accommodate any custom path requirements. The path of the generated volume mount defaults to /apiserver.local.config/certificates and any existing volume mounts with the same path are replaced.
5.6.9.2. Required API services
OLM ensures all required CSVs have an API service that is available and all expected GVKs are discoverable before attempting installation. This allows a CSV to rely on specific kinds provided by API services it does not own.
| Field | Description | Required/optional |
|---|---|---|
|
|
Group that the API service provides, for example | Required |
|
|
Version of the API service, for example | Required |
|
| A kind that the API service is expected to provide. | Required |
|
|
A human readable version of your API service name, for example | Required |
|
| A short description of how this API service is used by the Operator or a description of the functionality provided by the API service. | Required |
5.7. Working with bundle images
You can use the Operator SDK to package, deploy, and upgrade Operators in the Bundle Format on Operator Lifecycle Manager (OLM).
5.7.1. Bundling an Operator and deploying with Operator Lifecycle Manager
Operator Lifecycle Manager (OLM) helps you to install, update, and generally manage the lifecycle of Operators and their associated services on a Kubernetes cluster. OLM is installed by default on OpenShift Container Platform and runs as a Kubernetes extension so that you can use the web console and the OpenShift CLI (oc) for all Operator lifecycle management functions without any additional tools.
The Operator Bundle Format is the default packaging method for Operator SDK and OLM. You can get your Operator ready for OLM by using the Operator SDK to build, push, validate, and run a bundle image with OLM.
Prerequisites
- Operator SDK CLI installed on a development workstation
-
OpenShift CLI (
oc) v4.7+ installed -
Operator Lifecycle Manager (OLM) installed on a Kubernetes-based cluster (v1.16.0 or later if you use
apiextensions.k8s.io/v1CRDs, for example OpenShift Container Platform 4.7) -
Logged into the cluster with
ocusing an account withcluster-adminpermissions - Operator project initialized by using the Operator SDK
- If your Operator is Go-based, your project must have been updated to use supported images for running on OpenShift Container Platform
Procedure
Run the following
makecommands in your Operator project directory to build and push your Operator image. Modify theIMGargument in the following steps to reference a repository that you have access to. You can obtain an account for storing containers at repository sites such as Quay.io.Build the image:
$ make docker-build IMG=<registry>/<user>/<operator_image_name>:<tag>NoteThe Dockerfile generated by the SDK for the Operator explicitly references
GOARCH=amd64forgo build. This can be amended toGOARCH=$TARGETARCHfor non-AMD64 architectures. Docker will automatically set the environment variable to the value specified by–platform. With Buildah, the–build-argwill need to be used for the purpose. For more information, see Multiple Architectures.Push the image to a repository:
$ make docker-push IMG=<registry>/<user>/<operator_image_name>:<tag>
Create your Operator bundle manifest by running the
make bundlecommand, which invokes several commands, including the Operator SDKgenerate bundleandbundle validatesubcommands:$ make bundle IMG=<registry>/<user>/<operator_image_name>:<tag>Bundle manifests for an Operator describe how to display, create, and manage an application. The
make bundlecommand creates the following files and directories in your Operator project:-
A bundle manifests directory named
bundle/manifeststhat contains aClusterServiceVersionobject -
A bundle metadata directory named
bundle/metadata -
All custom resource definitions (CRDs) in a
config/crddirectory -
A Dockerfile
bundle.Dockerfile
These files are then automatically validated by using
operator-sdk bundle validateto ensure the on-disk bundle representation is correct.-
A bundle manifests directory named
Build and push your bundle image by running the following commands. OLM consumes Operator bundles using an index image, which reference one or more bundle images.
Build the bundle image. Set
BUNDLE_IMAGEwith the details for the registry, user namespace, and image tag where you intend to push the image:$ make bundle-build BUNDLE_IMG=<registry>/<user>/<bundle_image_name>:<tag>Push the bundle image:
$ docker push <registry>/<user>/<bundle_image_name>:<tag>
Check the status of OLM on your cluster by using the following Operator SDK command:
$ operator-sdk olm status \
    --olm-namespace=openshift-operator-lifecycle-manager
Run the Operator on your cluster by using the OLM integration in Operator SDK:
$ operator-sdk run bundle \
    [-n <namespace>] \
1 <registry>/<user>/<bundle_image_name>:<tag>- 1
- By default, the command installs the Operator in the currently active project in your
~/.kube/configfile. You can add the-nflag to set a different namespace scope for the installation.
This command performs the following actions:
- Create an index image with your bundle image injected.
- Create a catalog source that points to your new index image, which enables OperatorHub to discover your Operator.
- Deploy your Operator to your cluster by creating an Operator group, subscription, install plan, and all other required objects, including RBAC.
5.7.2. Testing an Operator upgrade on Operator Lifecycle Manager
You can quickly test upgrading your Operator by using Operator Lifecycle Manager (OLM) integration in the Operator SDK, without requiring you to manually manage index images and catalog sources.
The run bundle-upgrade subcommand automates triggering an installed Operator to upgrade to a later version by specifying a bundle image for the later version.
Prerequisites
-
Operator installed with OLM by using the
run bundlesubcommand - A bundle image that represents a later version of the installed Operator
Procedure
If your Operator has not already been installed on OLM with the
run bundlesubcommand, install the earlier version of your Operator by specifying the bundle image. For example, for a Memcached Operator:$ operator-sdk run bundle <registry>/<user>/memcached-operator:v0.0.1Example output
INFO[0009] Successfully created registry pod: quay-io-demo-memcached-operator-v0-0-1
INFO[0009] Created CatalogSource: memcached-operator-catalog
INFO[0010] OperatorGroup "operator-sdk-og" created
INFO[0010] Created Subscription: memcached-operator-v0-0-1-sub
INFO[0013] Approved InstallPlan install-bqggr for the Subscription: memcached-operator-v0-0-1-sub
INFO[0013] Waiting for ClusterServiceVersion "my-project/memcached-operator.v0.0.1" to reach 'Succeeded' phase
INFO[0013]   Waiting for ClusterServiceVersion "my-project/memcached-operator.v0.0.1" to appear
INFO[0019]   Found ClusterServiceVersion "my-project/memcached-operator.v0.0.1" phase: Succeeded
Upgrade the installed Operator by specifying the bundle image for the later Operator version:
$ operator-sdk run bundle-upgrade <registry>/<user>/memcached-operator:v0.0.2Example output
INFO[0002] Found existing subscription with name memcached-operator-v0-0-1-sub and namespace my-project
INFO[0002] Found existing catalog source with name memcached-operator-catalog and namespace my-project
INFO[0009] Successfully created registry pod: quay-io-demo-memcached-operator-v0-0-2
INFO[0009] Updated catalog source memcached-operator-catalog with address and annotations
INFO[0010] Deleted previous registry pod with name "quay-io-demo-memcached-operator-v0-0-1"
INFO[0041] Approved InstallPlan install-gvcjh for the Subscription: memcached-operator-v0-0-1-sub
INFO[0042] Waiting for ClusterServiceVersion "my-project/memcached-operator.v0.0.2" to reach 'Succeeded' phase
INFO[0042]   Found ClusterServiceVersion "my-project/memcached-operator.v0.0.2" phase: InstallReady
INFO[0043]   Found ClusterServiceVersion "my-project/memcached-operator.v0.0.2" phase: Installing
INFO[0044]   Found ClusterServiceVersion "my-project/memcached-operator.v0.0.2" phase: Succeeded
INFO[0044] Successfully upgraded to "memcached-operator.v0.0.2"
Clean up the installed Operators:
$ operator-sdk cleanup memcached-operator
5.8. Validating Operators using the scorecard tool
As an Operator author, you can use the scorecard tool in the Operator SDK to do the following tasks:
- Validate that your Operator project is free of syntax errors and packaged correctly
- Review suggestions about ways you can improve your Operator
5.8.1. About the scorecard tool
While the Operator SDK bundle validate subcommand can validate local bundle directories and remote bundle images for content and structure, you can use the scorecard command to run tests on your Operator based on a configuration file and test images. These tests are implemented within test images that are configured and constructed to be executed by the scorecard.
The scorecard assumes it is run with access to a configured Kubernetes cluster, such as OpenShift Container Platform. The scorecard runs each test within a pod, from which pod logs are aggregated and test results are sent to the console. The scorecard has built-in basic and Operator Lifecycle Manager (OLM) tests and also provides a means to execute custom test definitions.
Scorecard workflow
- Create all resources required by any related custom resources (CRs) and the Operator
- Create a proxy container in the deployment of the Operator to record calls to the API server and run tests
- Examine parameters in the CRs
The scorecard tests make no assumptions as to the state of the Operator being tested. Creating Operators and CRs for an Operators are beyond the scope of the scorecard itself. Scorecard tests can, however, create whatever resources they require if the tests are designed for resource creation.
scorecard command syntax
$ operator-sdk scorecard <bundle_dir_or_image> [flags]The scorecard requires a positional argument for either the on-disk path to your Operator bundle or the name of a bundle image.
For further information about the flags, run:
$ operator-sdk scorecard -h5.8.2. Scorecard configuration
The scorecard tool uses a configuration that allows you to configure internal plug-ins, as well as several global configuration options. Tests are driven by a configuration file named config.yaml, which is generated by the make bundle command, located in your bundle/ directory:
./bundle
...
└── tests
    └── scorecard
        └── config.yaml
Example scorecard configuration file
kind: Configuration
apiversion: scorecard.operatorframework.io/v1alpha3
metadata:
  name: config
stages:
- parallel: true
  tests:
  - image: quay.io/operator-framework/scorecard-test:v1.3.0
    entrypoint:
    - scorecard-test
    - basic-check-spec
    labels:
      suite: basic
      test: basic-check-spec-test
  - image: quay.io/operator-framework/scorecard-test:v1.3.0
    entrypoint:
    - scorecard-test
    - olm-bundle-validation
    labels:
      suite: olm
      test: olm-bundle-validation-test
The configuration file defines each test that scorecard can execute. The following fields of the scorecard configuration file define the test as follows:
| Configuration field | Description |
|---|---|
|
| Test container image name that implements a test |
|
| Command and arguments that are invoked in the test image to execute a test |
|
| Scorecard-defined or custom labels that select which tests to run |
5.8.3. Built-in scorecard tests
The scorecard ships with pre-defined tests that are arranged into suites: the basic test suite and the Operator Lifecycle Manager (OLM) suite.
| Test | Description | Short name |
|---|---|---|
| Spec Block Exists |
This test checks the custom resource (CR) created in the cluster to make sure that all CRs have a |
|
| Test | Description | Short name |
|---|---|---|
| Bundle Validation | This test validates the bundle manifests found in the bundle that is passed into scorecard. If the bundle contents contain errors, then the test result output includes the validator log as well as error messages from the validation library. |
|
| Provided APIs Have Validation |
This test verifies that the custom resource definitions (CRDs) for the provided CRs contain a validation section and that there is validation for each |
|
| Owned CRDs Have Resources Listed |
This test makes sure that the CRDs for each CR provided via the |
|
| Spec Fields With Descriptors |
This test verifies that every field in the CRs |
|
| Status Fields With Descriptors |
This test verifies that every field in the CRs |
|
5.8.4. Running the scorecard tool
A default set of Kustomize files are generated by the Operator SDK after running the init command. The default bundle/tests/scorecard/config.yaml file that is generated can be immediately used to run the scorecard tool against your Operator, or you can modify this file to your test specifications.
Prerequisites
- Operator project generated by using the Operator SDK
Procedure
Generate or regenerate your bundle manifests and metadata for your Operator:
$ make bundleThis command automatically adds scorecard annotations to your bundle metadata, which is used by the
scorecardcommand to run tests.Run the scorecard against the on-disk path to your Operator bundle or the name of a bundle image:
$ operator-sdk scorecard <bundle_dir_or_image>
5.8.5. Scorecard output
The --output flag for the scorecard command specifies the scorecard results output format: either text or json.
Example 5.2. Example JSON output snippet
{
  "apiVersion": "scorecard.operatorframework.io/v1alpha3",
  "kind": "TestList",
  "items": [
    {
      "kind": "Test",
      "apiVersion": "scorecard.operatorframework.io/v1alpha3",
      "spec": {
        "image": "quay.io/operator-framework/scorecard-test:v1.3.0",
        "entrypoint": [
          "scorecard-test",
          "olm-bundle-validation"
        ],
        "labels": {
          "suite": "olm",
          "test": "olm-bundle-validation-test"
        }
      },
      "status": {
        "results": [
          {
            "name": "olm-bundle-validation",
            "log": "time=\"2020-06-10T19:02:49Z\" level=debug msg=\"Found manifests directory\" name=bundle-test\ntime=\"2020-06-10T19:02:49Z\" level=debug msg=\"Found metadata directory\" name=bundle-test\ntime=\"2020-06-10T19:02:49Z\" level=debug msg=\"Getting mediaType info from manifests directory\" name=bundle-test\ntime=\"2020-06-10T19:02:49Z\" level=info msg=\"Found annotations file\" name=bundle-test\ntime=\"2020-06-10T19:02:49Z\" level=info msg=\"Could not find optional dependencies file\" name=bundle-test\n",
            "state": "pass"
          }
        ]
      }
    }
  ]
}
Example 5.3. Example text output snippet
--------------------------------------------------------------------------------
Image:      quay.io/operator-framework/scorecard-test:v1.3.0
Entrypoint: [scorecard-test olm-bundle-validation]
Labels:
	"suite":"olm"
	"test":"olm-bundle-validation-test"
Results:
	Name: olm-bundle-validation
	State: pass
	Log:
		time="2020-07-15T03:19:02Z" level=debug msg="Found manifests directory" name=bundle-test
		time="2020-07-15T03:19:02Z" level=debug msg="Found metadata directory" name=bundle-test
		time="2020-07-15T03:19:02Z" level=debug msg="Getting mediaType info from manifests directory" name=bundle-test
		time="2020-07-15T03:19:02Z" level=info msg="Found annotations file" name=bundle-test
		time="2020-07-15T03:19:02Z" level=info msg="Could not find optional dependencies file" name=bundle-test
The output format spec matches the Test type layout.
5.8.6. Selecting tests
Scorecard tests are selected by setting the --selector CLI flag to a set of label strings. If a selector flag is not supplied, then all the tests within the scorecard configuration file are run.
Tests are run serially with test results being aggregated by the scorecard and written to standard output, or stdout.
Procedure
To select a single test, for example
basic-check-spec-test, specify the test by using the--selectorflag:$ operator-sdk scorecard <bundle_dir_or_image> \ -o text \ --selector=test=basic-check-spec-testTo select a suite of tests, for example
olm, specify a label that is used by all of the OLM tests:$ operator-sdk scorecard <bundle_dir_or_image> \ -o text \ --selector=suite=olmTo select multiple tests, specify the test names by using the
selectorflag using the following syntax:$ operator-sdk scorecard <bundle_dir_or_image> \ -o text \ --selector='test in (basic-check-spec-test,olm-bundle-validation-test)'
5.8.7. Enabling parallel testing
As an Operator author, you can define separate stages for your tests using the scorecard configuration file. Stages run sequentially in the order they are defined in the configuration file. A stage contains a list of tests and a configurable parallel setting.
By default, or when a stage explicitly sets parallel to false, tests in a stage are run sequentially in the order they are defined in the configuration file. Running tests one at a time is helpful to guarantee that no two tests interact and conflict with each other.
However, if tests are designed to be fully isolated, they can be parallelized.
Procedure
To run a set of isolated tests in parallel, include them in the same stage and set
paralleltotrue:apiVersion: scorecard.operatorframework.io/v1alpha3 kind: Configuration metadata: name: config stages: - parallel: true1 tests: - entrypoint: - scorecard-test - basic-check-spec image: quay.io/operator-framework/scorecard-test:v1.3.0 labels: suite: basic test: basic-check-spec-test - entrypoint: - scorecard-test - olm-bundle-validation image: quay.io/operator-framework/scorecard-test:v1.3.0 labels: suite: olm test: olm-bundle-validation-test- 1
- Enables parallel testing
All tests in a parallel stage are executed simultaneously, and scorecard waits for all of them to finish before proceding to the next stage. This can make your tests run much faster.
5.8.8. Custom scorecard tests
The scorecard tool can run custom tests that follow these mandated conventions:
- Tests are implemented within a container image
- Tests accept an entrypoint which include a command and arguments
-
Tests produce
v1alpha3scorecard output in JSON format with no extraneous logging in the test output -
Tests can obtain the bundle contents at a shared mount point of
/bundle - Tests can access the Kubernetes API using an in-cluster client connection
Writing custom tests in other programming languages is possible if the test image follows the above guidelines.
The following example shows of a custom test image written in Go:
Example 5.4. Example custom scorecard test
// Copyright 2020 The Operator-SDK Authors
//
// Licensed under the Apache License, Version 2.0 (the "License");
// you may not use this file except in compliance with the License.
// You may obtain a copy of the License at
//
//     http://www.apache.org/licenses/LICENSE-2.0
//
// Unless required by applicable law or agreed to in writing, software
// distributed under the License is distributed on an "AS IS" BASIS,
// WITHOUT WARRANTIES OR CONDITIONS OF ANY KIND, either express or implied.
// See the License for the specific language governing permissions and
// limitations under the License.

package main

import (
	"encoding/json"
	"fmt"
	"log"
	"os"

	scapiv1alpha3 "github.com/operator-framework/api/pkg/apis/scorecard/v1alpha3"
	apimanifests "github.com/operator-framework/api/pkg/manifests"
)

// This is the custom scorecard test example binary
// As with the Redhat scorecard test image, the bundle that is under
// test is expected to be mounted so that tests can inspect the
// bundle contents as part of their test implementations.
// The actual test is to be run is named and that name is passed
// as an argument to this binary.  This argument mechanism allows
// this binary to run various tests all from within a single
// test image.

const PodBundleRoot = "/bundle"

func main() {
	entrypoint := os.Args[1:]
	if len(entrypoint) == 0 {
		log.Fatal("Test name argument is required")
	}

	// Read the pod's untar'd bundle from a well-known path.
	cfg, err := apimanifests.GetBundleFromDir(PodBundleRoot)
	if err != nil {
		log.Fatal(err.Error())
	}

	var result scapiv1alpha3.TestStatus

	// Names of the custom tests which would be passed in the
	// `operator-sdk` command.
	switch entrypoint[0] {
	case CustomTest1Name:
		result = CustomTest1(cfg)
	case CustomTest2Name:
		result = CustomTest2(cfg)
	default:
		result = printValidTests()
	}

	// Convert scapiv1alpha3.TestResult to json.
	prettyJSON, err := json.MarshalIndent(result, "", "    ")
	if err != nil {
		log.Fatal("Failed to generate json", err)
	}
	fmt.Printf("%s\n", string(prettyJSON))

}

// printValidTests will print out full list of test names to give a hint to the end user on what the valid tests are.
func printValidTests() scapiv1alpha3.TestStatus {
	result := scapiv1alpha3.TestResult{}
	result.State = scapiv1alpha3.FailState
	result.Errors = make([]string, 0)
	result.Suggestions = make([]string, 0)

	str := fmt.Sprintf("Valid tests for this image include: %s %s",
		CustomTest1Name,
		CustomTest2Name)
	result.Errors = append(result.Errors, str)
	return scapiv1alpha3.TestStatus{
		Results: []scapiv1alpha3.TestResult{result},
	}
}

const (
	CustomTest1Name = "customtest1"
	CustomTest2Name = "customtest2"
)

// Define any operator specific custom tests here.
// CustomTest1 and CustomTest2 are example test functions. Relevant operator specific
// test logic is to be implemented in similarly.

func CustomTest1(bundle *apimanifests.Bundle) scapiv1alpha3.TestStatus {
	r := scapiv1alpha3.TestResult{}
	r.Name = CustomTest1Name
	r.State = scapiv1alpha3.PassState
	r.Errors = make([]string, 0)
	r.Suggestions = make([]string, 0)
	almExamples := bundle.CSV.GetAnnotations()["alm-examples"]
	if almExamples == "" {
		fmt.Println("no alm-examples in the bundle CSV")
	}

	return wrapResult(r)
}

func CustomTest2(bundle *apimanifests.Bundle) scapiv1alpha3.TestStatus {
	r := scapiv1alpha3.TestResult{}
	r.Name = CustomTest2Name
	r.State = scapiv1alpha3.PassState
	r.Errors = make([]string, 0)
	r.Suggestions = make([]string, 0)
	almExamples := bundle.CSV.GetAnnotations()["alm-examples"]
	if almExamples == "" {
		fmt.Println("no alm-examples in the bundle CSV")
	}
	return wrapResult(r)
}

func wrapResult(r scapiv1alpha3.TestResult) scapiv1alpha3.TestStatus {
	return scapiv1alpha3.TestStatus{
		Results: []scapiv1alpha3.TestResult{r},
	}
}
5.9. Configuring built-in monitoring with Prometheus
This guide describes the built-in monitoring support provided by the Operator SDK using the Prometheus Operator and details usage for Operator authors.
5.9.1. Prometheus Operator support
Prometheus is an open-source systems monitoring and alerting toolkit. The Prometheus Operator creates, configures, and manages Prometheus clusters running on Kubernetes-based clusters, such as OpenShift Container Platform.
Helper functions exist in the Operator SDK by default to automatically set up metrics in any generated Go-based Operator for use on clusters where the Prometheus Operator is deployed.
5.9.2. Metrics helper
In Go-based Operators generated using the Operator SDK, the following function exposes general metrics about the running program:
func ExposeMetricsPort(ctx context.Context, port int32) (*v1.Service, error)
These metrics are inherited from the controller-runtime library API. By default, the metrics are served on 0.0.0.0:8383/metrics.
A Service object is created with the metrics port exposed, which can be then accessed by Prometheus. The Service object is garbage collected when the leader pod’s root owner is deleted.
The following example is present in the cmd/manager/main.go file in all Operators generated using the Operator SDK:
import(
    "github.com/operator-framework/operator-sdk/pkg/metrics"
    "machine.openshift.io/controller-runtime/pkg/manager"
)

var (
    // Change the below variables to serve metrics on a different host or port.
    metricsHost       = "0.0.0.0"
metricsPort int32 = 8383
)
...
func main() {
    ...
    // Pass metrics address to controller-runtime manager
    mgr, err := manager.New(cfg, manager.Options{
        Namespace:          namespace,
        MetricsBindAddress: fmt.Sprintf("%s:%d", metricsHost, metricsPort),
    })

    ...
    // Create Service object to expose the metrics port.
    _, err = metrics.ExposeMetricsPort(ctx, metricsPort)
    if err != nil {
        // handle error
        log.Info(err.Error())
    }
    ...
}5.9.2.1. Modifying the metrics port
Operator authors can modify the port that metrics are exposed on.
Prerequisites
- Go-based Operator generated using the Operator SDK
- Kubernetes-based cluster with the Prometheus Operator deployed
Procedure
In the
cmd/manager/main.gofile of the generated Operator, change the value ofmetricsPortin the following line:var metricsPort int32 = 8383
5.9.3. Service monitors
A ServiceMonitor is a custom resource provided by the Prometheus Operator that discovers the Endpoints in Service objects and configures Prometheus to monitor those pods.
In Go-based Operators generated using the Operator SDK, the GenerateServiceMonitor() helper function can take a Service object and generate a ServiceMonitor object based on it.
5.9.3.1. Creating service monitors
Operator authors can add service target discovery of created monitoring services using the metrics.CreateServiceMonitor() helper function, which accepts the newly created service.
Prerequisites
- Go-based Operator generated using the Operator SDK
- Kubernetes-based cluster with the Prometheus Operator deployed
Procedure
Add the
metrics.CreateServiceMonitor()helper function to your Operator code:import( "k8s.io/api/core/v1" "github.com/operator-framework/operator-sdk/pkg/metrics" "machine.openshift.io/controller-runtime/pkg/client/config" ) func main() { ... // Populate below with the Service(s) for which you want to create ServiceMonitors. services := []*v1.Service{} // Create one ServiceMonitor per application per namespace. // Change the below value to name of the Namespace you want the ServiceMonitor to be created in. ns := "default" // restConfig is used for talking to the Kubernetes apiserver restConfig := config.GetConfig() // Pass the Service(s) to the helper function, which in turn returns the array of ServiceMonitor objects. serviceMonitors, err := metrics.CreateServiceMonitors(restConfig, ns, services) if err != nil { // Handle errors here. } ... }
5.10. Configuring leader election
During the lifecycle of an Operator, it is possible that there may be more than one instance running at any given time, for example when rolling out an upgrade for the Operator. In such a scenario, it is necessary to avoid contention between multiple Operator instances using leader election. This ensures only one leader instance handles the reconciliation while the other instances are inactive but ready to take over when the leader steps down.
There are two different leader election implementations to choose from, each with its own trade-off:
- Leader-for-life
-
The leader pod only gives up leadership, using garbage collection, when it is deleted. This implementation precludes the possibility of two instances mistakenly running as leaders, a state also known as split brain. However, this method can be subject to a delay in electing a new leader. For example, when the leader pod is on an unresponsive or partitioned node, the
pod-eviction-timeoutdictates long how it takes for the leader pod to be deleted from the node and step down, with a default of5m. See the Leader-for-life Go documentation for more. - Leader-with-lease
- The leader pod periodically renews the leader lease and gives up leadership when it cannot renew the lease. This implementation allows for a faster transition to a new leader when the existing leader is isolated, but there is a possibility of split brain in certain situations. See the Leader-with-lease Go documentation for more.
By default, the Operator SDK enables the Leader-for-life implementation. Consult the related Go documentation for both approaches to consider the trade-offs that make sense for your use case.
5.10.1. Operator leader election examples
The following examples illustrate how to use the two leader election options for an Operator, Leader-for-life and Leader-with-lease.
5.10.1.1. Leader-for-life election
With the Leader-for-life election implementation, a call to leader.Become() blocks the Operator as it retries until it can become the leader by creating the config map named memcached-operator-lock:
import (
  ...
  "github.com/operator-framework/operator-sdk/pkg/leader"
)

func main() {
  ...
  err = leader.Become(context.TODO(), "memcached-operator-lock")
  if err != nil {
    log.Error(err, "Failed to retry for leader lock")
    os.Exit(1)
  }
  ...
}
If the Operator is not running inside a cluster, leader.Become() simply returns without error to skip the leader election since it cannot detect the name of the Operator.
5.10.1.2. Leader-with-lease election
The Leader-with-lease implementation can be enabled using the Manager Options for leader election:
import (
  ...
  "sigs.k8s.io/controller-runtime/pkg/manager"
)

func main() {
  ...
  opts := manager.Options{
    ...
    LeaderElection: true,
    LeaderElectionID: "memcached-operator-lock"
  }
  mgr, err := manager.New(cfg, opts)
  ...
}
When the Operator is not running in a cluster, the Manager returns an error when starting because it cannot detect the namespace of the Operator to create the config map for leader election. You can override this namespace by setting the LeaderElectionNamespace option for the Manager.
5.11. Operator SDK CLI reference
The Operator SDK command-line interface (CLI) is a development kit designed to make writing Operators easier.
Operator SDK CLI syntax
$ operator-sdk <command> [<subcommand>] [<argument>] [<flags>]Operator authors with cluster administrator access to a Kubernetes-based cluster (such as OpenShift Container Platform) can use the Operator SDK CLI to develop their own Operators based on Go, Ansible, or Helm. Kubebuilder is embedded into the Operator SDK as the scaffolding solution for Go-based Operators, which means existing Kubebuilder projects can be used as is with the Operator SDK and continue to work.
5.11.1. bundle
The operator-sdk bundle command manages Operator bundle metadata.
5.11.1.1. validate
The bundle validate subcommand validates an Operator bundle.
| Flag | Description |
|---|---|
|
|
Help output for the |
|
|
Tool to pull and unpack bundle images. Only used when validating a bundle image. Available options are |
|
| List all optional validators available. When set, no validators are run. |
|
|
Label selector to select optional validators to run. When run with the |
5.11.2. cleanup
The operator-sdk cleanup command destroys and removes resources that were created for an Operator that was deployed with the run command.
| Flag | Description |
|---|---|
|
|
Help output for the |
|
|
Path to the |
|
| If present, namespace in which to run the CLI request. |
|
|
Time to wait for the command to complete before failing. The default value is |
5.11.3. completion
The operator-sdk completion command generates shell completions to make issuing CLI commands quicker and easier.
| Subcommand | Description |
|---|---|
|
| Generate bash completions. |
|
| Generate zsh completions. |
| Flag | Description |
|---|---|
|
| Usage help output. |
For example:
$ operator-sdk completion bashExample output
# bash completion for operator-sdk                         -*- shell-script -*-
...
# ex: ts=4 sw=4 et filetype=sh
5.11.4. create
The operator-sdk create command is used to create, or scaffold, a Kubernetes API.
5.11.4.1. api
The create api subcommand scaffolds a Kubernetes API. The subcommand must be run in a project that was initialized with the init command.
| Flag | Description |
|---|---|
|
|
Help output for the |
5.11.5. generate
The operator-sdk generate command invokes a specific generator to generate code or manifests.
5.11.5.1. bundle
The generate bundle subcommand generates a set of bundle manifests, metadata, and a bundle.Dockerfile file for your Operator project.
Typically, you run the generate kustomize manifests subcommand first to generate the input Kustomize bases that are used by the generate bundle subcommand. However, you can use the make bundle command in an initialized project to automate running these commands in sequence.
| Flag | Description |
|---|---|
|
|
Comma-separated list of channels to which the bundle belongs. The default value is |
|
|
Root directory for |
|
| The default channel for the bundle. |
|
|
Root directory for Operator manifests, such as deployments and RBAC. This directory is different from the directory passed to the |
|
|
Help for |
|
|
Directory from which to read an existing bundle. This directory is the parent of your bundle |
|
|
Directory containing Kustomize bases and a |
|
| Generate bundle manifests. |
|
| Generate bundle metadata and Dockerfile. |
|
| Directory to write the bundle to. |
|
|
Overwrite the bundle metadata and Dockerfile if they exist. The default value is |
|
| Package name for the bundle. |
|
| Run in quiet mode. |
|
| Write bundle manifest to standard out. |
|
| Semantic version of the Operator in the generated bundle. Set only when creating a new bundle or upgrading the Operator. |
5.11.5.2. kustomize
The generate kustomize subcommand contains subcommands that generate Kustomize data for the Operator.
5.11.5.2.1. manifests
The generate kustomize manifests subcommand generates or regenerates Kustomize bases and a kustomization.yaml file in the config/manifests directory, which are used to build bundle manifests by other Operator SDK commands. This command interactively asks for UI metadata, an important component of manifest bases, by default unless a base already exists or you set the --interactive=false flag.
| Flag | Description |
|---|---|
|
| Root directory for API type definitions. |
|
|
Help for |
|
| Directory containing existing Kustomize files. |
|
|
When set to |
|
| Directory where to write Kustomize files. |
|
| Package name. |
|
| Run in quiet mode. |
5.11.6. init
The operator-sdk init command initializes an Operator project and generates, or scaffolds, a default project directory layout for the given plug-in.
This command writes the following files:
- Boilerplate license file
-
PROJECTfile with the domain and repository -
Makefileto build the project -
go.modfile with project dependencies -
kustomization.yamlfile for customizing manifests - Patch file for customizing images for manager manifests
- Patch file for enabling Prometheus metrics
-
main.gofile to run
| Flag | Description |
|---|---|
|
|
Help output for the |
|
|
Name and optionally version of the plug-in to initialize the project with. Available plug-ins are |
|
|
Project version. Available values are |
5.11.7. run
The operator-sdk run command provides options that can launch the Operator in various environments.
5.11.7.1. bundle
The run bundle subcommand deploys an Operator in the bundle format with Operator Lifecycle Manager (OLM).
| Flag | Description |
|---|---|
|
|
Index image in which to inject a bundle. The default image is |
|
|
Install mode supported by the cluster service version (CSV) of the Operator, for example |
|
|
Install timeout. The default value is |
|
|
Path to the |
|
| If present, namespace in which to run the CLI request. |
|
|
Help output for the |
5.11.7.2. bundle-upgrade
The run bundle-upgrade subcommand upgrades an Operator that was previously installed in the bundle format with Operator Lifecycle Manager (OLM).
| Flag | Description |
|---|---|
|
|
Upgrade timeout. The default value is |
|
|
Path to the |
|
| If present, namespace in which to run the CLI request. |
|
|
Help output for the |
5.11.8. scorecard
The operator-sdk scorecard command runs the scorecard tool to validate an Operator bundle and provide suggestions for improvements. The command takes one argument, either a bundle image or directory containing manifests and metadata. If the argument holds an image tag, the image must be present remotely.
| Flag | Description |
|---|---|
|
|
Path to scorecard configuration file. The default path is |
|
|
Help output for the |
|
|
Path to |
|
| List which tests are available to run. |
|
| Namespace in which to run the test images. |
|
|
Output format for results. Available values are |
|
| Label selector to determine which tests are run. |
|
|
Service account to use for tests. The default value is |
|
| Disable resource cleanup after tests are run. |
|
|
Seconds to wait for tests to complete, for example |