Red Hat AMQ 6
As of February 2025, Red Hat is no longer supporting Red Hat AMQ 6. If you are using AMQ 6, please upgrade: Migrating to AMQ 7.Questo contenuto non è disponibile nella lingua selezionata.
8.8. Enable SSL/TLS on the LDAP Connection
Overview
Copia collegamentoCollegamento copiato negli appunti!
This tutorial explains how to enable SSL/TLS security on the connection between the LDAP login module and the Apache Directory Server.
The Apache Directory Server is already configured with an SSL endpoint. The default configuration creates an LDAPS endpoint that listens on the IP port
10636. The directory server automatically generates a self-signed X.509 certificate which it uses to identify itself during the SSL/TLS handshake.
Important
You can use the default SSL configuration for simple demonstrations, but it is not suitable for real deployments. For advice on how to configure a real deployment, see the section called “Tightening up security”.
Procedure
Copia collegamentoCollegamento copiato negli appunti!
To enable SSL/TLS security on the connection to the Apache Directory Server:
- Obtain a copy of the server's self-signed certificate.
- Using a Web browser , navigate to the following URL:
https://localhost:10636
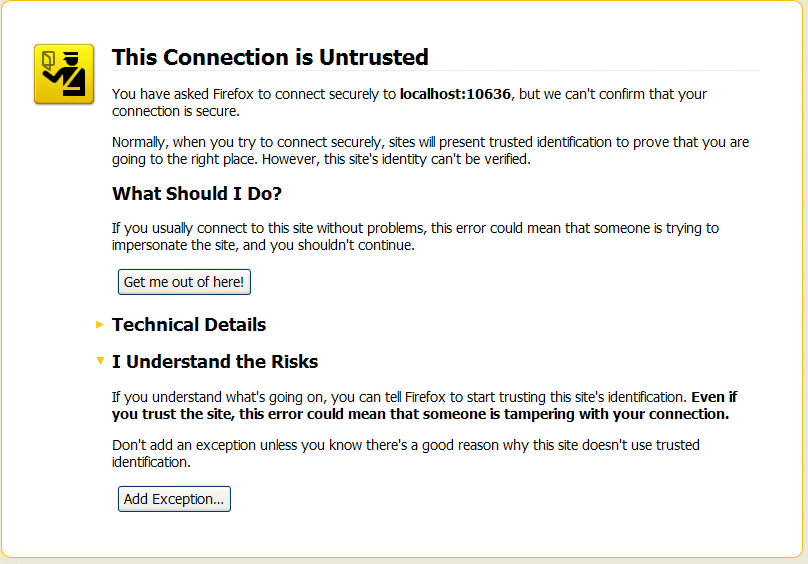
https://localhost:10636Copy to Clipboard Copied! Toggle word wrap Toggle overflow ImportantRemember to specify the scheme ashttps, not justhttp.The Web browser now signals an error, because the certificate it receives from the server is untrusted. In the case of Firefox, you will see the following error in the browser window:Figure 8.6. Obtaining the Certificate
- Click I Understand the Risks.
- Click Add Exception.The Add Security Exception dialog opens.
- In the Add Security Exception dialog, click .
- Click .The Certificate Viewer dialog opens.
- In the Certificate Viewer dialog, select the Details tab.
- Click .The Save Certificate To File dialog opens.
- In the Save Certificate To File dialog, use the drop-down list to set the Save as type to X.509 Certificate (DER).
- Save the certificate,
ApacheDS.der, to a convenient location on the filesystem.
- Convert the DER format certificate into a keystore.
- From a command prompt, change directory to the directory where you have stored the
ApacheDS.derfile. - Enter the following
keytoolcommand:keytool -import -file ApacheDS.der -alias server -keystore truststore.ks -storepass secret
keytool -import -file ApacheDS.der -alias server -keystore truststore.ks -storepass secretCopy to Clipboard Copied! Toggle word wrap Toggle overflow
- Copy the newly created keystore file,
truststore.ks, into the Red Hat JBoss A-MQetc/directory. - Open the
ldap-module.xmlfile you created in Section 8.4, “Enable LDAP Authentication in the OSGi Container” in a text editor. - Edit the connection.url to use ldaps://localhost:10636.
- Add the highlighted lines in Example 8.3, “LDAP Configuration for Using SSL/TLS”.
Example 8.3. LDAP Configuration for Using SSL/TLS
Copy to Clipboard Copied! Toggle word wrap Toggle overflow - Copy the
ldap-module.xmlfile into the Red Hat JBoss A-MQdeploy/directory.The LDAP module is automatically activated. - Test the new LDAP realm by connecting to the running container using the JBoss A-MQ
clientutility.- Open a new command prompt.
- Change to the JBoss A-MQ install directory.
- Enter the following command to log on to the running container instance using the identity
jdoe:client -u jdoe -p secret
client -u jdoe -p secretCopy to Clipboard Copied! Toggle word wrap Toggle overflow You should successfully log into the container's remote console becausejdoedoes have theadminrole.
Tightening up security
Copia collegamentoCollegamento copiato negli appunti!
The SSL set-up described here is suitable only as a proof-of-concept demonstration. For a real deployment, you must make the following changes to tighten up security:
- Delete all entries from the Red Hat JBoss A-MQ's
etc/users.propertiesfile.If theldap-module.xmlbundle fails to start up properly, JAAS authentication reverts to the built-in file-basedkarafrealm, which takes its user data from theusers.propertiesfile. - Disable the insecure LDAP endpoint on the Apache Directory Server.
- Create and deploy a properly signed X.509 certificate on the Apache Directory Server.
- Make sure that the LDAP server is configured to use the TLSv1 protocol (POODLE vulnerability). Do not enable the SSLv3 protocol. For more information, see Poodle vulnerability (CVE-2014-3566).
Apache Directory Server Reference
Copia collegamentoCollegamento copiato negli appunti!
For more details of how to configure SSL/TLS security on the Apache Directory Server, see How to enable SSL.
