Questo contenuto non è disponibile nella lingua selezionata.
Chapter 3. Installing Ansible development tools
Red Hat provides two options for installing Ansible development tools.
- Installation on a RHEL container running inside VS Code. You can install this option on MacOS, Windows, and Linux systems.
Installation on your local RHEL 8 or RHEL 9 system using an RPM (Red Hat Package Manager) package.
NoteRPM installation is not supported on RHEL 10.
3.1. Requirements
To install and use Ansible development tools, you must meet the following requirements. Extra requirements for Windows installations and containerized installations are indicated in the procedures.
- Python 3.10 or later.
- VS Code (Visual Studio Code) with the Ansible extension added. See Installing VS Code.
- For containerized installations, the Microsoft Dev Containers VS Code extension. See Installing and configuring the Dev Containers extension.
A containerization platform, for example Podman, Podman Desktop, Docker, or Docker Desktop.
NoteThe installation procedure for Ansible development tools on Windows covers the use of Podman Desktop only. See Requirements for Ansible development tools on Windows.
-
You have a Red Hat account and you can log in to the Red Hat container registry at
registry.redhat.io. For information about logging in toregistry.redhat.io, see Authenticating with the Red Hat container registry.
3.1.1. Requirements for Ansible development tools on Windows
If you are installing Ansible development tools on a container in VS Code on Windows, there are extra requirements:
- Windows Subsystem for Linux(WSL2)
- Podman Desktop
Procedure
Install WSL2 without a distribution:
wsl --install --no-distribution
$ wsl --install --no-distributionCopy to Clipboard Copied! Toggle word wrap Toggle overflow Use
cgroupsv2by disablingcgroupsv1for WSL2:Edit the
%USERPROFILE%/wsl.conffile and add the following lines to forcecgroupv2usage:[wsl2] kernelCommandLine = cgroup_no_v1="all"
[wsl2] kernelCommandLine = cgroup_no_v1="all"Copy to Clipboard Copied! Toggle word wrap Toggle overflow Install Podman Desktop. Follow the instructions in Installing Podman Desktop and Podman on Windows in the Podman Desktop documentation.
You do not need to change the default settings in the set-up wizard.
Ensure the podman machine is using
cgroupsv2:podman info | findstr cgroup
$ podman info | findstr cgroupCopy to Clipboard Copied! Toggle word wrap Toggle overflow Test Podman Desktop:
podman run hello
$ podman run helloCopy to Clipboard Copied! Toggle word wrap Toggle overflow Configure the settings for Podman Desktop. Add a
%USERPROFILE%\bin\docker.batfile with the following content:@echo off podman %*
@echo off podman %*Copy to Clipboard Copied! Toggle word wrap Toggle overflow This avoids having to install Docker as required by the VS Code
Dev Containerextension.Add the
%USERPROFILE%\bindirectory to thePATH:- Select Settings and search for "Edit environment variables for your account" to display all of the user environment variables.
- Highlight "Path" in the top user variables box, click and add the path.
- Click to set the path for any new console that you open.
3.1.2. Authenticating with the Red Hat container registry
All container images available through the Red Hat container catalog are hosted on an image registry, registry.redhat.io. The registry requires authentication for access to images.
If you are planning to install the Ansible development tools on a container inside VS Code, you must log in to registry.redhat.io before launching VS Code so that VS Code can pull the devtools container from registry.redhat.io.
If you are running Ansible development tools on a container inside VS Code and you want to pull execution environments or the devcontainer to use as an execution environment, you must log in from a terminal prompt within the devcontainer from a terminal inside VS Code.
Prerequisites
To use the
registry.redhat.ioregistry, you must have a Red Hat login.This is the same account that you use to log in to the Red Hat Customer Portal (access.redhat.com) and manage your Red Hat subscriptions.
Procedure
Check whether you are already logged in to the
registry.redhat.ioregistry:podman login --get-login registry.redhat.io
$ podman login --get-login registry.redhat.ioCopy to Clipboard Copied! Toggle word wrap Toggle overflow The command output displays your Red Hat login if you are logged in to
registry.redhat.io.If you are not logged in to
registry.redhat.io, use thepodman logincommand with your credentials to access content on the registry.podman login registry.redhat.io Username: my_redhat_username Password: ***********
$ podman login registry.redhat.io
Username: my_redhat_username
Password: ***********
Copy to Clipboard Copied! Toggle word wrap Toggle overflow
3.1.3. Installing VS Code
To install VS Code, follow the instructions on the Download Visual Studio Code page in the Visual Studio Code documentation.
3.1.4. Installing the VS Code Ansible extension
The Ansible extension adds language support for Ansible to VS Code. It incorporates Ansible development tools to facilitate creating and running automation content.
For a full description of the Ansible extension, see the Visual Studio Code Marketplace.
Use the following procedure to install the Ansible VS Code extension:
Procedure
- Open VS Code.
-
Click the Extensions (
 ) icon in the Activity Bar, or click
 , to display the Extensions view. -
In the search field in the Extensions view, type
Ansible Red Hat. - Select the Ansible extension and click .
Verification
When the language for a file is recognized as Ansible, the Ansible extension provides features such as auto-completion, hover, diagnostics, and goto. The language identified for a file is displayed in the Status bar at the bottom of the VS Code window.
The following files are assigned the Ansible language:
-
YAML files in a
/playbooksdirectory -
Files with the following double extension:
.ansible.ymlor.ansible.yaml -
Certain YAML names recognized by Ansible, for example
site.ymlorsite.yaml -
YAML files whose filename contains "playbook":
playbook.ymlorplaybook.yaml
Troubleshooting
If the extension does not identify the language for your playbook files as Ansible, follow the procedure in Associating the Ansible language to YAML files.
3.1.5. Configuring Ansible extension settings
The Ansible extension supports multiple configuration options.
You can configure the settings for the extension on a user level, on a workspace level, or for a particular directory. User-based settings are applied globally for any instance of VS Code that is opened. A VS Code workspace is a collection of one or more folders that you can open in a single VS Code window. Workspace settings are stored within your workspace and only apply when the current workspace is opened.
It is useful to configure settings for your workspace for the following reasons:
- If you define and maintain configurations specific to your playbook project, you can customize your Ansible development environment for individual projects without altering your preferred setup for other work. You can have different settings for a Python project, an Ansible project, and a C++ project, each optimized for the respective stack without the need to manually reconfigure settings each time you switch projects.
- If you include workspace settings when setting up version control for a project you want to share with your team, everyone uses the same configuration for that project.
Prerequisites
-
Open a workspace or folder, or create a new folder, in VS Code using the
menu. This is necessary because the file that stores settings preferences for workspaces is specific to a folder or workspace.
Procedure
Open the Ansible extension settings:
-
Click the
Extensions icon in the activity bar.
Select the Ansible extension, and click the 'gear' icon and then Extension Settings to display the extension settings.
-
Alternatively, click
to open the Settings page.
-
Alternatively, click
-
Enter
Ansiblein the search bar to display the settings for the extension.
-
Click the
Select the Workspace tab to configure your settings for the current VS Code workspace.
-
If the Workspace tab is not displayed, open a folder or create a new folder using the
menu.
-
If the Workspace tab is not displayed, open a folder or create a new folder using the
The Ansible extension settings are pre-populated. Modify the settings to suit your requirements:
-
Check the
box to enable ansible-lint. -
Check the
Ansible Execution Environment: Enabledbox to use an execution environment. - Specify the execution environment image you want to use in the Ansible > Execution Environment: image field.
- To use Red Hat Ansible Lightspeed, check the Ansible > Lightspeed: Enabled box, and enter the URL for Lightspeed.
-
Check the
3.1.6. Manually adding the Ansible language to YAML files
The Ansible VS Code extension works only when the language associated with a file is set to Ansible. The extension provides features that help create Ansible playbooks, such as auto-completion, hover, and diagnostics.
The Ansible VS Code extension automatically associates the Ansible language with some files. The procedures below describe how to set the language for files that are not recognized as Ansible files.
3.1.6.1. Associating the Ansible language to YAML files
The following procedure describes how to manually assign the Ansible language to a YAML file that is open in VS Code.
Procedure
- Open or create a YAML file in VS Code.
- Hover the cursor over the language identified in the status bar at the bottom of the VS Code window to open the Select Language Mode list.
Select Ansible in the list.
The language shown in the status bar at the bottom of the VS Code window for the file is changed to Ansible.
3.1.6.2. Adding persistent file association for the Ansible language to settings.json
instread of manually associating the Ansible language to YAML files, you can add file association for the Ansible language in your settings.json file.
Procedure
Open the
settings.jsonfile:-
Click
to open the command palette. -
Enter
Workspace settingsin the search box and select Open Workspace Settings (JSON).
-
Click
Add the following code to
settings.json.Copy to Clipboard Copied! Toggle word wrap Toggle overflow
3.1.7. Installing and configuring the Dev Containers extension
If you are installing the containerized version of Ansible development tools, you must install the Microsoft Dev Containers extension in VS Code.
Procedure
- Open VS Code.
-
Click the Extensions (
) icon in the Activity Bar, or click
, to display the Extensions view. -
In the search field in the Extensions view, type
Dev Containers. Select the Dev Containers extension from Microsoft and click .
If you are using Podman or Podman Desktop as your containerization platform, you must modify the default settings in the
Dev Containersextension.Replace docker with podman in the
Dev Containersextension settings:- In VS Code, open the settings editor.
Search for
@ext:ms-vscode-remote.remote-containers.Alternatively, click the Extensions icon in the activity bar and click the gear icon for the
Dev Containersextension.
-
Set
Dev > Containers:Docker Pathtopodman. -
Set
Dev > Containers:Docker Compose Pathtopodman-compose.
3.2. Installing Ansible development tools on a container inside VS Code
The Dev Containers VS Code extension requires a .devcontainer file to store settings for your dev containers. You must use the Ansible extension to scaffold a config file for your dev container, and reopen your directory in a container in VS Code.
Prerequisites
- You have installed a containerization platform, for example Podman, Podman Desktop, Docker, or Docker Desktop.
-
You have a Red Hat login and you have logged in to the Red Hat registry at
registry.redhat.io. For information about logging in toregistry.redhat.io, see Authenticating with the Red Hat container registry. - You have installed VS Code.
- You have installed the Ansible extension in VS Code.
- You have installed the Microsoft Dev Containers extension in VS Code.
If you are installing Ansible development tools on Windows, launch VS Code and connect to the WSL machine:
-
Click the
Remote( ) icon.
- In the dropdown menu that appears, select the option to connect to the WSL machine.
-
Click the
Procedure
- In VS Code, navigate to your project directory.
- Click the Ansible icon in the VS Code activity bar to open the Ansible extension.
- In the Ansible Development Tools section of the Ansible extension, scroll down to the ADD option and select Devcontainer.
In the Create a devcontainer page, select the Downstream container image from the Container image options.
This action adds
devcontainer.jsonfiles for both Podman and Docker in a.devcontainerdirectory.Reopen or reload the project directory:
If VS Code detects that your directory contains a
devcontainer.jsonfile, the following notification appears: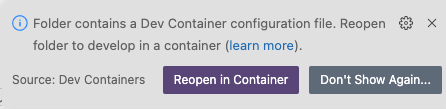
Click Reopen in Container.
-
If the notification does not appear, click the
Remote(
) icon. In the dropdown menu that appears, select Reopen in Container.
Select the dev container for Podman or Docker according to the containerization platform you are using.
The Remote () status in the VS Code Status bar displays
opening Remoteand a notification indicates the progress in opening the container.
Verification
When the directory reopens in a container, the Remote () status displays Dev Container: ansible-dev-container.
The base image for the container is a Universal Base Image Minimal (UBI Minimal) image that uses microdnf as a package manager. The dnf and yum package managers are not available in the container.
For information about using microdnf in containers based on UBI Minimal images, see Adding software in a minimal UBI container in the Red Hat Enterprise Linux Building, running, and managing containers guide.
3.3. Installing Ansible development tools from a package on RHEL
Ansible development tools are bundled in the Ansible Automation Platform RPM (Red Hat Package Manager) package. Refer to the RPM installation documentation for information on installing Ansible Automation Platform.
Prerequisites
You have installed RHEL 8 or RHEL 9.
NoteRPM installation is not supported on RHEL 10.
- You have registered your system with Red Hat Subscription Manager.
- You have installed a containerization platform, for example Podman or Docker.
Procedure
Run the following command to check whether Simple Content Access (SCA) is enabled:
sudo subscription-manager status
$ sudo subscription-manager statusCopy to Clipboard Copied! Toggle word wrap Toggle overflow If Simple Content Access is enabled, the output contains the following message:
Content Access Mode is set to Simple Content Access.
Content Access Mode is set to Simple Content Access.Copy to Clipboard Copied! Toggle word wrap Toggle overflow If Simple Content Access is not enabled, attach the Red Hat Ansible Automation Platform SKU:
sudo subscription-manager attach --pool=<sku-pool-id>
$ sudo subscription-manager attach --pool=<sku-pool-id>Copy to Clipboard Copied! Toggle word wrap Toggle overflow
Install Ansible development tools with the following command:
sudo dnf install --enablerepo=ansible-automation-platform-2.5-for-rhel-8-x86_64-rpms ansible-dev-tools
$ sudo dnf install --enablerepo=ansible-automation-platform-2.5-for-rhel-8-x86_64-rpms ansible-dev-toolsCopy to Clipboard Copied! Toggle word wrap Toggle overflow sudo dnf install --enablerepo=ansible-automation-platform-2.5-for-rhel-9-x86_64-rpms ansible-dev-tools
$ sudo dnf install --enablerepo=ansible-automation-platform-2.5-for-rhel-9-x86_64-rpms ansible-dev-toolsCopy to Clipboard Copied! Toggle word wrap Toggle overflow
Verification
Verify that the Ansible development tools components have been installed:
rpm -aq | grep ansible
$ rpm -aq | grep ansibleThe output displays the Ansible packages that are installed:
On successful installation, you can view the help documentation for ansible-creator: