Questo contenuto non è disponibile nella lingua selezionata.
Chapter 13. The Certificate System Configuration Files
The primary configuration file for every subsystem is its CS.cfg file. This chapter covers basic information about and rules for editing the CS.cfg file. This chapter also describes some other useful configuration files used by the subsystems, such as password and web services files.
13.1. File and directory locations for Certificate System subsystems
Certificate System servers consist of an Apache Tomcat instance, which contains one or more subsystems. Each subsystem consists of a web application, which handles requests for a specific type of PKI function.
The available subsystems are: CA, KRA, OCSP, TKS, and TPS. Each instance can contain only one of each type of a PKI subsystem.
A subsystem can be installed within a particular instance using the pkispawn command.
13.1.1. Instance-specific information
For instance information for the default instance (pki-tomcat), see Table 2.2, “Tomcat instance information”
| Port Type | Port Number | Notes |
|---|---|---|
| Secure port | 8443 | Main port used to access PKI services by end-users, agents, and admins over HTTPS. |
| Insecure port | 8080 | Used to access the server insecurely for some end-entity functions over HTTP. Used for instance to provide CRLs, which are already signed and therefore need not be encrypted. |
| AJP port | 8009 | Used to access the server from a front end Apache proxy server through an AJP connection. Redirects to the HTTPS port. |
| Tomcat port | 8005 | Used by the web server. |
13.1.2. CA subsystem information
This section contains details about the CA subsystem, which is one of the possible subsystems that can be installed as a web application in a Certificate Server instance.
| Setting | Value |
|---|---|
| Main directory | /var/lib/pki/pki-tomcat/ca/ |
| Configuration directory | /var/lib/pki/pki-tomcat/ca/conf/ |
| Configuration file | /var/lib/pki/pki-tomcat/ca/conf/CS.cfg |
| Subsystem certificates | CA signing certificate |
| OCSP signing certificate (for the CA’s internal OCSP service) | TLS server certificate |
| Audit log signing certificate | Subsystem certificate |
| Security databases | /var/lib/pki/pki-tomcat/alias/ |
| Log files | /var/lib/pki/pki-tomcat/ca/logs/ |
| Install log | /var/log/pki/pki-ca-spawn.date.log |
| Uninstall log | /var/log/pki/pki-ca-destroy.date.log |
| Audit logs | /var/log/pki/pki-tomcat/ca/signedAudit/ |
| Profile files | /var/lib/pki/pki-tomcat/ca/profiles/ca/ |
| Email notification templates | /var/lib/pki/pki-tomcat/ca/emails/ |
| Web services files | Agent services: /var/lib/pki/pki-tomcat/ca/webapps/ca/agent/ |
| Admin services: /var/lib/pki/pki-tomcat/ca/webapps/ca/admin/ | End user services: /var/lib/pki/pki-tomcat/ca/webapps/ca/ee/ |
13.1.3. KRA subsystem information
This section contains details about the KRA subsystem, which is one of the possible subsystems that can be installed as a web application in a Certificate Server instance.
| Setting | Value |
|---|---|
| Main directory | /var/lib/pki/pki-tomcat/kra/ |
| Configuration directory | /var/lib/pki/pki-tomcat/kra/conf/ |
| Configuration file | /var/lib/pki/pki-tomcat/kra/conf/CS.cfg |
| Subsystem certificates | Transport certificate |
| Storage certificate | TLS server certificate |
| Audit log signing certificate | Subsystem certificate |
| Security databases | /var/lib/pki/pki-tomcat/alias/ |
| Log files | /var/lib/pki/pki-tomcat/kra/logs/ |
| Install log | /var/log/pki/pki-kra-spawn-date.log |
| Uninstall log | /var/log/pki/pki-kra-destroy-date.log |
| Audit logs | /var/log/pki/pki-tomcat/kra/signedAudit/ |
| Web services files | Agent services: /var/lib/pki/pki-tomcat/kra/webapps/kra/agent/ |
13.1.4. OCSP subsystem information
This section contains details about the OCSP subsystem, which is one of the possible subsystems that can be installed as a web application in a Certificate Server instance.
| Setting | Value |
|---|---|
| Main directory | /var/lib/pki/pki-tomcat/ocsp/ |
| Configuration directory | /var/lib/pki/pki-tomcat/ocsp/conf/ |
| Configuration file | /var/lib/pki/pki-tomcat/ocsp/conf/CS.cfg |
| Subsystem certificates | Transport certificate |
| Storage certificate | TLS server certificate |
| Audit log signing certificate | Subsystem certificate |
| Security databases | /var/lib/pki/pki-tomcat/alias/ |
| Log files | /var/lib/pki/pki-tomcat/ocsp/logs/ |
| Install log | /var/log/pki/pki-ocsp-spawn-date.log |
| Uninstall log | /var/log/pki/pki-ocsp-destroy-date.log |
| Audit logs | /var/log/pki/pki-tomcat/ocsp/signedAudit/ |
| Web services files | Agent services: /var/lib/pki/pki-tomcat/ocsp/webapps/ocsp/agent/ |
13.1.5. TKS subsystem information
This section contains details about the TKS subsystem, which is one of the possible subsystems that can be installed as a web application in a Certificate Server instance.
| Setting | Value |
|---|---|
| Main directory | /var/lib/pki/pki-tomcat/tks/ |
| Configuration directory | /var/lib/pki/pki-tomcat/tks/conf/ |
| Configuration file | /var/lib/pki/pki-tomcat/tks/conf/CS.cfg |
| Subsystem certificates | Transport certificate |
| Storage certificate | TLS server certificate |
| Audit log signing certificate | Subsystem certificate |
| Security databases | /var/lib/pki/pki-tomcat/alias/ |
| Log files | /var/lib/pki/pki-tomcat/tks/logs/ |
| Install log | /var/log/pki/pki-tks-spawn-date.log |
| Uninstall log | /var/log/pki/pki-tks-destroy-date.log |
| Audit logs | /var/log/pki/pki-tomcat/tks/signedAudit/ |
| Web services files | Agent services: /var/lib/pki/pki-tomcat/tks/webapps/tks/agent/ |
13.1.6. TPS subsystem information
This section contains details about the TPS subsystem, which is one of the possible subsystems that can be installed as a web application in a Certificate Server instance.
| Setting | Value |
|---|---|
| Main directory | /var/lib/pki/pki-tomcat/tps |
| Configuration directory | /var/lib/pki/pki-tomcat/tps/conf/ |
| Configuration file | /var/lib/pki/pki-tomcat/tps/conf/CS.cfg |
| Subsystem certificates | Transport certificate |
| Storage certificate | TLS server certificate |
| Audit log signing certificate | Subsystem certificate |
| Security databases | /var/lib/pki/pki-tomcat/alias/ |
| Log files | /var/lib/pki/pki-tomcat/tps/logs/ |
| Install log | /var/log/pki/pki-tps-spawn-date.log |
| Uninstall log | /var/log/pki/pki-tps-destroy-date.log |
| Audit logs | /var/log/pki/pki-tomcat/tps/signedAudit/ |
| Web services files | Agent services: /var/lib/pki/pki-tomcat/tps/webapps/tps/agent/ |
13.1.7. Shared Certificate System subsystem file locations
There are some directories used by or common to all Certificate System subsystem instances for general server operations, listed in Table 13.7, “Subsystem file locations”.
| Directory Location | Contents |
|---|---|
| /var/lib/instance_name | Contains the main instance directory, which is the location for user-specific directory locations and customized configuration files, profiles, certificate databases, web files, and other files for the subsystem instance. |
| /usr/share/java/pki | Contains Java archive files shared by the Certificate System subsystems. Along with shared files for all subsystems, there are subsystem-specific files in subfolders:
|
| /usr/share/pki | Contains common files and templates used to create Certificate System instances. Along with shared files for all subsystems, there are subsystem-specific files in subfolders:
|
| /usr/bin |
Contains the |
| /var/lib/tomcat5/common/lib | Contains links to Java archive files shared by local Tomcat web applications and shared by the Certificate System subsystems. Not used by the TPS subsystem. |
| /var/lib/tomcat5/server/lib | Contains links to Java archive files used by the local Tomcat web server and shared by the Certificate System subsystems. Not used by the TPS subsystem. |
| /usr/shared/pki | Contains the Java archive files used by the Tomcat server and applications used by the Certificate System instances. Not used by the TPS subsystem. |
| Contains Apache modules used by the TPS subsystem. Not used by the CA, KRA, OCSP, or TKS subsystems. |
| Mozilla LDAP SDK tools used by the TPS subsystem. Not used by the CA, KRA, OCSP, or TKS subsystems. |
13.2. CS.cfg files
The runtime properties of a Certificate System subsystem are governed by a set of configuration parameters. These parameters are stored in a file that is read by the server during startup, CS.cfg.
The CS.cfg, an ASCII file, is created and populated with the appropriate configuration parameters when a subsystem is first installed. The way the instance functions are modified is by making changes through the subsystem console, which is the recommended method. The changes made in the administrative console are reflected in the configuration file.
It is also possible to edit the CS.cfg configuration file directly, and in some cases this is the easiest way to manage the subsystem.
13.2.1. Locating the CS.cfg file
Each instance of a Certificate System subsystem has its own configuration file, CS.cfg. The contents of the file for each subsystem instance is different depending on the way the subsystem was configured, additional settings and configuration (like adding new profiles or enabling self-tests), and the type of subsystem.
The CS.cfg file is located in the configuration directory for the instance.
/var/lib/pki/ instance_name/subsystem_type/conf
/var/lib/pki/ instance_name/subsystem_type/confFor example:
/var/lib/pki/ instance_name/ca/conf
/var/lib/pki/ instance_name/ca/conf13.2.2. Editing the configuration file
Do not edit the configuration file directly without being familiar with the configuration parameters or without being sure that the changes are acceptable to the server. The Certificate System fails to start if the configuration file is modified incorrectly. Incorrect configuration can also result in data loss.
To modify the CS.cfg file:
Stop the subsystem instance.
pki-server stop instance_name
# pki-server stop instance_nameCopy to Clipboard Copied! Toggle word wrap Toggle overflow OR (if using
nuxwdog watchdog)systemctl stop pki-tomcatd-nuxwdog@instance_name.service
# systemctl stop pki-tomcatd-nuxwdog@instance_name.serviceCopy to Clipboard Copied! Toggle word wrap Toggle overflow The configuration file is stored in the cache when the instance is started. Any changes made to the instance through the Console are changed in the cached version of the file. When the server is stopped or restarted, the configuration file stored in the cache is written to disk. Stop the server before editing the configuration file or the changes will be overwritten by the cached version when the server is stopped.
-
Open the
/var/lib/pki/ instance_name/subsystem_type/confdirectory. -
Open the
CS.cfgfile in a text editor. - Edit the parameters in the file, and save the changes.
Start the subsystem instance.
pki-server start instance_name
# pki-server start instance_nameCopy to Clipboard Copied! Toggle word wrap Toggle overflow OR (if using
nuxwdog watchdog)systemctl start pki-tomcatd-nuxwdog@instance_name.service
# systemctl start pki-tomcatd-nuxwdog@instance_name.serviceCopy to Clipboard Copied! Toggle word wrap Toggle overflow
13.2.3. Overview of the CS.cfg configuration file
Each subsystem instances has its own main configuration file, CS.cfg, which contains all of the settings for the instance, such as plug-ins and Java classes for configuration. The parameters and specific settings are different depending on the type of subsystem, but, in a general sense, the CS.cfg file defines these parts of the subsystem instance:
- Basic subsystem instance information, like its name, port assignments, instance directory, and hostname
- Logging
- Plug-ins and methods to authenticate to the instance’s user directory (authorization)
- The security domain to which the instance belongs
- Subsystem certificates
- Other subsystems used by the subsystem instance
- Database types and instances used by the subsystem
- Settings for PKI-related tasks, like the key profiles in the TKS, the certificate profiles in the CA, and the required agents for key recovery in the KRA
Many of the configuration parameters (aside from the ones for PKI tasks) are very much the same between the CA, OCSP, KRA, and TKS because they all use a Java-based console, so configuration settings which can be managed in the console have similar parameters.
The CS.cfg file a basic parameter=value format.
#comment
parameter=value
#comment
parameter=value
In the CS.cfg file, many of the parameter blocks have descriptive comments, commented out with a pound (#) character. Comments, blank lines, unknown parameters, or misspelled parameters are ignored by the server.
A bug in the TPS prevents it from ignoring lines which are commented out in the CS.cfg file. Rather than commenting out lines in the TPS CS.cfg file, simply delete those lines.
Parameters that configure the same area of the instance tend to be grouped together into the same block.
Example 13.1. Logging settings in the CS.cfg file
Some areas of functionality are implemented through plug-ins, such as self-tests, jobs, and authorization to access the subsystem. For those parameters, the plug-in instance has a unique identifier (since there can be multiple instances of even the same plug-in called for a subsystem), the implementation plug-in name, and the Java class.
Example 13.2. Subsystem authorization settings
authz.impl._000=##
authz.impl._001=## authorization manager implementations
authz.impl._002=##
authz.impl.BasicAclAuthz.class=com.netscape.cms.authorization.BasicAclAuthz
authz.instance.BasicAclAuthz.pluginName=BasicAclAuthz
authz.impl._000=##
authz.impl._001=## authorization manager implementations
authz.impl._002=##
authz.impl.BasicAclAuthz.class=com.netscape.cms.authorization.BasicAclAuthz
authz.instance.BasicAclAuthz.pluginName=BasicAclAuthzThe values for configuration parameters must be properly formatted, so they must obey two rules:
- The values that need to be localized must be in UTF8 characters.
-
The
CS.cfgfile supports forward slashes (/) in parameter values. If a back slash (\) is required in a value, it must be escaped with a back slash, meaning that two back slashes in a row must be used.
The following sections are snapshots of CS.cfg file settings and parameters. These are not exhaustive references or examples of CS.cfg file parameters. Also, the parameters available and used in each subsystem configuration file is very different, although there are similarities.
13.2.3.1. Basic subsystem settings
Basic settings are specific to the instance itself, without directly relating to the functionality or behavior of the subsystem. This includes settings for the instance name, root directory, the user ID for the process, and port numbers. Many of the settings assigned when the instance is first installed or configured are prefaced with pkispawn.
Example 13.3. Basic Instance Parameters for the CA: pkispawn file ca.cfg
While information like the port settings is included in the CS.cfg file, it is not set in the CS.cfg. The server configuration is set in the server.xml file.
The ports in CS.cfg and server.xml must match for a working RHCS instance.
13.2.3.2. Logging settings
There are several different types of logs that can be configured, depending on the type of subsystem. Each type of log has its own configuration entry in the CS.cfg file.
For example, the CA has this entry for transaction logs, which allows log rotation, buffered logging, and log levels, among other settings:
For more information about these parameters and their values, see Section 17.1, “Certificate System log settings”. As long as audit logging is enabled, these values do not affect compliance.
13.2.3.3. Authentication and authorization settings
The CS.cfg file sets how users are identified to access a subsystem instance (authentication) and what actions are approved (authorization) for each authenticated user.
A CS subsystem uses authentication plug-ins to define the method for logging into the subsystem.
The following example shows an authentication instance named SharedToken that instantiates a JAVA plug-in named SharedSecret.
For some authorization settings, it is possible to select an authorization method that uses an LDAP database to store user entries, in which case the database settings are configured along with the plug-in as shown below.
For more information on securely configuring LDAP and an explanation of parameters, refer to Section 7.5.4, “Enabling TLS mutual authentication from CS to DS”. The parameters paths differ than what is shown there, but the same names and values are allowed in both places.
The CA also has to have a mechanism for approving user requests. As with configuring authorization, this is done by identifying the appropriate authentication plug-in and configuring an instance for it:
auths.impl.AgentCertAuth.class=com.netscape.cms.authentication.AgentCertAuthentication
auths.instance.AgentCertAuth.agentGroup=Certificate Manager Agents
auths.instance.AgentCertAuth.pluginName=AgentCertAuth
auths.impl.AgentCertAuth.class=com.netscape.cms.authentication.AgentCertAuthentication
auths.instance.AgentCertAuth.agentGroup=Certificate Manager Agents
auths.instance.AgentCertAuth.pluginName=AgentCertAuth13.2.3.4. Subsystem certificate settings
Several of the subsystems have entries for each subsystem certificate in the configuration file.
ca.sslserver.cert=MIIDmDCCAoCgAwIBAgIBAzANBgkqhkiG9w0BAQUFADBAMR4wHAYDVQQKExVSZWR...
ca.sslserver.certreq=MIICizCCAXMCAQAwRjEeMBwGA1UEChMVUmVkYnVkY29tcHV0ZXIgRG9tYWluMSQwIgYDV...
ca.sslserver.nickname=Server-Cert cert-pki-ca
ca.sslserver.tokenname=Internal Key Storage Token
ca.sslserver.cert=MIIDmDCCAoCgAwIBAgIBAzANBgkqhkiG9w0BAQUFADBAMR4wHAYDVQQKExVSZWR...
ca.sslserver.certreq=MIICizCCAXMCAQAwRjEeMBwGA1UEChMVUmVkYnVkY29tcHV0ZXIgRG9tYWluMSQwIgYDV...
ca.sslserver.nickname=Server-Cert cert-pki-ca
ca.sslserver.tokenname=Internal Key Storage Token13.2.3.5. Settings for required subsystems
At a minimum, each subsystem depends on a CA, which means that the CA (and any other required subsystem) has to be configured in the subsystem’s settings. Any connection to another subsystem is prefaced by conn. and then the subsystem type and number.
13.2.3.6. Database settings
All of the subsystems use an LDAP directory to store their information. This internal database is configured in the internaldb parameters, except for the TPS which configured it in the tokendb parameters with a lot of other configuration settings.
For further information on securely configuring LDAP and an explanation of parameters, refer to Section 7.5.4, “Enabling TLS mutual authentication from CS to DS”. No additional configuration is necessary outside of what is done as part Section 7.5.4, “Enabling TLS mutual authentication from CS to DS”.
13.2.3.7. Enabling and configuring a publishing queue
Part of the enrollment process includes publishing the issued certificate to any directories or files. This, essentially, closes out the initial certificate request. However, publishing a certificate to an external network can significantly slow down the issuance process -which leaves the request open.
To avoid this situation, administrators can enable a publishing queue. The publishing queue separates the publishing operation (which may involve an external LDAP directory) from the request and enrollment operations, which uses a separate request queue. The request queue is updated immediately to show that the enrollment process is complete, while the publishing queue sends the information at the pace of the network traffic.
The publishing queue sets a defined, limited number of threads that publish generated certificates, rather than opening a new thread for each approved certificate.
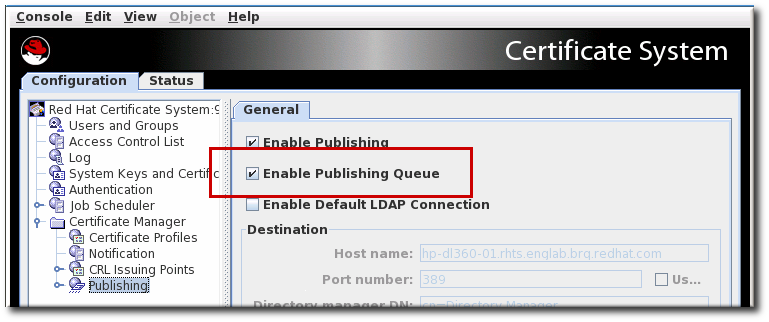
The publishing queue is disabled by default. It can be enabled in the CA Console, along with enabling publishing.
While the publishing queue is disabled by default, the queue is automatically enabled if LDAP publishing is enabled in the Console. Otherwise, the queue can be enabled manually.
Figure 13.1. Enabling the Publishing Queue
13.2.3.7.1. Enabling and configuring a publishing queue by editing the CS.cfg file
Enabling the publishing queue by editing the CS.cfg file allows administrators to set other options for publishing, like the number of threads to use for publishing operations and the queue page size.
Stop the CA server, so that you can edit the configuration files.
systemctl stop pki-tomcatd-nuxwdog@instance_name.service
# systemctl stop pki-tomcatd-nuxwdog@instance_name.serviceCopy to Clipboard Copied! Toggle word wrap Toggle overflow Open the CA’s
CS.cfgfile.vim /var/lib/pki/ instance_name/ca/conf/CS.cfg
# vim /var/lib/pki/ instance_name/ca/conf/CS.cfgCopy to Clipboard Copied! Toggle word wrap Toggle overflow Set the
ca.publish.queue.enableto true. If the parameter is not present, then add a line with the parameter.ca.publish.queue.enable=true
ca.publish.queue.enable=trueCopy to Clipboard Copied! Toggle word wrap Toggle overflow Set other related publishing queue parameters:
-
ca.publish.queue.maxNumberOfThreadssets the maximum number of threads that can be opened for publishing operations. The default is 3. -
ca.publish.queue.priorityLevelsets the priority for publishing operations. The priority value ranges from-2(lowest priority) to2(highest priority). Zero (0) is normal priority and is also the default. -
ca.publish.queue.pageSizesets the maximum number of requests that can be stored in the publishing queue page. The default is 40. ca.publish.queue.saveStatussets the interval to save its status every specified number of publishing operations. This allows the publishing queue to be recovered if the CA is restarted or crashes. The default is 200, but any non-zero number will recover the queue when the CA restarts. Setting this parameter to 0 disables queue recovery.ca.publish.queue.maxNumberOfThreads=1 ca.publish.queue.priorityLevel=0 ca.publish.queue.pageSize=100 ca.publish.queue.saveStatus=200
ca.publish.queue.maxNumberOfThreads=1 ca.publish.queue.priorityLevel=0 ca.publish.queue.pageSize=100 ca.publish.queue.saveStatus=200Copy to Clipboard Copied! Toggle word wrap Toggle overflow TIPSetting
ca.publish.queue.enableto false andca.publish.queue.maxNumberOfThreadsto 0 disables both the publishing queue and using separate threads for publishing issued certificates.
-
Restart the CA server.
systemctl start pki-tomcatd-nuxwdog@instance_name.service
# systemctl start pki-tomcatd-nuxwdog@instance_name.serviceCopy to Clipboard Copied! Toggle word wrap Toggle overflow
13.2.3.8. Settings for PKI tasks
The CS.cfg file is used to configure the PKI tasks for every subsystem. The parameters are different for every single subsystem, without any overlap.
For example, the KRA has settings for a required number of agents to recover a key.
kra.noOfRequiredRecoveryAgents=1
kra.noOfRequiredRecoveryAgents=1
Review the CS.cfg file for each subsystem to become familiar with its PKI task settings; the comments in the file are a decent guide for learning what the different parameters are.
- The CA configuration file lists all of the certificate profiles and policy settings, as well as rules for generating CRLs.
- The TPS configures different token operations.
- The TKS lists profiles for deriving keys from different key types.
- The OCSP sets key information for different key sets.
13.2.3.9. Changing DN attributes in CA-issued certificates
In certificates issued by the Certificate System, DNs identify the entity that owns the certificate. In all cases, if the Certificate System is connected with a Directory Server, the format of the DNs in the certificates should match the format of the DNs in the directory. It is not necessary that the names match exactly; certificate mapping allows the subject DN in a certificate to be different from the one in the directory.
In the Certificate System, the DN is based on the components, or attributes, defined in the X.509 standard. Table 13.8, “Allowed characters for value types” lists the attributes supported by default. The set of attributes is extensible.
| Attribute | Value Type | Object Identifier |
|---|---|---|
| cn | DirectoryString | 2.5.4.3 |
| ou | DirectoryString | 2.5.4.11 |
| o | DirectoryString | 2.5.4.10 |
| c | PrintableString, two-character | 2.5.4.6 |
| l | DirectoryString | 2.5.4.7 |
| st | DirectoryString | 2.5.4.8 |
| street | DirectoryString | 2.5.4.9 |
| title | DirectoryString | 2.5.4.12 |
| uid | DirectoryString | 0.9.2342.19200300.100.1.1 |
| | IA5String | 1.2.840.113549.1.9.1 |
| dc | IA5String | 0.9.2342.19200300.100.1.2.25 |
| serialnumber | PrintableString | 2.5.4.5 |
| unstructuredname | IA5String | 1.2.840.113549.1.9.2 |
| unstructuredaddress | PrintableString | 1.2.840.113549.1.9.8 |
By default, the Certificate System supports the attributes identified in Table 13.8, “Allowed characters for value types”. This list of supported attributes can be extended by creating or adding new attributes. The syntax for adding additional X.500Name attributes, or components, is as follows:
X500Name.NEW_ATTRNAME.oid=n.n.n.n
X500Name.NEW_ATTRNAME.class=string_to_DER_value_converter_class
X500Name.NEW_ATTRNAME.oid=n.n.n.n
X500Name.NEW_ATTRNAME.class=string_to_DER_value_converter_class
The value converter class converts a string to an ASN.1 value; this class must implement the netscape.security.x509.AVAValueConverter interface. The string-to-value converter class can be one of the following:
-
netscape.security.x509.PrintableConverterconverts a string to aPrintableStringvalue. The string must have only printable characters. -
netscape.security.x509.IA5StringConverterconverts a string to anIA5Stringvalue. The string must have only IA5String characters. -
netscape.security.x509.DirStrConverterconverts a string to aDirectoryString. The string is expected to be inDirectoryStringformat according to RFC 2253. netscape.security.x509.GenericValueConverterconverts a string character by character in the following order, from the smallest characterset to the largest:- PrintableString
- IA5String
- BMPString
- Universal String
An attribute entry looks like the following:
X500Name.MY_ATTR.oid=1.2.3.4.5.6
X500Name.MY_ATTR.class=netscape.security.x509.DirStrConverter
X500Name.MY_ATTR.oid=1.2.3.4.5.6
X500Name.MY_ATTR.class=netscape.security.x509.DirStrConverter13.2.3.9.1. Adding new or custom attributes
To add a new or proprietary attribute to the Certificate System schema, do the following:
Stop the Certificate Manager.
systemctl stop pki-tomcatd-nuxwdog@instance_name.service
# systemctl stop pki-tomcatd-nuxwdog@instance_name.serviceCopy to Clipboard Copied! Toggle word wrap Toggle overflow -
Open the
/var/lib/pki/cs`instance/conf/directory. -
Open the configuration file,
CS.cfg. Add the new attributes to the configuration file.
For example, to add three proprietary attributes,
MYATTR1that is aDirectoryString,MYATTR2that is anIA5String, andMYATTR3that is aPrintableString, add the following lines at the end of the configuration file:Copy to Clipboard Copied! Toggle word wrap Toggle overflow - Save the changes, and close the file.
Restart the Certificate Manager.
systemctl start pki-tomcatd-nuxwdog@instance_name.service
# systemctl start pki-tomcatd-nuxwdog@instance_name.serviceCopy to Clipboard Copied! Toggle word wrap Toggle overflow - Reload the enrollment page and verify the changes; the new attributes should show up in the form.
To verify that the new attributes are in effect, request a certificate using the manual enrollment form.
Enter values for the new attributes so that it can be verified that they appear in the certificate subject names. For example, enter the following values for the new attributes and look for them in the subject name:
MYATTR1: a_value
MYATTR2: a.Value
MYATTR3: aValue
cn: John Doe
o: Example Corporation
MYATTR1: a_value
MYATTR2: a.Value
MYATTR3: aValue
cn: John Doe
o: Example Corporation
Copy to Clipboard Copied! Toggle word wrap Toggle overflow - Open the agent services page, and approve the request.
- When the certificate is issued, check the subject name. The certificate should show the new attribute values in the subject name.
13.2.3.9.2. Changing the DER-encoding order
It is possible to change the DER-encoding order of a DirectoryString, so that the string is configurable since different clients support different encodings.
The syntax for changing the DER-encoding order of a DirectoryString is as follows:
X500Name.directoryStringEncodingOrder=encoding_list_separated_by_commas
X500Name.directoryStringEncodingOrder=encoding_list_separated_by_commasThe possible encoding values are as follows:
-
PrintableString -
IA5String -
UniversalString -
BMPString -
UTF8String
For example, the DER-encoding ordered can be listed as follows:
X500Name.directoryStringEncodingOrder=PrintableString,BMPString
X500Name.directoryStringEncodingOrder=PrintableString,BMPString
To change the DirectoryString encoding, do the following:
Stop the Certificate Manager.
systemctl stop pki-tomcatd-nuxwdog@instance_name.service
# systemctl stop pki-tomcatd-nuxwdog@instance_name.serviceCopy to Clipboard Copied! Toggle word wrap Toggle overflow -
Open the
/var/lib/pki/cs`instance/conf/directory. -
Open the
CS.cfgconfiguration file. Add the encoding order to the configuration file.
For example, to specify two encoding values,
PrintableStringandUniversalString, and the encoding order isPrintableStringfirst andUniversalStringnext, add the following line at the end of the configuration file:X500Name.directoryStringEncodingOrder=PrintableString,UniversalString
X500Name.directoryStringEncodingOrder=PrintableString,UniversalStringCopy to Clipboard Copied! Toggle word wrap Toggle overflow - Save the changes, and close the file.
Start the Certificate Manager.
systemctl start pki-tomcatd-nuxwdog@instance_name.service
# systemctl start pki-tomcatd-nuxwdog@instance_name.serviceCopy to Clipboard Copied! Toggle word wrap Toggle overflow -
To verify that the encoding orders are in effect, enroll for a certificate using the manual enrollment form. Use
John_Doefor thecn. - Open the agent services page, and approve the request.
When the certificate is issued, use the
dumpasn1tool to examine the encoding of the certificate.The
cncomponent of the subject name should be encoded as aUniversalString.Create and submit a new request using
John Smithfor thecn.The
cncomponent of the subject name should be encoded as aPrintableString.
13.2.3.10. Setting a CA to use a different certificate to sign CRLs
A Certificate Manager uses the key pair corresponding to its OCSP signing certificate for signing certificates and certificate revocation lists (CRLs). To use a different key pair to sign the CRLs that the Certificate Manager generates, then a CRL signing certificate can be created. The Certificate Manager’s CRL signing certificate must be signed or issued by itself.
To enable a Certificate Manager to sign CRLs with a different key pair, do the following:
Request a CRL signing certificate for the Certificate Manager.
Alternatively, use a tool that is capable of generating keypairs, such as the
certutiltool to generate a key pair, request a certificate for the key pair, and install the certificate in the Certificate Manager’s certificate database. For more information about thecertutiltool, see http://www.mozilla.org/projects/security/pki/nss/tools/.When the certificate request has been created, submit it through the Certificate Manager end-entities page, selecting the right profile, such as the "Manual OCSP Manager Signing Certificate Enrollment" profile. The page has a URL in the following format:
https://hostname:port/ca/ee/ca
https://hostname:port/ca/ee/caCopy to Clipboard Copied! Toggle word wrap Toggle overflow - After the request is submitted, log into the agent services page.
-
Check the request for required extensions. The CRL signing certificate must contain the
Key Usageextension with thecrlSigningbit set. - Approve the request.
- After the CRL signing certificate is generated, install the certificate in the Certificate Manager’s database through System Keys and Certificates in the console.
Stop the Certificate Manager.
pki-server stop instance_name
# pki-server stop instance_nameCopy to Clipboard Copied! Toggle word wrap Toggle overflow Update the Certificate Manager’s configuration to recognize the new key pair and certificate.
Change to the Certificate Manager instance configuration directory.
cd /var/lib/pki/instance-name/ca/conf/
# cd /var/lib/pki/instance-name/ca/conf/Copy to Clipboard Copied! Toggle word wrap Toggle overflow Open the
CS.cfgfile and add the following lines:ca.crl_signing.cacertnickname=nickname cert-instance_ID ca.crl_signing.defaultSigningAlgorithm=signing_algorithm ca.crl_signing.tokenname=token_name
ca.crl_signing.cacertnickname=nickname cert-instance_ID ca.crl_signing.defaultSigningAlgorithm=signing_algorithm ca.crl_signing.tokenname=token_nameCopy to Clipboard Copied! Toggle word wrap Toggle overflow nickname is the name assigned to the CRL signing certificate.
instance_ID is the name of the Certificate Manager instance.
If the installed CA is a RSA-based CA, signing_algorithm can be
SHA256withRSA,SHA384withRSA, orSHA512withRSA. If the installed CA is an EC-based CA, signing_algorithm can beSHA256withEC,SHA384withEC,SHA512withEC.token_name is the name of the token used for generating the key pair and the certificate. If the internal/software token is used, use
Internal Key Storage Tokenas the value.For example, the entries might look like this:
ca.crl_signing.cacertnickname=crlSigningCert cert-pki-ca
ca.crl_signing.defaultSigningAlgorithm=SHAMD512withRSA
ca.crl_signing.tokenname=Internal Key Storage Token
ca.crl_signing.cacertnickname=crlSigningCert cert-pki-ca
ca.crl_signing.defaultSigningAlgorithm=SHAMD512withRSA
ca.crl_signing.tokenname=Internal Key Storage Token
Copy to Clipboard Copied! Toggle word wrap Toggle overflow - Save the changes, and close the file.
Restart the Certificate Manager.
pki-server restart instance_name
# pki-server restart instance_nameCopy to Clipboard Copied! Toggle word wrap Toggle overflow Now the Certificate Manager is ready to use the CRL signing certificate to sign the CRLs it generates.
13.2.3.11. Configuring CRL generation from cache in CS.cfg
The CRL cache is a simple mechanism that allows cert revocation information to be taken from a collection of revocation information maintained in memory. For best performance, it is recommended that this feature be enabled, which already represents the default behavior. The following configuration information (which is the default) is presented for information purposes or if changes are desired.
Stop the CA server.
systemctl stop pki-tomcatd-nuxwdog@instance_name.service
# systemctl stop pki-tomcatd-nuxwdog@instance_name.serviceCopy to Clipboard Copied! Toggle word wrap Toggle overflow Open the CA configuration directory.
cd /var/lib/ instance_name/conf/
# cd /var/lib/ instance_name/conf/Copy to Clipboard Copied! Toggle word wrap Toggle overflow Edit the
CS.cfgfile, setting theenableCRLCacheandenableCacheRecoveryparameters to true:ca.crl.MasterCRL.enableCRLCache=true ca.crl.MasterCRL.enableCacheRecovery=true
ca.crl.MasterCRL.enableCRLCache=true ca.crl.MasterCRL.enableCacheRecovery=trueCopy to Clipboard Copied! Toggle word wrap Toggle overflow Start the CA server.
systemctl start pki-tomcatd-nuxwdog@instance_name.service
# systemctl start pki-tomcatd-nuxwdog@instance_name.serviceCopy to Clipboard Copied! Toggle word wrap Toggle overflow
13.2.3.12. Configuring update intervals for CRLs in CS.cfg
The following describes how to configure the CRL system flexibly to reflect desired behavior. The goal is to configure CRL updates according to some schedule of two types. One type allows for a list of explicit times and the other consists of a length of time interval between updates. There is also a hybrid scenario where both are enabled to account for drift. The Note entry just below actually represents the default out of the box scenario.
The default scenario is listed as follows:
Deviate from this only when a more detailed and specific update schedule is desired. The rest of the section will talk about how that is accomplished.
Configuring the settings for full and delta CRLs in the CS.cfg file involves editing parameters.
| Parameter | Description | Accepted Values |
|---|---|---|
| updateSchema | Sets the ratio for how many delta CRLs are generated per full CRL | An integer value |
| enableDailyUpdates | Enables and disables setting CRL updates based on set times | true or false |
| enableUpdateInterval | Enables and disables setting CRL updates based on set intervals | true or false |
| dailyUpdates | Sets the times the CRLs should be updated | A comma-delimited list of times |
| autoUpdateInterval | Sets the interval in minutes to update the CRLs | An integer value |
| autoUpdateInterval.effectiveAtStart | Allows the system to attempt to use the new value of auto update immediately instead of waiting for the currently scheduled nextUpdate time | true or false |
| nextUpdateGracePeriod | Adds the time in minutes to the CRL validity period to ensure that CRLs remain valid throughout the publishing or replication period | An integer value |
| refreshInSec | Sets the periodicity in seconds of the thread on the clone OCSP to check LDAP for any updates of the CRL | An integer value |
The autoUpdateInterval.effectiveAtStart parameter requires a system restart in order for a new value to apply. The default value of this parameter is false, it should only be changed by users who are sure of what they are doing.
Procedure: How to configure CRL update intervals in CS.cfg
Stop the CA server.
systemctl stop pki-tomcatd-nuxwdog@instance_name.service
# systemctl stop pki-tomcatd-nuxwdog@instance_name.serviceCopy to Clipboard Copied! Toggle word wrap Toggle overflow Change to the CA configuration directory.
cd /var/lib/ instance_name/conf/
# cd /var/lib/ instance_name/conf/Copy to Clipboard Copied! Toggle word wrap Toggle overflow Edit the
CS.cfgfile, and add the following line to set the update interval:ca.crl.MasterCRL.updateSchema=3
ca.crl.MasterCRL.updateSchema=3Copy to Clipboard Copied! Toggle word wrap Toggle overflow The default interval is 1, meaning a full CRL is generated every time a CRL is generated. The
updateSchemainterval can be set to any integer.Set the update frequency, either by specifying a cyclical interval or set times for the updates to occur:
Specify set times by enabling the
enableDailyUpdatesparameter, and add the desired times to thedailyUpdatesparameter:ca.crl.MasterCRL.enableDailyUpdates=true ca.crl.MasterCRL.enableUpdateInterval=false ca.crl.MasterCRL.dailyUpdates=0:50,04:55,06:55
ca.crl.MasterCRL.enableDailyUpdates=true ca.crl.MasterCRL.enableUpdateInterval=false ca.crl.MasterCRL.dailyUpdates=0:50,04:55,06:55Copy to Clipboard Copied! Toggle word wrap Toggle overflow This field sets a daily time when the CRL should be updated. To specify multiple times, enter a comma-separated list of times, such as
01:50,04:55,06:55. To enter a schedule for multiple days, enter a comma-separated list to set the times within the same day, and then a semicolon separated list to identify times for different days. For example, set01:50,04:55,06:55;02:00,05:00,17:00to configure revocation on Day 1 of the cycle at 1:50am, 4:55am, and 6:55am and then Day 2 at 2am, 5am, and 5pm.Specify intervals by enabling the
enableUpdateIntervalparameter, and add the required interval in minutes to theautoUpdateIntervalparameter:ca.crl.MasterCRL.enableDailyUpdates=false ca.crl.MasterCRL.enableUpdateInterval=true ca.crl.MasterCRL.autoUpdateInterval=240
ca.crl.MasterCRL.enableDailyUpdates=false ca.crl.MasterCRL.enableUpdateInterval=true ca.crl.MasterCRL.autoUpdateInterval=240Copy to Clipboard Copied! Toggle word wrap Toggle overflow
Set the following parameters depending on your environment:
If you run a CA without an OCSP subsystem, set:
ca.crl.MasterCRL.nextUpdateGracePeriod=0
ca.crl.MasterCRL.nextUpdateGracePeriod=0Copy to Clipboard Copied! Toggle word wrap Toggle overflow If you run a CA with an OCSP subsystem, set:
ca.crl.MasterCRL.nextUpdateGracePeriod=time_in_minutes
ca.crl.MasterCRL.nextUpdateGracePeriod=time_in_minutesCopy to Clipboard Copied! Toggle word wrap Toggle overflow The
ca.crl.MasterCRL.nextUpdateGracePeriodparameter defines the time in minutes, and the value must be big enough to enable the CA to propagate the new CRL to the OCSP. You must set the parameter to a non-zero value.If you additionally have OCSP clones in your environment, also set:
ocsp.store.defStore.refreshInSec=time_in_seconds
ocsp.store.defStore.refreshInSec=time_in_secondsCopy to Clipboard Copied! Toggle word wrap Toggle overflow The
ocsp.store.defStore.refreshInSecparameter sets the frequency in seconds with which the clone OCSP instances are informed of CRL updates through LDAP replication updates from the master OCSP instance.See Table 13.9, “CRL extended interval parameters” for details on the parameters.
Restart the CA server.
systemctl start pki-tomcatd-nuxwdog@instance_name.service
# systemctl start pki-tomcatd-nuxwdog@instance_name.serviceCopy to Clipboard Copied! Toggle word wrap Toggle overflow
Schedule drift can occur when updating CRLs by interval. Typically, drift occurs as a result of manual updates and CA restarts.
To prevent schedule drift, set both enableDailyUpdates and enableUpdateInterval parameters to true, and add the required values to autoUpdateInterval and dailyUpdates:
ca.crl.MasterCRL.enableDailyUpdates=true
ca.crl.MasterCRL.enableUpdateInterval=true
ca.crl.MasterCRL.autoUpdateInterval=240
ca.crl.MasterCRL.dailyUpdates=1:00
ca.crl.MasterCRL.enableDailyUpdates=true
ca.crl.MasterCRL.enableUpdateInterval=true
ca.crl.MasterCRL.autoUpdateInterval=240
ca.crl.MasterCRL.dailyUpdates=1:00
Only one dailyUpdates value will be accepted when updating CRLs by interval.
The interval updates will resynchronize with the dailyUpdates value every 24 hours preventing schedule drift.
13.2.3.13. Changing the access control settings for the subsystem
By default, access control rules are applied by evaluating deny rules first and then by evaluating allow rules. To change the order, change the authz.evaluateOrder parameter in the CS.cfg.
authz.evaluateOrder=deny,allow
authz.evaluateOrder=deny,allow
Additionally, access control rules can be evaluated from the local web.xml file (basic ACLs) or more complex ACLs can be accessed by checking the LDAP database. The authz.sourceType parameter identifies what type of authorization to use.
authz.sourceType=web.xml
authz.sourceType=web.xml
Always restart the subsystem after editing the CS.cfg file to load the updated settings.
13.2.3.14. Setting requirement for pkiconsole to use TLS client certificate authentication
pkiconsole is being deprecated.
Edit the CS.cfg file of each subsystem, search for the authType parameter and set it as follows:
authType=sslclientauth
authType=sslclientauth13.3. Managing system passwords
As explained in Section 2.3.9, “Passwords and watchdog (nuxwdog)”, Certificate System uses passwords bind to servers or to unlock tokens when the server starts.
The password.conf file stores system passwords in plain text. However, some administrators prefer to remove the password file entirely to allow nuxwdog to prompt for manual entry of each password initially and store for auto-restart in case of an unplanned shutdown.
When a Certificate System instance starts, the subsystem automatically checks for the password.conf file. If the file exists, then it uses those passwords to connect to other services, such as the internal LDAP database. If that file does not exist, then the watchdog daemon prompts for all of the passwords required by the PKI server to start.
If the password.conf file is present, the subsystem assumes that all the required passwords are present and properly formatted in clear text. If any passwords are missing or wrongly formatted, then the system fails to start correctly.
The required passwords are listed in the cms.passwordlist parameter in the CS.cfg file:
cms.passwordlist=internaldb,replicationdb,CA LDAP Publishing
cms.password.ignore.publishing.failure=true
cms.passwordlist=internaldb,replicationdb,CA LDAP Publishing
cms.password.ignore.publishing.failure=true
The cms.password.ignore.publishing.failure parameter allows a CA subsystem to start up successfully even if it has a failed connection to one of its LDAP publishing directories.
For the CA, KRA, OCSP, and TKS subsystems, the default expected passwords are:
-
internalfor the NSS database -
internaldbfor the internal LDAP database -
replicationdbfor the replication password Any passwords to access external LDAP databases for publishing (CA only)
NoteIf a publisher is configured after the
password.conffile is removed, nothing is written to thepassword.conffile. Unlessnuxwdogis configured, the server will not have access to the prompts for the new publishing password the next time that the instance restarts.- Any external hardware token passwords
For the TPS, this prompts for three passwords:
-
internalfor the NSS database -
tokendbpassfor the internal LDAP database - Any external hardware token passwords
This section describes the two mechanisms provided for Certificate System to retrieve these passwords:
-
password.conffile (the default) - nuxwdog (watchdog)
13.3.1. Configuring the password.conf file
This section is here for reference only. Correct and secure operation must involve using the nuxwdog watchdog. Please refer to Section 13.3.2, “Using the Certificate System watchdog service” to enable nuxwdog, as it is required for full compliance.
By default, passwords are stored in a plain text file, password.conf, in the subsystem conf/ directory. Therefore, it is possible to modify them simply through a text editor.
The list of passwords stored in this file includes the following:
- The bind password used by the Certificate System instance to access and update the internal database.
- The password to the HSM
- The bind password used by the Certificate System instance to access the authentication directory, in case of CMC Shared Token.
- The bind password used by the subsystem to access and update the LDAP publishing directory; this is required only if the Certificate System instance is configured for publishing certificates and CRLs to an LDAP-compliant directory.
- the bind password used by the subsystem to access its replication database.
- For a TPS instance, the bind password used to access and update the token database.
The password.conf file also contains the token passwords needed to open the private keys of the subsystem.
The name and location password file to use for the subsystem is configured in the CS.cfg file:
passwordFile=/var/lib/pki/ instance_name/conf/password.conf
passwordFile=/var/lib/pki/ instance_name/conf/password.confThe internal password store and replication database have randomly-generated PINs which were set when the subsystem was installed and configured; the internal LDAP database password was defined by the administrator when the instance was configured.
The password entries in the password.conf file are in the following format:
name=password
name=passwordFor example:
internal=413691159497
internal=413691159497In cases where an HSM token is required, use the following format:
hardware-name=password
hardware-name=passwordFor example:
hardware-NHSM-CONN-XC=MyHSM$S8cret
hardware-NHSM-CONN-XC=MyHSM$S8cret
Example content of a password.conf file:
internal=376577078151
internaldb=secret12
replicationdb=1535106826
hardware-NHSM-CONN-XC=MyHSM$S8cret
internal=376577078151
internaldb=secret12
replicationdb=1535106826
hardware-NHSM-CONN-XC=MyHSM$S8cret13.3.2. Using the Certificate System watchdog service
In Certificate System, the watchdog service is used to start services which require passwords to access the security database in order to start. In case there is a requirement not to store the unencrypted passwords on the system, the watchdog service:
- prompts for the relevant passwords during server startup and caches them.
- uses cached passwords in case of a failure when the server is automatically restarted due to a crash.
13.3.2.1. Enabling the watchdog service
To enable the watchdog service:
- If you also want to use the Shared Secret feature on this host, enable the Shared Secret feature as described in Section 13.7.8, “Enabling the CMC Shared Secret feature”.
Backup the
server.xmlandpassword.conffiles from the/var/lib/pki/ instance_name/conf/directory. For example:cp -p /var/lib/pki/ instance_name/conf/server.xml /root/ cp -p /var/lib/pki/ instance_name/conf/password.conf /root/
# cp -p /var/lib/pki/ instance_name/conf/server.xml /root/
# cp -p /var/lib/pki/ instance_name/conf/password.conf /root/
Copy to Clipboard Copied! Toggle word wrap Toggle overflow Stop and disable the Certificate System instance’s service:
systemctl stop pki-tomcatd@instance_name.service
systemctl disable pki-tomcatd@instance_name.service
# systemctl stop pki-tomcatd@instance_name.service
# systemctl disable pki-tomcatd@instance_name.service
Copy to Clipboard Copied! Toggle word wrap Toggle overflow If you use a Hardware Security Module (HSM), enable the watchdog service to prompt for the password of the hardware token:
Display the name of the hardware token:
egrep "^hardware-" /var/lib/pki/ instance_name/conf/password.conf
# egrep "^hardware-" /var/lib/pki/ instance_name/conf/password.conf
hardware-HSM_token_name=password
Copy to Clipboard Copied! Toggle word wrap Toggle overflow The highlighted string in the previous example is the hardware token name.
Add the
cms.tokenListparameter to the/var/lib/pki/ instance_name/conf/ca/CS.cfgfile and set it to the name of the hardware token. For example:cms.tokenList=HMS_token_name
cms.tokenList=HMS_token_nameCopy to Clipboard Copied! Toggle word wrap Toggle overflow
Enable the watchdog configuration for the instance:
pki-server instance-nuxwdog-enable instance_name
# pki-server instance-nuxwdog-enable instance_nameCopy to Clipboard Copied! Toggle word wrap Toggle overflow Alternatively, enable the watchdog for all instances:
pki-server nuxwdog-enable
# pki-server nuxwdog-enableCopy to Clipboard Copied! Toggle word wrap Toggle overflow For further details, see the
pki-server-nuxwdog(8)man page.By default,
nuxwdogstarts the server as the user configured in theTOMCAT_USERvariable in the/etc/sysconfig/pki-tomcatfile. Optionally, to modify the user and group:Copy the watchdog
systemdunit file of the instance to the/etc/systemd/system/directory:cp -p /usr/lib/systemd/system/instance_name-nuxwdog@.service /etc/systemd/system/
# cp -p /usr/lib/systemd/system/instance_name-nuxwdog@.service /etc/systemd/system/Copy to Clipboard Copied! Toggle word wrap Toggle overflow NoteUnit files in the
/etc/systemd/system/directory have a higher priority and are not replaced during updates.Add the following entries to the
[Service]section in the/etc/pki/ instance_name/nuxwdog.conffile:User new_user_name
User new_user_nameCopy to Clipboard Copied! Toggle word wrap Toggle overflow Reload the
systemdconfiguration:systemctl daemon-reload
# systemctl daemon-reloadCopy to Clipboard Copied! Toggle word wrap Toggle overflow
Enable the Certificate System service that uses the watchdog:
systemctl enable pki-tomcatd-nuxwdog@instance_name.service
# systemctl enable pki-tomcatd-nuxwdog@instance_name.serviceCopy to Clipboard Copied! Toggle word wrap Toggle overflow - Optionally: See Section 13.3.2.3, “Verifying that the Certificate System watchdog service is enabled”.
To start the Certificate System instance, run the following command and enter the prompted passwords:
systemctl start pki-tomcatd-nuxwdog@instance_name.service
# systemctl start pki-tomcatd-nuxwdog@instance_name.serviceCopy to Clipboard Copied! Toggle word wrap Toggle overflow
13.3.2.2. Starting and stopping Certificate System with the watchdog enabled
For information how to manage a Certificate System instance refer to Section 2.2.3, “Execution management (systemctl)”.
13.3.2.3. Verifying that the Certificate System watchdog service is enabled
To verify that the watchdog service is enabled:
Verify that the
pki-tomcatd-nuxwdogservice is enabled:systemctl is-enabled pki-tomcatd-nuxwdog@instance_name.service
# systemctl is-enabled pki-tomcatd-nuxwdog@instance_name.service
enabled
Copy to Clipboard Copied! Toggle word wrap Toggle overflow Verify that the
pki-tomcatdservice is disabled:systemctl is-disabled pki-tomcatd@instance_name.service
# systemctl is-disabled pki-tomcatd@instance_name.service
disabled
Copy to Clipboard Copied! Toggle word wrap Toggle overflow In the
/etc/pki/ instance_name/server.xmlfile:verify that the
passwordFileparameter refers to theCS.cfgfile. For example:passwordFile="/var/lib/pki/ instance_name/ca/CS.cfg"
passwordFile="/var/lib/pki/ instance_name/ca/CS.cfg"Copy to Clipboard Copied! Toggle word wrap Toggle overflow verify that the
passwordClassparameter is set to com.netscape.cms.tomcat.NuxwdogPasswordStore:passwordClass="com.netscape.cms.tomcat.NuxwdogPasswordStore"
passwordClass="com.netscape.cms.tomcat.NuxwdogPasswordStore"Copy to Clipboard Copied! Toggle word wrap Toggle overflow
13.3.2.4. Disabling the watchdog service
To disable the watchdog service:
Stop and disable the Certificate System instance’s service that uses the watchdog:
systemctl stop pki-tomcatd-nuxwdog@instance_name.service
systemctl disable pki-tomcatd-nuxwdog@instance_name.service
# systemctl stop pki-tomcatd-nuxwdog@instance_name.service
# systemctl disable pki-tomcatd-nuxwdog@instance_name.service
Copy to Clipboard Copied! Toggle word wrap Toggle overflow Enable the regular service without watch dog for the instance:
pki-server instance-nuxwdog-disable instance_name
# pki-server instance-nuxwdog-disable instance_nameCopy to Clipboard Copied! Toggle word wrap Toggle overflow Disable the watchdog configuration for the instance:
systemctl enable pki-tomcatd@instance_name.service
# systemctl enable pki-tomcatd@instance_name.serviceCopy to Clipboard Copied! Toggle word wrap Toggle overflow For further details, see the
pki-server-nuxwdog(8)man page.Restore the
password.conffile to its original location. For example:cp /root/password.conf.bak /var/lib/pki/ instance_name/conf/password.conf
# cp /root/password.conf.bak /var/lib/pki/ instance_name/conf/password.confCopy to Clipboard Copied! Toggle word wrap Toggle overflow Start the Certificate System instance:
systemctl start pki-tomcatd@instance_name.service
# systemctl start pki-tomcatd@instance_name.serviceCopy to Clipboard Copied! Toggle word wrap Toggle overflow
13.4. Configuration files for the tomcat engine and web services
All of the user and administrative (administrators, agents, and auditors) services for the subsystems are accessed over web protocols.
This section discusses the two major sets of configuration files that apply to all Red Hat Certificate System subsystems (CA, KRA, OCSP, TKS, and TPS):
-
/var/lib/pki/ instance_name/conf/server.xmlprovides the configuration for the Tomcat engine. -
/usr/share/pki/subsystem_type/webapps/WEB-INF/web.xmlprovides the configuration for the web services offered by this instance.
13.4.1. Tomcatjss
The later subsections include important configuration information on required changes to parameter values. Ensure they are followed for strict compliance.
The following configuration in the server.xml file found in the example pki-tomcat/conf directory can be used to explain how Tomcatjss fits into the entire Certificate System ecosystem. Portions of the Connector entry for the secure port and its corresponding SSLHostConfig parameters are shown below.
In the server.xml configuration file for the Tomcat engine, there is this Connector configuration element that contains the pointer to the tomcatjss implementation, which can be plugged into the sslImplementation property of this Connector object.
Each key parameter element is explained in the subsections below.
13.4.1.1. TLS cipher configuration
Red Hat Certificate System} supports TLS 1.2 cipher suites. These are defined in the instance’s server.xml when the CS instance acts as a server, and in CS.cfg when the CS instance acts as a client.
- If you need to configure the ciphers, refer to the corresponding post-installation section in Update the ciphers list.
- For information on the supported ciphers, refer to Supported cipher suites.
13.4.1.2. Enabling automatic revocation checking on the CA
Revocation checks are supported/enabled in the CA in the same way as all other RHCS subsystems (see Enabling certificate revocation checking for RHCS subsystems). In general, RHCS recommends OCSP for more efficient certificate revocation checks. However, one thing that sets the CA apart from the other CS subsystems is that the CAs are the creators of the CRLs for the certificates they issue, and therefore are the sources of the CRLs that are needed by the OCSP subsystems. For this reason, they need to be able to start up independently before the OCSP or other RHCS subsystems.
In the case when the CA’s own internal LDAP server-cert is issued by the CA itself, it is very important that the CRL Distribution Point extension is used instead of the AIA (OCSP) so as not to fall victim to the chicken and egg issue during startup of the CA.
13.4.1.2.1. Configure support for CRL Distribution Point
For the purpose of mitigating propagation and reducing storage of large CRLs, it is important to note that RHCS recommends partitioning of the CRL to allow the certificates that utilize the CRL Distribution Point to be grouped into a smaller subset.
See Configure support for CRL Distribution Point for information on how to set up the CA to support partitioned CRL for server-certs that are issued using the CRL Distribution Point certificate enrollment profile.
13.4.1.3. Enabling certificate revocation checking for RHCS subsystems
Certificate revocation check is a vital part of certificate validation in a PKI environment. RHCS provides two types of certificate revocation validation methods: OCSP and CRL by means of detecting/processing either the AIA (OCSP) or the CRL Distribution Point extension of its peer certificate.
RHCS recommends OCSP for more efficient certificate revocation checks.
The usage of CRL Distribution Point is unavoidable in cases when the use of OCSP is not plausible. Such a case can be exemplified in Enabling automatic revocation checking on the CA above.
Applications (in this case, PKI subsystems) adopting OCSP need to know how to contact the OCSP system in order to verify the certificates in question. The PKI subsystems do not have OCSP checking enabled by default. You can enable OCSP checking for a PKI subsystem by editing its server.xml file.
If you have configured the subsystem to use an SSL/TLS connection with its internal database, then the SSL/TLS server certificate of the LDAP internal database must be recognized by the OCSP responder. If the OCSP responder does not recognize the LDAP server certificate, then the subsystem will not start properly. This configuration is covered in the Red Hat Certificate System Planning, Installation and Deployment Guide, since subsystem-LDAP SSL/TLS server connections are configured as part of the subsystem setup.
Procedure
Stop the instance
systemctl stop pki-tomcatd@<instance_name>.service
systemctl stop pki-tomcatd@<instance_name>.serviceCopy to Clipboard Copied! Toggle word wrap Toggle overflow Edit the
/var/lib/pki/<instance_name>/conf/server.xmlfile to configure theConnector name="Secure"section:-
Set the
enableOCSPparameter totrue. Make sure you remove these two parameters and their assigned values:
ocspResponderURL
ocspResponderCertNickname
ocspResponderURL
ocspResponderCertNickname
Copy to Clipboard Copied! Toggle word wrap Toggle overflow For example:
Copy to Clipboard Copied! Toggle word wrap Toggle overflow
-
Set the
Start the instance:
systemctl start pki-tomcatd@<instance_name>.service
systemctl start pki-tomcatd@<instance_name>.serviceCopy to Clipboard Copied! Toggle word wrap Toggle overflow
By default, all PKI system certificates created during installation are generated with an AIA (Authority Information Access) extension pointing to its issuing CA’s internal OCSP service. If you follow the steps in Adding an AIA extension to a certificate, to point to the external OCSP prior to installing PKI subsystems, then all their certificates (and all other certificates issued by its CA thereon) should bear the correct AIA pointing to the external OCSP instead.
13.4.1.3.1. Setting trust of the OCSP signing certificate
Each OCSP signing certificate must chain up to a trusted root in the Certificate System’s NSS database. In RHCS, during validation, each OCSP response includes the OCSP signer certificate chain. Therefore, the following consideration is required.
- If the OCSP responder being used has been configured to provide the entire certificate chain of the OCSP signing certificate with each OCSP response, as is the default case for RHCS OCSP services, then no further action is required. NSS knows how to validate this chain from the given information.
- If on the other hand the OCSP is known to not return the full chain, you then need to import the chain manually during installation setup. For details, see Importing an OCSP responder.
The Certificate System OCSP responder already includes the chain with every response. This includes the Certificate System external OCSP responder and the internal OCSP service that comes with each CA. This behavior is by default and cannot be changed.
13.4.1.3.2. OCSP parameters for server.xml
The following table provides information on each parameter relevant to certificate revocation checks (that is, OCSP and CRL) in the server.xml file.
| Parameter | Description |
|---|---|
| enableRevocationCheck (also known as enableOCSP) | Enables (or disables) revocation checking for the subsystem. |
| ocspResponderURL | Sets the URL where the OCSP requests are sent. For an OCSP Manager, this can be another OCSP service in another OCSP or in a CA. For a TKS or KRA, this always points to an external OCSP service in an OCSP or a CA. |
| ocspResponderCertNickname | Sets the nickname of the signing certificate for the responder, either the OCSP signing certificate or the CA’s OCSP signing certificate. The certificate must be imported into the subsystem’s NSS database and have the appropriate trust settings set. |
| ocspCacheSize | Sets the maximum number of cache entries. |
| ocspMinCacheEntryDuration | Sets minimum seconds before another fetch attempt can be made. For example, if this is set to 120, then the validity of a certificate cannot be checked again until at least 2 minutes after the last validity check. |
| ocspMaxCacheEntryDuration | Sets the maximum number of seconds to wait before making the next fetch attempt. This prevents having too large a window between validity checks. |
| ocspTimeout | Sets the timeout period, in seconds, for the OCSP request. |
If a nextUpdate field is sent with the OCSP response, it can affect the next fetch time with ocspMinCacheEntryDuration and ocspMaxCacheEntryDuration as follows:
-
If the value in
nextUpdatehas been reached before the value set inocspMinCacheEntryDuration, the fetch is not started until the value set inocspMinCacheEntryDurationhas been reached. -
If
ocspMinCacheEntryDurationhas been reached, the server checks if the value innextUpdatehas been reached. If the value has been reached, the fetch will happen. -
Regardless of the value in
nextUpdate, if the setting inocspMaxCacheEntryDurationhas been reached, the fetch will happen.
Due to the underlying SSL/TLS session caches kept by NSS, which follows the industry standard to prevent very expensive full handshakes as well as provide stronger privacy, OCSP requests are only made when NSS determines that a validation is required. The SSL/TLS session caches are independent of the OCSP status cache. Once NSS determines that an OCSP request is to be made, the request will be made and the response received will be kept in the OCSP certificate status cache. Due to the SSL/TLS session caches, these OCSP cache parameters only come into play when allowed by NSS.
13.4.1.4. Adding an AIA extension to a certificate
By default, unless explicitly specified, the CA issues certificates with an AIA (Authority Information Access) extension pointing to the CA’s own internal OCSP. Once you have set up an OCSP instance, you can configure the CA to start issuing certificates with an AIA extension that points to the OCSP instance instead.
Prerequisite
- You are logged in as root user.
Procedure
Stop the CA:
systemctl stop pki-tomcatd@<instance_name>.service
systemctl stop pki-tomcatd@<instance_name>.serviceCopy to Clipboard Copied! Toggle word wrap Toggle overflow Edit the CA’s
CS.cfgand set theca.defaultOcspUrivariable to point to the OCSP. For example:ca.defaultOcspUri=http://hostname:32080/ocsp/ee/ocsp
ca.defaultOcspUri=http://hostname:32080/ocsp/ee/ocspCopy to Clipboard Copied! Toggle word wrap Toggle overflow Start the CA:
systemctl start pki-tomcatd@<instance_name>.service
systemctl start pki-tomcatd@<instance_name>.serviceCopy to Clipboard Copied! Toggle word wrap Toggle overflow
The OCSP URL of each subsystem (e.g. KRA) is set in its server.xml file by default. When enabled, this directs the RHCS instance to use the static URL when looking up a certificate status, instead of the AIA extension embedded in the peer certificate. For more information on using the AIA extension, refer to Enabling certificate revocation checking for RHCS subsystems.
13.4.1.5. Adding a CRL Distribution Point extension to a certificate
To add the CRL Distribution Point extension to a certificate, you need to use a certificate enrollment profile equipped with the CRL Distribution Point extension. To enable a certificate enrollment profile, see CA’s enrollment profile configuration with CRL Distribution Points.
Note that the CA needs to be configured to handle CRL Distribution Points for such profiles to work. See Configure support for CRL Distribution Point.
13.4.2. Session timeout
When a user connects to PKI server through a client application, the server will create a session to keep track of the user. As long as the user remains active, the user can execute multiple operations over the same session without having to re-authenticate.
Session timeout determines how long the server will wait since the last operation before terminating the session due to inactivity. Once the session is terminated, the user will be required to re-authenticate to continue accessing the server, and the server will create a new session.
There are two types of timeouts:
- TLS session timeout
- HTTP session timeout
Due to differences in the way clients work, the clients will be affected differently by these timeouts.
Certain clients have their own timeout configuration. For example, Firefox has a keep-alive timeout setting. For details, see http://kb.mozillazine.org/Network.http.keep-alive.timeout. If the value is different from the server’s setting for TLS Session Timeout or HTTP Session Timeout, different behavior can be observed.
13.4.2.1. TLS session timeout
A TLS session is a secure communication channel over a TLS connection established through TLS handshake protocol.
PKI server generates audit events for TLS session activities. The server generates an ACCESS_SESSION_ESTABLISH audit event with Outcome=Success when the connection is created. If the connection fails to be created, the server will generate an ACCESS_SESSION_ESTABLISH audit event with Outcome=Failure. When the connection is closed, the server will generate an ACCESS_SESSION_TERMINATED audit event.
TLS session timeout (that is TLS connection timeout) is configured in the keepAliveTimeout parameter in the Secure Connector element in the /etc/pki/instance/server.xml file:
By default the timeout value is set to 300000 milliseconds (that is 5 minutes). To change this value, edit the /etc/pki/instance/server.xml file and then restart the server.
Note that this value will affect all TLS connections to the server. A large value may improve the efficiency of the clients since they can reuse existing connections that have not expired. However, it may also increase the number of connections that the server has to support simultaneously since it takes longer for abandoned connections to expire.
13.4.2.2. HTTP session timeout
An HTTP session is a mechanism to track a user across multiple HTTP requests using HTTP cookies. PKI server does not generate audit events for the HTTP sessions.
For the purpose of auditing consistency, set the session-timeout value in this section to match the keepAliveTimeout value in Section 13.4.2.1, “TLS session timeout”. For example if keepAliveTimeout was set to 300000 (5 minutes), then set session-timeout to 30.
The HTTP session timeout can be configured in the session-timeout element in the /etc/pki/instance/web.xml file:
By default the timeout value is set to 30 minutes. To change the value, edit the /etc/pki/instance/web.xml file and then restart the server.
Note that this value affects all sessions in all web applications on the server. A large value may improve the experience of the users since they will not be required to re-authenticate or view the access banner again so often. However, it may also increase the security risk since it takes longer for abandoned HTTP sessions to expire.
13.4.2.3. Session timeout for PKI Web UI
PKI Web UI is an interactive web-based client that runs in a browser. Currently it only supports client certificate authentication.
When the Web UI is opened, the browser may create multiple TLS connections to a server. These connections are associated to a single HTTP session.
To configure a timeout for the Web UI, see Section 13.4.2.2, “HTTP session timeout”. The TLS session timeout is normally irrelevant since the browser caches the client certificate so it can recreate the TLS session automatically.
When the HTTP session expires, the Web UI does not provide any immediate indication. However, the Web UI will display an access banner (if enabled) before a user executes an operation.
13.4.2.4. Session timeout for PKI Console
PKI Console is an interactive standalone graphical UI client. It supports username/password and client certificate authentication.
When the console is started, it will create a single TLS connection to the server. The console will display an access banner (if enabled) before opening the graphical interface. Unlike the Web UI, the console does not maintain an HTTP session with the server.
To configure a timeout for the console, see Section 13.4.2.1, “TLS session timeout”. The HTTP session timeout is irrelevant since the console does not use HTTP session.
When the TLS session expires, the TLS connection will close, and the console will exit immediately to the system. If the user wants to continue, the user will need to restart the console.
13.4.2.5. Session timeout for PKI CLI
PKI CLI is a command-line client that executes a series of operations. It supports username/password and client certificate authentication.
When the CLI is started, it will create a single TLS connection to the server and an HTTP session. The CLI will display an access banner (if enabled) before executing operations.
Both timeouts are generally irrelevant to PKI CLI since the operations are executed in sequence without delay and the CLI exits immediately upon completion. However, if the CLI waits for user inputs, is slow, or becomes unresponsive, the TLS session or the HTTP session may expire and the remaining operations fail. If such delay is expected, see Section 13.4.2.1, “TLS session timeout” and Section 13.4.2.2, “HTTP session timeout” to accommodate the expected delay.
13.5. Removing unused interfaces from web.xml (CA only)
Several legacy interfaces (for features like bulk issuance or the policy framework) are still included in the CA’s web.xml file. However, since these features are deprecated and no longer in use, then they can be removed from the CA configuration to increase security.
Procedure
Stop the CA.
pki-server stop instance_name
# pki-server stop instance_nameCopy to Clipboard Copied! Toggle word wrap Toggle overflow OR (if using
nuxwdog watchdog)systemctl stop pki-tomcatd-nuxwdog@instance_name.service
# systemctl stop pki-tomcatd-nuxwdog@instance_name.serviceCopy to Clipboard Copied! Toggle word wrap Toggle overflow Open the web files directory for the CA. For example:
cd /var/lib/pki/ instance_name/ca/webapps/ca/WEB-INF
# cd /var/lib/pki/ instance_name/ca/webapps/ca/WEB-INFCopy to Clipboard Copied! Toggle word wrap Toggle overflow Back up the current
web.xmlfile.cp web.xml web.xml.servlets
# cp web.xml web.xml.servletsCopy to Clipboard Copied! Toggle word wrap Toggle overflow Edit the
web.xmlfile and remove the entireservlet>entries for each of the following deprecated servlets:- caadminEnroll
- cabulkissuance
- cacertbasedenrollment
- caenrollment
caProxyBulkIssuance
For example, remove the
caadminEnrollservlet entry:Copy to Clipboard Copied! Toggle word wrap Toggle overflow
After removing the servlet entries, remove the corresponding
servlet-mapping>entries.<servlet-mapping> <servlet-name> caadminEnroll </servlet-name> <url-pattern> /admin/ca/adminEnroll </url-pattern> </servlet-mapping><servlet-mapping> <servlet-name> caadminEnroll </servlet-name> <url-pattern> /admin/ca/adminEnroll </url-pattern> </servlet-mapping>Copy to Clipboard Copied! Toggle word wrap Toggle overflow Remove three
filter-mapping>entries for an end-entity request interface.Copy to Clipboard Copied! Toggle word wrap Toggle overflow Start the CA again.
pki-server start instance_name
# pki-server start instance_nameCopy to Clipboard Copied! Toggle word wrap Toggle overflow OR (if using
nuxwdog watchdog)systemctl start pki-tomcatd-nuxwdog@instance_name.service
# systemctl start pki-tomcatd-nuxwdog@instance_name.serviceCopy to Clipboard Copied! Toggle word wrap Toggle overflow
13.6. Customizing Web Services
All of the subsystems (with the exception of the TKS) have some kind of a web-based services page for agents and some for other roles, like administrators or end entities. These web-based services pages use basic HTML and JavaScript, which can be customized to use different colors, logos, and other design elements to fit in with an existing site or intranet.
13.6.1. Customizing subsystem web applications
Each PKI subsystem has a corresponding web application, which contains:
- HTML pages containing texts, JavaScript codes, page layout, CSS formatting, and so on
-
A
web.xmlfile, which defines servlets, paths, security constraints, and other - Links to PKI libraries.
The subsystem web applications are deployed using context files located in the /var/lib/pki/pki-tomcat/conf/Catalina/localhost/ direcotry, for example, the ca.xml file:
Context docBase="/usr/share/pki/ca/webapps/ca" crossContext="true" allowLinking="true"
    ...
/Context
Context docBase="/usr/share/pki/ca/webapps/ca" crossContext="true" allowLinking="true"
    ...
/Context
The docBase points to the location of the default web application directory, /usr/share/pki/.
To customize the web application, copy the web application directory into the instance’s webapps directory:
cp -r /usr/share/pki/ca/webapps/ca /var/lib/pki/pki-tomcat/webapps
$ cp -r /usr/share/pki/ca/webapps/ca /var/lib/pki/pki-tomcat/webapps
Then change the docBase to point to the custom web application directory relative from the webapps directory:
Context docBase="ca" crossContext="true" allowLinking="true"
    ...
/Context
Context docBase="ca" crossContext="true" allowLinking="true"
    ...
/ContextThe change will be effective immediately without the need to restart the server.
To remove the custom web application, simply revert the docBase and delete the custom web application directory:
rm -rf /var/lib/pki/pki-tomcat/webapps/ca
$ rm -rf /var/lib/pki/pki-tomcat/webapps/ca13.6.2. Customizing the Web UI theme
The subsystem web applications in the same instance share the same theme, which contains:
- CSS files, which determine the global appearance
- Image files including logo, icons, and other
- Branding properties, which determine the page title, logo link, title color, and other.
The Web UI theme is deployed using the pki.xml context file in the /var/lib/pki/pki-tomcat/conf/Catalina/localhost/ directory:
Context docBase="/usr/share/pki/common-ui" crossContext="true" allowLinking="true"
    ...
/Context
Context docBase="/usr/share/pki/common-ui" crossContext="true" allowLinking="true"
    ...
/Context
The docBase points to the location of the default theme directory, /usr/share/pki/.
To customize the theme, copy the default theme directory into the pki directory in the instance’s webapps directory:
cp -r /usr/share/pki/common-ui /var/lib/pki/pki-tomcat/webapps/pki
$ cp -r /usr/share/pki/common-ui /var/lib/pki/pki-tomcat/webapps/pki
Then change the docBase to point to the custom theme directory relative from the webapps directory:
Context docBase="pki" crossContext="true" allowLinking="true"
    ...
/Context
Context docBase="pki" crossContext="true" allowLinking="true"
    ...
/ContextThe change will be effective immediately without the need to restart the server.
To remove the custom theme, simply revert the docBase and delete the custom theme directory:
rm -rf /var/lib/pki/pki-tomcat/webapps/pki
$ rm -rf /var/lib/pki/pki-tomcat/webapps/pki13.6.3. Customizing TPS token state labels
The default token state labels are stored in the /usr/share/pki/tps/conf/token-states.properties file and described in Section 2.5.2.4.1.4, “Token state and transition labels”.
To customize the labels, copy the file into the instance directory:
cp /usr/share/pki/tps/conf/token-states.properties /var/lib/pki/pki-tomcat/tps/conf
$ cp /usr/share/pki/tps/conf/token-states.properties /var/lib/pki/pki-tomcat/tps/confThe change will be effective immediately without the need to restart the server.
To remove the customized labels, simply delete the customized file:
rm /var/lib/pki/pki-tomcat/tps/conf/token-states.properties
$ rm /var/lib/pki/pki-tomcat/tps/conf/token-states.properties13.7. Using an access banner
In Certificate System, Administrators can configure a banner with customizable text. The banner will be displayed in the following situations:
| Application | When the banner is displayed |
|---|---|
| PKI Console |
|
| Web interface |
|
|
|
|
You can use the banner to display important information to the users before they can use Certificate System. The user must agree to the displayed text to continue.
Example 13.4. When the access banner is displayed
The following example shows when the access banner is displayed if you are using the pki utility:
13.7.1. Enabling an access banner
To enable the access banner, create the /etc/pki/ instance_name/banner.txt file and enter the text to displayed.
The text in the /etc/pki/ instance_name/banner.txt file must use the UTF-8 format. To validate, see Section 13.7.4, “Validating the banner”.
13.7.2. Disabling an access banner
To disable the access banner, either delete or rename the /etc/pki/ instance_name/banner.txt file. For example:
mv /etc/pki/ instance_name/banner.txt /etc/pki/ instance_name/banner.txt.UNUSED
# mv /etc/pki/ instance_name/banner.txt /etc/pki/ instance_name/banner.txt.UNUSED13.7.3. Displaying the banner
To display the currently configured banner:
pki-server banner-show -i instance_name
# pki-server banner-show -i instance_name13.7.4. Validating the banner
To validate that the banner does not contain invalid characters:
pki-server banner-validate -i instance_name
# pki-server banner-validate -i instance_name
---------------
Banner is valid
---------------13.7.5. Configuration for CMC
This section describes how to configure Certificate System for Certificate Management over CMS (CMC).
13.7.6. Understanding how CMC works
Before configuring CMC, read the following documentation to learn more about the subject:
- Section 2.4.1.1.2.2, “Enrolling with CMC”
- Issuing Certificates Using CMC in the Red Hat Certificate System Administration Guide.
- Making Rules for Issuing Certificates (Certificate Profiles) in the Red Hat Certificate System Administration Guide.
13.7.7. Enabling the PopLinkWittnessV2 feature
For a high-level security on the Certificate Authority (CA), enable the following option in the /var/lib/pki/ instance_name/ca/conf/CS.cfg file:
cmc.popLinkWitnessRequired=true
cmc.popLinkWitnessRequired=true13.7.9. Enabling CMCRevoke for the Web User Interface
As described in the Performing a CMC Revocation section in the Red Hat Certificate System Administration Guide, there are two ways to submit CMC revocation requests.
In cases when you use the CMCRevoke utility to create revocation requests to be submitted through the web UI, add the following setting to the /var/lib/pki/ instance_name/ca/conf/CS.cfg file:
cmc.bypassClientAuth=true
cmc.bypassClientAuth=true13.8. ServerSide Key Generation for EE
13.8.1. Overview
Many newer versions of browsers, including Firefox v69 and up, as well as Chrome, have removed the functionality to generate PKI keys and the support for CRMF for key archival. While CLIs such as CRMFPopClient (see "CRMFPopClient --help") or pki (see "pki client-cert-request --help") could be used as a workaround on the Fedora or RHEL platforms, clients on other platforms have been largely left out.
Server-Side Keygen enrollment has been around for a long time since the introduction of Token Key Management System (TMS), where keys could be generated on KRA instead of locally on smart cards. Starting from PKI v.10.5, we adopt a similar mechanism to resolve the browser keygen deficiency issue. Keys are generated on the server (KRA to be specific) and then transferred securely back to the client in PKCS#12.
It is highly recommended that the Server-Side Keygen mechanism only being employed for encryption certificates.
13.8.2. Functionality Highlights
- Certificate request keys are generated on KRA (Note: KRA must be installed to work with the CA)
- The profile default plugin, serverKeygenUserKeyDefaultImpl, provides selection to enable or disable key archival (i.e. the “enableArchival” parameter)
- Support for both RSA and EC keys
- Support for both manual (agent) approval and automatic approval (e.g. directory password-based)
13.8.3. Installation configuration
A KRA instance is required in addition to the CA for setting up Server-Side Keygen.
In the case when the CA and KRA are sharing a Tomcat instance, there is no need to execute the below step to import the transport certificate.
After installing CA and KRA instances, in the case of stand-alone Tomcat web server instances, you’d need to add the KRA’s transport cert to the CA’s nssdb.
First, shut down CA
Systemctl stop pki-tomcatd@<ca_instance_name>.service
e.g.
# Systemctl stop pki-tomcatd@pki-ca.service
Systemctl stop pki-tomcatd@<ca_instance_name>.service
e.g.
# Systemctl stop pki-tomcatd@pki-ca.serviceExport KRA’s transport certificate into a file
- Find and export KRA transport cert:
grep "kra.transport.cert=" /var/lib/pki/<kra_instance_name>/kra/conf/CS.cfg | sed 's/kra.transport.cert=//' > <kra transport cert file>
e.g.
# grep "kra.transport.cert=" /var/lib/pki/pki-kra/kra/conf/CS.cfg | sed 's/kra.transport.cert=//' > /tmp/kraTransport.cert
grep "kra.transport.cert=" /var/lib/pki/<kra_instance_name>/kra/conf/CS.cfg | sed 's/kra.transport.cert=//' > <kra transport cert file>
e.g.
# grep "kra.transport.cert=" /var/lib/pki/pki-kra/kra/conf/CS.cfg | sed 's/kra.transport.cert=//' > /tmp/kraTransport.certImport KRA’s transport cert into CA’s nssdb, using the nickname specified in CA’s CS.cfg
- List the transport cert nickname:
grep "ca.connector.KRA.transportCertNickname" /var/lib/pki/<ca_instance_name>/ca/conf/CS.cfg
e.g.
# grep "ca.connector.KRA.transportCertNickname" /var/lib/pki/pki-ca/ca/conf/CS.cfg
ca.connector.KRA.transportCertNickname=KRA transport cert
grep "ca.connector.KRA.transportCertNickname" /var/lib/pki/<ca_instance_name>/ca/conf/CS.cfg
e.g.
# grep "ca.connector.KRA.transportCertNickname" /var/lib/pki/pki-ca/ca/conf/CS.cfg
ca.connector.KRA.transportCertNickname=KRA transport cert- Import using the nickname listed from above step:
certutil -d /var/lib/pki/<ca_instance_name>/alias -A -t “,,” -n <transportNickName> -i <kra transport cert file>
e.g.
# certutil -d /var/lib/pki/pki-ca/alias -A -t “,,” -n "KRA transport cert" -i /tmp/kraTransport.cert
certutil -d /var/lib/pki/<ca_instance_name>/alias -A -t “,,” -n <transportNickName> -i <kra transport cert file>
e.g.
# certutil -d /var/lib/pki/pki-ca/alias -A -t “,,” -n "KRA transport cert" -i /tmp/kraTransport.certStart CA
systemctl start pki-tomcatd@<ca_instance_name>.service
e.g.
# Systemctl start pki-tomcatd@pki-ca.service
systemctl start pki-tomcatd@<ca_instance_name>.service
e.g.
# Systemctl start pki-tomcatd@pki-ca.service13.8.4. Profile Configuration
Two default profiles, caServerKeygen_UserCert and caServerKeygen_DirUserCert, are provided by default to allow for certificate enrollments where keys are generated on the server side. However, any profile with the right input, output, and policy set could be turned into a server-side keygen profile.
A Server-Side Keygen profile must contain the following components.
13.8.4.1. Input
input.i1.class_id=serverKeygenInputImpl
input.i1.class_id=serverKeygenInputImpl13.8.4.2. Output
output.o1.class_id=pkcs12OutputImpl
output.o1.class_id=pkcs12OutputImpl13.8.4.3. Policyset
Password for the generated PKCS12 can be enforced with the following policy:
This policy allows to set:
-
password.minSize- the minimum size for the passwor`d; -
password.minUpperLetter- the minimum number of capital letters; -
password.minLowerLetter- the minimum number of lower letters; -
password.minNumber- the minimum number of digits; -
password.minSpecialChar- the minimum number of punctuation characters; -
password.seqLength- the size of substring sequence which cannot be repeated; -
password.maxRepeatedChar- maximum number of repeating for each character;
If the constraint does not include specific configuration, it reads the options from the CS.cfg. In the case the name is different, the prefix password. is replaced by passwordChecker.. The configuration in CS.cfg are used for all the passwords but each profile can overwrite to allow stronger or weaker passwords.
Key type and key size parameters can be configured as exemplified below:
13.8.4.4. Authentication
The two default server-side keygen enrollment profiles different in the authentication mechanism, where
- caServerKeygen_UserCert.cfg
- contains empty value to "auth.class_id=", meaning that enrollment requests through this profile will require approval from a CA agent.
- caServerKeygen_DirUserCert.cfg
- contains "auth.instance_id=UserDirEnrollment", meaning that the user is required to pass LDAP uid/password authentication; Such authentication mechanism is considered as an automatic certificate issuance as it does not require per-request approval from a CA agent.
Automatic approval could be configured by setting the auth.instance_id directive to any compatible authentication plugin class, as examplified in the caServerKeygen_DirUserCert.cfg profile mentioned above. Here is an example of such configuration in CS.cfg:
13.8.5. Enrolling a Certificate Using Server-Side Keygen
The default Sever-Side Keygen enrollment profile can be found on the EE page, under the “List Certificate Profiles” tab:
13.8.5.1. Manual User Dual-Use Certificate Enrollment Using server-side Key generation
Figure 13.2. Server-Side Keygen Enrollment that requires agent manual approval
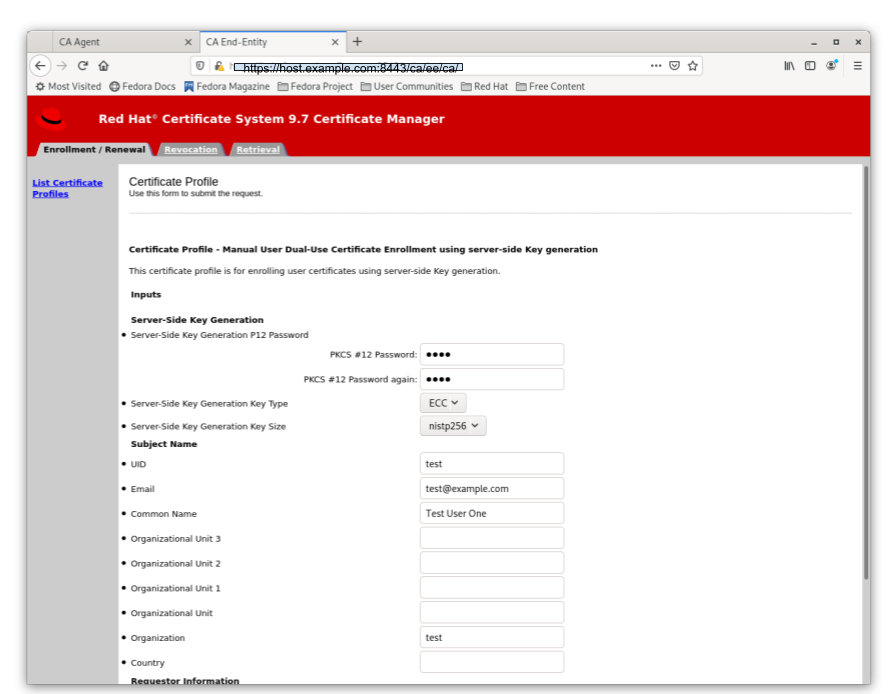
13.8.5.2. Directory-authenticated User Dual-Use Certificate Enrollment Using server-side Key generation
Figure 13.3. Server-Side Keygen Enrollment that will be automatically approved upon successful LDAP uid/pwd authentication
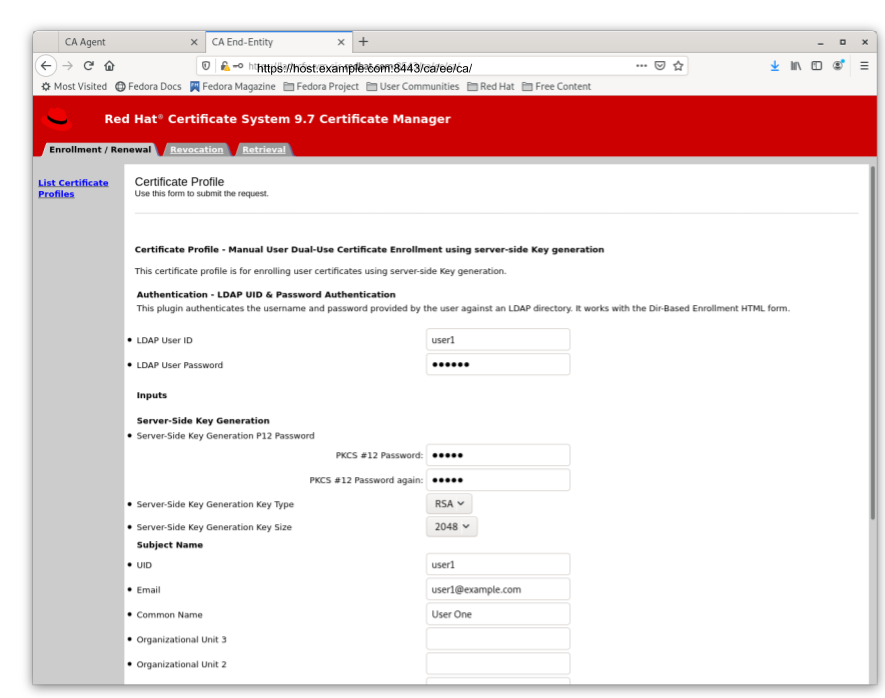
Regardless of how the request is approved, the Server-Side Keygen Enrollment mechanism requires the End Entity user to enter a password for the PKCS#12 package which will contain the issued certificate as well as the encrypted private key generated by the server once issued.
Users should not share their passwords with anyone. Not even the CA or KRA agents.
When the enrollment request is approved, the PKCS#12 package will be generated and,
- In case of manual approval, the PKCS#12 file will be returned to the CA agent that approves the request; The agent is then expected to forward the PKCS#12 file to the user.
- In case of automatic approval, the PKCS#12 file will be returned to the user who submitted the request
Figure 13.4. Enrollment manually approved by an agent
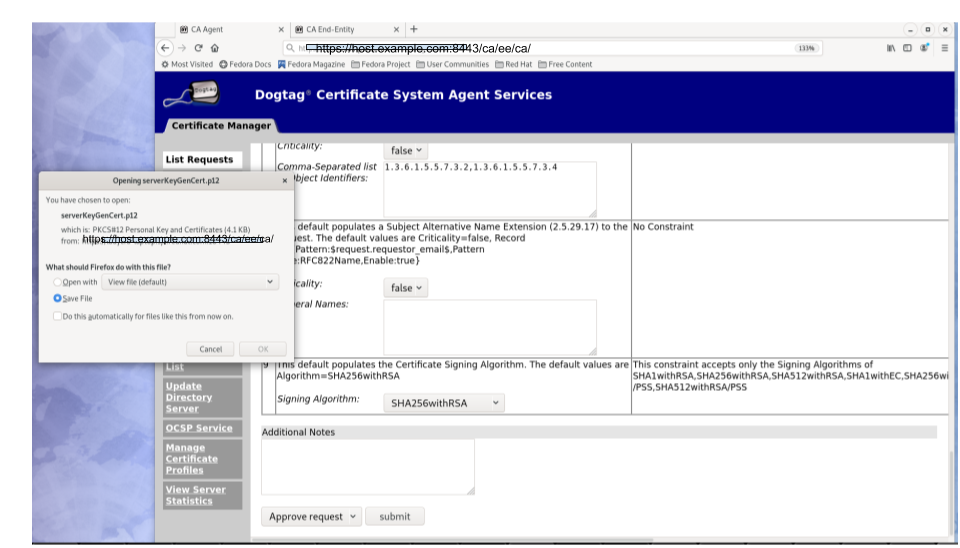
Once the PKCS#12 is received, the user could use cli such as pkcs12util to import the PKCS#12 file into her/her own user internal cert/key database for each application. E.g. the user’s Firefox nss database.
13.8.6. Key Recovery
If the enableArchival parameter is set to true in the certificate enrollment profile, then the private keys are archived at the time of Server-Side Keygen enrollment. The archived private keys could then be recovered by the authorized KRA agents.
13.8.7. Additional Information
13.8.7.1. KRA Request Records
due to the nature of this mechanism, in case when enableArchival parameter is set to true in the profile, there are two KRA requests records per Server-Side keygen request:
One for request type “asymkeyGenRequest”
- This request type cannot be filtered at “List Requests” on KRA agent page; One could select “Show All Requests” to see them listed.
- One for request type “recovery”
13.8.7.2. Audit Records
Some audit records could be observed if enabled:
CA
- SERVER_SIDE_KEYGEN_ENROLL_KEYGEN_REQUEST
- SERVER_SIDE_KEYGEN_ENROLL_KEY_RETRIEVAL_REQUEST
KRA
- SERVER_SIDE_KEYGEN_ENROLL_KEYGEN_REQUEST_PROCESSED
- SERVER_SIDE_KEYGEN_ENROLL_KEY_RETRIEVAL_REQUEST_PROCESSED (not yet implemented)
13.9. Configuring Certificate Transparency
Certificate System provides a basic version of Certificate Transparency (CT) V1 support (rfc 6962). It has the capability of issuing certificates with embedded Signed Certificate Time stamps (SCTs) from any trusted log where each deployment site choses to have its root CA cert included. You can also configure the system to support multiple CT logs. A minimum of one trusted CT log is required for this feature to work.
It is the responsibility of the deployment site to establish its trust relationship with a trusted CT log server.
To configure Certificate Transparency, edit the CA’s CS.cfg file located in the /var/lib/pki/instance name/ca/conf/CS.cfg directory.
For more information on how to test your Certificate Transparency setup, see the Testing Certificate Transparency section in the Red Hat Certificate System Administration Guide.
13.9.1. ca.certTransparency.mode
The ca.certTransparency.mode specifies one of three Certificate Transparency modes:
- disabled: issued certs will not carry the SCT extension
- enabled: issued certs will carry the SCT extension
-
perProfile: certs enrolled through those profiles that contain the following policyset will carry the SCT extension:
SignedCertificateTimestampListExtDefaultImpl
The default value is disabled.
13.9.2. ca.certTransparency.log.num
ca.certTransparency.log.num specifies the total number of CT logs defined in the configuration.
Not all CT log entries that are defined are considered active; see ca.certTransparency.log.id.enable in Section 13.9.3, “ca.certTransparency.log.id.*”.
13.9.3. ca.certTransparency.log.id.*
ca.certTransparency.log.id.* specifies information pertaining to the log id, where id is a unique id you assign to the CT log server to differentiate it from other CT logs.
The parameter names follow each ca.certTransparency.log.id. and belong to the id:
- ca.certTransparency.log.id.enable specifies whether the id CT log is enabled (true) or disabled (false).
- ca.certTransparency.log.id.pubKey contains the base64 encoding of the CT log’s public key.
- ca.certTransparency.log.id.url contains the base64 encoding of the CT log url.
- ca.certTransparency.log.id.version specifies the CT version number that the CT supports (as well as the CT log server); it currently only supports version 1.