Questo contenuto non è disponibile nella lingua selezionata.
Chapter 6. Camel Components
This chapter details information about supported camel components
6.1. camel-activemq
Camel ActiveMQ integration is provided by the activemq component.
The component can be configured to work with an embedded or external broker. For Wildfly / EAP container managed connection pools and XA-Transaction support, the ActiveMQ Resource Adapter can be configured into the container configuration file.
6.1.1. JBoss EAP ActiveMQ resource adapter configuration
Download the ActiveMQ resource adapter rar file. The following steps outline how to configure the ActiveMQ resource adapter.
- Stop your JBoss EAP instance.
Download the resource adapter and copy to the relevant JBoss EAP deployment directory. For standalone mode:
cp activemq-rar-5.11.1.rar ${JBOSS_HOME}/standalone/deployments/activemq-rar.rar- Configure the JBoss EAP resource adapters subsystem for the ActiveMQ adapter.
<subsystem xmlns="urn:jboss:domain:resource-adapters:2.0">
     <resource-adapters>
         <resource-adapter id="activemq-rar.rar">
             <archive>
                 activemq-rar.rar
             </archive>
             <transaction-support>XATransaction</transaction-support>
             <config-property name="UseInboundSession">
                 false
             </config-property>
             <config-property name="Password">
                 defaultPassword
             </config-property>
             <config-property name="UserName">
                 defaultUser
             </config-property>
             <config-property name="ServerUrl">
                 tcp://localhost:61616?jms.rmIdFromConnectionId=true
             </config-property>
             <connection-definitions>
                 <connection-definition class-name="org.apache.activemq.ra.ActiveMQManagedConnectionFactory" jndi-name="java:/ActiveMQConnectionFactory" enabled="true" pool-name="ConnectionFactory">
                     <xa-pool>
                         <min-pool-size>1</min-pool-size>
                         <max-pool-size>20</max-pool-size>
                         <prefill>false</prefill>
                         <is-same-rm-override>false</is-same-rm-override>
                     </xa-pool>
                 </connection-definition>
             </connection-definitions>
             <admin-objects>
                 <admin-object class-name="org.apache.activemq.command.ActiveMQQueue" jndi-name="java:/queue/HELLOWORLDMDBQueue" use-java-context="true" pool-name="HELLOWORLDMDBQueue">
                     <config-property name="PhysicalName">
                         HELLOWORLDMDBQueue
                     </config-property>
                 </admin-object>
                 <admin-object class-name="org.apache.activemq.command.ActiveMQTopic" jndi-name="java:/topic/HELLOWORLDMDBTopic" use-java-context="true" pool-name="HELLOWORLDMDBTopic">
                     <config-property name="PhysicalName">
                         HELLOWORLDMDBTopic
                     </config-property>
                 </admin-object>
             </admin-objects>
         </resource-adapter>
     </resource-adapters>
 </subsystem>
If your resource adapter archive filename differs from activemq-rar.rar, you must change the content of the archive element in the preceding configuration to match the name of your archive file.
The values of the UserName and Password configuration properties must be chosen to match the credentials of a valid user in the external broker.
You might need to change the value of the ServerUrl configuration property to match the actual hostname and port exposed by the external broker.
4) Start JBoss EAP. If everything is configured correctly, you should see a message within the JBoss EAP server.log like.
13:16:08,412 INFO [org.jboss.as.connector.deployment] (MSC service thread 1-5) JBAS010406: Registered connection factory java:/AMQConnectionFactory`6.1.2. Camel route configuration
The following ActiveMQ producer and consumer examples make use of the ActiveMQ embedded broker and the 'vm' transport (thus avoiding the need for an external ActiveMQ broker).
The examples use CDI in conjunction with the camel-cdi component. JMS ConnectionFactory instances are injected into the Camel RouteBuilder through JNDI lookups.
6.1.2.1. ActiveMQ Producer
@Startup
@ApplicationScoped
@ContextName("activemq-camel-context")
public class ActiveMQRouteBuilder extends RouteBuilder {
@Override
public void configure() throws Exception {
from("timer://sendJMSMessage?fixedRate=true&period=10000")
.transform(constant("<?xml version='1.0><message><greeting>hello world</greeting></message>"))
.to("activemq:queue:WildFlyCamelQueue?brokerURL=vm://localhost")
.log("JMS Message sent");
}
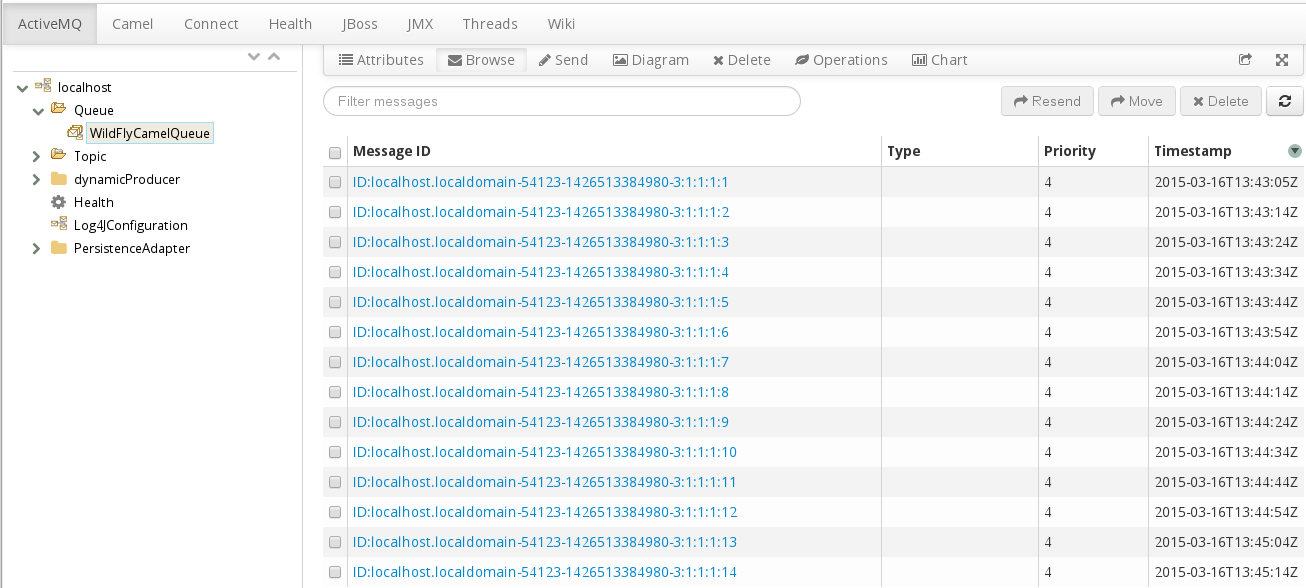
}A log message will be output to the console each time a message is added to the WildFlyCamelQueue destination. To verify that the messages really are being placed onto the queue, you can use the ../features/hawtio.md[Hawtio console,window=_blank] provided by the Camel on EAP subsystem.
6.1.2.2. ActiveMQ Consumer
To consume ActiveMQ messages the Camel RouteBuilder implementation is similar to the producer example.
When the ActiveMQ endpoint consumes messages from the WildFlyCamelQueue destination, the content is logged to the console.
@Override
public void configure() throws Exception {
  from("activemq:queue:WildFlyCamelQueue?brokerURL=vm://localhost")
  .to("log:jms?showAll=true");
}
6.1.2.3. ActiveMQ Transactions
6.1.2.3.1. ActiveMQ Resource Adapter Configuration
The ActiveMQ resource adapter is required to leverage XA transaction support, connection pooling etc.
The XML snippet below shows how the resource adapter is configured within the JBoss EAP server XML configuration. Notice that the ServerURL is set to use an embedded broker. The connection factory is bound to the JNDI name java:/ActiveMQConnectionFactory. This will be looked up in the RouteBuilder example that follows.
Finally, two queues are configured named 'queue1' and 'queue2'.
<subsystem xmlns="urn:jboss:domain:resource-adapters:2.0">
  <resource-adapters>
    <resource-adapter id="activemq-rar.rar">
      ...
      <admin-objects>
        <admin-object class-name="org.apache.activemq.command.ActiveMQQueue" jndi-name="java:/queue/queue1" use-java-context="true" pool-name="queue1pool">
          <config-property name="PhysicalName">queue1</config-property>
        </admin-object>
        <admin-object class-name="org.apache.activemq.command.ActiveMQQueue" jndi-name="java:/queue/queue2" use-java-context="true" pool-name="queue2pool">
          <config-property name="PhysicalName">queue2</config-property>
        </admin-object>
      </admin-objects>
    </resource-adapter>
  </resource-adapters>
</subsystem>
6.1.2.4. Transaction Manager
The camel-activemq component requires a transaction manager of type org.springframework.transaction.PlatformTransactionManager. Therefore, you can start by creating a bean extending JtaTransactionManager which fulfills this requirement. Note that the bean is annotated with @Named to allow the bean to be registered within the Camel bean registry. Also note that the JBoss EAP transaction manager and user transaction instances are injected using CDI.
@Named("transactionManager")
public class CdiTransactionManager extends JtaTransactionManager {

  @Resource(mappedName = "java:/TransactionManager")
  private TransactionManager transactionManager;

  @Resource
  private UserTransaction userTransaction;

  @PostConstruct
  public void initTransactionManager() {
    setTransactionManager(transactionManager);
    setUserTransaction(userTransaction);
  }
}
6.1.2.5. Transaction Policy
Next you need to declare the transaction policy that you want to use. Again, use the @Named annotation to make the bean available to Camel. The transaction manager is also injected so that a TransactionTemplate can be created with the desired transaction policy. PROPAGATION_REQUIRED in this instance.
@Named("PROPAGATION_REQUIRED")
public class CdiRequiredPolicy extends SpringTransactionPolicy {
  @Inject
  public CdiRequiredPolicy(CdiTransactionManager cdiTransactionManager) {
    super(new TransactionTemplate(cdiTransactionManager,
      new DefaultTransactionDefinition(TransactionDefinition.PROPAGATION_REQUIRED)));
  }
}
6.1.2.6. Route Builder
Now you can configure the Camel RouteBuilder class and inject the dependencies needed for the Camel ActiveMQ component. The ActiveMQ connection factory that you configured on the resource adapter configuration is injected together with the transaction manager you configured earlier.
In this example RouteBuilder, whenever any messages are consumed from queue1, they are routed to another JMS queue named queue2. Messages consumed from queue2 result in JMS transaction being rolled back using the rollback() DSL method. This results in the original message being placed onto the dead letter queue(DLQ).
@Startup
@ApplicationScoped
@ContextName("activemq-camel-context")
public class ActiveMQRouteBuilder extends RouteBuilder {

  @Resource(mappedName = "java:/ActiveMQConnectionFactory")
  private ConnectionFactory connectionFactory;

  @Inject
  private CdiTransactionManager transactionManager;

  @Override
  public void configure() throws Exception {
    ActiveMQComponent activeMQComponent = ActiveMQComponent.activeMQComponent();
    activeMQComponent.setTransacted(false);
    activeMQComponent.setConnectionFactory(connectionFactory);
    activeMQComponent.setTransactionManager(transactionManager);

    getContext().addComponent("activemq", activeMQComponent);

      errorHandler(deadLetterChannel("activemq:queue:ActiveMQ.DLQ")
      .useOriginalMessage()
      .maximumRedeliveries(0)
      .redeliveryDelay(1000));

    from("activemq:queue:queue1F")
      .transacted("PROPAGATION_REQUIRED")
      .to("activemq:queue:queue2");

    from("activemq:queue:queue2")
      .to("log:end")
      .rollback();
  }
}
6.1.3. Security
Refer to the JMS security section.
6.1.4. Code examples on GitHub
An example camel-activemq application is available on GitHub.
6.2. camel-jms
There are two supported ways of connecting camel-jms, camel-sjms and camel-sjms2 endpoints to a remote AMQ 7 broker.
- Configuring a remote-connector with a pooled-connection-factory as described in the section called Configuring the Artemis Resource Adapter to Connect to Red Hat JBoss AMQ 7 in the JBoss EAP Configuring Messaging guide.
- Configuring a remote-connector with connection-factory as described in Configure a remote-connector with connection-factory
The first option is the preferred method, because it provides connection pooling and XA transaction support.
For messaging scenarios that use durable subscribers, pooled-connection-factory is not supported by Fuse 7.13 on JBoss EAP due to constraints imposed by the JavaEE 7 specification. In these scenarios configuring a standard unpooled connection-factory is preferred.
Configure a remote-connector with connection-factory
Create an outbound-socket-binding pointing to the remote messaging server:
/socket-binding-group=standard-sockets/remote-destination-outbound-socket-binding=messaging-remote-throughput:add(host=localhost, port=61616)Create a remote-connector referencing the outbound-socket-binding created in step 1.
/subsystem=messaging-activemq/server=default/remote-connector=netty-remote-throughput:add(socket-binding=messaging-remote-throughput)Create a connection-factory referencing the remote-connector created in step 2.
/subsystem=messaging-activemq/server=default/connection-factory=simple-remote-artemis-connection-factory:add(entries=[java:/jms/RemoteJms],connectors=[netty-remote-throughput])
6.2.1. Messaging brokers and clients
Abstract
Fuse 7.13 does not ship with a default internal messaging broker, but it is designed to interface with external JMS brokers.
Fuse 7.13 on JBoss EAP uses the resource adapters detailed in Configuring Messaging on JBoss EAP to access external messaging brokers.
See Supported Configurations for more information about the external brokers, JCA adapters and Camel component combinations that are available for messaging on Fuse 7.13 on JBoss EAP.
For more information about connecting to external brokers using Fuse on JBoss EAP using JMS, see Section 6.2, “camel-jms”.
camel-jms quickstart
A quickstart is provided to demonstrate the use of the camel-jms component with Fuse on JBoss EAP to produce and consume JMS messages.
In this quickstart a Camel route consumes files from EAP_HOME/standalone/data/orders and places their contents onto an in-memory ActiveMQ Artemis queue named OrdersQueue. Another Camel route then consumes the contents of OrdersQueue and sorts the orders into individual country directories within EAP_HOME/standalone/data/orders/processed.
CLI commands create and delete OrdersQueue CLI scripts take care of creating and removing the JMS OrdersQueue for you when the application is deployed and undeployed. These scripts are located within the EAP_HOME/quickstarts/camel-jms/src/main/resources/cli directory.
Prerequisites
To run this quickstart you must have a working version of Fuse 7.13
You must also follow the instructions in Using JBoss AMQ for remote JMS Communication to connect to an external AMQ 7 broker. You can then inject the connection factory as you would with the default connection factory.
@Resource(mappedName = "java:jboss/RemoteJmsXA")
ConnectionFactory connectionFactory;
Setup the quickstart
- Start JBOSS EAP in standalone mode.
-
Navigate to
EAP_HOME/quickstarts/camel/camel-jms -
Enter
mvn clean install -Pdeploy`to build and deploy the quickstart. - Browse to http://localhost:8080/example-camel-jms
You should see a page titled 'Orders Received'. As we send orders to the example application, a list of orders per country will be listed on this page.
Run the quickstart
There are some example order XML files within the EAP_HOME/quickstarts/camel/camel-jms/src/main/resources directory. Camel will choose a file at random every 5 seconds and will copy it into EAP_HOME/standalone/data/orders for processing.
The console will output messages detailing what happened to each of the orders. The output will look something like this.
JmsConsumer[OrdersQueue]) Sending order to the UK
JmsConsumer[OrdersQueue]) Sending order to another country
JmsConsumer[OrdersQueue]) Sending order to the US
When the files have been consumed, you can return to http://localhost:8080/example-camel-jms/orders. The count of received orders for each country should have been increased by 1.
All the processed orders will be split into the following destinations:
EAP_HOME/standalone/data/orders/processed/uk
EAP_HOME/standalone/data/orders/processed/us
EAP_HOME/standalone/data/orders/processed/other
Undeploy
To undeploy the example, navigate to EAP_HOME/quickstarts/camel/camel-jms run mvn clean -Pdeploy.
6.3. camel-mail
Interaction with email is provided by the mail component.
By default, Camel will create its own mail session and use this to interact with your mail server. Since JBoss EAP already provides a mail subsystem with all of the relevant support for secure connections, username and password encryption etc, therefore, it is recommended to configure your mail sessions within the JBoss EAP configuration and use JNDI to wire them into your Camel endpoints.
6.3.1. JBoss EAP configuration
First you configure the JBoss EAP mail subsystem for the Mail server. The following example adds configuration for Google Mail IMAP and SMTP .
An additional mail-session is configured after the 'default' session.
<subsystem xmlns="urn:jboss:domain:mail:2.0">
    <mail-session name="default" jndi-name="java:jboss/mail/Default">
      <smtp-server outbound-socket-binding-ref="mail-smtp"/>
    </mail-session>
<mail-session debug="true" name="gmail" jndi-name="java:jboss/mail/gmail">
<smtp-server outbound-socket-binding-ref="mail-gmail-smtp" ssl="true" username="your-username-here" password="your-password-here"/>
<imap-server outbound-socket-binding-ref="mail-gmail-imap" ssl="true" username="your-username-here" password="your-password-here"/>
</mail-session>
</subsystem>
You can configure outbound-socket-binding-ref values of 'mail-gmail-smtp' and 'mail-gmail-imap'.
The next step is to configure these socket bindings. You can add additional bindings to the socket-binding-group configuration as per the following.
<outbound-socket-binding name="mail-gmail-smtp">
  <remote-destination host="smtp.gmail.com" port="465"/>
</outbound-socket-binding>

<outbound-socket-binding name="mail-gmail-imap">
  <remote-destination host="imap.gmail.com" port="993"/>
</outbound-socket-binding>
This configures the mail session to connect to host smtp.gmail.com on port 465 and imap.gmail.com on port 993. If you’re using a different mail host, then this detail will be different.
6.3.2. POP3 Configuration
If you need to configure POP3 sessions, the principles are the same as defined in the examples above.
<!-- Server configuration -->
<pop3-server outbound-socket-binding-ref="mail-pop3" ssl="true" username="your-username-here" password="your-password-here"/>

<!-- Socket binding configuration -->
<outbound-socket-binding name="mail-gmail-imap">
  <remote-destination host="pop3.gmail.com" port="993"/>
</outbound-socket-binding>
6.3.3. Camel route configuration
6.3.3.1. Mail producer
This example uses the SMTPS protocol, together with CDI in conjunction with the camel-cdi component. The Java mail session that you configured within the JBoss EAP configuration is injected into a Camel RouteBuilder through JNDI.
6.3.3.1.1. Route builder SMTPS example
The GMail mail session is injected into a Producer class using the @Resource annotation with a reference to the jndi-name attribute that you previously configured. This allows you to reference the mail session on the camel-mail endpoint configuration.
public class MailSessionProducer {
    @Resource(lookup = "java:jboss/mail/greenmail")
    private Session mailSession;

    @Produces
    @Named
    public Session getMailSession() {
        return mailSession;
    }
}
public class MailRouteBuilder extends RouteBuilder {
@Override
public void configure() throws Exception {
from("direct:start")
.to("smtps://smtp.gmail.com?session=#mailSession");
}
}To send an email, you can create a ProducerTemplate and send an appropriate body together with the necessary email headers.
Map<String, Object> headers = new HashMap<String, Object>();
headers.put("To", "destination@test.com");
headers.put("From", "sender@example.com");
headers.put("Subject", "Camel on Wildfly rocks");

String body = "Hi,\n\nCamel on Wildfly rocks!.";

ProducerTemplate template = camelContext.createProducerTemplate();
template.sendBodyAndHeaders("direct:start", body, headers);
6.3.3.2. Mail consumer
To receive email you can use an IMAP MailEndpoint. The Camel route configuration looks like the following.
public void configure() throws Exception {
   from("imaps://imap.gmail.com?session=#mailSession")
   .to("log:email");
}
6.3.4. Security
6.3.4.1. SSL configuration
JBoss EAP can be configured to manage Java mail sessions and their associated transports using SSL / TLS. When configuring mail sessions you can configure SSL or TLS on server types:
- smtp-server
- imap-server
- pop-server
By setting attributes ssl="true" or tls="true".
6.3.4.2. Securing passwords
It is recommended to not use clear text for passwords within configuration files. You can mask sensitive data using the WildFly Vault.
6.3.4.3. Camel security
Camel endpoint security documentation can be found on the mail component guide. Camel also has a security summary page.
6.3.5. Code examples on GitHub
An example camel-mail application is available on GitHub for you to try out sending / receiving email.
6.4. camel-rest
The rest component allows you to define REST endpoints using the Rest DSL and plugin to other Camel components as the REST transport.
The Camel on EAP Subsystem only supports the camel-servlet and camel-undertow components for use with the REST DSL. However, the subsystem does not work, If you attempt to configure other components.
CamelContext camelctx = new DefaultCamelContext();
camelctx.addRoutes(new RouteBuilder() {
    @Override
    public void configure() throws Exception {
        restConfiguration().component("servlet").contextPath("camel/rest").port(8080);
        rest("/hello").get("/{name}").to("direct:hello");
        from("direct:hello").transform(simple("Hello ${header.name}"));
    }
});
6.5. camel-rest-swagger
The rest-swagger component can configure REST producers from a Swagger document and delegate to a component implementing the RestProducerFactory interface such as:
6.6. camel-sql
The SQL component allows you to work with databases using JDBC queries. The difference between this component and JDBC component is that in case of SQL the query is a property of the endpoint and it uses message payload as parameters passed to the query.
CamelContext camelctx = new DefaultCamelContext();
camelctx.addRoutes(new RouteBuilder() {
    @Override
    public void configure() throws Exception {
        from("sql:select name from information_schema.users?dataSource=java:jboss/datasources/ExampleDS")
        .to("direct:end");
    }
});
The JNDI datasource lookup shown above works only when configuring a DefaultCamelContext. See below for CdiCamelContext and SpringCamelContext examples.
When used in conjunction with the camel-cdi component, Jarkarta EE annotations can make a datasource available to Camel. This example uses the @Named annotation so that Camel can discover the desired datasource.
public class DatasourceProducer {
    @Resource(lookup = "java:jboss/datasources/ExampleDS")
    DataSource dataSource;

    @Produces
    @Named("wildFlyExampleDS")
    public DataSource getDataSource() {
        return dataSource;
    }
}
Now the datasource can be referenced through the dataSource parameter on the camel-sql endpoint configuration.
@ApplicationScoped
@ContextName("camel-sql-cdi-context")
@Startup
public class CdiRouteBuilder extends RouteBuilder {
    @Override
    public void configure() throws Exception {
        from("sql:select name from information_schema.users?dataSource=wildFlyExampleDS")
        .to("direct:end");
    }
}
When using camel-spring the route configuration would look like:
<beans xmlns="http://www.springframework.org/schema/beans"
       xmlns:xsi="http://www.w3.org/2001/XMLSchema-instance"
       xmlns:jee="http://www.springframework.org/schema/jee"
       xsi:schemaLocation="
       http://www.springframework.org/schema/beans http://www.springframework.org/schema/beans/spring-beans.xsd
       http://camel.apache.org/schema/spring http://camel.apache.org/schema/spring/camel-spring.xsd
       http://www.springframework.org/schema/jee http://www.springframework.org/schema/jee/spring-jee.xsd">

    <jee:jndi-lookup id="wildFlyExampleDS" jndi-name="java:jboss/datasources/ExampleDS"/>

    <camelContext id="sql-spring-context" xmlns="http://camel.apache.org/schema/spring">
        <route>
            <from uri="sql:select name from information_schema.users?dataSource=#wildFlyExampleDS" />
            <to uri="direct:end" />
        </route>
    </camelContext>

</beans>
6.6.1. Spring JDBC XML namespace support
Support for the following Spring JDBC XML configurations is supported
jdbc:embedded-database
<jdbc:embedded-database id="datasource" type="H2">
  <jdbc:script location="db-schema.sql"/>
</jdbc:embedded-database>Only H2 databases are supported by default as JBoss EAP has native support for this. If you want to use other embedded database providers, you will need to install the appropriate database driver.
jdbc:initialize-database
<jdbc:initialize-database data-source="datasource">
  <jdbc:script location="classpath:db-init.sql"/>
</jdbc:initialize-database>
6.7. camel-soap-rest-bridge
A simple Camel route can bridge REST invocation to a legacy SOAP service. A quickstart example is provided to demonstrate the use of the camel-soap-rest-bridge component with Camel’s REST DSL to expose a backend SOAP API service.
In this quickstart, security is involved for both REST endpoint and SOAP endpoint, both backed by RH SSO. The frontend REST API is protected via OAuth and OpenID Connect and the client will fetch a JWT (JSON Web Token) access token from RH SSO using "Resource Owner Password Credentials" OAuth2 mode. The client will use this token to access the REST endpoint.
In the bridge Camel route, the client identity is propagated from SecurityContext and when camel-cxf producer talks to the backend WS-SECURITY protected SOAP service, it will initially use this client identity to fetch a SAML2 token issued by the CXF STS service (which is backed by RH SSO as Identity Provider). The SAML2 token is signed and added to the WS-SECURITY header and the backend WS-SECURITY protected SOAP service will validate this SAML2 token.
The SOAP invocation also includes XSD Schema validation. If the token validation is successful, the backend SOAP service returns a response to the REST client which initiated the request.
Prerequisites
- You have installed JBoss EAP 7.3 or later version.
- You have installed Apache Maven 3.3.x or later later version.
- You have installed and configured RH SSO 7.4 - follow the installation instructions at https://access.redhat.com/documentation/en-us/red_hat_single_sign-on/7.4/html/getting_started_guide/installing-standalone_#installing-server-product
- You have installed RH SSO EAP adapter - follow the installation instructions at https://access.redhat.com/documentation/en-us/red_hat_single_sign-on/7.4/html/getting_started_guide/securing-sample-app_#installing-client-adapter
Set up the quickstart
- Start JBOSS EAP in standalone mode.
-
Navigate to
EAP_HOME/quickstarts/camel/camel-soap-rest-bridge -
Enter
mvn clean install -Pdeployto build and deploy the quickstart. Configure RH SSO
- Login RH SSO Admin Console from http://localhost:8180/auth with admin/admin as username/password
- Click Add realm
- Click Select file
- Select ./src/main/resources/keycloak-config/realm-export-new.json in this example folder which will import pre-defined necessary realm/client/user/role for this example
- Click Create
Quickstart examples in Fuse on EAP
This quickstart example which contains additional information about running the quickstart and test case outcomes is available in your Fuse on EAP installation at EAP_HOME/quickstarts/camel/camel-soap-rest-bridge directory.
Undeploy
To undeploy the example, navigate to the EAP_HOME/quickstarts/camel/camel-soap-rest-bridge directory and run mvn clean -Pdeploy.
6.8. Adding Components
Adding support for additional Camel Components is easy
Add your modules.xml definition
A modules.xml descriptor defines the class loading behavior for your component. It should be placed together with the component’s jar in modules/system/layers/fuse/org/apache/camel/component. Module dependencies should be setup for direct compile time dependencies.
Here is an example for the camel-ftp component
<module xmlns="urn:jboss:module:1.1" name="org.apache.camel.component.ftp">
  <resources>
    <resource-root path="camel-ftp-2.14.0.jar" />
  </resources>
  <dependencies>
    <module name="com.jcraft.jsch" />
    <module name="javax.xml.bind.api" />
    <module name="org.apache.camel.core" />
    <module name="org.apache.commons.net" />
  </dependencies>
</module>
Please make sure you don’t duplicate modules that are already available in WildFly and can be reused.
Add a reference to the component
To make this module visible by default to arbitrary JavaEE deployments add a reference to modules/system/layers/fuse/org/apache/camel/component/main/module.xml
<module xmlns="urn:jboss:module:1.3" name="org.apache.camel.component">
  <dependencies>
    ...
    <module name="org.apache.camel.component.ftp" export="true" services="export"/>
  </dependencies>
</module>