Questo contenuto non è disponibile nella lingua selezionata.
Chapter 2. Installing Linux Virtual Machines
This chapter describes the steps required to install a Linux virtual machine:
- Create a blank virtual machine on which to install an operating system.
- Add a virtual disk for storage.
- Add a network interface to connect the virtual machine to the network.
- Install an operating system on the virtual machine. See your operating system's documentation for instructions.
- Red Hat Enterprise Linux 6: https://access.redhat.com/documentation/en-US/Red_Hat_Enterprise_Linux/6/html/Installation_Guide/index.html
- Red Hat Enterprise Linux 7: https://access.redhat.com/documentation/en-US/Red_Hat_Enterprise_Linux/7/html/Installation_Guide/index.html
- Red Hat Enterprise Linux Atomic Host 7: https://access.redhat.com/documentation/en/red-hat-enterprise-linux-atomic-host/7/single/installation-and-configuration-guide/
- Register the virtual machine with the Content Delivery Network and subscribe to the relevant entitlements.
- Install guest agents and drivers for additional virtual machine functionality.
When all of these steps are complete, the new virtual machine is functional and ready to perform tasks.
2.1. Creating a Linux Virtual Machine
Copia collegamentoCollegamento copiato negli appunti!
Create a new virtual machine and configure the required settings.
Procedure 2.1. Creating Linux Virtual Machines
- Click the tab.
- Click the button to open the New Virtual Machine window.
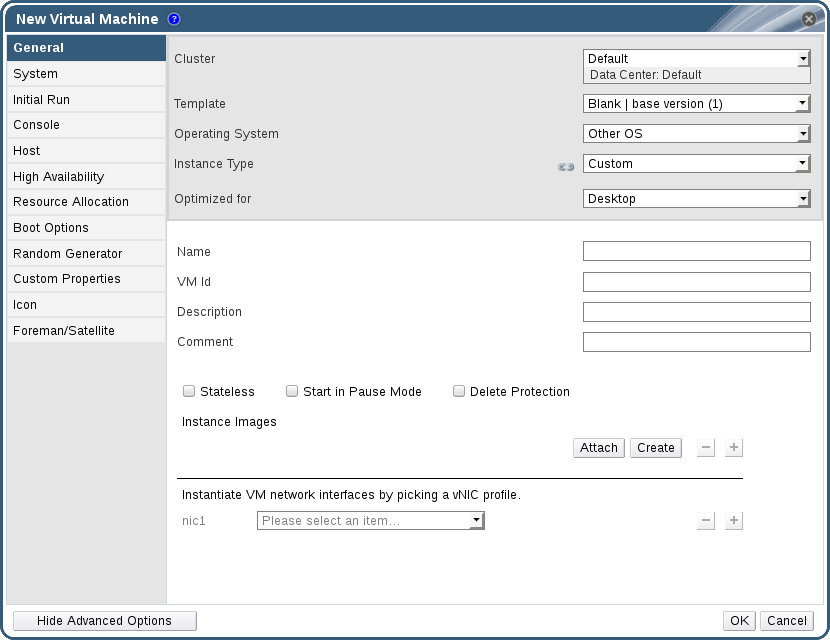
Figure 2.1. The New Virtual Machine Window
- Select a Linux variant from the Operating System drop-down list.
- Enter a Name for the virtual machine.
- Add storage to the virtual machine. or a virtual disk under Instance Images.
- Click and select an existing virtual disk.
- Click and enter a Size(GB) and Alias for a new virtual disk. You can accept the default settings for all other fields, or change them if required. See Section A.3, “Explanation of Settings in the New Virtual Disk and Edit Virtual Disk Windows” for more details on the fields for all disk types.
- Connect the virtual machine to the network. Add a network interface by selecting a vNIC profile from the nic1 drop-down list at the bottom of the General tab.
- Specify the virtual machine's Memory Size on the System tab.
- Choose the First Device that the virtual machine will boot from on the Boot Options tab.
- You can accept the default settings for all other fields, or change them if required. For more details on all fields in the New Virtual Machine window, see Section A.1, “Explanation of Settings in the New Virtual Machine and Edit Virtual Machine Windows”.
- Click .
The new virtual machine is created and displays in the list of virtual machines with a status of
Down. Before you can use this virtual machine, you must install an operating system and register with the Content Delivery Network.