第8章 デスクトップの外観とブランディングのカスタマイズ
システム管理者は、システム上のすべてのユーザーに対して GNOME インターフェイスのデフォルトの外観とブランディングを設定できます。
8.1. デスクトップ背景のカスタマイズ
システム管理者は、デフォルトのデスクトップの背景を設定したり、背景を追加したり、システムのすべてのユーザーが使用できる複数の背景を追加したりできます。
ユーザーがデフォルトの背景を変更できない場合は、locks ディレクトリーを使用して設定をロックする必要があります。ロックしない場合は、各ユーザーは設定に応じて背景をカスタマイズできます。
8.1.1. デフォルトのデスクトップ背景のカスタマイズ
関連する GSettings キーを org.gnome.desktop.background スキーマに設定して、デフォルトのデスクトップ背景とその外観を設定できます。
手順
システム全体の設定用に、ローカルデータベースを
/etc/dconf/db/local.d/00-backgroundに作成します。[org/gnome/desktop/background] picture-uri='file:///usr/local/share/backgrounds/wallpaper.jpg' picture-options='scaled' primary-color='000000' secondary-color='FFFFFF'-
picture-uri: デスクトップバックグラウンドイメージファイルへのパス。 -
picture-options: バックグラウンドイメージのレンダリング方法。有効な値は、none、wallpaper、centered、scale、sanditiveed、zoom、spannedです。 -
primary-color: グラデーションの描画時の左または上位色、またはソリッド色。 -
secondary-color: グラデーションの描画時の右色または下色。
-
オプション: デフォルトの背景をユーザーが変更できないようにする場合は、
/etc/dconf/db/local.d/locks/backgroundファイルでユーザーの設定をオーバーライドします。# List the keys used to configure the desktop background /org/gnome/desktop/background/picture-uri /org/gnome/desktop/background/picture-options /org/gnome/desktop/background/primary-color /org/gnome/desktop/background/secondary-colorシステムデータベースを更新します。
[subs="+quotes"]# dconf update
. Users must log out and back in again before the system-wide settings take effect.


:leveloffset: 2

:leveloffset: +1

:_mod-docs-content-type: PROCEDURE
// Module included in the following assemblies:
//
// <List assemblies here, each on a new line>

// This module can be included from assemblies using the following include statement:
// include::<path>/proc_adding-extra-backgounds.adoc[leveloffset=+1]

// The file name and the ID are based on the module title. For example:
// * file name: proc_doing-procedure-a.adoc
// * ID: [id='proc_doing-procedure-a_{context}']
// * Title: = Doing procedure A
//
// The ID is used as an anchor for linking to the module. Avoid changing
// it after the module has been published to ensure existing links are not
// broken.
//
// The `context` attribute enables module reuse. Every module's ID includes
// {context}, which ensures that the module has a unique ID even if it is
// reused multiple times in a guide.
//
// Start the title with a verb, such as Creating or Create. See also
// _Wording of headings_ in _The IBM Style Guide_.
[id="adding-extra-backgrounds_{context}"]
= Adding extra backgrounds

You can make extra backgrounds available to users on your system.

.Procedure

. Create the `/usr/share/gnome-background-properties/extra-backgrounds.xml` file.

. In the new file, specify the extra background files and their appearance in the following format:
+
[source,xml, subs="+quotes"]
<?xml version="1.0" encoding="UTF-8"?> <!DOCTYPE wallpapers SYSTEM "gnome-wp-list.dtd"> <wallpapers> <wallpapers> <wallpaper deleted="false"> <name>Background name</name> <filename>full-path-to-the-image</filename> <options>display-option</options> <shade_type>background-shade</shade_type> <pcolor>primary-color</pcolor> <scolor>secondary-color</scolor> </wallpaper> </wallpapers>
. The new backgrounds are now available to all users in the *Background* section of the *Settings* application.

:leveloffset: 3

:leveloffset: +1

:_mod-docs-content-type: REFERENCE

[id="frequently-used-background-schema-keys_{context}"]
= Frequently used background schema keys

[role="_abstract"]
The following configuration controls the behavior of desktop backgrounds in the GSettings system.

.Frequently used GSettings and XML background keys
[options="header", cols="2,2,2a,3"]
|=======
|Key name |XML name |Possible values |Description
|`picture-options`
|`options` |
* `none`
* `wallpaper`
* `centered`
* `scaled`
* `stretched`
* `zoom`
* `spanned`
|Determines how the image set by `wallpaper_filename` is rendered.
|`color-shading-type`
|`shade_type` |
* `horizontal`
* `vertical`
* `solid`
|Determines the shade of the background color.
|`primary-color` |`pcolor` |default: `#023c88` |Left or Top color when drawing gradients, or the solid color.
|`secondary-color` |`scolor` |default: `#5789ca` |Right or Bottom color when drawing gradients, not used for solid color.
|=======

.An extra backgrounds file with one `<wallpaper>` element
====
[source,xml]
<?xml version="1.0" encoding="UTF-8"?> <!DOCTYPE wallpapers SYSTEM "gnome-wp-list.dtd"> <wallpapers> <wallpaper deleted="false"> <name>Company Background</name> <name xml:lang="de">Firmenhintergrund</name> <filename>/usr/local/share/backgrounds/company-wallpaper.jpg</filename> <options>zoom</options> <shade_type>solid</shade_type> <pcolor>#⚙ff</pcolor> <scolor>#00000Apnsscolor> </wallpaper> </wallpapers>
====

.An extra backgrounds file with two `<wallpaper>` elements
====
In one configuration file, you can specify multiple `<wallpaper>` elements to add more backgrounds as shown in the following example with two `<wallpaper>` elements, adding two different backgrounds.

[source,xml]
<?xml version="1.0" encoding="UTF-8"?> <!DOCTYPE wallpapers SYSTEM "gnome-wp-list.dtd"> <wallpapers> <wallpaper deleted="false"> <name>Company Background</name> <name xml:lang="de">Firmenhintergrund</name> <filename>/usr/local/share/backgrounds/company-wallpaper.jpg</filename> <options>zoom</options> <shade_type>solid</shade_type> <pcolor>#⚙ff</pcolor> <scolor>#00000Apnsscolor> </wallpaper> <wallpaper deleted="false"> <name>Company Background 2</name> <name xml:lang="de">Firmenhintergrund 2</name> <filename>/usr/local/share/backgrounds/company-wallpaper-2.jpg</filename> <options>zoom</options> <shade_type>solid</shade_type> <pcolor>#ff0000</pcolor> <scolor>#00⚙</scolor> </wallpaper> </wallpapers>
====

:leveloffset: 3

:leveloffset: +1

:_mod-docs-content-type: PROCEDURE
[id="setting-the-screenshield_{context}"]
= Setting the screen shield

Screen shield is the screen that slides down when you lock the system. You can set a default screen shield picture for all users on the system.

.Procedure

. Create the [filename]`/etc/dconf/db/gdm.d/01-screensaver` file:
+
[subs="+quotes"]
....
[org/gnome/desktop/screensaver]
picture-uri='file://__/opt/corp/background.jpg__'
....
+
Replace [filename]`__/opt/corp/background.jpg__` with the absolute path to the image file that you want to use as the default screen shield. Supported formats are PNG, JPG, JPEG, and TGA. Note that the screen shield scales your image if necessary to fit the screen.

. Update the system databases:
+
8.1.2. dconf の更新
. Users must log out and back in again before the system-wide settings take effect.

// Next time you lock the screen, the new Screen Shield will show in the background. In the foreground, time, date and the current day of the week will be displayed.

.Troubleshooting

* If the screen shield does not update:

.. Verify that you have updated the system databases:
+
8.1.3. dconf の更新
.. Try restarting GDM:
+
8.1.4. systemctl restart gdm.service
+
:leveloffset: +1

[WARNING]
--
////
Restarting GDM

This snippet explains the risks of restarting the `gdm` service. Include it next to all procedure steps that restart `gdm`.

This comment must stay inside the admonition block so that you can nest the snippet inside procedures.
////

Restarting the `gdm` service terminates all currently running GNOME sessions of all desktop users who are logged in. This might result in users losing unsaved data.
--

:leveloffset: 3


:leveloffset: 3

:context: {parent-context-of-customizing-desktop-backgrounds}


:leveloffset: 1

:leveloffset: +1

:_mod-docs-content-type: PROCEDURE

[id="customizing-the-branding-of-the-login-screen_{context}"]
= Customizing the branding of the login screen

[role="_abstract"]
You can change the logo that appears on the GNOME login screen (GDM) using a `dconf` profile.

.Prerequisites

* Prepare an image file in any of the supported formats: ANI, BPM, GIF, GTIFF, ICNS, ICO, JPEG, JPEG 2000, PCX, PNM, PBM, PGM, PPM, RAS, SVG, TGA, TIFF, WBMP, XBM, or XPM.
* The image must be around 48 pixels in height. If it is significantly larger, it will exceed the logo area.
* Store the image file in a location that the `gdm` user can access. For example, select a universally readable system directory such as `/opt/` or `/usr/local/`.

.Procedure

. Create the `/etc/dconf/db/gdm.d/01-override-logo` configuration file with the following content:
+
....
[org/gnome/login-screen]
logo='/path/to/logo.png'
....
+
Replace `__/path/to/logo.png__` with the full path to the image file that you want to use as the login screen logo.

. Update the system databases:
+
8.1.5. dconf の更新
.Verification

. Log out or otherwise switch to the login screen.

. Check if it displays the logo that you selected.

. If the logo does not update, restart GDM:
+
8.1.6. systemctl restart gdm
+
:leveloffset: +1

[WARNING]
--
////
Restarting GDM

This snippet explains the risks of restarting the `gdm` service. Include it next to all procedure steps that restart `gdm`.

This comment must stay inside the admonition block so that you can nest the snippet inside procedures.
////

Restarting the `gdm` service terminates all currently running GNOME sessions of all desktop users who are logged in. This might result in users losing unsaved data.
--

:leveloffset: 3

////
[role="_additional-resources"]
.Additional resources

* This section is optional.
* Provide a bulleted list of links to other closely-related material. These links can include `link:` and `xref:` macros.
* Use an unnumbered bullet (*) if the list includes only one step.
////

:leveloffset: 3

////
[role="_additional-resources"]
== Additional resources

* This section is optional.
* Provide a bulleted list of links to other closely-related material. These links can include `link:` and `xref:` macros.
* Use an unnumbered bullet (*) if the list includes only one step.
////

:context: {parent-context-of-customizing-desktop-appearance-and-branding}


:leveloffset!:

:leveloffset: +1

:parent-context-of-restricting-the-desktop-session: {context}

:_mod-docs-content-type: ASSEMBLY

[id="restricting-the-desktop-session_{context}"]
= Restricting the desktop session

:context: restricting-the-desktop-session

You can restrict and control various functionalities on the GNOME desktop environment. You can enforce specific configurations and restrictions to maintain system integrity and prevent unauthorized access.

:leveloffset: +1

:_mod-docs-content-type: PROCEDURE

[id="disabling-user-logout-and-user-switching_{context}"]
= Disabling user logout and user switching


Disabling user logout and user switching can improve security, prevent user errors, and enforce a specific workflow. This can mitigate unauthorized access to sensitive data and disruptions to the workflow caused by users accidentally logging out or switching to another user.

.Prerequisites

* Administrative access.

.Procedure

. Create a plain text `/etc/dconf/db/local.d/00-logout` keyfile in the `/etc/dconf/db/local.d/` directory with the following content:
+
....
[org/gnome/desktop/lockdown]
# Disable user logut
disable-log-out=true

# Disable user switching
disable-user-switching=true
....

. Create a new file under the `/etc/dconf/db/local.d/locks/` directory and list the keys or subpaths you want to lock down:
+
8.1.7. ユーザーのログアウトのロック
/org/gnome/desktop/lockdown/disable-log-out
8.1.8. ロックユーザーの切り替え
/org/gnome/desktop/lockdown/disable-user-switching
. Apply the changes to the system databases:
+
8.1.9. dconf の更新
:leveloffset: 3

:leveloffset: +1

:_mod-docs-content-type: PROCEDURE

[id="disabling-printing_{context}"]
= Disabling printing

Disabling printing can prevent unauthorized access to sensitive documents and potential breaches and safeguard confidential information.

.Prerequisites

* Administrative access.

.Procedure

. Create a plain text `/etc/dconf/db/local.d/00-printing` keyfile in the `/etc/dconf/db/local.d/` directory with the following content:
+
....
[org/gnome/desktop/lockdown]
# Disable printing
disable-printing=true
....

. Create a new file under the `/etc/dconf/db/local.d/locks/` directory and list the keys or subpaths you want to lock down:
+
....
# Lock printing
/org/gnome/desktop/lockdown/disable-printing
....

. Apply the changes to the system databases:
+
....
# dconf update
....

:leveloffset: 3

:leveloffset: +1

:_mod-docs-content-type: PROCEDURE

[id="disabling-filesaving_{context}"]
= Disabling filesaving

Disabling file saving can help to protect sensitive data from unauthorized access and protect against potential data leaks.

.Prerequisites

* Administrative access.

.Procedure

. Create a plain text `/etc/dconf/db/local.d/00-filesaving` keyfile in the `/etc/dconf/db/local.d/` directory with the following content:
+
....
[org/gnome/desktop/lockdown]
# Disable saving files on disk
disable-save-to-disk=true
....

. Create a new file under the `/etc/dconf/db/local.d/locks/` directory and list the keys or subpaths you want to lock down:
+
....
# Lock file saving
/org/gnome/desktop/lockdown/disable-save-to-disk
....

. Apply the changes to the system databases:
+
....
# dconf update
....

:leveloffset: 3

:leveloffset: +1

:_mod-docs-content-type: PROCEDURE

[id="disabling-the-command-prompt_{context}"]
= Disabling the command prompt

Disabling the command prompt can simplify user interactions with the system, prevent inexperienced users from executing potentially harmful commands that might cause system instability or data loss, and  reduce the risk of unauthorized changes to system settings or configurations.

.Prerequisites

* Administrative access.

.Procedure

. Create a plain text `/etc/dconf/db/local.d/00-lockdown` keyfile in the `/etc/dconf/db/local.d/` directory with the following content:
+
....
[org/gnome/desktop/lockdown]

# Disable command prompt
disable-command-line=true/etc/dconf/db/local.d/locks/ディレクトリーの下に新しいファイルを作成し、ロックダウンするキーまたはサブパスをリストします。# Lock command prompt /org/gnome/desktop/lockdown/disable-command-line変更をシステムデータベースに適用します。
# dconf update- この設定を有効にするには、ユーザーはログアウトしてから再度ログインする必要があります。
8.1.9.1. パーティション再構成の無効化
ディスク管理を制御するデフォルトのシステム設定をオーバーライドできます。
/usr/share/polkit-1/actions/org.freedesktop.udisks2.policy ファイルを直接変更しないでください。加えた変更は、次回のパッケージ更新時に置き換えられます。
前提条件
- 管理アクセスがある。
手順
/usr/share/polkit-1/actions/org.freedesktop.udisks2.policyファイルを/etc/share/polkit-1/actions/ディレクトリーにコピーします。# cp /usr/share/polkit-1/actions/org.freedesktop.udisks2.policy /etc/share/polkit-1/actions/org.freedesktop.udisks2.policy/etc/polkit-1/actions/org.freedesktop.udisks2.policyファイルで、不要なアクションを削除し、次の行を追加します。<action id="org.freedesktop.udisks2.modify-device"> <message>Authentication is required to modify the disks settings</message> <defaults> <allow_any>no</allow_any> <allow_inactive>no</allow_inactive> <allow_active>yes</allow_active> </defaults> </action>アクセスを root ユーザーのみに制限する場合は、
<allow_any>no</allow_any>を<allow_any>auth_admin</allow_any>に置き換えます。
8.1.9.2. セッションを 1 つのアプリケーションに制限する
GNOME セッションは、シングルアプリケーションモード (キオスクモードとも呼ばれます) で開始できます。このセッションでは、GNOME により、選択したアプリケーションのフルスクリーンウィンドウのみが表示されます。
8.1.9.2.1. シングルアプリケーションモード
シングルアプリケーションモードは、Mutter ウィンドウマネージャーを対話式キオスクに再設定する改変された GNOME セッションです。このセッションでは、特定の動作がロックされ、標準的なデスクトップの制限が強化されます。ユーザーは、管理者が選択した 1 つのアプリケーションのみと対話できます。
シングルアプリケーションモードは、次のような複数のユースケース向けに設定できます。
- 通信、娯楽、または教育の分野で
- セルフサービスマシンとして
- イベントマネージャーとして
- 登録ポイントとして
GNOME キオスクユーティリティーは、シングルアプリケーションモードの設定とセッションを提供します。
次のシングルアプリケーションセッションを利用できます。
- 検索アプライアンスセッション
-
このセッションは常に、
www.google.comWeb サイトで Mozilla Firefox Web ブラウザーを起動します。 - キオスクスクリプトセッション
- このセッションは、シェルスクリプトで指定した任意のアプリケーションを起動します。
8.1.9.2.2. 検索アプライアンスモードの有効化
この手順では、検索アプライアンスセッションをインストールして有効にします。これにより、GNOME セッションが Web ブラウザーの Google 検索エンジンに制限されます。
手順
GNOME キオスクパッケージをインストールします。
# dnf install gnome-kiosk gnome-kiosk-search-appliance- GNOME ログイン画面で、歯車ボタンメニューから Search Appliance Session を選択し、シングルアプリケーションユーザーとしてログインします。
- Mozilla Firefox ブラウザーがキオスクモードで全画面表示されます。ブラウザーには Google 検索ページが表示されます。
8.1.9.2.3. シングルアプリケーションモードの有効化
この手順では、キオスクスクリプトセッションをインストールして有効にします。これにより、GNOME セッションが選択した 1 つのアプリケーションに制限されます。
手順
GNOME キオスクパッケージをインストールします。
# dnf install gnome-kiosk gnome-kiosk-script-session- GNOME ログイン画面で、歯車ボタンメニューから Kiosk Script Session を選択し、シングルアプリケーションユーザーとしてログインします。
gedit テキストエディターが全画面表示されます。シングルアプリケーションセッションで実行するアプリケーションを設定するシェルスクリプトが表示されます。
シェルスクリプトを編集し、シングルアプリケーションセッションで起動するアプリケーションを入力します。
たとえば、Mozilla Firefox ブラウザーを起動するには、次の内容を入力します。
#!/usr/bin/sh firefox --kiosk https://example.org- スクリプトファイルを保存します。
gedit ウィンドウを閉じます。
セッションが終了し、選択したアプリケーションで再開します。
- 次にシングルアプリケーションセッションにログインすると、選択したアプリケーションが実行されます。
8.1.9.3. GNOME でサウンドを設定する
GNOME でサウンドボリュームおよびその他のサウンドオプションを設定できます。
8.1.9.3.1. GNOME のサウンド設定ツール
RHEL 9 では、PipeWire サウンドサーバーがサウンド出力と入力を処理します。PipeWire により、プログラムは pipewire デーモンを使用して音声を出力できるようになります。
サウンドを設定するには、GNOME で以下のグラフィカルアプリケーションのいずれかを使用できます。
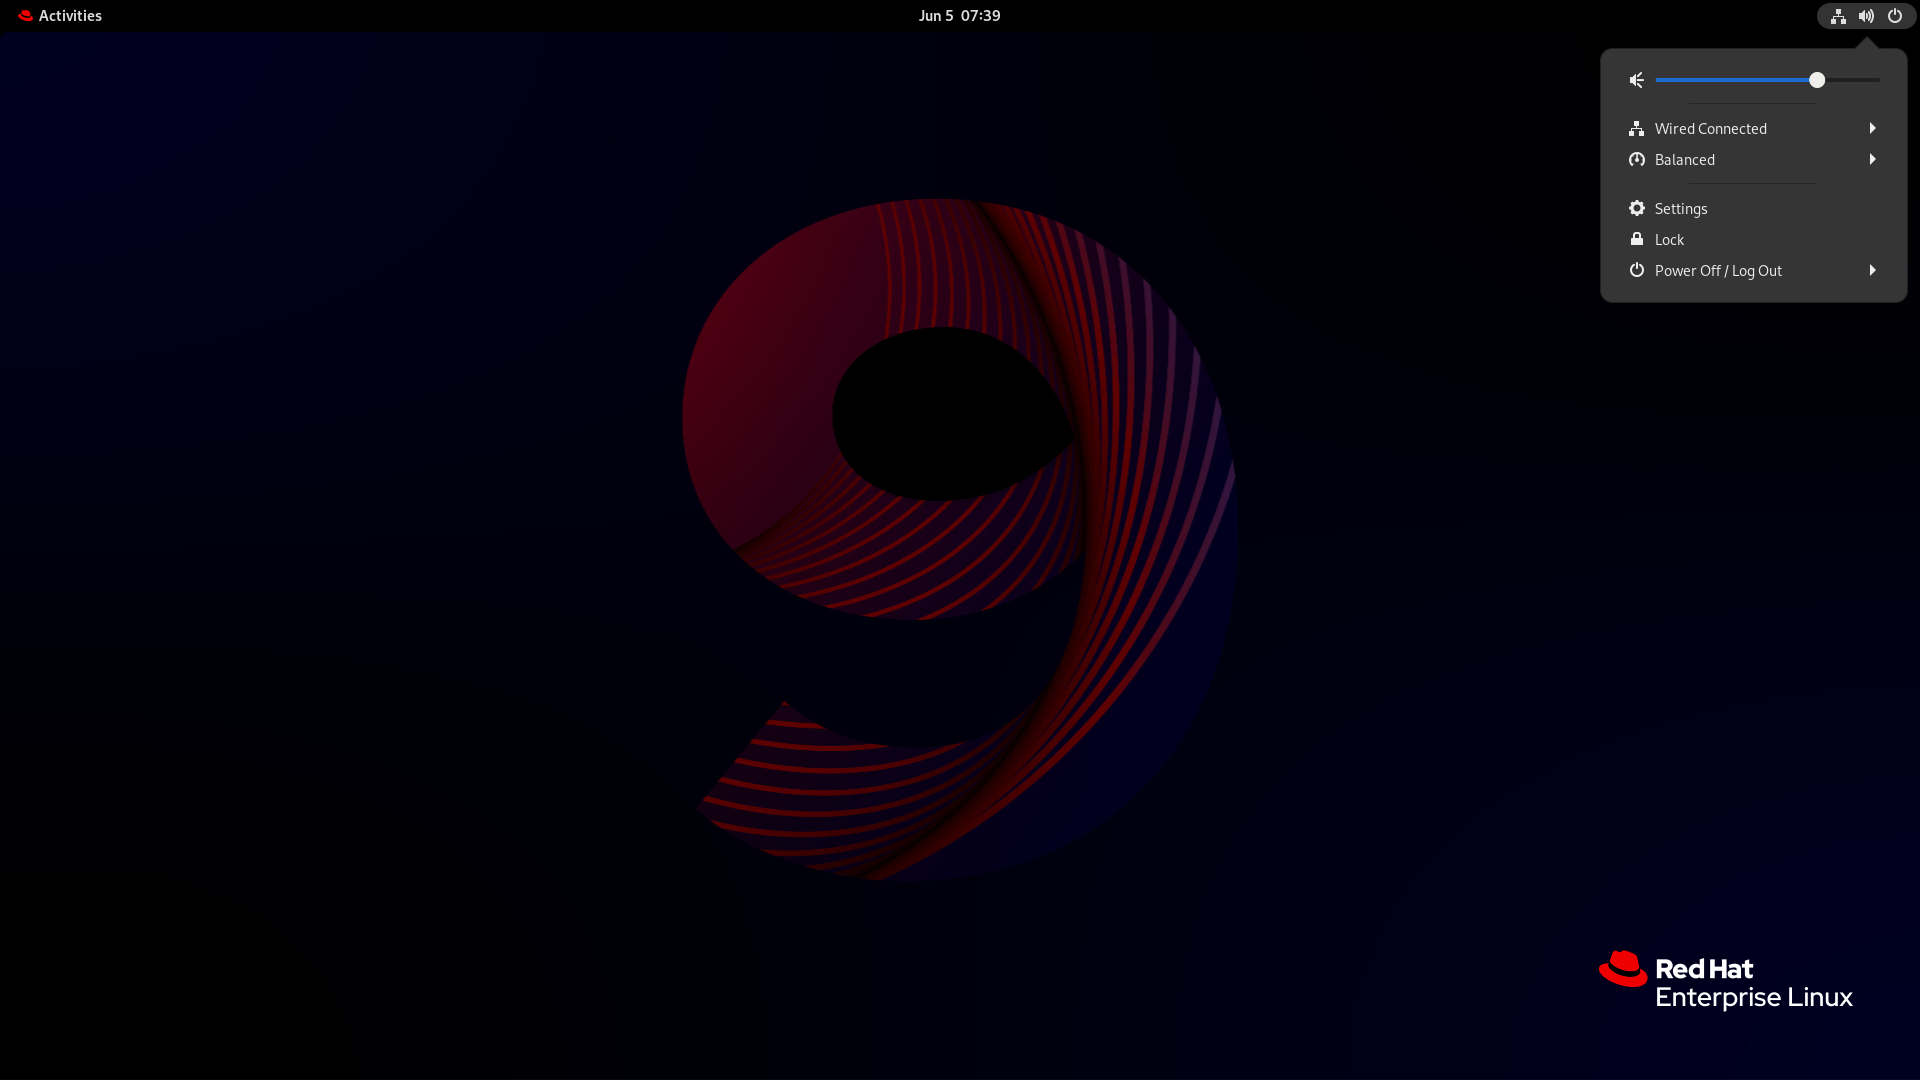
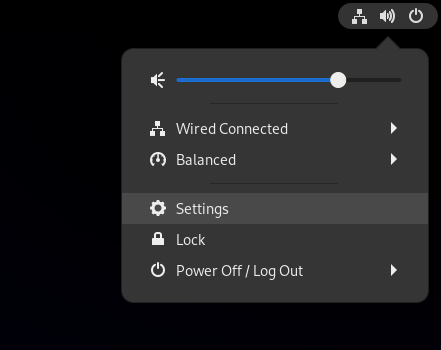
システムメニュー
システムメニュー は、画面の右上隅にあります。サウンドバーからサウンドの出力または入力の強弱のみを設定できます。入力サウンドのサウンドバーは、テレカンファレンスツールなど、内部マイク (内蔵オーディオ) を使用するアプリケーションを実行してる場合にのみ利用できます。
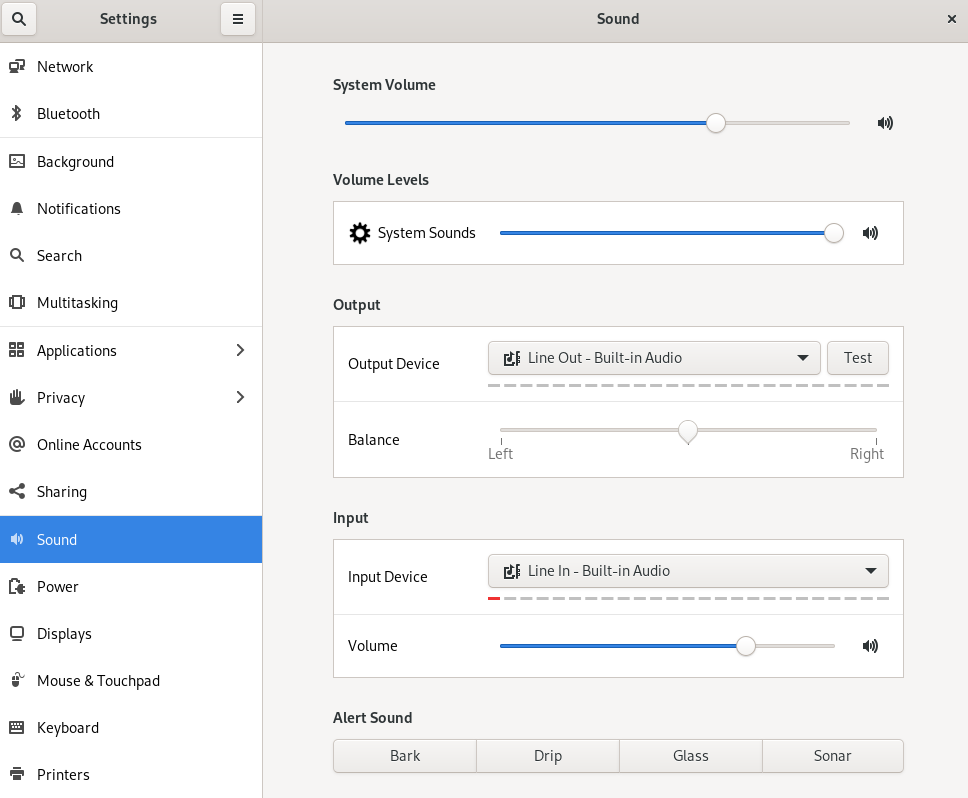
Settings
Settings には、サウンドを設定するためのその他の一般的なオプションがあります。
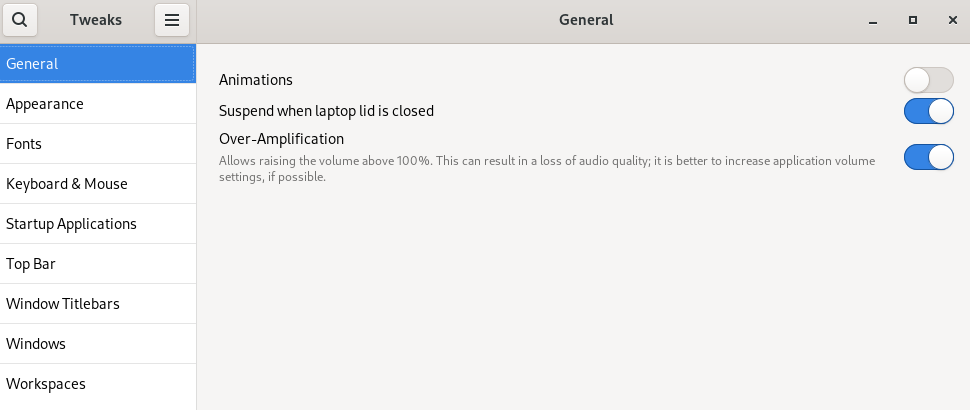
Tweak
Tweaks アプリケーションでは、ボリュームの過剰増幅のみを設定できます。
8.1.9.3.2. Settings でサウンド設定にアクセス
この手順により、Settings のサウンド設定画面が開きます。
Settings を起動します。
GNOME でのアプリケーションの起動 で説明されているアプローチのいずれかを使用できます。また、そのアイコンをクリックして システムメニュー から起動することもできます。
- Settings で、左側の垂直バーから Sound を選択します。
8.1.9.3.3. Settings のサウンドオプション
Settings の Sound メニューから、次のサウンドオプションを設定できます。
- Volume Levels
- Volume levels セクションでは、サウンドを処理できる実行中のアプリケーションがすべて表示され、特定のアプリケーションのサウンドの強弱の調整できます。
- 出力 と 入力
- Output セクションと Input セクションには、現在接続されているすべてのビルトインオーディオデバイスと外部オーディオデバイスが表示されます。
- Alert sound
- Alert sound セクションには、システムオーディオアラートのさまざまなテーマが表示されます。
サウンド設定画面の Output セクション
8.1.9.4. 視覚障害のあるユーザーのアクセシビリティーの有効化
システム管理者は、視覚障害のあるユーザーをサポートするように、デスクトップ環境を設定できます。
アクセシビリティーを有効にするには、以下の手順を実行します。
8.1.9.4.1. アクセシビリティー機能を提供するコンポーネント
RHEL 9 デスクトップでは、Orca スクリーンリーダーにより、視覚障害のあるユーザーのアクセシビリティーを確保しています。Orca は、デフォルトの RHEL インストールに含まれています。
Orca は、画面から情報を読み取り、以下のコンポーネントを使用してその情報をユーザーに伝えます。
- スピーチディスパッチャー
- Orca は、スピーチディスパッチャー を使用して、音声シンセサイザーと通信します。スピーチディスパッチャー は、さまざまな音声合成バックエンドをサポートし、他のアプリケーションからのメッセージが Orca からのメッセージに割り込むのを防ぐとともに、その他の機能を提供します。
- スピーチシンセサイザー
- 音声出力を提供します。デフォルトの音声シンセサイザーは eSpeak-NG です。
- 点字ディスプレイ
- 触覚出力を提供します。この機能は、BRLTTY サービスにより実現されています。
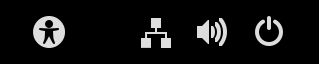
8.1.9.4.2. アクセシビリティーメニューの有効化
トップパネルの Accessibility menu アイコンを有効にすると、複数のアクセシビリティーオプションを備えたメニューが提供されます。
手順
- Settings アプリケーションを開きます。
- Accessibility を選択します。
Always Show Accessibility Menu アイテムを有効にします。
設定でアクセシビリティーメニューを有効にする
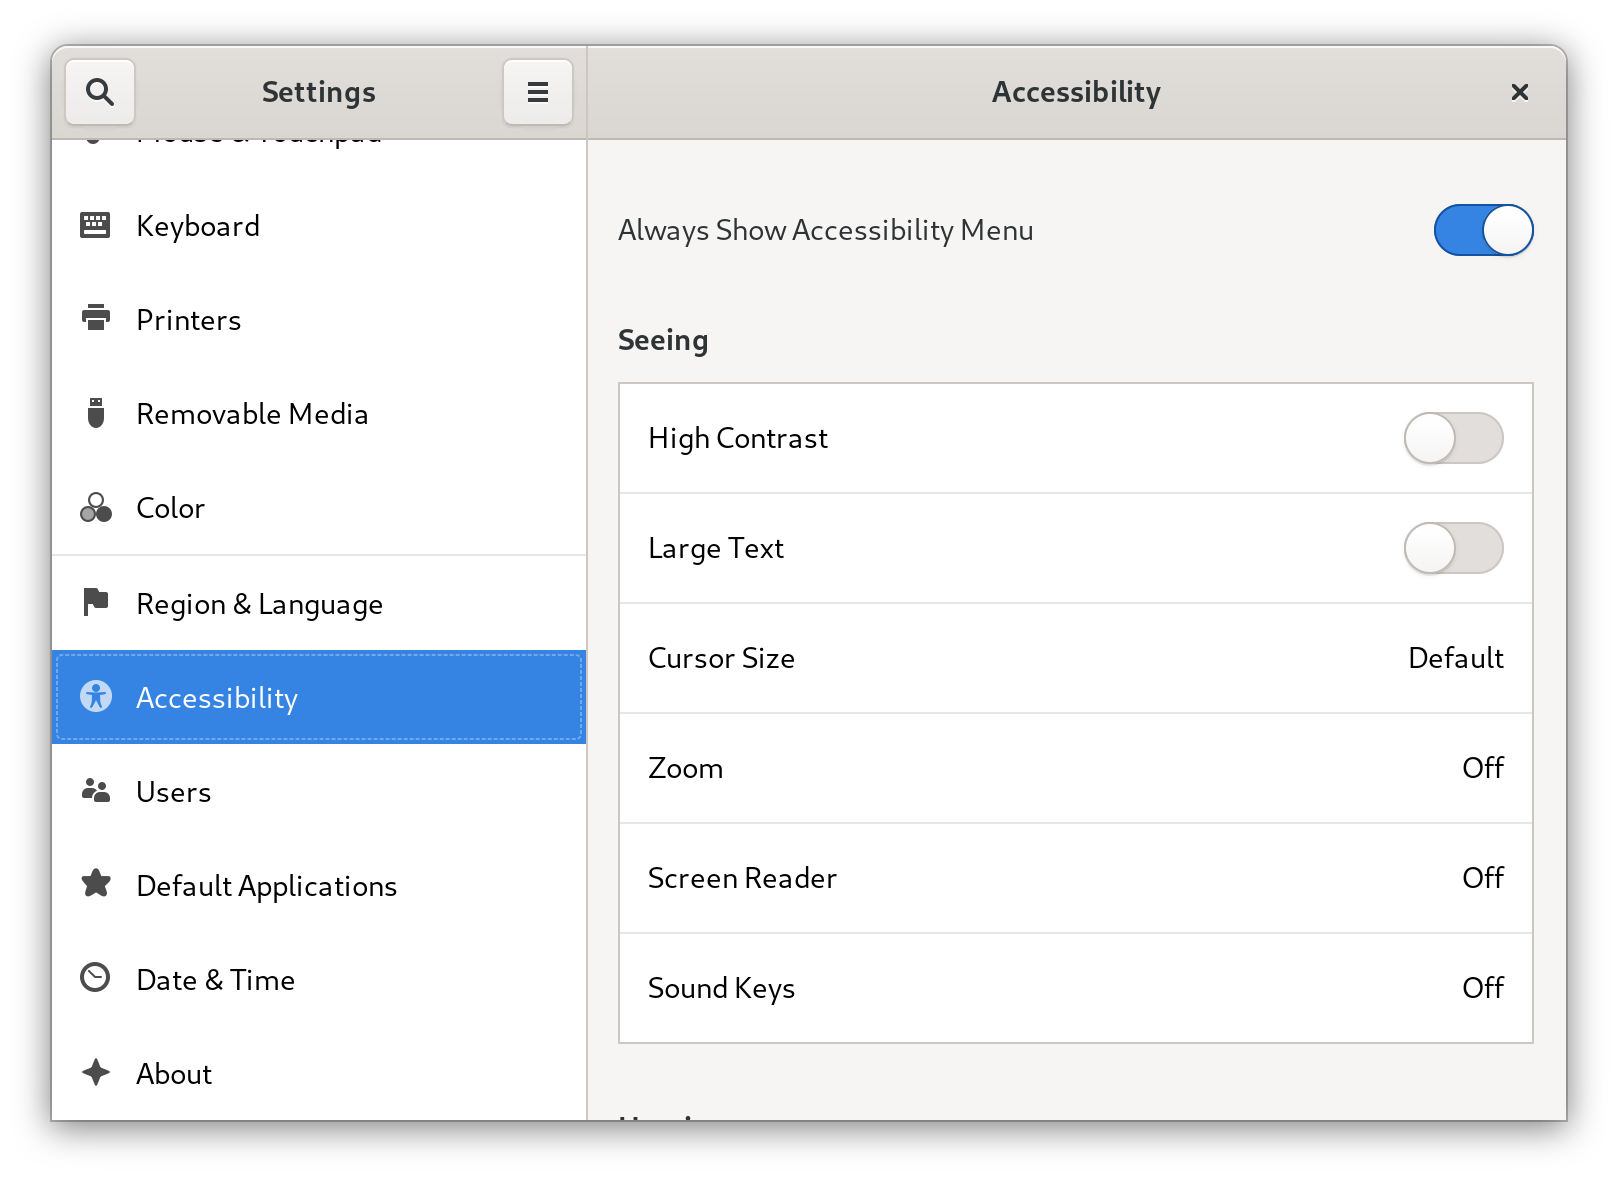
検証
このメニューのすべてのオプションがオフになっている場合でも、Accessibility menu アイコンがトップバーに表示されることを確認します。
8.1.9.4.3. スクリーンリーダーの有効化
デスクトップ環境で Orca スクリーンリーダーを有効にできます。スクリーンリーダーが画面に表示されたテキストを読み上げるようになり、アクセシビリティーが向上します。
手順
次のいずれかの方法を使用して、スクリーンリーダーを有効にします。
- Super+Alt+S キーボードショートカットを押します。
- トップパネルに Universal Access メニューが表示されている場合は、メニューで Screen Reader を選択します。
検証
- テキストコンテンツを含むアプリケーションを開きます。
- スクリーンリーダーがアプリケーション内のテキストを読み上げることを確認します。
8.1.9.4.4. 点字ディスプレイデバイスの有効化
点字ディスプレイは、brltty サービスを使用して視覚障害のあるユーザーに触覚出力を提供するデバイスです。
点字ディスプレイを正しく機能させるためには、以下の手順を実行します。
8.1.9.4.4.1. サポートされている点字ディスプレイデバイスのタイプ
RHEL 9 では、次のタイプの点字ディスプレイデバイスがサポートされています。
| 点字デバイスのタイプ | タイプの構文 | 注記 |
|---|---|---|
| シリアルデバイス |
|
相対パスは |
| USB デバイス |
|
ここでの括弧 ( |
| Bluetooth デバイス |
|
8.1.9.4.4.2. brltty サービスの有効化
点字ディスプレイを有効にするには、システムの起動時に brltty サービスが自動的に起動するように設定します。デフォルトでは、brltty は無効になっています。
前提条件
brlttyパッケージがインストールされていることを確認します。# dnf install brlttyオプションで、
brlttyの音声合成サポートをインストールできます。# dnf install brltty-espeak-ng
手順
システムの起動時に
brlttyサービスが起動するように設定します。# systemctl enable --now brltty
検証
- システムを再起動します。
brlttyサービスが実行されていることを確認します。# systemctl status brltty ● brltty.service - Braille display driver for Linux/Unix Loaded: loaded (/usr/lib/systemd/system/brltty.service; enabled; vendor pres> Active: active (running) since Tue 2019-09-10 14:13:02 CEST; 39s ago Process: 905 ExecStart=/usr/bin/brltty (code=exited, status=0/SUCCESS) Main PID: 914 (brltty) Tasks: 3 (limit: 11360) Memory: 4.6M CGroup: /system.slice/brltty.service └─914 /usr/bin/brltty
8.1.9.4.4.3. 点字ディスプレイデバイスのユーザーの許可
点字ディスプレイデバイスを使用するには、点字ディスプレイデバイスの使用を許可するユーザーを設定する必要があります。
手順
/etc/brltty.confファイルで、keyfileが/etc/brlapi.keyに設定されていることを確認します。api-parameters Auth=keyfile:/etc/brlapi.keyこれはデフォルト値です。組織によっては変更されている可能性があります。
選択したユーザーを
brlapiグループに追加して許可します。# usermod --append -G brlapi user-name
8.1.9.4.4.4. 点字ディスプレイデバイスのドライバーの設定
brltty サービスは、点字ディスプレイデバイスのドライバーを自動的に選択します。自動検出に失敗したり、時間がかかりすぎる場合は、ドライバーを手動で設定できます。
前提条件
- ドライバーの自動検出に失敗したか、時間がかかりすぎている。
手順
-
/etc/brltty.conf設定ファイルを開きます。 -
点字ディスプレイデバイスのドライバーを指定する
braille-driverディレクティブを見つけます。 braille-driverディレクティブで、必要なドライバーの識別コードを指定します。/etc/brltty.confで提供されるリストから、必要なドライバーの識別コードを選択します。たとえば、XWindow ドライバーを使用するには、次のようにします。# XWindow braille-driver xw複数のドライバーを設定するには、コンマで区切ってリストします。すると、自動検出により、リストされたドライバーから選択されます。
8.1.9.4.4.5. 点字ディスプレイデバイスの接続
brltty サービスは、点字ディスプレイデバイスに自動的に接続します。自動検出に失敗した場合は、接続方法を手動で設定できます。
前提条件
- 点字ディスプレイデバイスがシステムに物理的に接続されている。
- 自動接続に失敗した。
手順
デバイスがシリアル USB 変換アダプターで接続されている場合は、デバイスプラグのカーネルメッセージで実際のデバイス名を見つけます。
# journalctl --dmesg | fgrep ttyUSB-
/etc/brltty.conf設定ファイルを開きます。 -
braille-deviceディレクティブを見つけます。 braille-deviceディレクティブで、接続を指定します。また、複数のデバイスをコンマで区切って設定することもできます。その場合、各デバイスが順番に検索されます。
以下に例を示します。
例8.1 最初のシリアルデバイスの設定
braille-device serial:ttyS0例8.2 点字ドライバーに一致する最初の USB デバイスの設定
braille-device usb:例8.3 シリアル番号による特定の USB デバイスの設定
braille-device usb:nnnnn例8.4 シリアル USB 変換アダプターの設定
以前にカーネルメッセージで見つけたデバイス名を使用します。
braille-device serial:ttyUSB0注記braille-deviceをusb:に設定しても、シリアル USB 変換アダプターでは機能しません。例8.5 アドレスによる特定の Bluetooth デバイスの設定
braille-device bluetooth:xx:xx:xx:xx:xx:xx
8.1.9.4.4.6. テキストテーブルの設定
brltty サービスは、システム言語に基づいて、テキストテーブルを自動的に選択します。システム言語が、読み上げるドキュメントの言語と同じでない場合は、テキストテーブルを手動で設定できます。
手順
-
/etc/brltty.confファイルを編集します。 選択したテキストテーブルのコードを特定します。
/etc/brltty/Text/ディレクトリーに、利用可能なすべてのテキストテーブルがあります。コードは、ファイル接尾辞を除いたテキストテーブルのファイル名です。選択したテキストテーブルのコードを
text-tableディレクティブで指定します。たとえば、アメリカ英語のテキストテーブルを使用するには、次を指定します。
text-table en_US # English (United States)
8.1.9.4.4.7. 短縮形テーブルの設定
点字ディスプレイデバイスで短縮形をエンコードするために使用するテーブルを選択できます。特定の短縮形テーブルへの相対パスは、/etc/brltty/Contraction/ ディレクトリー内に保存されます。
テーブルが指定されていない場合、brltty サービスは短縮形テーブルを使用しません。
手順
/etc/brltty.confファイルのリストから短縮形テーブルを選択します。たとえば、グレード 2 のアメリカ英語の短縮形テーブルを使用するには、次を指定します。
contraction-table en-us-g2 # English (US, grade 2)
8.1.9.5. GNOME での特殊文字の使用
GNOME では、Compose キーを使用して、キーボードで使用できないものも含め、さまざまな言語や記号セットの特殊文字を入力できます。さまざまな言語や記号セットの特殊文字を入力および表示できるため、GNOME ではさまざまな文字セットを簡単に操作できます。
このような特殊文字を入力するには、キーボードの既存のキーの 1 つを Compose キーとして定義します。Compose キーを有効にすると、複数のキーを特定の順序で押すことで、特殊文字や記号を入力できるようになります。
8.1.9.5.1. 個々のユーザーの Compose キーを有効にする
ユーザーとしてログインしているときに、設定メニューから Compose キーを有効にできます。
手順
- 画面の左上隅にある Activities ボタンをクリックします。
- Settings と入力し、Settings アイコンをクリックして Settings アプリケーションを開きます。
- Settings ウィンドウで、左側のサイドバーにある Keyboard をクリックします。
- 下にスクロールして、Compose Key オプションを選択します。
- スライダーを切り替えて、Compose Key を有効にします。
- Compose キーとして使用するキーを選択します。
- Compose キーを選択したら、Settings ウィンドウを閉じます。
これで、Compose キーが有効になります。Compose キーを押してから対応する一連のキーを押すことで、特殊文字や記号を入力できます。
特殊文字の作成に使用できるマルチキーシーケンスを確認するには、次のコマンドを使用します。
$ grep "<Multi_key>" /usr/share/X11/locale/en_US.UTF-8/Compose検証
-
Compose キーを押して、入力する特殊文字の一連のキーを入力します。たとえば、
©と入力するには、Compose キー を押してから o と c を押します。
8.1.9.5.2. 別のユーザーの Compose キーを有効にする
gsettings ユーティリティーを使用して、別のユーザーの Compose キーを有効にできます。
前提条件
- 管理アクセスがある。
手順
すべてのクライアントが X サーバーに接続できるようにします。
# xhost +次のコマンドを実行して Compose キーを設定します。
# su - <username> -c "gsettings set org.gnome.desktop.input-sources xkb-options \"['compose:<compose_key>']\""<username>は、Compose キーを有効にするユーザーのユーザー名に置き換えます。<compose_key>は、Compose キーとして使用するキーに置き換えます。raltオプションを使用すると、右の Alt キーを Compose キーとして指定できます。キーボードに Compose キーを設定するのに使用できる他の Compose キーオプションを表示するには、次のコマンドを使用します。
$ grep compose /usr/share/X11/xkb/rules/evdev.lstアクセス制御をリセットします。
# xhost -
検証
別のユーザーの Compose キー設定を確認するには、次を使用します。
# su - <username> -c "gsettings get org.gnome.desktop.input-sources xkb-options"<username>は、Compose キー設定を確認するユーザーのユーザー名に置き換えます。
8.1.9.5.3. すべてのユーザーの Compose キーを有効にする
dconf 設定ファイルを作成することで、すべてのユーザーの Compose キーを有効にできます。
前提条件
- 管理アクセスがある。
手順
次の内容で
/etc/dconf/db/local.d/00-compose-key設定ファイルを作成します。[org/gnome/desktop/input-sources] xkb-options=['compose:<compose_key>']<compose_key>は、Compose キーとして使用するキーに置き換えます。raltオプションを使用すると、右の Alt キーを Compose キーとして指定できます。キーボードに Compose キーを設定するのに使用できる他の Compose キーオプションを表示するには、次のコマンドを使用します。
$ grep compose /usr/share/X11/xkb/rules/evdev.lst新しい設定で
dconfデータベースを更新します。# dconf update- 変更を有効にするには、システムを再起動するか、ログアウトして GNOME セッションに再度ログインします。
これで、システムの全ユーザーの Compose キーが有効になります。Compose キーを押してから対応する一連のキーを押すことで、特殊文字や記号を入力できます。
検証
-
Compose キーを押して、入力する特殊文字の一連のキーを入力します。たとえば、
©と入力するには、Compose キー を押してから o と c を押します。
8.1.9.5.4. 特殊文字用の Compose キーのシーケンス
次の表は、GNOME でダイアクリティカルマークまたはアクセント記号を含む特殊文字を入力するために使用する Compose キーのシーケンスを示しています。各行に、Compose キーのシーケンスと対応する結果が表示されています。
| Compose キーのシーケンス | 結果 |
|---|---|
| Compose+'+文字 | アキュートアクセント付きの文字 (é、á、ñ) |
| Compose+`+文字 | グレイヴアクセント付きの文字 (è、ù、ò) |
| Compose+"+文字 | ウムラウトまたは分音符付きの文字 (ë、ö、ü) |
| Compose+-+文字 | マクロン付きの文字 (ā、ē、ō) |
| Compose+/+文字 | ストロークまたはダイアクリティカルマーク付きの文字 (ø、ł、ǿ) |
| Compose+=+文字 | 二重アキュートアクセント付きの文字 (ő、ű、ȁ) |
| Compose+.+文字 | 上ドット付きの文字 (ȧ、ċ、ḋ) |
| Compose+,+文字 | セディージャ付きの文字 (ç、ş、ņ) |
| Compose+^+文字 | 曲折アクセント付きの文字 (â、ê、î) |
| Compose+~+文字 | チルダアクセント付きの文字 (ã、ñ、õ) |
8.1.9.6. コマンドラインを使用した GNOME Shell 拡張機能の管理
gnome-extensions ユーティリティーは、ターミナルから GNOME Shell 拡張機能を管理できるようにするコマンドラインツールです。拡張機能のリスト表示、インストール、有効化、無効化、削除、および情報の取得を行うためのさまざまなコマンドを提供します。
各 GNOME Shell 拡張機能には、gnome-extensions list コマンドで一覧表示されている UUID (Universally Unique Identifier)があります。
手順
インストールされている GNOME Shell 拡張機能をリスト表示するには、次のコマンドを使用します。
$ gnome-extensions listGNOME Shell 拡張子をインストールするには、次のコマンドを使用します。これは、( GNOME 拡張機能からダウンロードした
.zipファイルから)拡張アーカイブのファイル名を使用します。$ gnome-extensions install <zip_file>GNOME Shell 拡張機能を有効にするには、次のコマンドを使用します。
$ gnome-extensions enable <UUID>GNOME Shell 拡張機能に関する情報を表示するには、次のコマンドを使用します。
$ gnome-extensions info <UUID>GNOME Shell 拡張機能を無効にするには、次のコマンドを使用します。
$ gnome-extensions disable <UUID>GNOME Shell 拡張機能を削除するには、次のコマンドを使用します。
$ gnome-extensions uninstall <UUID>
<UUID> は、インストールする GNOME Shell 拡張機能に割り当てられている一意の識別子に置き換えます。
8.1.9.7. GNOME Shell 拡張機能の有効化と適用
GNOME Shell 拡張機能は、GNOME デスクトップ環境の機能と外観を強化するアドオンです。ユーザーは、自分のデスクトップセッションまたはシステム上のすべてのユーザーに対して拡張機能を有効にできます。
8.1.9.7.1. システム全体での GNOME Shell 拡張機能の有効化
すべてのユーザーに対して GNOME 拡張機能を自動的に有効にすると、個別にインストールする必要がなくなります。拡張機能をパーソナライズしている既存のユーザーには影響しません。
前提条件
- 管理アクセスがある。
手順
- GNOME Extensions Web サイトから拡張機能のアーカイブをダウンロードします。
アーカイブを
/usr/share/gnome-shell/extensionsディレクトリーに展開します。# unzip -q <extension-file.zip> -d /usr/share/gnome-shell/extensions/<extension-file.zip>は、拡張機能の zip ファイルの名前に置き換えます。パーミッションを調整して、すべてのユーザーが拡張機能のファイルを読み取り、実行できるようにします。
# chmod -R 755 /usr/share/gnome-shell/extensions/<extension-directory>/<extension-directory>は、拡張機能のディレクトリーの名前に置き換えます。次の内容を含む新しい
/etc/dconf/db/local.d/00-extensionsファイルを作成します。[org/gnome/shell] enabled-extensions=['myextension1@myname.example.com', 'myextension2@myname.example.com']UUID (
myextension1@myname.example.com、myextension2@myname.example.com) は、有効にする UUID に置き換えます。拡張機能の UUID は、GNOME Shell Extensions Web サイトのページで確認できます。変更をシステムデータベースに適用します。
# dconf update
これらの手順を完了すると、指定した拡張機能が、システム上のすべての新規ユーザーに対してデフォルトで有効になります。
8.1.9.7.2. GNOME Shell 拡張機能の制限
特定の GNOME Shell 拡張機能をロックダウンすることで、所定の拡張機能のセットをすべてのユーザーに一貫して提供できます。必須の拡張機能のセットを設定し、ユーザーによる変更を防止できます。指定した拡張機能はすべてのユーザーに必須となります。また、定義済みの設定に準拠させるために、Looking Glass ツールが無効になります。
前提条件
- 管理アクセスがある。
手順
次の内容を含む新しい
/etc/dconf/db/local.d/00-extensionsファイルを作成します。[org/gnome/shell] enabled-extensions=['myextension1@myname.example.com', 'myextension2@myname.example.com'] development-tools=falseUUID (
myextension1@myname.example.com、myextension2@myname.example.com) は、有効にする UUID に置き換えます。拡張機能の UUID は、GNOME Shell Extensions Web サイトのページで確認できます。ユーザーがこの設定を変更できないようにするには、次の内容を含む新しい
/etc/dconf/db/local.d/locks/extensionsファイルを作成します。/org/gnome/shell/enabled-extensions /org/gnome/shell/development-tools変更をシステムデータベースに適用します。
# dconf update
org.gnome.shell.enabled-extensions ファイルにリストされていない拡張機能は GNOME Shell によってロードされないため、ユーザーはその拡張機能を使用できません。