このコンテンツは選択した言語では利用できません。
Chapter 20. JMX Navigator
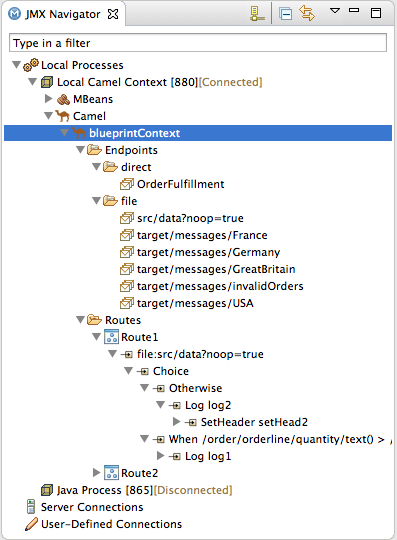
The JMX Navigator view, shown in Figure 20.1, “JMX Navigator view”, displays all processes that are running in your application and it drives all interactions with the monitoring and testing features. Other areas of the Fuse Integration perspective adapt to display information related to the node selected in the JMX Navigator view. In the JMX Navigator view, its context menu provides the commands needed to activate route tracing and to add JMS destinations.
Figure 20.1. JMX Navigator view
By default, the JMX Navigator view discovers all JMX servers running on the local machine and lists them under the following categories:
- Local Processes
- Server Connections
- User-Defined Connections
You can add other JMX servers by using a server’s JMX URL. For details, see Section 20.2, “Adding a JMX server”.
20.1. Viewing Processes in JMX
Overview
The JMX Navigator view lists all known processes in a series of trees. The root for each tree is a JMX server.
The first tree in the list is a special Local Processes tree that contains all JMX servers that are running on the local machine. You must connect to one of the JMX servers to see the processes it contains.
Viewing processes in a local JMX server
To view information about processes in a local JMX server:
- In the JMX Navigator view, expand Local Processes.
- Under Local Processes, double-click one of the top-level entries to connect to it.
-
Click the
 icon that appears next to the entry to display a list of its components that are running in the JVM.
Viewing processes in alternate JMX servers
To view information about processes in an alternate JMX server:
- Section 20.2, “Adding a JMX server” the JMX server to the JMX Navigator view.
-
In the JMX Navigator view, expand the server’s entry by using the
 icon that appears next to the entry. This displays a list of that JMX server’s components that are running in the JVM.
20.2. Adding a JMX server
Overview
In the JMX Navigator view, under the Local Processes branch of the tree, you can see a list of all local JMX servers. You may need to connect to specific JMX servers to see components deployed on other machines.
To add a JMX server, you must know the JMX URL of the server you want to add.
Procedure
To add a JMX server to the JMX Navigator view:
-
In the JMX Navigator view, click New Connection
 .
.
- In the Create a new JMX connection wizard, select Default JMX Connection.
- Click Next.
- Select the Advanced tab.
In the Name field, enter a name for the JMX server.
The name can be any string. It is used to label the entry in the JMX Navigator tree.
- In the JMX URL field, enter the JMX URL of the server.
- If the JMX server requires authentication, enter your user name and password in the Username and Password fields.
Click Finish.
The new JMX server appears as a branch in the User-Defined Connections tree.
