第9章 JUnit を使用したルートのテスト
このチュートリアルでは、New Camel Test Case ウィザードを使用してルートのテストケースを作成し、ルートをテストする方法を示します。
概要
New Camel Test Case ウィザードは、定型的な JUnit テストケースを生成します。ルートを作成または変更する場合 (たとえば、プロセッサーを追加する場合)、作成または変更したルートに固有の期待値とアサーションを追加するために、生成されたテストケースを作成または変更する必要があります。これにより、テストがルートに対して有効であることが保証されます。
ゴール
このチュートリアルでは、次のタスクを完了します。
-
JUnit テストケースを保存する
/src/test/フォルダーを作成する -
ZooOrderAppプロジェクトの JUnit テストケースを生成する - 新しく生成された JUnit テストケースを変更します
-
ZooOrderAppプロジェクトのpom.xmlファイルを変更する -
新しい JUnit テストケースで
ZooOrderAppを実行する - 出力を観察します
前提条件
このチュートリアルを開始するには、次のいずれかの結果である ZooOrderApp プロジェクトが必要です。
8章ルートを介したメッセージのトレースチュートリアルを完了します。
または
-
2章環境の設定チュートリアルを完了し、「リソースファイルについて」に記載されているように、プロジェクトの
blueprint.xmlファイルを、提供されるblueprintContexts/blueprint3.xmlファイルに置き換える。
Project Explorer で、
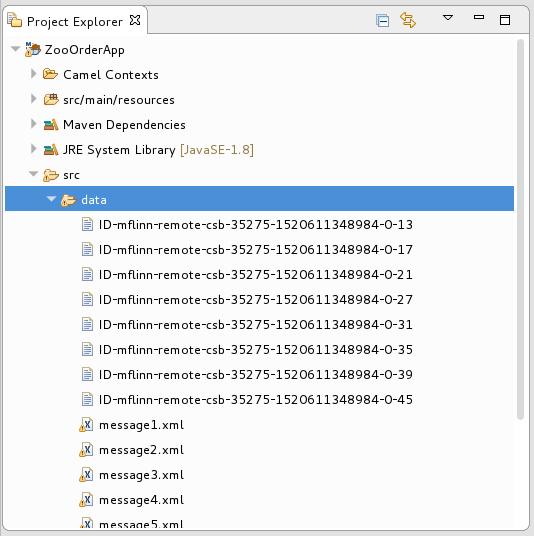
ZooOrderAppプロジェクトの/src/data/ディレクトリーおよび/target/messages/サブディレクトリーからトレースにより生成されたメッセージを削除します。トレースにより生成されたメッセージは、ID-接頭辞で始まります。例えば、図9.1「トレースで生成されたメッセージ」トレースによって生成された 8 つのメッセージを示します。図9.1 トレースで生成されたメッセージ
トレースで生成されたすべてのメッセージをバッチで選択し、右クリックして Delete を選択します。
src/test フォルダーの作成
ZooOrderApp プロジェクトの JUnit テストケースを作成する前に、ビルドパスに含まれるフォルダーを作成する必要があります。
-
Project Explorer で
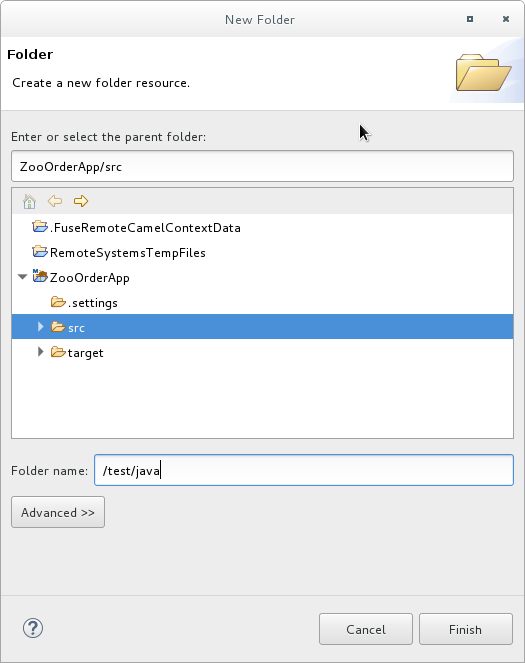
ZooOrderAppプロジェクトを右クリックし、NewFolder を選択します。 New Folder ダイアログで、プロジェクトツリーペインで
ZooOrderAppノードを展開し、srcフォルダーを選択します。ZooOrderApp/srcが Enter or select the parent folder フィールドに表示されるのを確認してください。Folder name に
/test/javaを入力します。Finish をクリックします。
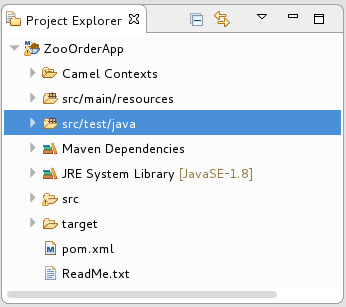
Project Explorer では、新しい
src/test/javaフォルダーがsrc/main/resourcesフォルダーの下に表示されます。新しい
/src/test/javaフォルダーがビルドパスに含まれていることを確認します。-
Project Explorer で
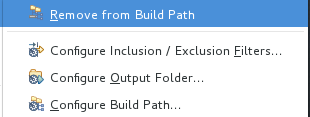
/src/test/javaフォルダーを右クリックし、コンテキストメニューを開きます。 ビルドパスを選択して、メニューオプションを表示します。
Remove from Build Path のメニューオプションで、
/src/test/javaフォルダーが現在ビルドパスに含まれていることが確認できます。
-
Project Explorer で
JUnit テストケースの作成
ZooOrderApp プロジェクトの JUnit テストケースを作成するには、以下を実行します。
-
Project Explorer で
src/test/javaを選択します。 右クリックして、New
Camel Test Case を選択します。 -
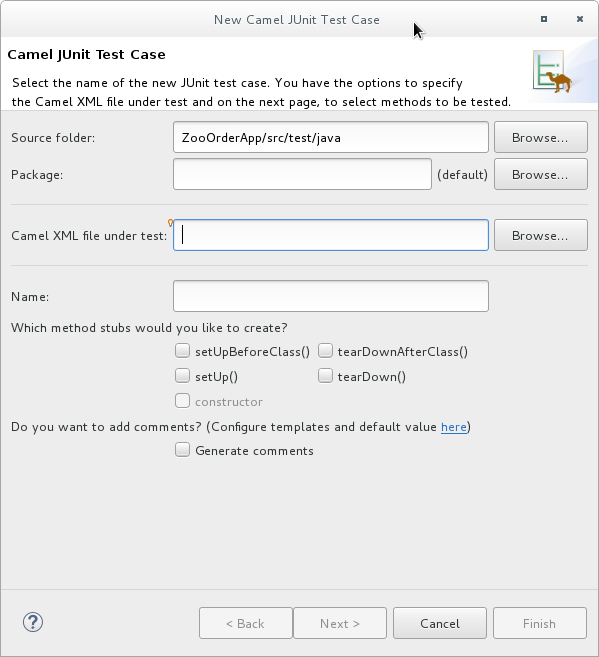
Camel JUnit Test Case ウィザードで、
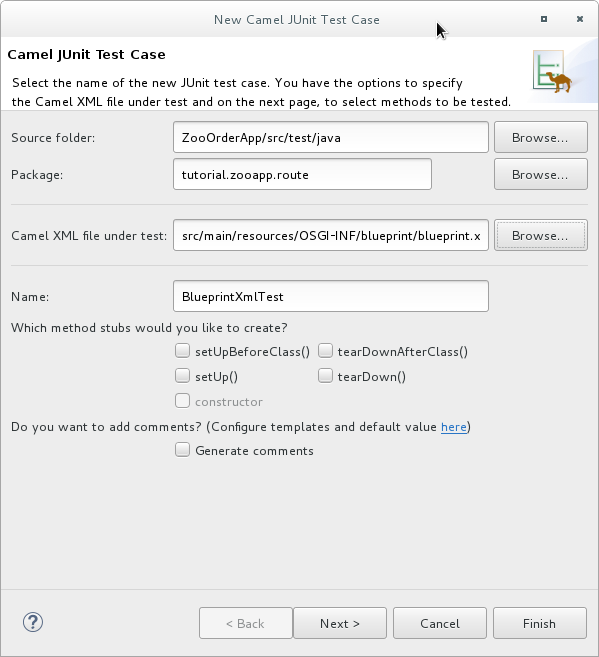
Source folderフィールドにZooOrderApp/src/test/javaが含まれるようにします。適切なフォルダーを見つけるには、をクリックします。 -
Package フィールドに
tutorial.zooapp.routeと入力します。このパッケージには、新しいテストケースが含まれます。 Camel XML file under test フィールドで、
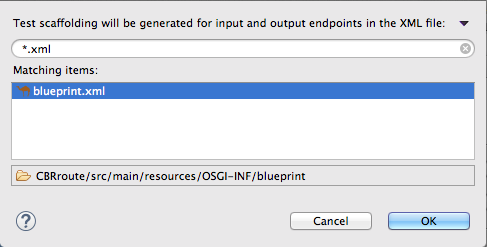
 をクリックし、XML ファイルをフィルターするように設定されたファイルエクスプローラーを開き、
ZooOrderAppプロジェクトのblueprint.xmlファイルを選択します。OK をクリックします。Name フィールドのデフォルトは BlueprintXmlTest です。
Next をクリックして、Test Endpoints ページを開きます。
デフォルトでは、すべてのエンドポイントが選択され、テストケースに含まれます。
Finish をクリックします。
注記プロンプトが表示されたら、ビルドパスに JUnit を追加します。
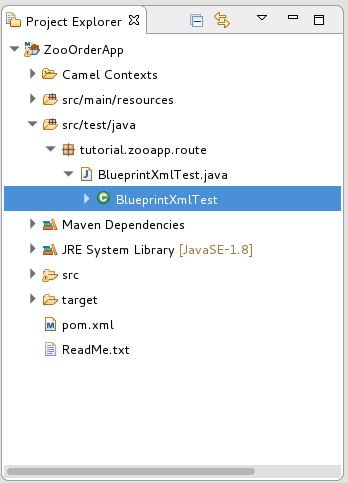
テストのアーティファクトはプロジェクトに追加され、src/test/java の下にある Project Explorer に表示されます。テストケースを実装するクラスは、ツールの Java エディターで開きます。
この生成された JUnit テストケースは ZooOrderApp プロジェクトには不十分なため、正常に実行できません。「BlueprintXmlTest ファイルの変更」および「pom.xml ファイルの変更」に記載されているように、テストケースおよびプロジェクトの pom.xml を変更する必要があります。
BlueprintXmlTest ファイルの変更
BlueprintXmlTest.java ファイルを変更し、以下を実行する必要があります。
- 必要なファイル機能をサポートするいくつかのクラスをインポートします
-
さまざまなソース
.xmlファイルの内容を保持する変数を作成する -
ソース
.xmlファイルの内容を読み取る - 適切な期待値を定義します
次の手順に従って、BlueprintXmlTest.java ファイルを変更します。
Project Explorer で、
ZooOrderAppプロジェクトを展開してBlueprintXmlTest.javaファイルを公開します。-
BlueprintXmlTest.javaファイルを開きます。 -
Java エディターで
import org.apache.camel.EndpointInject;の横にある展開ボタンをクリックしてリストを展開します。 太字で示されている 2 行を追加します。最初の行を追加するとエラーが発生しますが、次のセクションで指示どおりに
pom.xmlファイルを更新すると解決されます。Copy to Clipboard Copied! Toggle word wrap Toggle overflow -
// Expected message bodiesのすぐ後の行までスクロールします。 protected Object[] expectedBodies={ …… expectedBody2</something>"};の行をprotected String body#;の行に置き換えます。protected String body1; protected String body2; protected String body3; protected String body4; protected String body5; protected String body6;
protected String body1; protected String body2; protected String body3; protected String body4; protected String body5; protected String body6;Copy to Clipboard Copied! Toggle word wrap Toggle overflow public void testCamelRoute() throws Exception {の行まで下方向にスクロールし、その直後に以下のようにbody# = FileUtils.readFileToString(new File("src/data/message#.xml"), "UTF-8");の行を挿入します。これらの行は、次のセクションで指示どおりにpom.xmlファイルを更新するまでエラーを示します。// Valid orders body2 = FileUtils.readFileToString(new File("src/data/message2.xml"), "UTF-8"); body4 = FileUtils.readFileToString(new File("src/data/message4.xml"), "UTF-8"); body5 = FileUtils.readFileToString(new File("src/data/message5.xml"), "UTF-8"); body6 = FileUtils.readFileToString(new File("src/data/message6.xml"), "UTF-8"); // Invalid orders body1 = FileUtils.readFileToString(new File("src/data/message1.xml"), "UTF-8"); body3 = FileUtils.readFileToString(new File("src/data/message3.xml"), "UTF-8");// Valid orders body2 = FileUtils.readFileToString(new File("src/data/message2.xml"), "UTF-8"); body4 = FileUtils.readFileToString(new File("src/data/message4.xml"), "UTF-8"); body5 = FileUtils.readFileToString(new File("src/data/message5.xml"), "UTF-8"); body6 = FileUtils.readFileToString(new File("src/data/message6.xml"), "UTF-8"); // Invalid orders body1 = FileUtils.readFileToString(new File("src/data/message1.xml"), "UTF-8"); body3 = FileUtils.readFileToString(new File("src/data/message3.xml"), "UTF-8");Copy to Clipboard Copied! Toggle word wrap Toggle overflow -
// TODO Ensure expectations make sense for the route(s) we're testingの直後の行まで下方向にスクロールします。 outputEndpoint.expectedBodiesReceivedInAnyOrder(expectedBodies);で始まりinputEndpoint.sendBody(expectedBody); }で終わるコードのブロックを、ここに示す行に置き換えます。// Invalid orders outputEndpoint.expectedBodiesReceived(body1, body3); // Valid orders for USA output3Endpoint.expectedBodiesReceived(body2, body5, body6); // Valid order for Germany output4Endpoint.expectedBodiesReceived(body4);
// Invalid orders outputEndpoint.expectedBodiesReceived(body1, body3); // Valid orders for USA output3Endpoint.expectedBodiesReceived(body2, body5, body6); // Valid order for Germany output4Endpoint.expectedBodiesReceived(body4);Copy to Clipboard Copied! Toggle word wrap Toggle overflow 残りのコードはそのままにしておきます。
- ファイルを保存します。
更新された
BlueprintXmlTest.javaファイルに必要な変更が反映されていることを確認します。次のようになります。Copy to Clipboard Copied! Toggle word wrap Toggle overflow
pom.xml ファイルの変更
commons-io プロジェクトの依存関係を ZooOrderApp プロジェクトの pom.xml ファイルに追加する必要があります。
-
Project Explorer で、
targetフォルダーの下のpom.xmlを選択し、ツールの XML エディターで開きます。 -
ページの下部にある
pom.xmlタブをクリックして、ファイルを表示して編集します。 <dependencies>セクションの最後に以下の行を追加します。Copy to Clipboard Copied! Toggle word wrap Toggle overflow - ファイルを保存します。
JUnit テストの実行
テストを実行するには:
- より多くのワークスペースを解放するには、JBoss パースペクティブに切り替えます。
-
Project Explorer で
ZooOrderAppプロジェクトを右クリックします。 Run As
JUnit Test を選択します。 デフォルトでは、JUnit ビューはサイドバーで開きます。(見やすくするには、Console、Servers、および Properties のタブが表示されている右下のパネルにドラッグします。)
注記プロジェクトで JUnit を初めて実行すると、テストが失敗することがあります。通常、テストを再実行すると、成功します。
テストが正常に実行されると、次のように表示されます。
図9.2 JUnit の実行が成功しました
テストが失敗すると、次のように表示されます。
図9.3 JUnit の実行に失敗しました
注記実行環境が Java SE 8 に設定されていない場合、JUnit は失敗します。JUnit タブの上部にあるメッセージバーに、正しい SDK が見つからないことを示すエラーメッセージが表示されます。
この問題を解決するには、プロジェクトのコンテキストメニューを開き、Run As
Run Configurations JRE を選択します。Environments] button next to the *Execution environment フィールドをクリックして、Java SE 8 環境を見つけて選択します。 出力を調べて、テストの失敗を解決するためのアクションを実行します。
JUnit パネルに表示されるエラーの詳細を表示するには、
 をクリックし、パネルのメニューバーで、ビューを最大化します。
JUnit テストケースを再度実行する前に、Project Explorer で ZooOrderApp プロジェクトの
/src/dataフォルダーから JUnit が生成するテストメッセージを削除します (図9.1「トレースで生成されたメッセージ」を参照)。
関連資料
JUnit テストの詳細は、JUnit を参照してください。
次のステップ
10章プロジェクトを Red Hat Fuse に公開するチュートリアルでは、Apache Camel プロジェクトを Red Hat Fuse に公開する方法を学びます。
