이 콘텐츠는 선택한 언어로 제공되지 않습니다.
28.7. Administering HornetQ Resources Using the Admin Console
It is possible to create and configure HornetQ resources via the admin console within the JBoss Enterprise Application Platform.
The admin console will allow you to create destinations (JMS topics and queues) and JMS connection factories.
Once logged in to the admin console you will see a JMS Manager item in the left hand tree. All HornetQ resources will be configured via this. This will have child items for JMS queues, topics and connection factories. Clicking on each node will reveal which resources are currently available. The following sections explain how to create and configure each resource in turn.
28.7.1. JMS Queues
링크 복사링크가 클립보드에 복사되었습니다!
To create a new JMS queue click on the JMS Queues item to reveal the available queues. On the right hand panel you will see an button. Click on this and then choose the default (JMS Queue) template. Click . The important things to fill in here are the name of the queue and the JNDI name of the queue. The JNDI name is what you will use to look up the queue in JNDI from your client. For most queues this will be the only info you will need to provide, as sensible defaults are provided for the others. You will also see a security roles section near the bottom. If you do not provide any roles for this queue then the server's default security configuration will be used. After you have created the queue these will be shown in the configuration. All configuration values, except the name and JNDI name, can be changed via the configuration tab after clicking on the queue in the admin console. The following section explains these in more detail.
After highlighting the configuration you will see the following screen:
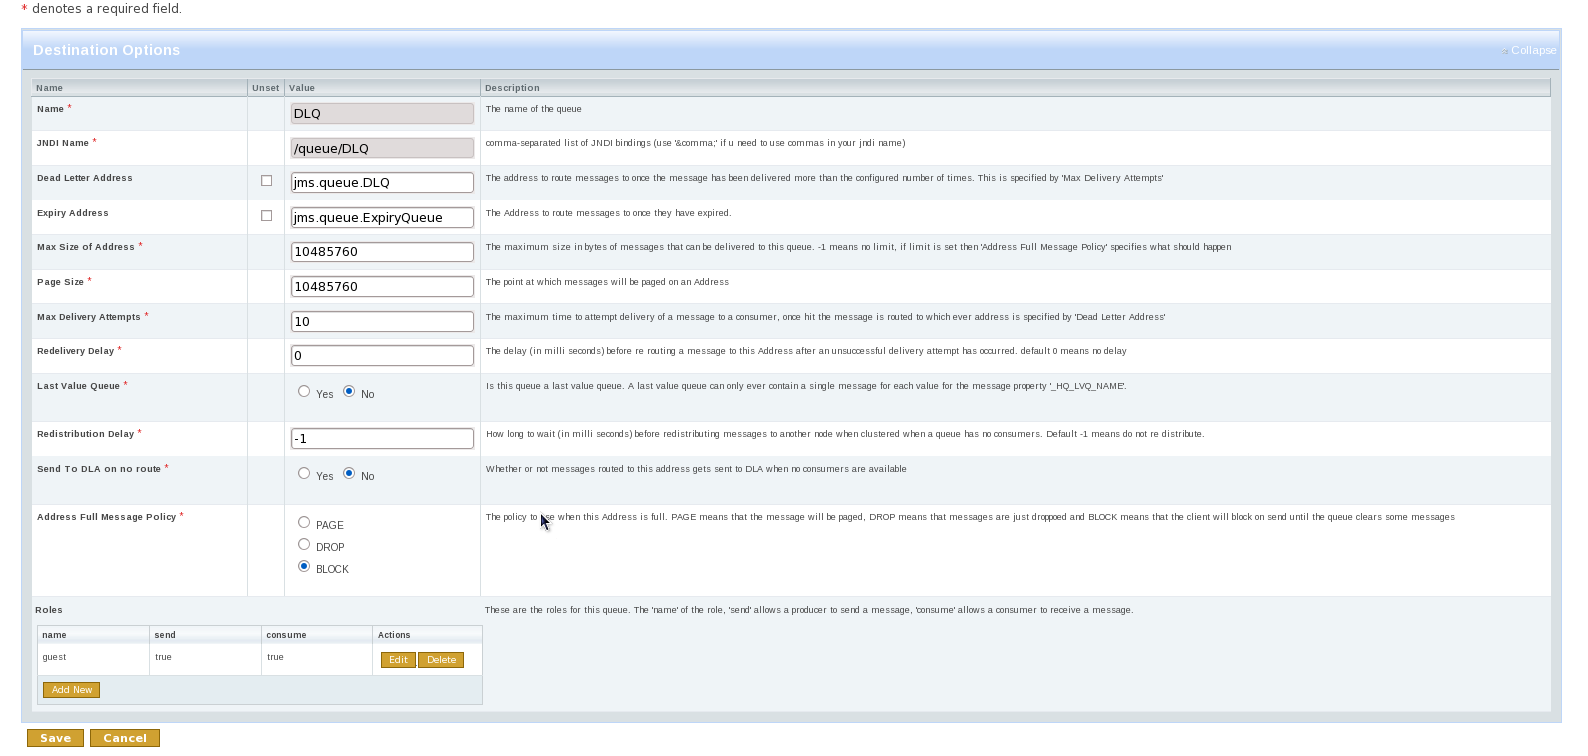
The name and JNDI name cannot be changed. Recreate the queue with the appropriate settings if you want to change these names. The rest of the configuration options, apart from security roles, relate to address settings for a particular address. The default address settings are picked up from the server configuration. If you change any of these settings or create a queue via the console, a new Address Settings entry will be added. For a full explanation on Address Settings, see Section 23.3, “Configuring Queues Through Address Settings”
To delete a queue, click on the button beside the queue name in the main JMS queues screen. This will also delete any address settings or security settings previously created for the queue address.
The last part of the configuration options are security roles. If none are provided on creation then the server's default security settings will be shown. If these are changed or updated, new security settings are created for the address of this queue. For more information on security settings, see Chapter 29, Security.
It is also possible to view statistics for this queue via the metrics tab. This will show statistics such as message count, consumer count, and so on.
Operations can be performed on a queue via the control tab. This will allow you to start and stop the queue, list, move, expire, and delete messages from the queue and other useful operations. To invoke an operation, click on the button for the operation you want. This will take you to a screen where parameters for the operation can be set. Once set, click the button to invoke the operation. Results will appear at the bottom of the screen.