이 콘텐츠는 선택한 언어로 제공되지 않습니다.
Chapter 4. Running APIcast on Red Hat OpenShift
This tutorial describes how to deploy the APIcast API Gateway on Red Hat OpenShift.
4.1. Prerequisites
To follow the tutorial steps below, you will first need to configure APIcast in your 3scale Admin Portal as per the APIcast Overview. Make sure Self-managed Gateway is selected as the deployment option in the integration settings. You should have both Staging and Production environment configured to proceed.
4.2. Step 1: Set up OpenShift
If you already have a running OpenShift cluster, you can skip this step. Otherwise, continue reading.
For production deployments you can follow the instructions for OpenShift installation. In order to get started quickly in development environments, there are a couple of ways you can install OpenShift:
-
Using
oc cluster upcommand – https://github.com/openshift/origin/blob/master/docs/cluster_up_down.md (used in this tutorial, with detailed instructions for Mac and Windows in addition to Linux which we cover here) - All-In-One Virtual Machine using Vagrant – https://www.openshift.org/vm
In this tutorial the OpenShift cluster will be installed using:
- Red Hat Enterprise Linux (RHEL) 7
- Docker containerized environment v1.10.3
- OpenShift Origin command line interface (CLI) - v1.3.1
4.2.1. Install the Docker containerized environment
Docker-formatted container images provided by Red Hat are released as part of the Extras channel in RHEL. To enable additional repositories, you can use either the Subscription Manager, or yum config manager. See the RHEL product documentation for details.
For a RHEL 7 deployed on a AWS EC2 instance we’ll use the following the instructions:
List all repositories:
sudo yum repolist all
Find the *-extras repository.
Enable extras repository:
sudo yum-config-manager --enable rhui-REGION-rhel-server-extrasInstall Docker-formatted container images:
sudo yum install docker docker-registryAdd an insecure registry of
172.30.0.0/16by adding or uncommenting the following line in/etc/sysconfig/dockerfile:INSECURE_REGISTRY='--insecure-registry 172.30.0.0/16'Start the Docker containerized environment:
sudo systemctl start docker
You can verify that the Docker containerized environment is running with the command:
sudo systemctl status docker4.2.2. Start OpenShift cluster
Download the latest stable release of the client tools (openshift-origin-client-tools-VERSION-linux-64bit.tar.gz) from OpenShift releases page, and place the Linux oc binary extracted from the archive in your PATH.
-
Please be aware that the
oc clusterset of commands are only available in the 1.3+ or newer releases. -
the docker command runs as the
rootuser, so you will need to run anyocor docker commands with root privileges.
Open a terminal with a user that has permission to run docker commands and run:
oc cluster upAt the bottom of the output you will find information about the deployed cluster:
    -- Server Information ...
      OpenShift server started.
      The server is accessible via web console at:
      https://172.30.0.112:8443

      You are logged in as:
        User:     developer
        Password: developer

      To login as administrator:
        oc login -u system:admin
Note the IP address that is assigned to your OpenShift server, we will refer to it in the tutorial as OPENSHIFT-SERVER-IP.
4.2.2.1. Setting up OpenShift cluster on a remote server
In case you are deploying the OpenShift cluster on a remote server, you will need to explicitly specify a public hostname and a routing suffix on starting the cluster, in order to be able to access the OpenShift web console remotely.
For example, if you are deploying on an AWS EC2 instance, you should specify the following options:
oc cluster up --public-hostname=ec2-54-321-67-89.compute-1.amazonaws.com --routing-suffix=54.321.67.89.xip.io
where ec2-54-321-67-89.compute-1.amazonaws.com is the Public Domain, and 54.321.67.89 is the IP of the instance. You will then be able to access the OpenShift web console at https://ec2-54-321-67-89.compute-1.amazonaws.com:8443.
4.3. Step 2: Deploy APIcast using the OpenShift template
By default you are logged in as developer and can proceed to the next step.
Otherwise login into OpenShift using the
oc logincommand from the OpenShift Client tools you downloaded and installed in the previous step. The default login credentials are username = "developer" and password = "developer":oc login https://OPENSHIFT-SERVER-IP:8443You should see
Login successful.in the output.Create your project. This example sets the display name as gateway
oc new-project "3scalegateway" --display-name="gateway" --description="3scale gateway demo"The response should look like this:
Now using project "3scalegateway" on server "https://172.30.0.112:8443".Ignore the suggested next steps in the text output at the command prompt and proceed to the next step below.
Create a new Secret to reference your project by replacing
<access_token>and<domain>with yours.oc create secret generic apicast-configuration-url-secret --from-literal=password=https://<access_token>@<admin_portal_domain> --type=kubernetes.io/basic-authHere
<access_token>is an Access Token (not a Service Token) for the 3scale Account Management API, and<domain>-admin.3scale.netis the URL of your 3scale Admin Portal.The response should look like this:
secret/apicast-configuration-url-secretCreate an application for your APIcast Gateway from the template, and start the deployment:
oc new-app -f https://raw.githubusercontent.com/3scale/3scale-amp-openshift-templates/2.3.0.GA/apicast-gateway/apicast.ymlYou should see the following messages at the bottom of the output:
--> Creating resources with label app=3scale-gateway ...
    deploymentconfig "apicast" created
    service "apicast" created
--> Success
    Run 'oc status' to view your app.
4.4. Step 3: Create routes in OpenShift console
Open the web console for your OpenShift cluster in your browser: https://OPENSHIFT-SERVER-IP:8443/console/
Use the value specified in
--public-hostnameinstead ofOPENSHIFT-SERVER-IPif you started OpenShift cluster on a remote server.You should see the login screen:
 Note
NoteYou may receive a warning about an untrusted web-site. This is expected, as we are trying to access the web console through secure protocol, without having configured a valid certificate. While you should avoid this in production environment, for this test setup you can go ahead and create an exception for this address.
Log in using the developer credentials created or obtained in the Setup OpenShift section above.
You will see a list of projects, including the "gateway" project you created from the command line above.
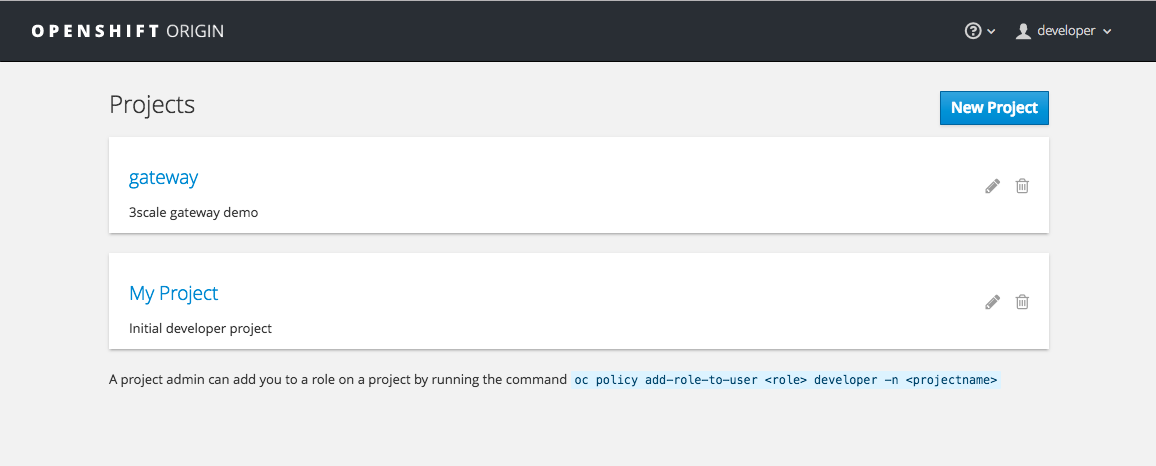
If you do not see your gateway project, you probably created it with a different user and will need to assign the policy role to to this user.
Click on "gateway" and you will see the Overview tab.
OpenShift downloaded the code for APIcast and started the deployment. You may see the message Deployment #1 running when the deployment is in progress.
When the build completes, the UI will refresh and show two instances of APIcast ( 2 pods ) that have been started by OpenShift, as defined in the template.
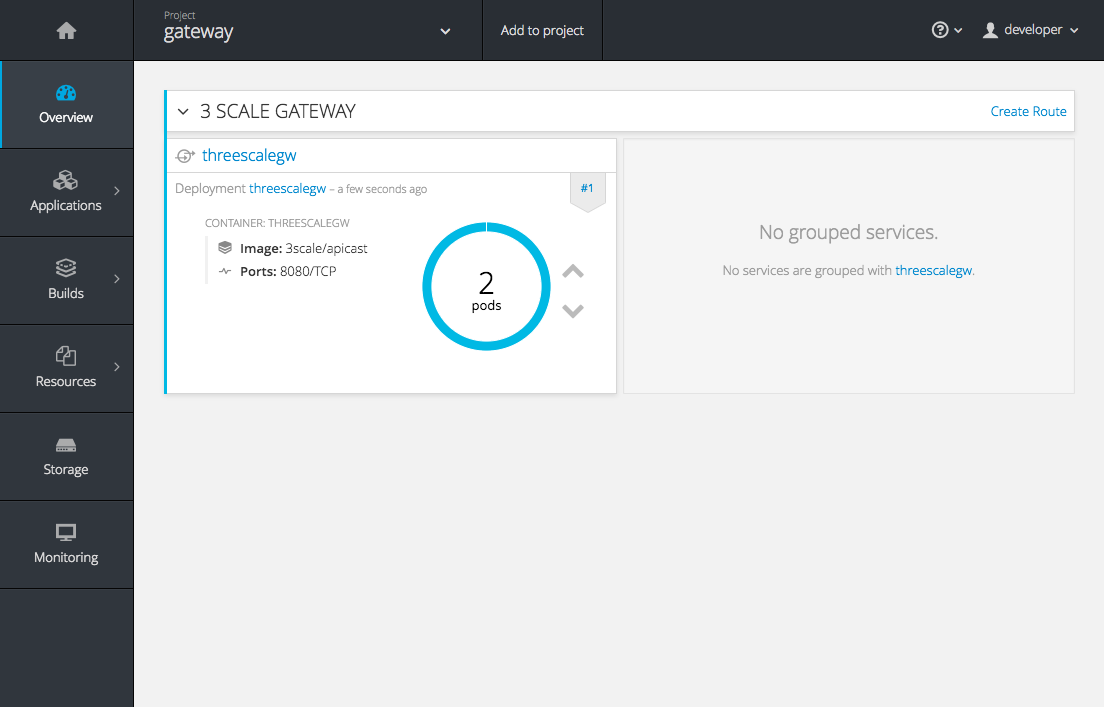
Each APIcast instance, upon starting, downloads the required configuration from 3scale using the settings you provided on the Integration page of your 3scale Admin Portal.
OpenShift will maintain two APIcast instances and monitor the health of both; any unhealthy APIcast instance will automatically be replaced with a new one.
In order to allow your APIcast instances to receive traffic, you’ll need to create a route. Start by clicking on Create Route.
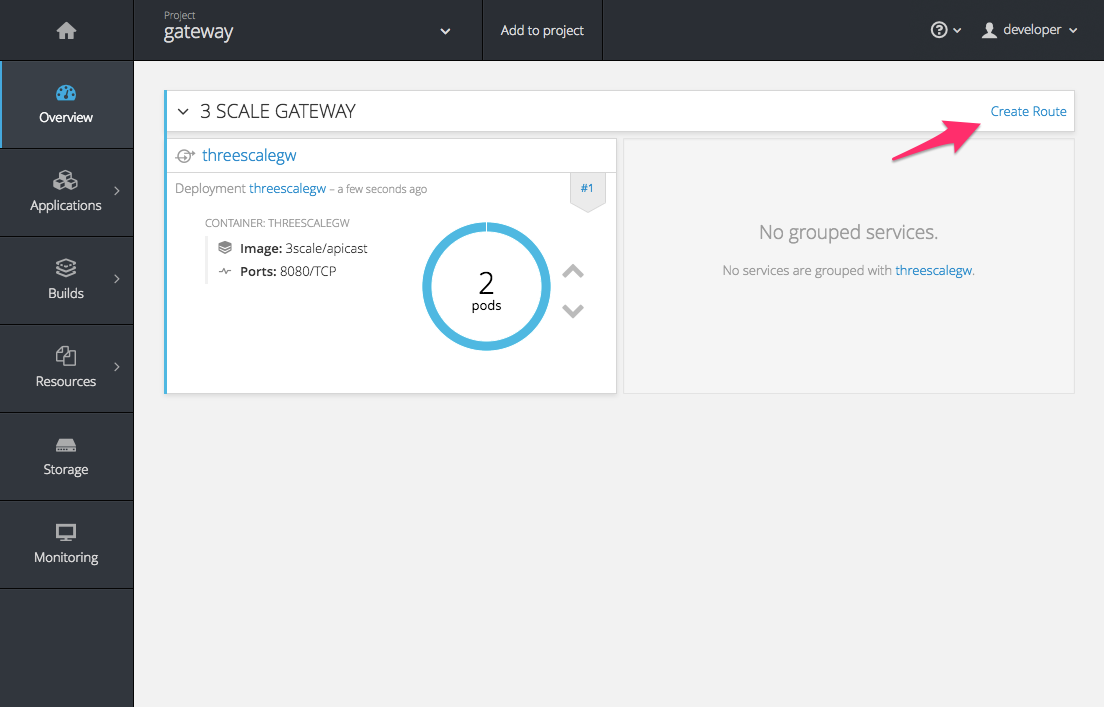
Enter the same host you set in 3scale above in the section Public Base URL (without the http:// and without the port) , e.g.
gateway.openshift.demo, then click the Create button.
Create a new route for every 3scale service you define. Alternatively, you could avoid having to create a new route for every 3scale service you define by deploying a wildcard router.