이 콘텐츠는 선택한 언어로 제공되지 않습니다.
Chapter 3. Getting started with Kaoto
This section describes how to:
- Setup a workspace in VS Code
- Access the important commands to create your integration
- Create your first Camel Route
- Run your Camel Route locally
- Get access to the source code of the Camel Route
3.1. Preparing the Workspace
Visual Studio Code requires you to create a workspace for your project to access the full functionality of the environment.
-
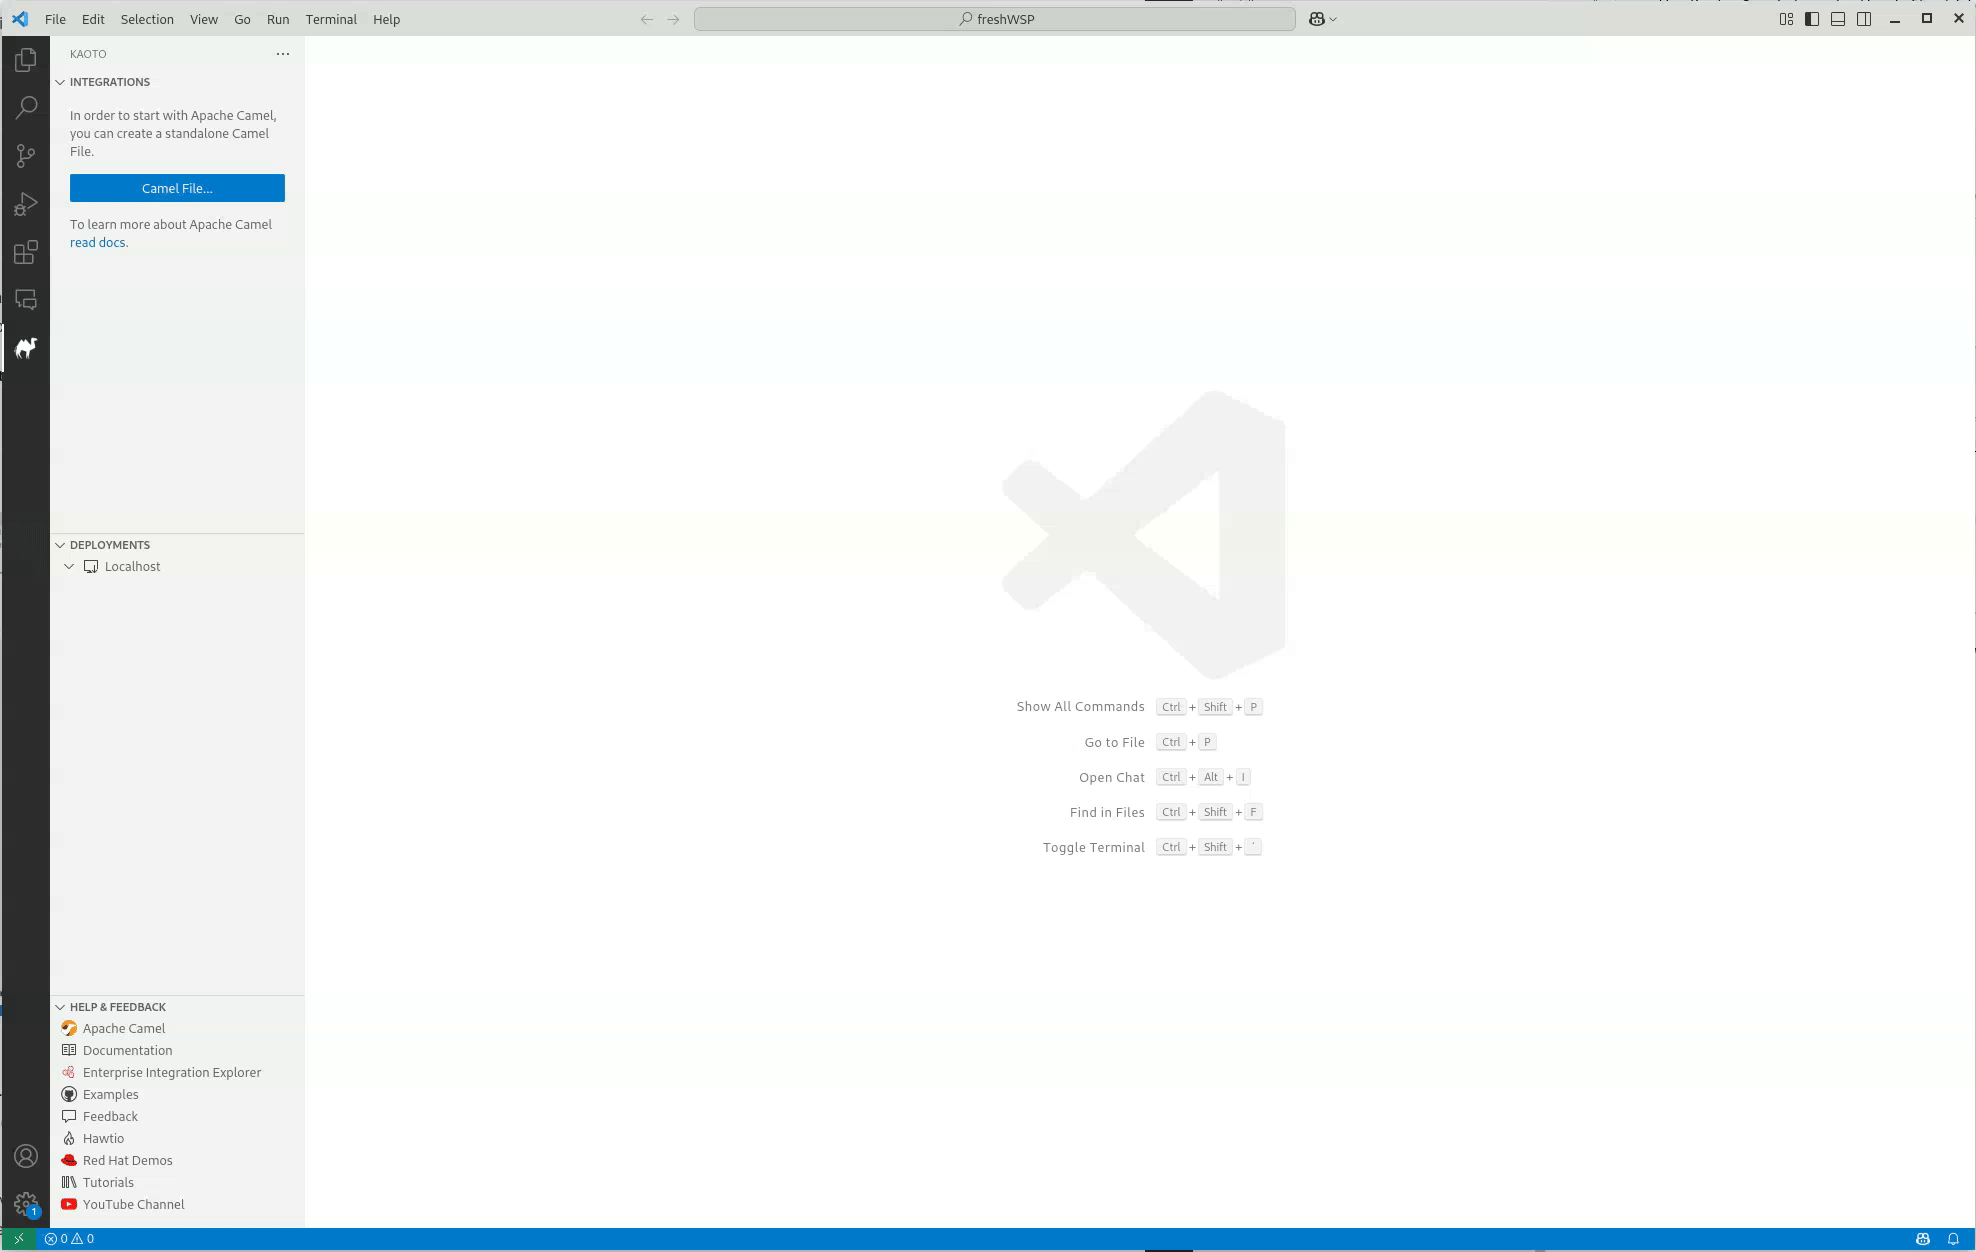
If you haven’t done so yet, please open your Visual Studio Code instance. You can do that by finding the right launcher on your computer or by opening a command shell and executing
code. This should leave you with a window like the one below. (In the picture below we selected already the Kaoto view - see the Kaoto Camel icon)
.png)
- Next we need to select our workspace folder which will store our project files.
-
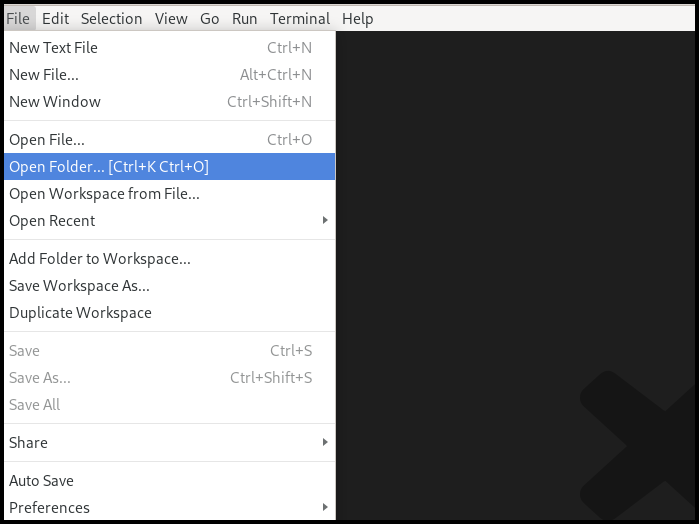
You can either click on the
Open Folderbutton or you can also go to theFilemenu and select the entryOpen Folder. In the following screen browse to the folder you would like to use and select it.
3.2. Creating first Camel Route
-
With the
Kaotoview (the Kaoto Camel icon) on the left sidebar open you will see theIntegrationsection on top. -
When moving the mouse to the right side of the
Integrationsheadline you will see some small icons, one of the is a file with a plus sign. -
Click on it, select
New Camel Routeand follow the instructions to create your first Camel Route. Once done, the new file will be created and the Kaoto editor should appear as shown in the video below. If the editor does not appear, revisit the earlier steps to ensure you have followed all instructions correctly.
At this point, you have successfully created your first working Camel Route, which can be tested immediately.
NoteYou should now see a similar screen like the one below.
.png)
3.2.1. Launching the Camel Route
Testing your integration is easy and straight-forward.
-
In the
Integrationssection hover over the file name of your integration and this will reveal some useful buttons. One of these buttons is a Camel icon with a green play button. - Click it to launch your integration locally using Camel JBang.
Please check the below video which will show you how to launch the integration and possible actions to interact with a running integration.

- As you can see in the video your integration is launched in Dev Mode and changes to the integration via the Kaoto editor or the source code will be reloaded whenever you save. This will help you prototyping faster.
3.2.2. Accessing the Source Code
You might wonder how the source of your new Camel Route looks like. While Kaoto tries relief users from the burden of working with the source code, we still allow access to it via the default Visual Studio Code Text Editor.
There are two ways to achieve this.
-
The first one is to use the
Open Source Codetoggle button on the top right of the Kaoto editor. This is the most convenient way. The second one is to invoke the context menu on the tab with the file name of your integration and then use the
Reopen Editor withitem. Both ways are shown in the following video.