이 콘텐츠는 선택한 언어로 제공되지 않습니다.
2.2.2. Using the --configure Option
Both the Red Hat Network Registration Client and the Red Hat Update Agent that ship with Red Hat Enterprise Linux provide interfaces for configuring various settings. For full listings of these settings, refer to the chapters dedicated to the applications in the RHN Management Reference Guide.
Each application offers a graphical user interface (GUI) for configuration that enables you to change the settings required by RHN Proxy Server or RHN Satellite Server. The GUI requires that the client system run the X Window System. The command to launch the GUI configuration interface will look like:
application_filename --configure
To reconfigure the Red Hat Update Agent, issue the following command as root:
up2date --configure
You are presented with a dialog box offering various settings that may be reconfigured. In the General tab, under
Select a Red Hat Network Server to use replace the default value with the fully qualified domain name (FQDN) of the RHN Satellite Server or RHN Proxy Server, such as https://your_proxy_or_sat.your_domain.com/XMLRPC. Retain the /XMLRPC at the end. When finished, click .
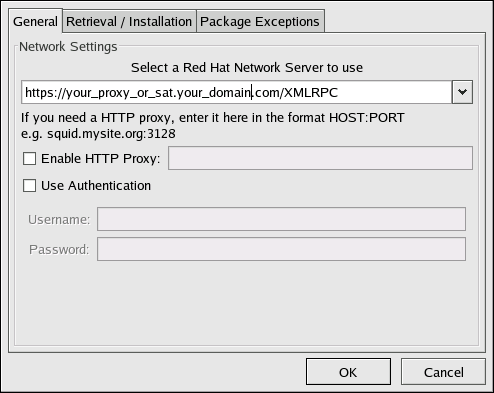
Figure 2.1. Red Hat Update Agent GUI Configuration
Make sure you enter the domain name of your RHN Satellite Server or RHN Proxy Server correctly. Entering an incorrect domain or leaving the field blank may prevent
up2date --configure from launching. This may be resolved, however, by editing the value in the up2date configuration file. Refer to Section 2.2.3, “Updating the Configuration Files Manually” for precise instructions.
Warning
Systems running Red Hat Enterprise Linux 3 or newer have registration functionality built into the Red Hat Update Agent and therefore do not install the Red Hat Network Registration Client. Systems running Red Hat Enterprise Linux 2.1 (and versions of Red Hat Linux prior to 8.0) must reconfigure and use the Red Hat Network Registration Client, as well as the Red Hat Update Agent.
To reconfigure the Red Hat Network Registration Client, perform an almost identical set of steps. As root, run the following command:
/usr/bin/rhn_register --configure
You are presented with a dialog box offering basic settings that may be reconfigured. Under
Select a Red Hat Network server to use replace the default value with the fully qualified domain name (FQDN) of the RHN Satellite Server or RHN Proxy Server, such as https://your_proxy_or_sat.your_domain.com/XMLRPC. Retain the /XMLRPC at the end. Click OK when finished.
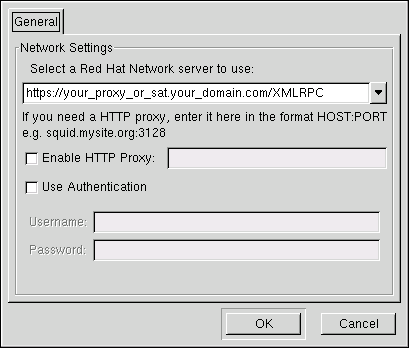
Figure 2.2. Red Hat Network Registration Client GUI Configuration
If your version of
rhn_register does not display the server field, and you cannot upgrade to a later version, you may enter the domain name of your RHN Satellite Server or RHN Proxy Server directly into the rhn_register configuration file. Refer to Section 2.2.3, “Updating the Configuration Files Manually” for precise instructions.