이 콘텐츠는 선택한 언어로 제공되지 않습니다.
Chapter 15. Red Hat Quay auto-pruning overview
Red Hat Quay administrators can set up auto-pruning policies on namespaces and repositories. This feature allows for image tags to be automatically deleted within a namespace or a repository based on specified criteria, which allows Red Hat Quay organization owners to stay below the storage quota by automatically pruning content.
Currently, two policies have been added:
- Prune images by the number of tags. For this policy, when the actual number of tags exceeds the desired number of tags, the oldest tags are deleted by their creation date until the desired number of tags is achieved.
- Prune image tags by creation date. For this policy, any tags with a creation date older than the given time span, for example, 10 days, are deleted.
After tags are automatically pruned, they go into the Red Hat Quay time machine, or the amount of time, after a tag is deleted, that the tag is accessible before being garbage collected. The expiration time of an image tag is dependent on your organization’s settings. For more information, see Red Hat Quay garbage collection.
Users can only configure one policy per namespace or repository; this can be done through the Red Hat Quay v2 UI. Policies can also be set by using the API endpoints through the command-line interface (CLI).
15.1. Prerequisites and limitations for auto-pruning
The following prerequisites and limitations apply to the auto-pruning feature:
- This feature is not available when using the Red Hat Quay legacy UI. You must use the v2 UI to create, view, or modify auto-pruning policies.
-
Auto-pruning is only supported in databases that support the
FOR UPDATE SKIP LOCKEDSQL command.
15.2. Managing auto-pruning policies using the Red Hat Quay UI
Auto-pruning policies are created using the Red Hat Quay v2 UI. This can be done after you have configured your Red Hat Quay config.yaml file to enable the auto-pruning feature and the v2 UI.
This feature is not available when using the Red Hat Quay legacy UI.
15.2.1. Configuring the Red Hat Quay auto-pruning feature
Use the following procedure to configure your Red Hat Quay config.yaml file to enable the auto-pruning feature.
Prerequisites
-
You have set
FEATURE_UI_V2totruein yourconfig.yamlfile.
Procedure
In your Red Hat Quay
config.yamlfile, add, and set, theFEATURE_AUTO_PRUNEenvironment variable toTrue. For example:# ... FEATURE_AUTO_PRUNE: true # ...
# ... FEATURE_AUTO_PRUNE: true # ...Copy to Clipboard Copied! Toggle word wrap Toggle overflow
15.2.2. Creating an auto-prune policy for a namespace using the Red Hat Quay v2 UI
Use the following procedure to create an auto-prune policy for a namespace using the Red Hat Quay v2 UI.
Prerequisites
-
You have enabled the
FEATURE_AUTO_PRUNEfeature.
Procedure
Tag four sample images, for example,
busybox, that will be pushed to the repository with auto-pruning enabled. For example:podman tag docker.io/library/busybox <quay-server.example.com>/<quayadmin>/busybox:test
$ podman tag docker.io/library/busybox <quay-server.example.com>/<quayadmin>/busybox:testCopy to Clipboard Copied! Toggle word wrap Toggle overflow podman tag docker.io/library/busybox <quay-server.example.com>/<quayadmin>/busybox:test2
$ podman tag docker.io/library/busybox <quay-server.example.com>/<quayadmin>/busybox:test2Copy to Clipboard Copied! Toggle word wrap Toggle overflow podman tag docker.io/library/busybox <quay-server.example.com>/<quayadmin>/busybox:test3
$ podman tag docker.io/library/busybox <quay-server.example.com>/<quayadmin>/busybox:test3Copy to Clipboard Copied! Toggle word wrap Toggle overflow podman tag docker.io/library/busybox <quay-server.example.com>/<quayadmin>/busybox:test4
$ podman tag docker.io/library/busybox <quay-server.example.com>/<quayadmin>/busybox:test4Copy to Clipboard Copied! Toggle word wrap Toggle overflow Push the four sample images, for example,
busybox, to the repository with auto-pruning enabled by entering the following commands:podman push <quay-server.example.com>/quayadmin/busybox:test
$ podman push <quay-server.example.com>/quayadmin/busybox:testCopy to Clipboard Copied! Toggle word wrap Toggle overflow podman push <quay-server.example.com>/<quayadmin>/busybox:test2
$ podman push <quay-server.example.com>/<quayadmin>/busybox:test2Copy to Clipboard Copied! Toggle word wrap Toggle overflow podman push <quay-server.example.com>/<quayadmin>/busybox:test3
$ podman push <quay-server.example.com>/<quayadmin>/busybox:test3Copy to Clipboard Copied! Toggle word wrap Toggle overflow podman push <quay-server.example.com>/<quayadmin>/busybox:test4
$ podman push <quay-server.example.com>/<quayadmin>/busybox:test4Copy to Clipboard Copied! Toggle word wrap Toggle overflow - Check that there are four tags in your repository.
- On the Red Hat Quay v2 UI, click Organizations in the navigation pane.
-
Select the name of an organization that you will apply the auto-pruning feature to, for example,
test_organization. - Click Settings.
Click Auto-Prune Policies. For example:
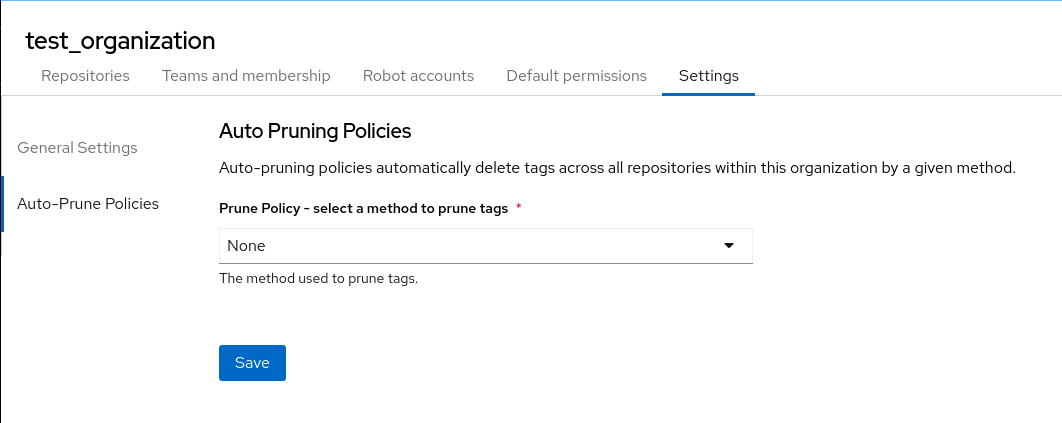
- Click the drop down menu and select the desired policy, for example, By number of tags.
- Select the desired number of tags to keep. By default, this is set at 20 tags. For this example, the number of tags to keep is set at 3.
- Click Save. A notification that your auto-prune policy has been updated appears.
Verification
Navigate to the Tags page of your Organization’s repository. With this example, tags are marked for deletion starting from the tag’s oldest creation date. After a few minutes, the auto-pruner worker removes tags that no longer fit within the established criteria. In this example, it removes the
busybox:testtag, and keeps thebusybox:test2,busybox:test3, andbusybox:test4tag.After tags are automatically pruned, they go into the Red Hat Quay time machine, or the amount of time after a tag is deleted that the tag is accessible before being garbage collected. The expiration time of an image tag is dependent on your organization’s settings. For more information, see Red Hat Quay garbage collection.
15.2.3. Creating an auto-prune policy for a namespace using the Red Hat Quay API
You can use Red Hat Quay API endpoints to manage auto-pruning policies for an namespace.
Prerequisites
- You have created an OAuth access token.
- You have logged into Red Hat Quay.
Procedure
Enter the following
POSTcommand create a new policy that limits the number of tags allowed in an organization:curl -X POST -H "Authorization: Bearer <access_token>" -H "Content-Type: application/json" -d '{"method": "number_of_tags", "value": 10}' http://<quay-server.example.com>/api/v1/organization/<organization_name>/autoprunepolicy/$ curl -X POST -H "Authorization: Bearer <access_token>" -H "Content-Type: application/json" -d '{"method": "number_of_tags", "value": 10}' http://<quay-server.example.com>/api/v1/organization/<organization_name>/autoprunepolicy/Copy to Clipboard Copied! Toggle word wrap Toggle overflow Alternatively, you can can set tags to expire for a specified time after their creation date:
curl -X POST -H "Authorization: Bearer <access_token>" -H "Content-Type: application/json" -d '{
"method": "creation_date", "value": "7d"}' http://<quay-server.example.com>/api/v1/organization/<organization_name>/autoprunepolicy/
$ curl -X POST -H "Authorization: Bearer <access_token>" -H "Content-Type: application/json" -d '{ "method": "creation_date", "value": "7d"}' http://<quay-server.example.com>/api/v1/organization/<organization_name>/autoprunepolicy/Copy to Clipboard Copied! Toggle word wrap Toggle overflow Example output
{"uuid": "73d64f05-d587-42d9-af6d-e726a4a80d6e"}{"uuid": "73d64f05-d587-42d9-af6d-e726a4a80d6e"}Copy to Clipboard Copied! Toggle word wrap Toggle overflow Attempting to create multiple policies returns the following error:
{"detail": "Policy for this namespace already exists, delete existing to create new policy", "error_message": "Policy for this namespace already exists, delete existing to create new policy", "error_type": "invalid_request", "title": "invalid_request", "type": "http://<quay-server.example.com>/api/v1/error/invalid_request", "status": 400}{"detail": "Policy for this namespace already exists, delete existing to create new policy", "error_message": "Policy for this namespace already exists, delete existing to create new policy", "error_type": "invalid_request", "title": "invalid_request", "type": "http://<quay-server.example.com>/api/v1/error/invalid_request", "status": 400}Copy to Clipboard Copied! Toggle word wrap Toggle overflow Check your auto-prune policy by entering the following command:
curl -X GET -H "Authorization: Bearer <access_token>" http://<quay-server.example.com>/api/v1/organization/<organization_name>/autoprunepolicy/
$ curl -X GET -H "Authorization: Bearer <access_token>" http://<quay-server.example.com>/api/v1/organization/<organization_name>/autoprunepolicy/Copy to Clipboard Copied! Toggle word wrap Toggle overflow Example output
{"policies": [{"uuid": "73d64f05-d587-42d9-af6d-e726a4a80d6e", "method": "creation_date", "value": "7d"}]}{"policies": [{"uuid": "73d64f05-d587-42d9-af6d-e726a4a80d6e", "method": "creation_date", "value": "7d"}]}Copy to Clipboard Copied! Toggle word wrap Toggle overflow You can delete the auto-prune policy by entering the following command. Note that deleting the policy requires the UUID.
curl -X DELETE -H "Authorization: Bearer <access_token>" http://<quay-server.example.com>/api/v1/organization/<organization_name>/autoprunepolicy/73d64f05-d587-42d9-af6d-e726a4a80d6e
$ curl -X DELETE -H "Authorization: Bearer <access_token>" http://<quay-server.example.com>/api/v1/organization/<organization_name>/autoprunepolicy/73d64f05-d587-42d9-af6d-e726a4a80d6eCopy to Clipboard Copied! Toggle word wrap Toggle overflow
15.2.4. Creating an auto-prune policy for a namespace for the current user using the API
You can use Red Hat Quay API endpoints to manage auto-pruning policies for your account.
The use of /user/ in the following commands represents the user that is currently logged into Red Hat Quay.
Prerequisites
- You have created an OAuth access token.
- You have logged into Red Hat Quay.
Procedure
Enter the following
POSTcommand create a new policy that limits the number of tags for the current user:curl -X POST -H "Authorization: Bearer <access_token>" -H "Content-Type: application/json" -d '{"method": "number_of_tags", "value": 10}' http://<quay-server.example.com>/api/v1/<user>/autoprunepolicy/$ curl -X POST -H "Authorization: Bearer <access_token>" -H "Content-Type: application/json" -d '{"method": "number_of_tags", "value": 10}' http://<quay-server.example.com>/api/v1/<user>/autoprunepolicy/Copy to Clipboard Copied! Toggle word wrap Toggle overflow Example output
{"uuid": "8c03f995-ca6f-4928-b98d-d75ed8c14859"}{"uuid": "8c03f995-ca6f-4928-b98d-d75ed8c14859"}Copy to Clipboard Copied! Toggle word wrap Toggle overflow Check your auto-prune policy by entering the following command:
curl -X GET -H "Authorization: Bearer <access_token>" http://<quay-server.example.com>/api/v1/<user>/autoprunepolicy/8c03f995-ca6f-4928-b98d-d75ed8c14859
$ curl -X GET -H "Authorization: Bearer <access_token>" http://<quay-server.example.com>/api/v1/<user>/autoprunepolicy/8c03f995-ca6f-4928-b98d-d75ed8c14859Copy to Clipboard Copied! Toggle word wrap Toggle overflow Alternatively, you can include the UUID:
curl -X GET -H "Authorization: Bearer <access_token>" http://<quay-server.example.com>/api/v1/<user>/autoprunepolicy/
$ curl -X GET -H "Authorization: Bearer <access_token>" http://<quay-server.example.com>/api/v1/<user>/autoprunepolicy/Copy to Clipboard Copied! Toggle word wrap Toggle overflow Example output
{"policies": [{"uuid": "8c03f995-ca6f-4928-b98d-d75ed8c14859", "method": "number_of_tags", "value": 10}]}{"policies": [{"uuid": "8c03f995-ca6f-4928-b98d-d75ed8c14859", "method": "number_of_tags", "value": 10}]}Copy to Clipboard Copied! Toggle word wrap Toggle overflow You can delete the auto-prune policy by entering the following command. Note that deleting the policy requires the UUID.
curl -X DELETE -H "Authorization: Bearer <access_token>" http://<quay-server.example.com>/api/v1/<user>/autoprunepolicy/8c03f995-ca6f-4928-b98d-d75ed8c14859
$ curl -X DELETE -H "Authorization: Bearer <access_token>" http://<quay-server.example.com>/api/v1/<user>/autoprunepolicy/8c03f995-ca6f-4928-b98d-d75ed8c14859Copy to Clipboard Copied! Toggle word wrap Toggle overflow Example output
{"uuid": "8c03f995-ca6f-4928-b98d-d75ed8c14859"}{"uuid": "8c03f995-ca6f-4928-b98d-d75ed8c14859"}Copy to Clipboard Copied! Toggle word wrap Toggle overflow
15.2.5. Creating an auto-prune policy for a repository using the Red Hat Quay v2 UI
Use the following procedure to create an auto-prune policy for a repository using the Red Hat Quay v2 UI.
Prerequisites
-
You have enabled the
FEATURE_AUTO_PRUNEfeature.
Procedure
Tag four sample images, for example,
busybox, that will be pushed to the repository with auto-pruning enabled. For example:podman tag docker.io/library/busybox <quay-server.example.com>/<organization_name>/<repository_name>:test
$ podman tag docker.io/library/busybox <quay-server.example.com>/<organization_name>/<repository_name>:testCopy to Clipboard Copied! Toggle word wrap Toggle overflow podman tag docker.io/library/busybox <quay-server.example.com>/<organization_name>/<repository_name>:test2
$ podman tag docker.io/library/busybox <quay-server.example.com>/<organization_name>/<repository_name>:test2Copy to Clipboard Copied! Toggle word wrap Toggle overflow podman tag docker.io/library/busybox <quay-server.example.com>/<organization_name>/<repository_name>:test3
$ podman tag docker.io/library/busybox <quay-server.example.com>/<organization_name>/<repository_name>:test3Copy to Clipboard Copied! Toggle word wrap Toggle overflow podman tag docker.io/library/busybox <quay-server.example.com>/<organization_name>/<repository_name>:test4
$ podman tag docker.io/library/busybox <quay-server.example.com>/<organization_name>/<repository_name>:test4Copy to Clipboard Copied! Toggle word wrap Toggle overflow Push the four sample images, for example,
busybox, to the repository with auto-pruning enabled by entering the following commands:podman push <quay-server.example.com>/<organization_name>/<repository_name>:test
$ podman push <quay-server.example.com>/<organization_name>/<repository_name>:testCopy to Clipboard Copied! Toggle word wrap Toggle overflow podman push <quay-server.example.com>/<organization_name>/<repository_name>:test2
$ podman push <quay-server.example.com>/<organization_name>/<repository_name>:test2Copy to Clipboard Copied! Toggle word wrap Toggle overflow podman push <quay-server.example.com>/<organization_name>/<repository_name>:test3
$ podman push <quay-server.example.com>/<organization_name>/<repository_name>:test3Copy to Clipboard Copied! Toggle word wrap Toggle overflow podman push <quay-server.example.com>/<organization_name>/<repository_name>:test4
$ podman push <quay-server.example.com>/<organization_name>/<repository_name>:test4Copy to Clipboard Copied! Toggle word wrap Toggle overflow - Check that there are four tags in your repository.
- On the Red Hat Quay v2 UI, click Repository in the navigation pane.
-
Select the name of an organization that you will apply the auto-pruning feature to, for example,
<organization_name>/<repository_name>. - Click Settings.
- Click Repository Auto-Prune Policies.
- Click the drop down menu and select the desired policy, for example, By number of tags.
- Select the desired number of tags to keep. By default, this is set at 20 tags. For this example, the number of tags to keep is set at 3.
- Click Save. A notification that your auto-prune policy has been updated appears.
Verification
Navigate to the Tags page of your Organization’s repository. With this example, tags are marked for deletion starting from the tag’s oldest creation date. After a few minutes, the auto-pruner worker removes tags that no longer fit within the established criteria. In this example, it removes the
busybox:testtag, and keeps thebusybox:test2,busybox:test3, andbusybox:test4tag.After tags are automatically pruned, they go into the Red Hat Quay time machine, or the amount of time after a tag is deleted that the tag is accessible before being garbage collected. The expiration time of an image tag is dependent on your organization’s settings. For more information, see Red Hat Quay garbage collection.
15.2.6. Creating an auto-prune policy for a repository using the Red Hat Quay API
You can use Red Hat Quay API endpoints to manage auto-pruning policies for an repository.
Prerequisites
- You have created an OAuth access token.
- You have logged into Red Hat Quay.
Procedure
Enter the following
POSTcommand create a new policy that limits the number of tags allowed in an organization:curl -X POST -H "Authorization: Bearer <access_token>" -H "Content-Type: application/json" -d '{"method": "number_of_tags","value": 2}' http://<quay-server.example.com>/api/v1/repository/<organization_name>/<repository_name>/autoprunepolicy/$ curl -X POST -H "Authorization: Bearer <access_token>" -H "Content-Type: application/json" -d '{"method": "number_of_tags","value": 2}' http://<quay-server.example.com>/api/v1/repository/<organization_name>/<repository_name>/autoprunepolicy/Copy to Clipboard Copied! Toggle word wrap Toggle overflow Alternatively, you can can set tags to expire for a specified time after their creation date:
curl -X POST -H "Authorization: Bearer <access_token>" -H "Content-Type: application/json" -d '{"method": "creation_date", "value": "7d"}' http://<quay-server.example.com>/api/v1/repository/<organization_name>/<repository_name>/autoprunepolicy/$ curl -X POST -H "Authorization: Bearer <access_token>" -H "Content-Type: application/json" -d '{"method": "creation_date", "value": "7d"}' http://<quay-server.example.com>/api/v1/repository/<organization_name>/<repository_name>/autoprunepolicy/Copy to Clipboard Copied! Toggle word wrap Toggle overflow Example output
{"uuid": "ce2bdcc0-ced2-4a1a-ac36-78a9c1bed8c7"}{"uuid": "ce2bdcc0-ced2-4a1a-ac36-78a9c1bed8c7"}Copy to Clipboard Copied! Toggle word wrap Toggle overflow Attempting to create multiple policies returns the following error:
{"detail": "Policy for this namespace already exists, delete existing to create new policy", "error_message": "Policy for this namespace already exists, delete existing to create new policy", "error_type": "invalid_request", "title": "invalid_request", "type": "http://quay-server.example.com/api/v1/error/invalid_request", "status": 400}{"detail": "Policy for this namespace already exists, delete existing to create new policy", "error_message": "Policy for this namespace already exists, delete existing to create new policy", "error_type": "invalid_request", "title": "invalid_request", "type": "http://quay-server.example.com/api/v1/error/invalid_request", "status": 400}Copy to Clipboard Copied! Toggle word wrap Toggle overflow Check your auto-prune policy by entering the following command:
curl -X GET -H "Authorization: Bearer <access_token>" http://<quay-server.example.com>/api/v1/repository/<organization_name>/<repository_name>/autoprunepolicy/
$ curl -X GET -H "Authorization: Bearer <access_token>" http://<quay-server.example.com>/api/v1/repository/<organization_name>/<repository_name>/autoprunepolicy/Copy to Clipboard Copied! Toggle word wrap Toggle overflow Alternatively, you can include the UUID:
curl -X GET -H "Authorization: Bearer <access_token>" http://<quay-server.example.com>/api/v1/repository/<organization_name>/<repository_name>/autoprunepolicy/ce2bdcc0-ced2-4a1a-ac36-78a9c1bed8c7
$ curl -X GET -H "Authorization: Bearer <access_token>" http://<quay-server.example.com>/api/v1/repository/<organization_name>/<repository_name>/autoprunepolicy/ce2bdcc0-ced2-4a1a-ac36-78a9c1bed8c7Copy to Clipboard Copied! Toggle word wrap Toggle overflow Example output
{"policies": [{"uuid": "ce2bdcc0-ced2-4a1a-ac36-78a9c1bed8c7", "method": "number_of_tags", "value": 10}]}{"policies": [{"uuid": "ce2bdcc0-ced2-4a1a-ac36-78a9c1bed8c7", "method": "number_of_tags", "value": 10}]}Copy to Clipboard Copied! Toggle word wrap Toggle overflow You can delete the auto-prune policy by entering the following command. Note that deleting the policy requires the UUID.
curl -X DELETE -H "Authorization: Bearer <access_token>" http://<quay-server.example.com>/api/v1/repository/<organization_name>/<repository_name>/autoprunepolicy/ce2bdcc0-ced2-4a1a-ac36-78a9c1bed8c7
$ curl -X DELETE -H "Authorization: Bearer <access_token>" http://<quay-server.example.com>/api/v1/repository/<organization_name>/<repository_name>/autoprunepolicy/ce2bdcc0-ced2-4a1a-ac36-78a9c1bed8c7Copy to Clipboard Copied! Toggle word wrap Toggle overflow Example output
{"uuid": "ce2bdcc0-ced2-4a1a-ac36-78a9c1bed8c7"}{"uuid": "ce2bdcc0-ced2-4a1a-ac36-78a9c1bed8c7"}Copy to Clipboard Copied! Toggle word wrap Toggle overflow
15.2.7. Creating an auto-prune policy on a repository for a user with the API
You can use Red Hat Quay API endpoints to manage auto-pruning policies on a repository for user accounts that are not your own, so long as you have admin privileges on the repository.
Prerequisites
- You have created an OAuth access token.
- You have logged into Red Hat Quay.
-
You have
adminprivileges on the repository that you are creating the policy for.
Procedure
Enter the following
POSTcommand create a new policy that limits the number of tags for the current user:curl -X POST -H "Authorization: Bearer <access_token>" -H "Content-Type: application/json" -d '{"method": "number_of_tags","value": 2}' http://<quay-server.example.com>/api/v1/repository/<user_account>/<user_repository>/autoprunepolicy/$ curl -X POST -H "Authorization: Bearer <access_token>" -H "Content-Type: application/json" -d '{"method": "number_of_tags","value": 2}' http://<quay-server.example.com>/api/v1/repository/<user_account>/<user_repository>/autoprunepolicy/Copy to Clipboard Copied! Toggle word wrap Toggle overflow Example output
{"uuid": "7726f79c-cbc7-490e-98dd-becdc6fefce7"}{"uuid": "7726f79c-cbc7-490e-98dd-becdc6fefce7"}Copy to Clipboard Copied! Toggle word wrap Toggle overflow Check your auto-prune policy by entering the following command:
curl -X GET -H "Authorization: Bearer <access_token>" http://<quay-server.example.com>/api/v1/repository/<user_account>/<user_repository>/autoprunepolicy/
$ curl -X GET -H "Authorization: Bearer <access_token>" http://<quay-server.example.com>/api/v1/repository/<user_account>/<user_repository>/autoprunepolicy/Copy to Clipboard Copied! Toggle word wrap Toggle overflow Alternatively, you can include the UUID:
curl -X GET -H "Authorization: Bearer <access_token>" http://<quay-server.example.com>/api/v1/repository/<user_account>/<user_repository>/autoprunepolicy/7726f79c-cbc7-490e-98dd-becdc6fefce7
$ curl -X GET -H "Authorization: Bearer <access_token>" http://<quay-server.example.com>/api/v1/repository/<user_account>/<user_repository>/autoprunepolicy/7726f79c-cbc7-490e-98dd-becdc6fefce7Copy to Clipboard Copied! Toggle word wrap Toggle overflow Example output
{"policies": [{"uuid": "7726f79c-cbc7-490e-98dd-becdc6fefce7", "method": "number_of_tags", "value": 2}]}{"policies": [{"uuid": "7726f79c-cbc7-490e-98dd-becdc6fefce7", "method": "number_of_tags", "value": 2}]}Copy to Clipboard Copied! Toggle word wrap Toggle overflow You can delete the auto-prune policy by entering the following command. Note that deleting the policy requires the UUID.
curl -X DELETE -H "Authorization: Bearer <access_token>" http://<quay-server.example.com>/api/v1/user/autoprunepolicy/7726f79c-cbc7-490e-98dd-becdc6fefce7
$ curl -X DELETE -H "Authorization: Bearer <access_token>" http://<quay-server.example.com>/api/v1/user/autoprunepolicy/7726f79c-cbc7-490e-98dd-becdc6fefce7Copy to Clipboard Copied! Toggle word wrap Toggle overflow Example output
{"uuid": "7726f79c-cbc7-490e-98dd-becdc6fefce7"}{"uuid": "7726f79c-cbc7-490e-98dd-becdc6fefce7"}Copy to Clipboard Copied! Toggle word wrap Toggle overflow