Creating agentic AI to deploy ARO cluster using Terraform with Red Hat OpenShift AI on ARO and Azure OpenAI
Learn how to create an artificial intelligence (AI) that can deploy Microsoft Azure Red Hat® OpenShift® clusters using Terraform. Explore prompt-based infrastructure and how it can be used to maintain clusters in your own environment.
This learning path is for operations teams or system administrators
Developers may want to check out Getting started with Red Hat OpenShift AI on developers.redhat.com.
Notebook integration for Agentic AI using Terraform
After carefully setting up all the necessary files and gathering all our credentials needed for our agentic AI task, it’s time to finally create the notebook to run our prompts. Note that here you would need your Azure OpenAI endpoint’s credentials, namely Azure OpenAI Endpoint Target URI and Azure OpenAI Endpoint Key, which you could retrieve from your Azure OpenAI deployment console.
What will you learn?
- How to create the notebook needed for the agentic AI
What do you need before starting?
- Azure Red Hat® OpenShift® cluster
- Azure OpenAI model access
- Setup file created in Azure
- OpenAI parser created
- Deployment agent and simulator files
Notebook integration
On your notebook console, go to the File tab on the upper left and choose New, and select Notebook. Copy the lines below into one cell and save it as notebook.ipynb. Replace the credentials placeholder with your Azure OpenAI credentials.
!pip install --upgrade pip
!pip install --upgrade jupyter-server websocket-client

import os
from simulator import AROAzureOpenAISimulator

os.environ['AZURE_OPENAI_ENDPOINT'] = 'YOUR-AZURE-OPENAI-ENDPOINT-TARGET-URI'  # e.g., 'https://xyz.openai.azure.com/xyz'
os.environ['AZURE_OPENAI_KEY'] = 'YOUR-AZURE-OPENAI-ENDPOINT-KEY'

simulator = AROAzureOpenAISimulator(
    mock=True,  # set to False for real deployment
    azure_openai_deployment="gpt-4o-mini",
    debug=True
)

simulator.setup()

# adjust your query/prompt here
result = simulator.process_request("Deploy ARO cluster named agentic-is-lyfe")

print("\n" + "="*60)
if result.get('status') == 'success':
    print("Deployment successful!")
    if result.get('console_url'):
        print(f"Console: {result['console_url']}")
    if result.get('api_url'):
        print(f"API: {result['api_url']}")
    if result.get('username') and result.get('password'):
        print(f"Username: {result['username']}")
        print(f"Password: {result['password']}")
else:
    print(f"Deployment failed: {result.get('message', 'Unknown error')}")
print("="*60 + "\n")

# comment out the line below if you want to keep the cluster running
simulator.process_request("Delete the ARO cluster named agentic-is-lyfe")
After plugging in the correct credential information, run the cell.
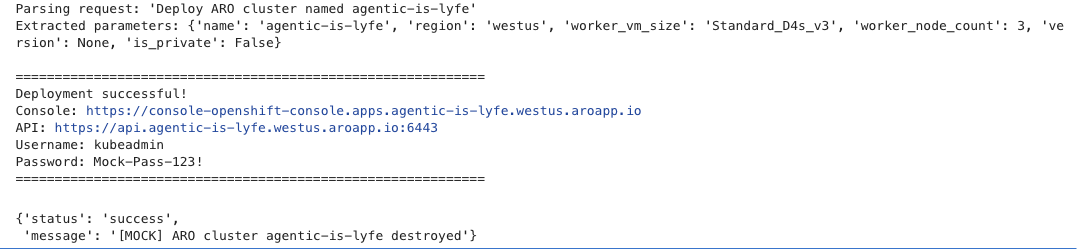
Please note: the lines above have the mock toggle set to True so if you run this notebook as is (without changing the prompt), it will show you the following:
Note that on the first run, you might see a warning message like ‘ERROR: pip's dependency resolver does not currently take into account all the packages that are installed…’. You can safely ignore it for this use case since the agent uses subprocess, Terraform, and Azure APIs (not websockets), so this dependency conflict won't impact your deployment functionality.
And then, if you set it to False for real deployment and re-run it, now it will look like the following:
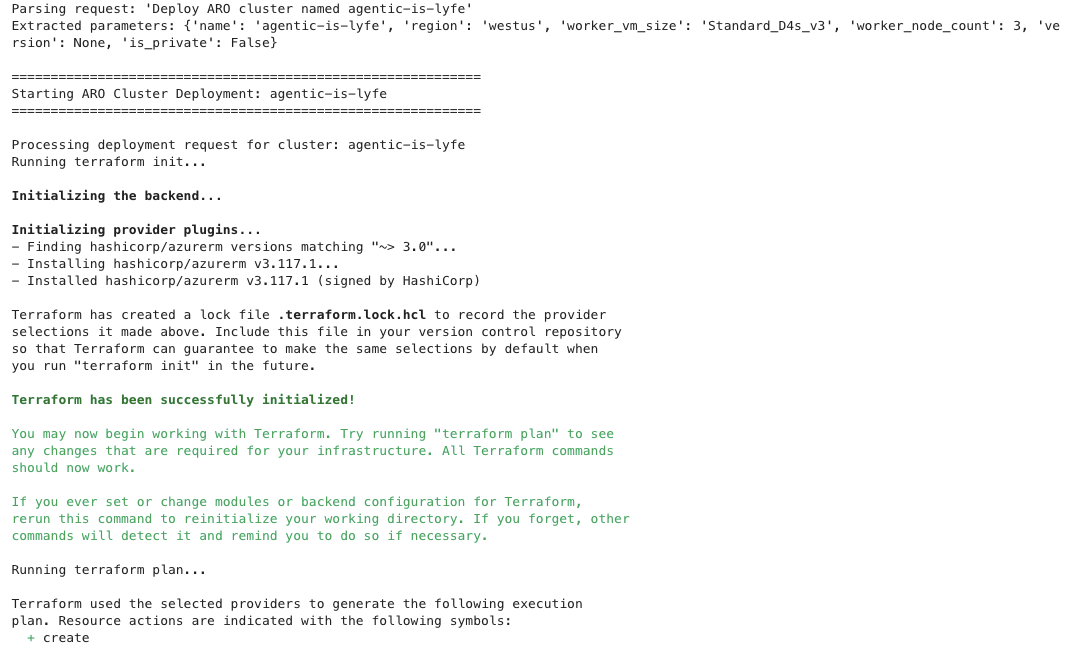
Note that the above figure is just a partial snippet of the entire terraform init and terraform plan states. It will show you the output of the Terraform states live just like when you run it on your own host terminal.
This below is when it starts the terraform apply state:
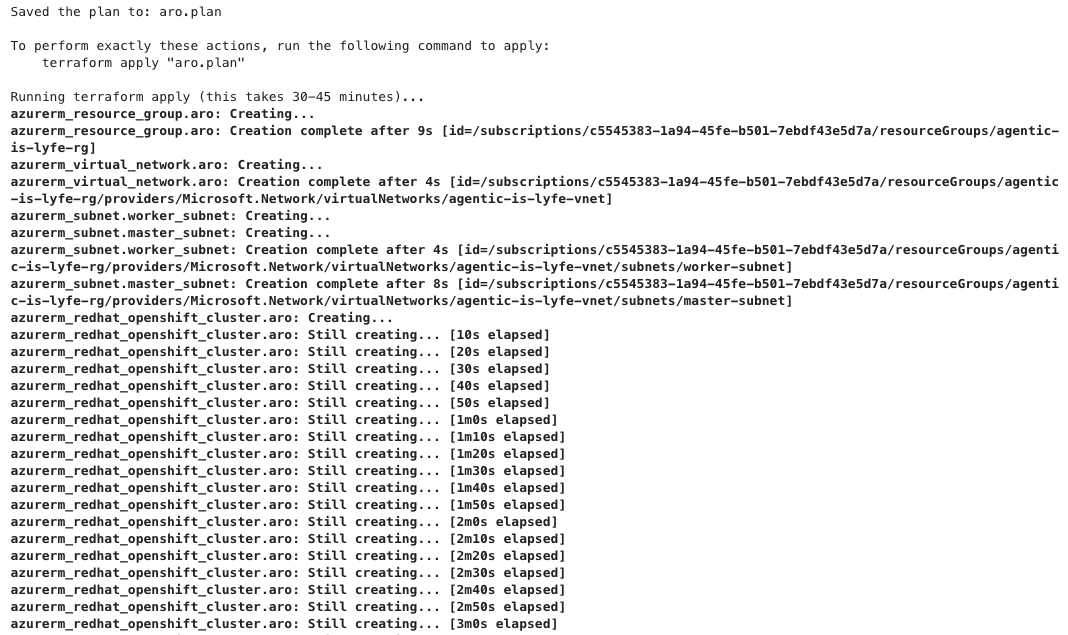
Again, the output above is just a partial snippet since the original output is very long. Note that each cluster deployment might take 30-45 minutes.
And when it’s done, it will show you the details to access the cluster like the example below:

And lastly, this is the output of when the cluster is destroyed:

Note that if you comment out the destroy command in the first cell and run it, then you will not see the destruction output like above. So when you’re ready to destroy the cluster, copy that destroy command to the second cell, and run it. You will then see the destruction output. This is possible because every notebook run keeps track of Terraform state in its own folder/directory. This also means that if you want to create another cluster at the same time, simply duplicate the notebook and run the new one there.
Extra notes: There are many things that you can improve for this guide and/or for future tutorials. Since the objective is to create a simple demonstration here, the credentials were hardcoded on the notebook, which does not actually follow security's best practice, so you might want to replace it with something like managed/workload identities or Azure Key Vault integration with Secret Store CSI driver, among others. It would also be nice if you can spin up (and destroy) not only an Azure Red Hat OpenShift cluster, but also a Red Hat OpenShift Service on AWS cluster for example. Alternatively, we can also have the agent deploy the cluster using Ansible instead of using Terraform. And then for production use cases, ideally you would want to integrate this with Slack or Microsoft Teams or something similar to make it more user-friendly and more accessible to non-technical users.
Congratulations! You now have an agentic AI that can spin up and destroy clusters as needed.