Este conteúdo não está disponível no idioma selecionado.
Chapter 2. Developing First Applications with JBoss Developer Studio Tools
2.1. Configuring JBoss Developer Studio for use with JBoss EAP and JBoss Web Framework Kit
This article provides details for new and existing users who need to configure a fresh install of the IDE or upgrade the versions of Red Hat JBoss Enterprise Application Platform or JBoss Web Framework Kit in use.
The IDE supports application development and deployment with JBoss EAP and JBoss Web Framework Kit only after you configure the IDE for use with JBoss EAP and JBoss Web Framework Kit. This configuration is essential for using the enterprise versions of the example Maven projects provided in JBoss Central. These projects are intended for deployment to JBoss EAP and necessitate IDE access to the JBoss EAP and JBoss Web Framework Kit Maven repositories.
Instructions are provided for the following tasks:
- Set up JBoss EAP for use in the IDE in one of three different ways
- Configure Maven for JBoss EAP and JBoss Web Framework Kit Maven repositories
2.1.1. Set Up JBoss EAP
To set up JBoss EAP for use in the IDE, you must direct the IDE to the local or remote runtime servers. This establishes a communication channel between the IDE and the JBoss EAP server for efficient deployment and server management workflows. Depending on your circumstance, you can set up the JBoss EAP server in one of three ways:
- If you are installing a new instance of the IDE, you can use the combined installer to download, install, and set up the IDE and JBoss EAP.
- If you already have the IDE installed but not JBoss EAP, you can download, install, and set up JBoss EAP from within the IDE.
- If the IDE and JBoss EAP are already installed, you can use runtime detection to set up JBoss EAP from within the IDE.
2.1.2. Download, Install and Set Up the IDE and JBoss EAP using a Single Installer
If you are installing a new instance of the IDE, you can use the combined installer to download, install, and set up the IDE and JBoss EAP. A specific JBoss EAP version is packaged in the installer; for details of the JBoss EAP version see https://access.redhat.com/site/articles/427493.
Note: If you want to install a different version of JBoss EAP, you can either download it from within the IDE (see download, install, and set up JBoss EAP from within the IDE) or install it separately and then follow the instructions in C,use runtime detection to set up JBoss EAP from within the IDE.
To install the IDE and JBoss EAP using a single installer:
-
Log onto the Red Hat Customer Portal at
https://access.redhat.com. - Locate the downloads for versions of the IDE greater than or equal to 9.x.
-
Download the installer
.jarfile. -
On the command line, navigate to the downloaded installer
.jarfile and enter:java -jar jboss-devstudio-version-installer-eap.jarwhere version is the version of the .jar file. -
In the
Red Hat JBoss Developer Studiowizard, clickNext. -
In the
End User License Agreementwindow, read the terms of the End User License Agreement, clickI accept the terms of this license agreement, and then clickNext. -
In the
Select Target Folderwindow, clickBrowseto select the location to install and clickNext. -
When you are prompted about the specified location being created (or overwritten), review the message and, if satisfied, click
OK(orYes). In the
Select Java VMwindow, select the appropriate option for your Java VM preference and then clickNext:-
To select the default Java VM that is listed in the disabled field below, click
Default Java VM. -
To select a different Java VM, click
Specific Java VMand then clickBrowseto locate the Java VM.
-
To select the default Java VM that is listed in the disabled field below, click
In the
Select Platforms and Serverswindow, with reference to installing JBoss EAP, clickYes, and have it ready for use in JBoss Developer Studioand clickNext.Figure 2.1. Select Platforms and Servers Window Confirming Installation
-
Review the information in the
Summary Informationwindow and clickNext. -
The
Installationwindow opens showing the installation progress. Once the installation is complete clickNext. -
In the
Setup Shortcutswindow, click the desired shortcut options and clickNext. -
In the
Finishwindow, clickDoneto complete the installation. The IDE starts. -
In the
Workspace Launcherwindow, in theWorkspacefield type the path for a new or existing workspace or clickBrowseto navigate to a workspace and clickOK. - When prompted to allow Red Hat to receive anonymous usage statistics, select the appropriate option.
-
Click
Get started with JBoss Centralto begin working.

Result: The server is listed in the Servers view in stopped mode.
2.1.3. Download, Install and Set Up JBoss EAP from within the IDE
If the IDE is already installed, you can download, install, and set up JBoss EAP from within the IDE. With this option, you can choose from a range of supported JBoss EAP versions; for details of supported JBoss EAP versions see https://access.redhat.com/site/articles/427493.
To download, install and set up JBoss EAP from within the IDE:
- Start the IDE.
-
Click
WindowPreferences, expandJBoss Tools, and then clickJBoss Runtime Detection. -
In the
Pathspane, clickDownload. In the
Download Runtimeswindow, from theDownload Runtimestable select the JBoss EAP version that you want to download and clickNext.Note:For JBoss EAP 6.1.x and later, continue to follow the steps given here. For JBoss EAP 6.0.x and earlier, follow the on-screen instructions for downloading JBoss EAP from the Red Hat Customer Portal and after JBoss EAP is installed continue to use runtime detection to set up JBoss EAP from within the IDE.Figure 2.2. Download Runtimes Window Listing Available JBoss EAP Versions
-
In the
JBoss.org Credentialswindow, in theDomainfield, typejboss.organd then clickAddnext to theUsernamefield. Note that if you do not have a JBoss.org account, you must click the link to sign up. -
In the
Add a Credentialwindow,Usernamefield, type your username and in thePasswordfield, type the password and clickOK. -
In the
Download Runtimeswindow, clickNext. -
In the
JBoss.org Terms and Conditionswindow, read the terms and conditions, from thePlease choose the country of uselist, select your country of use, and then clickAccept Now. If you have previously accepted the terms and conditions in the IDE or through the jboss.org website, this window is skipped. -
Click
Next. -
Read the
General Public License, clickI accept the terms of the license agreement, and then clickNext. -
For the
Install Folderfield, clickBrowseand choose a location in which to install JBoss EAP and clickFinish. -
Click
Applyand clickOKto close thePreferenceswindow. The download and installation starts and may take some time to complete.

Result: The server is listed in the Servers view in stopped mode.
2.1.4. Use Runtime Detection to Set Up JBoss EAP from within the IDE
If the IDE and JBoss EAP are already installed, you can use runtime detection to set up JBoss EAP from within the IDE. The runtime detection feature automatically identifies the JBoss EAP instance installed on your local system and generates a corresponding default server setup for use in the IDE. This feature makes getting started with a default JBoss EAP server very quick.
Note: Specific JBoss EAP versions are supported by each IDE release; for details of supported JBoss EAP versions see https://access.redhat.com/site/articles/427493.
To use runtime detection to set up JBoss EAP for use in the IDE:
- Start the IDE.
-
Click
WindowPreferences, expandJBoss Tools, and then selectJBoss Runtime Detection. -
Click
Add. -
Navigate to
path/to/jboss-eapand clickOK. JBoss Server Tools recursively scans the path searching for installed servers and displays a list of those it finds. Ensure the
jboss-eap-versioncheck box is selected, where version denotes the JBoss EAP version, and clickOK.Figure 2.3. Selecting a Runtime
-
Click
Applyand clickOKto close thePreferenceswindow.

Result: The server is listed in the Servers view in stopped mode.
2.1.5. Configure Maven for JBoss EAP and JBoss Web Framework Kit Maven Repositories
To configure Maven to use the JBoss EAP and JBoss Web Framework Kit Maven repositories when working inside the IDE, you must ensure that the IDE knows the location of your Maven configuration settings.xml file and that the necessary profiles for the JBoss EAP and JBoss Web Framework Kit Maven repositories are contained in that file. This ensures that Maven knows where to search for project dependencies when it is called to build Maven projects from within the IDE.
2.1.6. Specify Maven settings.xml File Location
If you have multiple Maven settings.xml files or you are using a shared settings.xml file, then this file may not be in the default location expected by the IDE. In this case, you must inform the IDE of the file location.
To specify the Maven settings.xml file location:
- Start the IDE.
-
Click
WindowPreferences, expandMaven, and then clickUser Settings. -
For the
User Settingsfield, clickBrowseand locate thesettings.xmlfile. -
Click
Update Settings. -
Click
Applyand then clickOK.
2.1.7. Use JBoss EAP and JBoss Web Framework Kit Maven Repositories
You can either download the JBoss EAP and JBoss Web Framework Kit Maven repositories from the Red Hat Customer Portal or use the online Maven repository located at https://maven.repository.redhat.com/ga.
2.1.8. Use the Offline Maven Repositories
If you have not previously used these versions of JBoss EAP and JBoss Web Framework Kit, you must configure your Maven settings.xml file to use the associated product Maven repositories. You can manually edit your settings.xml file in a text editor or use the JBoss Developer Studio Maven integration feature to automatically detect the JBoss repositories and appropriately edit your settings.xml file.
Note: The JBoss EAP and JBoss Web Framework Kit Maven repositories must be already obtained from the Red Hat Customer Portal and located on a system that you can access.
To specify the JBoss EAP and JBoss Web Framework Kit Maven repositories locations using the IDE:
- Start the IDE.
-
Click
WindowPreferences, expandJBoss Tools, and then clickJBoss Maven Integration. -
Click
Configure Maven Repositories. -
Click
Add Repository. -
Click
Recognize JBoss Maven Enterprise Repositories. -
Navigate to
path/to/jboss-eap-maven-repositoryand clickOK. JBoss Maven Tools recursively scans the path searching for a Maven repository. Modify the information in the
IDandNamefields as desired, ensure theActive by defaultcheck box is selected, and then clickOK.Figure 2.4. Details of the Selected Maven Repository
-
Click
Add Repository. -
Click
Recognize JBoss Maven Enterprise Repositories. -
Navigate to
path/to/jboss-wfk-maven-repositoryand clickOK. JBoss Maven Tools recursively scans the path searching for a Maven repository. -
Modify the information in the
IDandNamefields as desired, ensure theActive by defaultcheck box is selected, and then clickOK. -
Click
Finishand at the prompt asking if you are sure you want to update the Maven configuration file clickYes. If the specified configuration file does not exist, JBoss Maven Tools creates it. -
Click
Applyand clickOKto close thePreferenceswindow.

2.1.9. Use the Online Maven Repositories
Adding the online repository to the IDE, adds https://maven.repository.redhat.com/ga to your settings.xml , which takes care of all the dependencies.
To use the online Maven repositories:
- Start the IDE.
-
Click
WindowPreferences, expandJBoss Tools, and then clickJBoss Maven Integration. -
Click
Configure Maven Repositories. -
Click
Add Repository. In the
Profile IDdrop-down list, selectredhat-ga-repository.Figure 2.5. Add a Maven Repository
-
Click
OK. -
In the
Configure Maven Repositorieswindow, clickFinish. -
Click
Applyand then clickOKto close thePreferenceswindow.

2.2. Developing Applications Using the Forge Tool
Red Hat JBoss Developer Studio offers Forge Tools for developing Java EE applications and to extend the IDE functionality in Eclipse. Start developing Java EE applications using either the Forge context menu or the command line from the IDE.
2.2.1. Create a New Project
After you have created a Forge project you can set up persistence, add entities and fields, and create scaffold for the project.
To create a new project:
- Press Ctrl+4 to start Forge and open the JBoss Forge context menu.
-
Click
Project:Newto open theCreate a new projectwindow. In the
Create a new projectwindow:-
In the
Project namefield, type a project name. -
In the
Top level packagefield, type{com.example}as the top package. -
In the
Project locationfield, enter a target location for the Forge project. -
In the
Stacklist, clickJava EE 7.
-
In the
-
Click
Finish.
Figure 2.6. Create a New Forge Project

Result: The project is listed in the Project Explorer view.
2.2.2. Set Up Persistence
Setting up the JPA prerequisites, creates the persistence.xml file in the project and adds the required dependencies to the pom.xml file.
Note: While creating the JPA entity, the Forge console automatically detects any prerequisites that must be set up and prompts you to create those at runtime.
To set up persistence:
- Press Ctrl+4 to open the JBoss Forge context menu.
-
Click
JPA: New Entity. The window is populated with default values. -
Click
Nextto continue using the default values or edit the fields to change the values. -
In the
Configure your connection settingswindow, ensure that the fields display the appropriate values and then clickNext. In the
Create a new JPA entitywindow:-
In the
Package Namefield, type the package name. -
In the
Type Namefield, type a name for the new entity.
-
In the
-
Click
Finish.
Result: The new entity appears in the JBoss editor and is also listed in the Project Explorer view with the name: .java.
Figure 2.7. .java Displayed in the JBoss Editor

2.2.3. Add Fields to the Entity
To add fields to the entity:
- Press Ctrl+4 to open the JBoss Forge context menu.
-
Click
JPA: New Field. In the
Create a new fieldwindow:-
In the
Target Entityfield, select{package_name.model.entity}. -
In the
Field Namefield, typeFirstName.
-
In the
Click
Finish.Figure 2.8. Add Field to the Entity
- Repeat steps 1 through 4 to add more fields to the entity.

Result: The fields are added to the Customer.java file.
2.2.4. Create Scaffold
Scaffolding is automatic code generation by a program, using available information, usually a database to generate a basic CRUD (create, read, update, delete) admin interface. The Scaffold Generate command is used to create the scaffold.
To create the scaffold:
- Press Ctrl+4 to open the JBoss Forge context menu.
-
Click
Scaffold Generate. -
In the
Scaffold Typelist, clickAngular JSand then clickNext. -
If your project is not configured to use all the technologies that you want to use, Forge prompts you to set up the dependencies. Click
Next. In the
Select JPA entitieswindow:-
Select the check box in the
Targetsfield. -
Select the
Generate REST resourcescheck box.
-
Select the check box in the
-
Click
Finish.
Figure 2.9. Select JPA Entities to Create the Scaffold

Result: The entities are created and listed in the Project Explorer view.
2.2.5. Run and Test the Application
In this example we use the JBoss EAP server to run the application.
To run the application:
-
In the
Project Explorerview, right-click the application and clickRun AsRun on Server. Alternatively, drag and drop the application from theProject Explorerview to theJBoss EAP 1server in theServersview. The application opens in the default browser. -
Click
Customersand then clickCreateto create a new customer. -
In the
FirstNameand theLastNamefields, enter the first and last names and clickSave. The customer is added to the application.
Use the Search for Customers section to search for customers by their first and/or last names.
2.2.6. Create Extensions or Add Ons
The add ons/extensions run inside the IDE. After adding commands and features to the add-on, no further changes are required for the extensions or add-ons to run in another IDE.
To create an add-on:
- Press Ctrl+4 to open the JBoss Forge context menu.
-
Click
Project:New. In the
Create a new projectwindow:-
In the
Project namefield, type a name for the add-on. -
In the
Project typelist, clickForge Addon (JAR).
-
In the
-
Click
Next. -
In the
Furnace Addon Setupwindow,Depend on these addonssection, Forge automatically selects the prerequisites. Review the dependencies and clickFinish. - Press Ctrl+4 to open the Forge context menu.
-
Select
Java: New Classto open theJava: New Classwindow. -
In the
Type Namefield, typeCustomCommandand clickFinish. The CustomCommand.java file opens in the JBoss editor. To change this Java class into a Forge command:
- Press Ctrl+4 to open the Forge context menu.
-
Select
Addon: New UI Commandto open theGenerates a UICommand implementationwindow. In the
Generates a UICommand implementationwindow:-
In the
Type Namefield, typeCustomCommand. -
In the
Command namefield, typecustom.
-
In the
Click
Finish.Figure 2.10. Add a Command
The command is listed in the CustomerCommand.java file.
- Press Ctrl+4 to open the Forge context menu.
-
Select
Build and Install an Addonto open theBuild and install a Forge addonwindow. -
Click
Finishto install the add-on into the IDE. To execute the installed command:
- Press Ctrl+4 to open the Forge context menu.
-
Select
custom. Add parameters to the method in order to add user input to the command. Copy and paste the following command in the CustomCommand.java file:
Copy to Clipboard Copied! Toggle word wrap Toggle overflow
To rebuild and install:
-
In the
Project Explorerview, click the created add-on. - Press Ctrl+4 to open the Forge context menu.
-
Select
Build and Install an Addon. -
Click
Finishto install the add-on into the IDE. - Press Ctrl+4 to open the Forge context menu.
-
Click
JIRA: Setup.
-
In the

Figure 2.11. Add-on Listed in the Forge Context Menu

Result: The add-on is created and listed in the Forge context menu.
2.2.7. Did You Know
-
You can launch the Forge Console by clicking
. The Forge Consoleview opens in an inactive state. -
You can start JBoss Forge by clicking the `Start {JBoss Forge_version} ` button
 ).
).
-
To link the Forge Console output with the open editor, click the
Link with Editorbutton ( ).
).
2.3. Developing Applications Using the Hibernate Tools
Hibernate Tools is a collection of tools for projects related to Hibernate version 5 and earlier. The tools provide Eclipse plugins for reverse engineering, code generation, visualization and interaction with Hibernate.
Use the Hibernate Tools to easily generate, test and prototype your Hibernate or JPA mapped projects. You can also use Hibernate to Run queries, browse mappings and generate code for your data projects.
2.3.1. Create a JPA Project and Connect to the Sakila-h2 Database
2.3.1.1. Prerequisites
To connect to the sakila-h2 database:
- Download the sakila-h2 database from the h2 version of the Sakila database.
-
On the terminal, navigate to the directory where you have saved the
sakila-h2.jarfile and run the following command to start the database:$ ./runh2.sh.
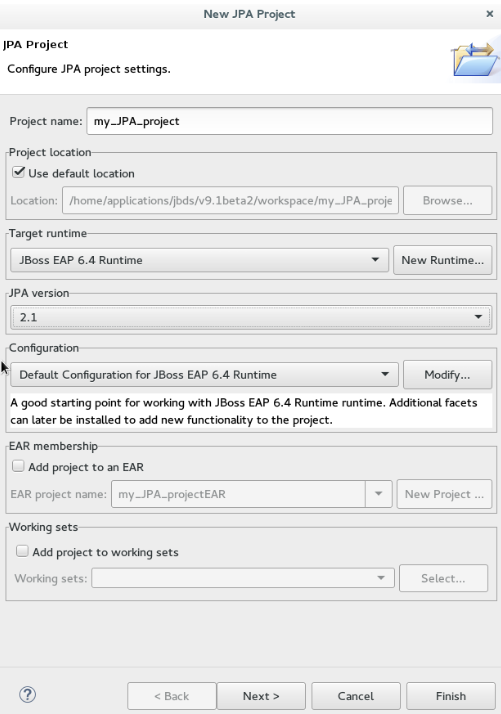
To create a JPA project and connect to the database:
-
In the workspace, click
FileNewOtherand then search forJPA Projectand double-click it to open theNew JPA Projectwizard. In the
New JPA Projectwizard:-
In the
Project namefield, type a name for the project. -
In the
Target runtimefield, click a runtime server that you wish to use. -
In the
JPA versionlist, click2.1.
-
In the
Click
Next.Figure 2.12. Create a New JPA Project
-
In the
Java Configure project for building a Java applicationwindow, select the source folder on the build path and clickNext. -
In the
JPA Facetwindow, clickAdd connection. In the
New Connection Profilewindow:-
Click
Generic JDBC. -
In the
Namefield, typesakila.
-
Click
-
Click
Next. -
Click the
New Driver Definitionicon ( ) located next to the
 Driversfield. -
Click the
Name/Typetab, clickGeneric JBDC Driverand then click theJAR listtab. Click
Add JAR/Zipand then select the previously downloadedsakila-h2.jarfile.Figure 2.13. Select sakila-h2.jar File
Click the
Propertiestab and enter the following details in thePropertiestable:-
Click
Connection URLand typejdbc:h2:tcp://localhost/sakila. -
Click
Driver Class, and then click the ellipsis icon .
.
-
In the
Available Classes from Jar Listwindow, clickBrowse for class. ClickOKwhen the required driver is found. -
Click
User ID, typesa.
-
Click
-
In the
New Driver Definitionwindow, clickOK. -
In the
New Connection Profilewindow, clickFinishto return to theJPA Facetwindow. -
In the
Platformlist, clickHibernate (JPA 2.1). -
In the
JPA implementationpane,Typelist, either clickUser Libraryand then clickManage libraries( ). In the
 Preferences (Filtered)window add the libraries, OR clickDisable Library Configuration. -
Click
Finish.

Result: The project is created and is listed in the Project Explorer view.
2.3.1.2. Generate DDL and Entities
DDL, Data Definition Language, is a syntax to define data structures. Generate DDL and entities to enable Hibernate runtime support in an Eclipse JPA project.
To generate DDL and Entities:
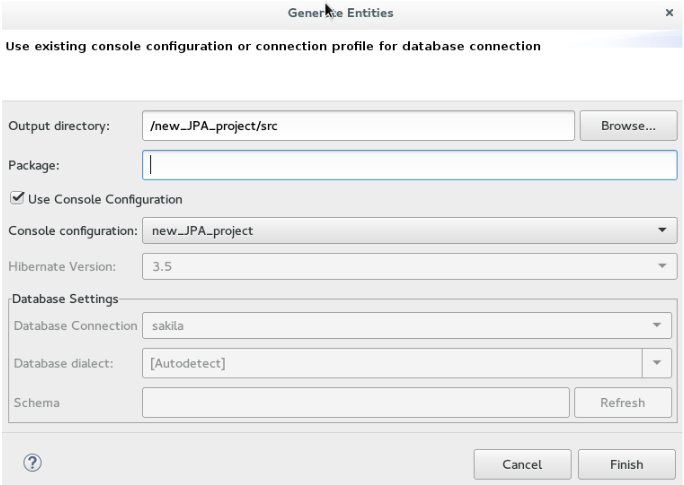
-
In the
Project Explorerview, right-click the {project_name}. -
Click
JPA ToolsGenerate Tables from EntitiesorGenerate Entities from Tables. TheGenerate Entitieswindow (or theGenerate Tables from Entitieswindow) appears. In the
Generate Entitieswindow:-
In the
Output directoryfield, change the default directory, if required. -
Optionally, in the
Packagefield, type the package name. -
Ensure that the
Use Console Configurationcheck box is selected. -
In the
Console Configurationlist, ensure that the relevant configuration is shown.
-
In the
Click
Finish.Figure 2.14. Generate Entities
2.3.1.3. Create a Hibernate Mapping File
Hibernate mapping files specify how your objects relate to database tables. To create basic mappings for properties and associations, i. e. generate .hbm.xml files:
Create a new Hibernate Mapping file:
-
Click
FileNew. -
In the
Newwizard, locateHibernateand then clickHibernate XML Mapping file (hbm.xml).
-
Click
-
Click
Next. In the
New Hibernate XML Mapping files (hbm.xml)window:-
Click
Add Classto add classes or clickAdd Packagesto add packages. You can create an empty.hbmfile by not selecting any packages or classes. An empty .hbm file is created in the specified location. -
Click the
depth controlcheck box to define the dependency depth used when choosing classes. -
Click
Next. - Select the target folder location.
-
In the
File namefield, type a name for the file and clickFinish.
-
Click
Result: The hibernate.hbm.xml file opens in the default editor.
2.3.1.4. Create a Hibernate Configuration File
For reverse engineering, prototype queries, or to simply use Hibernate Core, a hibernate.properties or hibernate.cfg.xml file is needed. Hibernate Tools provides a wizard to generate the hibernate.cfg.xml file if required.
To create a Hibernate Configuration file:
Create a new
cfg.xmlfile:-
Click
. -
In the
Newwizard, locateHibernateand then clickHibernate Configuration File (cfg.xml).
-
Click
-
Click
Next. -
In the
Create Hibernate Configuration File (cfg.xml)window, select the target folder for the file and then clickNext. In the
Hibernate Configuration File (cfg.xml)window:-
The
Containerfield, by default, shows the container folder. -
The
File namefield, by default, shows the configuration file name. -
In the
Database dialectlist, click the relevant database. -
In the
Driver classlist, click the driver class depending on the database dialect that you just selected. -
In the
Connection URLlist, click the relevant URL. -
Click the
Create a console configurationcheck box to use thehibernate.cfg.xmlfile as the basis of the console configuration.
-
The
Click
Finish.Figure 2.15. Create a New cfg.xml File

Result: The new hibernate.cfg.xml file opens in the default editor.
2.3.1.5. Create a Hibernate Console Configuration
A Console configuration describes how the Hibernate plugin configures Hibernate. It also describes the configuration files and classpaths needed to load the POJOs, JDBC drivers, etc. It is required to make use of query prototyping, reverse engineering and code generation. You can have multiple console configurations per project, but for most requirements, one configuration is sufficient.
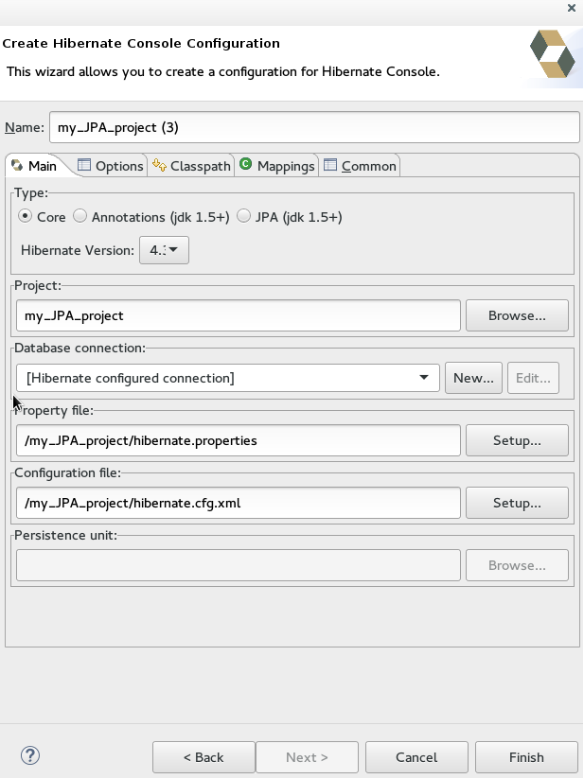
To create a Hibernate console configuration:
Create a
cfg.xmlfile:-
Click
. -
In the
Newwizard, locateHibernateand then clickHibernate Configuration File (cfg.xml).
-
Click
-
Click
Next. In the
Create Hibernate Configurationwindow,Maintab:-
In the
Namefield, the generated name provided by default can be edited if required. -
In the
Typefield, clickCore. -
In the
Hibernate Versionlist, select the relevant version. -
In the
Projectfield, type a project name or clickBrowseto locate an existing project. -
In the
Database connectionfield, clickNewto configure a new database connection or leave as is to use the default connection. -
In the
Property filefield, clickSetupto set the path to the firsthibernate.propertiesfile found in the selected project (refer to the Did You Know, Setup Property File section for detailed steps). Once created the path of the.propertiesfile displays in theProperty filefield. -
In the
Configuration filefield, clickSetupto set the path to the firsthibernate.cfg.xmlfile found in the selected project (refer to the Did you know, Setup Configuration File section for detailed steps). Once created, the path of thehibernate.cfg.xmlfile displays in theConfiguration filefield.
-
In the
-
Click
Finish.
Figure 2.16. Create Hibernate Console
2.3.1.6. Modify the Hibernate Configurations
You can edit the Hibernate Configurations from the Hibernate Configurations view.
To modify the Hibernate Configurations:
-
Click
and then click Hibernate Configurations. -
In the
Hibernate Configurationsview, right-click the {project_name} and clickEdit Configuration. -
The
Edit launch configuration propertieswindow displays. Edit the fields. -
To close the
Hibernate Configurationsview, right-click the configuration and then clickClose Configuration.
2.3.1.7. Generating Code and Reverse Engineering
Hibernate tools’ reverse engineering and code generation features allow you to generate a range of artifacts based on a database or an existing Hibernate configuration, like mapping files or annotated classes. Among others, these generated artifacts can be POJO Java source files, hibernate.hbm.xml files, hibernate.cfg.xml generation and schema documentation.
To generate code:
Configure Hibernate:
-
Click
. -
Search for
Hibernateand double-click it. TheHibernate Configurationsview appears.
-
Click
View the Hibernate Code Generation Configurations:
-
In the toolbar, next to the
Runicon, click the down arrow. -
Click
Hibernate Code Generation Configurations.
-
In the toolbar, next to the
-
Expand
Hibernate Code Generationand then clickNew_configuration. -
In the
Create, manage, and run configurationswindow, in theNamefield, type a logical name for the code generation launcher. If you do not specify a name, the default name,New_Generation, is used. In the
Maintab, enter the following details:NoteThe
At least one exporter option must be selectedwarning indicates that for the launcher to work you must select an exporter on theExportertab. The warning disappears after you select an exporter.-
In the
Console Configurationlist, click the name of the console configuration to be used when generating code. -
In the
Output directoryfield, clickBrowseand select an output directory. This is the default location where all output will be written. You can enter absolute directory paths, for example: d:/temp. Note that existing files will be overwritten/ if the correct directory is not specified. - To reverse engineer the database defined in the connection information, click the Reverse engineering from JDBC connection check box. JBoss Developer Studio generates code based on the database schema when this option is used.If this option is not enabled, the code generation is based on the existing mappings specified in the Hibernate Console configuration.
-
In the
Packagefield, add a default package name for any entities found when reverse engineering. In the
reveng.xmlfield, clickSetupto select an existingreveng.xmlfile, or create a new one. This file controls certain aspects of the reverse engineering process, such as:- how JDBC types are mapped to Hibernate types
- which tables are included or excluded from the process
In the
reveng. strategyfield, clickBrowseand provide an implementation of a ReverseEngineeringStrategy. this must be done if thereveng.xmlfile does not provide enough customization; the class must be in the classpath of the Console Configuration because if not, you will get a class not found exception.NoteRefer to the Did You Know, Create, manage, and run configurations window, Main tab, Check Boxes section for details of the selected check boxes.
-
The
Exportertab specifies the type of code that is generated. Each selection represents an Exporter that generates the code. In the Exporter tab: Click the
Use Java 5 syntaxcheck box to use a Java 5 syntax for the Exporter-
Click the
Generate EJB3 annotationscheck box to generate EJB 3 annotations Select the Exporters from the
Exporterstable. Refer to the Did You Know, Exporter section for details about the exporters.Each Exporter selected in the preceding step uses certain properties that can be set up in the
Propertiessection. In thePropertiessection, you can add and remove predefined or custom properties for each of the exporters.
-
Click the
-
In the
-
Click
Addnext to thePropertiestable to add a property to the chosen Exporter. In the resulting dialog box, select the property from the proposed list and the appropriate value for it. For an explanation of the property and its value, refer to the Did You Know, Exporter Property and its Values section. Click the
Refreshtab and enter the following:Click the
Refresh resources upon completioncheck box to refresh the resources and click one of the following:-
The entire workspace: To refresh the entire workspace. -
The selected resource: To only refresh the selected resource -
The project containing the selected resource: To refresh the project containing the selected resource -
The folder containing the selected resource: To refresh the folder containing the selected resource -
Specific resources: To refresh specific resources; then clickSpecify Resourcesto open theEdit Working Setwindow and select the working set.
-
-
Click the
Recursively include sub-folderscheck box to refresh the sub-folders.
Click the Common tab and enter the following:
- In the Save as pane, click Local file to save the configuration as a local file, OR click Shared file and then select a shared file location.
- In the Display in favourites menu pane, click the menu to display the configuration.
- In the Encoding pane, click the format that you want the configuration to be encoded to.
- In the Standard Input and Output pane, click the Allocate console check box and optionally click the Input File and Output File check boxes and select the relevant options.
- Click the Launch in background check box to show the configuration launch progress in the background.
- Click Apply and then click Run.
2.3.2. Did You Know
2.3.2.1. Set Up the Property File
To set up the property file:
- In the Create Hibernate Configuration window, Main tab, click Setup.
- In the Setup property file window, click Create new to create a new property file (or click Use existing to choose an existing file as a property file).
- In the Create Hibernate Properties file (.properties) window, click the parent folder name and then click Finish.

2.3.2.2. Set Up the Configuration File
To set up the configuration file:
- In the Create Hibernate Configuration window, Main tab, click Setup.
- In the Setup configuration file window, click Use existing to choose an existing file as a property file (or click Create new to create a new property file).
- In the Select hibernate.cfg.xml file window, expand the parent folder, choose the file to use as the hibernate.cfg.xml file, and then click OK.

2.3.2.3. Create, manage, and run configurations Window, Main tab, Check Boxes
The following check boxes are selected by default in the Create, manage, and run configurations window, Main tab:
- Generate basic typed composite ids: When a table has a multi-column primary key, a <composite-id> mapping will always be created. If this option is enabled and there are matching foreign-keys, each key column is still considered a 'basic' scalar (string, long, etc.) instead of a reference to an entity. If you disable this option a <key-many-to-one> property is created instead. Note that a <many-to-one> property is still created, but is simply marked as non-updatable and non-insertable.
- Detect optimistic lock columns: Automatically detects optimistic lock columns. Controllable via reveng. strategy; the current default is to use columns named VERSION or TIMESTAMP.
- Detect many-to-many tables: Automatically detects many-to-many tables. Controllable via reveng. Strategy.
- Detect one-to-one associations: Reverse engineering detects one-to-one associations via primary key and both the hbm.xml file and annotation generation generates the proper code for it. The detection is enabled by default (except for Seam 1.2 and Seam 2.0) reverse engineering. For Hibernate Tools generation there is a check box to disable this feature if it is not required.
2.3.2.4. Exporter Property and its Values
- jdj5: Generates Java 5 syntax
- ejb3: Generates EJB 3 annotations
- for_each: Specifies for which type of model elements the exporter should create a file and run through the templates. Possible values are: entity, component, configuration.
- template_path: Creates a custom template directory for this specific exporter. You can use Eclipse variables.
- template_name: Name for template relative to the template path.
- outputdir: Custom output directory for the specific exporter. You can use Eclipse variables.
- file_pattern: Pattern to use for the generated files, with a path relative to the output dir. Example: /.java.
- Dot.executable: Executable to run GraphViz (only relevant, but optional for Schema documentation).
- Drop: Output will contain drop statements for the tables, indices, and constraints.
- delimiter: Is used in the output file.
- create: Output will contain create statements for the tables, indices, and constraints.
- scriptToConsole: The script will be output to Console.
- exportToDatabase: Executes the generated statements against the database.
- outputFileName: If specified the statements will be dumped to this file.
- haltOnError: Halts the build process if an error occurs.
- Format: Applies basic formatting to the statements.
- schemaUpdate: Updates a schema.
- query: HQL Query template
2.3.2.5. Exporter
- Domain code (.java): Generates POJOs for all the persistent classes and components found in the given Hibernate configuration.
- Hibernate XML Mappings (.hbm.xml): Generate mapping (hbm.xml) files for each entity.
- DAO code (.java): Generates a set of DAOs for each entity found.
- Generic Exporter (<hbmtemplate>): Generates a fully customizable exporter that can be used to perform custom generation.
- Hibernate XML Configuration (.cfg.xml): Generates a hibernate.cfg.xml file; used to keep the hibernate.cfg.xml file updated with any newly discovered mapping files.
- Schema Documentation (.html): Generates a set of HTML pages that document the database schema and some of the mappings.
- Schema Export (.ddl): Generates the appropriate SQL DDL and allows you to store the result in a file or export it directly to the database.
- HQL Query Execution Exporter: Generates HQL Query according to given properties.
2.3.3. Troubleshooting
2.3.3.1. Problems while loading database driverclass

Error message: Problems while loading database driverclass (org.h2.Driver)
Resolution: To avoid this error, you must select a predefined DTP connection profile in the Database Connection dropdown. Also, the jar can be added on the Classpath page of the Console Configuration wizard if you don’t want to have it on the project classpath.
-
Right-click {project_name}
Properties Java Build Path. - Click the Libraries tab and then click Add External JARs.
- Navigate to the downloaded database JAR file and click OK.
- In the Properties for {project_name} window, click Apply and then click OK.
2.4. Creating Your First Mobile Web Application
Mobile Web Tools provides an HTML5 Project wizard that enables you to create web applications optimized for mobile devices. The HTML5 Project wizard is a useful starting point for creating all new HTML5 web applications in the IDE. The wizard generates a sample ready-to-deploy HTML5 mobile application with REST resources from a Maven archetype.
As demonstrated in this article, you can customize the application using the JBoss Tools HTML Editor, deploy and view the application with the mobile browser simulator BrowserSim, and use LiveReload to refresh BrowserSim as the application source code is modified and saved in the IDE.
The instructions here demonstrate how to complete the following tasks:
This article guides you through each of these configuration requirements and must be completed in the order given.
2.4.1. Prerequisite: Configure the IDE for an Available Server
The instructions in this article show you how to deploy your HTML5 web application to a server. The IDE must be configured for any servers to which you want to deploy applications, including the location and type of application server and any custom configuration or management settings. You can complete this configuration at the time of deploying the application but in this article it is assumed that you have completed the configuration beforehand.
For information on configuring a local runtime server and deploying applications to it, see Deploy Apps to a Local Server.
2.4.2. Create an HTML5 Project
The HTML5 Project wizard generates a sample project based on a Maven archetype and the project and application identifiers provided by you. The Maven archetype version is indicated in the Description field of the wizard first page and you can change the version, and therefore the project look and dependencies, by selected either an enterprise or non-enterprise target runtime within the wizard.
To create a HTML5 project, complete the following steps:
-
In JBoss Central, under
Start from scratch, clickHTML5 Project. -
From the
Target Runtimelist, select an IDE-ready server and clickNext. Complete the fields about the HTML5 project as follows:
-
In the
Project namefield, type a name for the project. -
In the
Packagefield, type an alpha-numeric package for the project.
-
In the
-
Click
Finish. -
When prompted with
'HTML5 Project' Project is now ready, clickFinish.
The project is generated and listed in the Project Explorer view.
2.4.3. Build and Deploy the Application
After the HTML5 project is generated, it can immediately be built and deployed to an application server.
To build and deploy the application, complete the following steps:
-
In the
Project Explorerview, right-click{project name}and click. -
Ensure
Choose an existing serveris selected. From the table of servers, expand
localhost, select the server on which to deploy the application and clickFinish.Figure 2.17. Selecting the server to run the application

The Console view shows output from the server starting and deploying the application. When deployment is complete, an IDE default web browser opens and shows the deployed web application.
Figure 2.18. Enterprise HTML5 web application Viewed in Browser

Figure 2.19. Non-enterprise HTML5 web application Viewed in Browser

2.4.4. View the Application with BrowserSim
The HTML5 web application has an interface optimized for mobile devices. You can view and test such web pages as they would be on mobile devices using BrowserSim. This mobile device web browser simulator provides skins for different mobile devices, making it easy to test and debug web applications for mobile devices.
To view the application with BrowserSim, complete the following steps:
-
Ensure
JBossis the perspective in use. To open theJBossperspective, clickand double-click JBoss. -
In the
Serversview, expand the server adapter to list the application. -
Right-click
{application name}and click.
Figure 2.20. HTML5 Web Application Viewed with BrowserSim

2.4.5. Enable LiveReload for BrowserSim
Mobile Web Tools supports the LiveReload protocol for automatic reloading of web pages in enabled browsers as the application source is modified and saved. LiveReload can be enabled for your system browsers and, as demonstrated here, BrowserSim. This provides an interactive web development experience.
To enable LiveReload for BrowserSim, complete the following steps:
- Close any open BrowserSim simulated devices.
-
In the
Serversview, right-click an existing server to display the context menu and click. -
From the list, expand
Basic, selectLiveReload Serverand clickFinish. -
In the
Serversview, right-clickLiveReload Serverand clickStart. -
In the
Serversview, right-click{application name}and click.
LiveReload is automatically enabled for this BrowserSim simulated device and all subsequent devices opened while the LiveReload server is running.
2.4.6. Change the Application
With LiveReload enabled for BrowserSim, you can make changes to your application source code and BrowserSim automatically reloads the application when changes are saved. This is demonstrated here by making a simple change to the project index.html file, specifically changing the text in the application title banner.
To change your application, complete the following steps:
-
In the
Project Explorerview, expand{project name}.src main webapp -
Double-click
index.htmlto open it for editing with theJBoss Tools HTML Editor. Locate the following line of code inside the
<body>tags<h3>HTML5 Quickstart</h3>
<h3>HTML5 Quickstart</h3>Copy to Clipboard Copied! Toggle word wrap Toggle overflow and replace it with
<h3>My Quickstart</h3>
<h3>My Quickstart</h3>Copy to Clipboard Copied! Toggle word wrap Toggle overflow - Save the file by pressing Ctrl+S (or Cmd+S).
This code change modifies the heading displayed on the main application page. Notice that BrowserSim automatically reloads the web page when you save the changed file and the application modifications are immediately visible.
2.4.7. Did You Know?
-
You can also launch the
HTML5 Projectwizard from theJBossperspective by clicking. -
You can test an undeployed
.htmlfile with BrowserSim by right-clicking the.htmlfile in theProject Explorerview and clicking. -
To set BrowserSim as the IDE default web browser, in the
JBossperspective clickor click and from the External web browserslist selectBrowserSim. -
You can also enable LiveReload for already opened BrowserSim simulated devices. After starting the LiveReload server, right-click the BrowserSim simulated device frame and click
Enable LiveReload.
2.5. Generating an HTML5 Web Application Using the Mobile Web Palette
The IDE provides the Mobile Web palette that allows the user to make interactive web applications. This palette offers a wide range of features including drag-and-drop widgets for adding common web interface framework features such as HTML5, jQuery Mobile, and Ionic tags to html files. It also contains widgets like Panels, Pages, Lists, Buttons to make the applications more user friendly and efficient.
Use the instructions to complete the following steps:
2.5.1. Add a New HTML5 jQuery Mobile File to a Project
The HTML5 jQuery Mobile file template consists of JavaScript and CSS library references that are inserted in the file’s HTML header. The template also inserts a skeleton of the jQuery Mobile page and listview widgets in the file’s HTML body. The following procedure details the steps to insert the template into your project.
To create a new HTML5 jQuery Mobile file in an existing project:
-
In the
Project Explorerview, expand [project name]srcmain. -
Right-click
webappand click. Complete the fields about the html file as follows:
-
Ensure the parent folder field shows
[project name]/src/main/webapp. -
In the
File namefield, type a name for the HTML5 file.
-
Ensure the parent folder field shows
-
Click
Next. -
From the
Templatestable, selectHTML5 jQuery Mobile Page (1.4)and clickFinish.
Figure 2.21. Select HTML5 jQuery Mobile Page (1.4)

Result: The new file is listed in the Project Explorer view under the project webapp directory and the file opens in the editor.
2.5.2. Add New Pages to the Web Application
Use the jQuery Mobile Page widget to add pages to your mobile web application as follows:
-
In the
Project Explorerview, expand [project name]srcmainwebapp. -
Right-click the new html file and click
. -
In the
Paletteview, click thejQuery Mobiletab to view the available widgets and clickPage. Complete the fields about the page as follows:
-
In the
Headerfield, type a name for the page header. -
In the
Footerfield, type a name for the page footer.
-
In the
Click
Finish.Figure 2.22. Adding a New Page
-
Save the changes to the file by clicking the
Saveicon.

Result: A page is added to the html file. JS and CSS references are also automatically added to the file by the Page widget wizard.
Figure 2.23. New Page Added to the HTML File

2.5.3. Customize the Home Page of the Web Application
Use the widgets in the jQuery Mobile palette to customize the page. Use the instructions to add a menu to the page. This menu links to three other pages: Home, Search, and the Add Contacts page.
To create and add the menu to your application page:
2.5.4. Add a Panel to the Page
- Place the cursor where you want the panel, in the html file.
-
In the
Paletteview, in thejQuery Mobiletab, clickPanel. Complete the fields about the Panel as follows:
-
In the
IDfield, typemy_panel_ID. -
Clear the
Add Menucheck box.
-
In the
-
Click
Finish. - Save the html file.
Figure 2.24. Adding a New Panel

Result: A corresponding code snippet, for the newly added panel, is added to the html file where you had placed the cursor.
2.5.5. Add a List to the Panel
- Within the panel’s code snippet, place your cursor at the desired location for the new list.
-
In the
Paletteview, in thejQuery Mobiletab, clickListView. Complete the fields about the ListView as follows:
-
In the
Itemssection,1tab, in theLabelfield, type the name for the first list item on the page. -
In the
URL (href)field, type a URL identifier for the label.
-
In the
Figure 2.25. New Listitem Added to the Panel

-
Click
Finish. - Save the html file.
Result: The new list item name appears in the code snippet.
Figure 2.26. Code for the New Listitem in the Panel Added

2.5.6. Add a Button in the Header of the Page to Display the List
- Place the cursor within the header at the desired location for the new button.
-
In the
Paletteview, in thejQuery Mobiletab, clickButton. Complete the fields about the button as follows:
-
In the
Labelfield, typeMenu. -
In the
URL (href)field, type#followed by the panel ID (#my_panel_ID, in this case). -
In the
Iconlist, select an icon. -
In the
Icon positionlist, select a desired value. -
Select the
Icon onlycheck-box.
-
In the
-
Click
Finish. - Save the html file.
Figure 2.27. Adding a Button
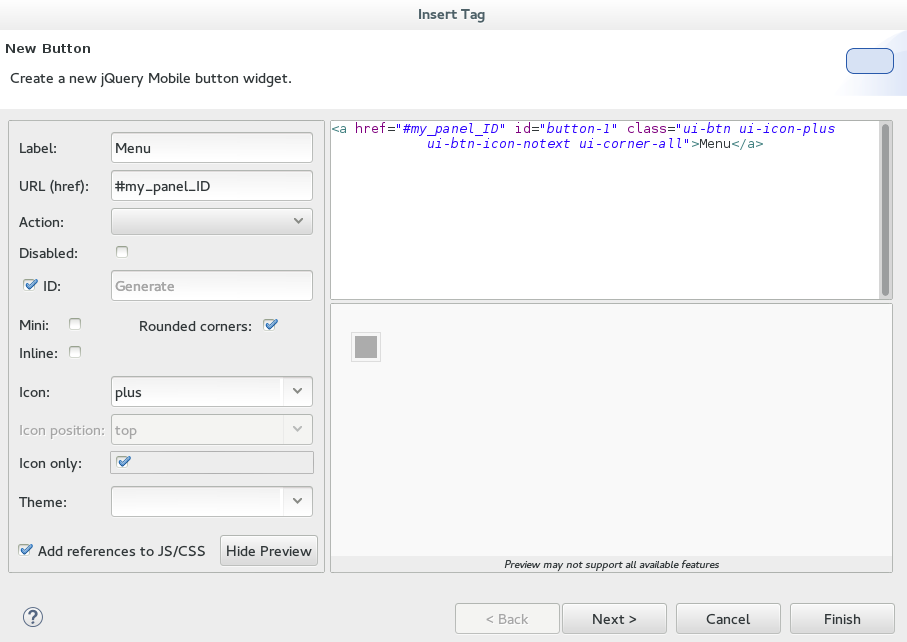
Result: The following code is added to the body of the html file.
2.5.7. Run and Test the HTML5 Mobile Application Using BrowserSim
Test the newly added elements to the application by navigating to the interface on BrowserSim as follows:
-
In the
Project Exploreview, expand [project name]srcmainwebapp. -
Right-click the changed html file and click
.
Result: A simulated device appears and displays the application.
Figure 2.28. The Changes Made to the HTML File Displayed on BrowserSim

2.5.8. Did You Know?
-
To access the
jQuery Mobilepalette when thePaletteview is not visible, click, expand Generaland selectPalette. -
Add BrowserSim in the toolbar by clicking
and select BrowserSimunderCommand Groups Availability. It appears as a Phone icon in the toolbar. -
Use the
Panelwidget to create menus, collapsible columns, drawers, and more. TheList Viewwidget is an unordered list containing links to list items. jQuery Mobile applies the necessary styles to make the listview mobile friendly. -
Add contacts to the
Add Contactspage by following the above listed procedure. You can addName,Email,Phone Numberfields to theAdd Contactspage by using theText Inputicon in theMobile Webpalette.
2.6. Creating Your First Hybrid Mobile Application
Mobile Hybrid Tools enables you to quickly create Cordova-based hybrid mobile applications using the Hybrid Mobile Project wizard. This wizard is a useful starting point for creating all new Cordova-based mobile applications in the IDE.
As illustrated in this article, from this foundation you can customize the application by adding a range of Cordova plug-ins for accessing device hardware with the Cordova Plug-in Discovery wizard. You can also test your Cordova-based hybrid mobile applications without leaving the IDE using CordovaSim, a mobile application simulator. The IDE also allows you to deploy your Hybrid Mobile project on the FeedHenry server.
The Hybrid Mobile Project wizard is also an ideal starting point for new users to Hybrid Mobile Tools and CordovaSim, guiding you through the necessary steps to set up the IDE and your system for developing Cordova applications before generating a basic Cordova project.
Before attempting to install or create a hybrid mobile project with JBoss Tools, ensure that the Android SDK is installed and up to date. Creating or installing hybrid mobile projects without a working and updated installation of Android SDK can result in unexpected errors.
The instructions here demonstrate how to complete the following tasks:
2.6.1. Prerequisites
Ensure that the following prerequisites are met to create a hybrid mobile project:
2.6.2. Enable the JBoss Hybrid Mobile Tools + CordovaSim Feature
To enable the JBoss Hybrid Mobile Tools + CordovaSim feature:
-
In JBoss Central, click the
Software/Updatetab. In the
Features Availablelist, select theJBoss Hybrid Mobile Tools + CordovaSimcheck box and then clickInstall/Update.Figure 2.29. Hybrid Mobile Tools + CordovaSim Check Box Selected
- Follow the on-screen instructions to complete the installation.

During the installation process you may receive warnings about installing unsigned content. If this is the case, review the details of the content and if satisfied click OK to continue with the installation.
Once installation is complete, you are prompted to restart Eclipse. Click Yes to restart immediately and No if you need to save any unsaved changes to open projects. Note that IDE changes do not take effect until the IDE is restarted.
2.6.3. Installing Android SDK
To install Android SDK:
- Download Android SDK and then unzip the file at a desired location.
-
In the IDE, click
WindowPreferences. -
In the
Preferenceswindow,type filter textfield, typeHybrid Mobile. -
In the
Hybrid Mobilecategory, clickAndroid. Click
Browseto locate and select the Android SDK directory on your machine.Figure 2.30. Select the Android SDK Location
-
Click
Applyand then clickOK.

2.6.4. Create a Hybrid Mobile Project
After the project wizard requirements are installed, you can restart the Hybrid Mobile Project wizard and follow it through to completion to create a template-based project. Within the wizard you must specify identifiers for the project and application and select the Cordova engine version to be used for building the project.
To create a Hybrid Mobile project, complete the following steps:
-
In JBoss Central, under
Start from scratch, clickHybrid Mobile Project. Complete the fields about the project and application as follows:
-
In the
Project namefield, type a name for the project. -
In the
Namefield, type a name for the application In the
IDfield, type an alpha-numeric package name for the application; IDs are akin to Java package names and must begin with an alpha character and contain at least one dot.Figure 2.31. Provide the Project and Application Information
-
In the
-
Click
Next. -
From the
Available Enginestable, select the latest Apache Cordova version. If theAvailable Enginestable is empty, first clickDownloadand follow the instructions to install the latest Cordova engine version on your system. -
Click
Finish.

Result: The project is created and listed in the Project Explorer view.
2.6.5. Customize the Hybrid Mobile Project
Before building and running the Hybrid Mobile application, instructions are given here for customizing the project by adding the Cordova Device Motion plug-in and modifying the source code to make use of it. The plug-in gives access to the mobile device accelerometer and the code snippets added to this project check for data every one second and display the X, Y, Z acceleration values on the front page of the application. This plug-in is just one of a catalog of plug-ins available to add to your Hybrid Mobile project.
To customize the Hybrid Mobile project with the Cordova Device Motion plug-in, complete the following steps:
-
In the
Project Explorerview, right-click{project name}and clickInstall Cordova Plug-in. -
In the
Findfield, entermotion. -
From the filtered list of plug-ins, select
org.apache.cordova.device-motionand clickFinish. -
In the
Project Explorerview, expand{project name}.www -
Double-click
index.htmlto open it in the JBoss Tools HTML Editor. Edit
index.htmlas follows:Before the closing
</head>tag, add the following lines<script type="text/javascript" charset="utf-8" src="cordova.js"></script> <script type="text/javascript" charset="utf-8" src="js/index.js"></script>
<script type="text/javascript" charset="utf-8" src="cordova.js"></script> <script type="text/javascript" charset="utf-8" src="js/index.js"></script>Copy to Clipboard Copied! Toggle word wrap Toggle overflow Replace the code inside the
<body></body>tags with the following lines<div class="app"> <h1>My Cordova Accelerometer App</h1> <div id="accelerometer">Waiting for accelerometer...</div> </div><div class="app"> <h1>My Cordova Accelerometer App</h1> <div id="accelerometer">Waiting for accelerometer...</div> </div>Copy to Clipboard Copied! Toggle word wrap Toggle overflow Figure 2.32. The Modified index.html File
-
Save the
index.htmlfile by pressing Ctrl+S (or Cmd+S). -
In the
Project Explorerview, expand{project name}.www js -
Double-click
index.jsto open it in the IDE JavaScript Editor. Replace the code in
index.jswith the following linesCopy to Clipboard Copied! Toggle word wrap Toggle overflow -
Save the
index.jsfile.

Result: Your Hybrid Mobile Project is now customized and saved.
2.6.6. Test the Hybrid Mobile Application using CordovaSim
You can build and test the Hybrid Mobile application within the IDE using CordovaSim. CordovaSim is a mobile device simulator specifically for testing Cordova-based hybrid mobile applications. Using the CordovaSim control panel you can input sample data for mobile device hardware, as illustrated here for a device accelerometer.
To run and test your Hybrid Mobile application using CordovaSim, complete the following steps:
-
In the
Project Explorerview, right-click{project name}and click. In the CordovaSim control panel, expand
Accelerometerand drag the 3D device representation to generate device accelerometer data.Figure 2.33. Generated Device Accelerometer Data Displayed in Application

Result: Your Hybrid Mobile application is running for testing.
2.6.7. Deploy the Hybrid Mobile Project on the FeedHenry Server
The IDE allows users to quickly and easily publish a Mobile Hybrid (Cordova) application, developed in the IDE, on the FeedHenry server.
The instructions here demonstrate to complete the following tasks:
2.6.8. Connect the Cordova Application to the FeedHenry Server
To connect the Cordova application to the FeedHenry server:
In the
Project Explorerview, right-click the{project name}and. NoteRefer to the Create a Hybrid Mobile Project section to create the Hybrid Mobile (Cordova) application.
-
In the search field, type
FeedHenryand then selectNew FeedHenry Applicationand clickNext. In the
Create FeedHenry Applicationwindow, enter the following details:-
Ensure that the
Source projectfield displays the name of the master Cordova project -
In the
Select FeedHenry projectfield, select the FeedHenry project name -
In the
Git remote namefield, type a Git remote name for the FeedHenry repository
-
Ensure that the
-
Click
Finish.
Result: The Almost Done window confirms that the project is created on the platform. The project structure in the Project Explorer view, shows the feedhenry.js and the fhconfig.json files.
Figure 2.34. Almost done Window Confirms the Application Creation

2.6.9. Push the Cordova Application to the FeedHenry Server
To push the application to the FeedHenry server:
-
In the
Project Explorerview, right-click the{project name}and click. -
If you are prompted for a confirmation to connect, click
Yes. In the
Push Branch masterwindow, enter the following details:-
In the
Remotefield, enter the location for the remote Git repository. -
In the
Branchfield, typemaster.
-
In the
Click
Next.Figure 2.35. Details of the Push Added in the Push Branch master Window
-
Confirm the details in the
Push Confirmationwindow and clickFinish. -
The
Pushed to gitwindow confirms the push. ClickOK. -
Log into FeedHenry at
https://[your-studio-domain].feedhenry.com. -
Click
Projectsand then click the relevant application.

Result: The Cordova application is visible in the FeedHenry instance.
Figure 2.36. Cordova Application Published on the FeedHenry Server

2.6.10. Modify Icon for a Mobile Application
Define the icons for the Mobile Hybrid application using the icon tag in the config.xml file. If an icon is not specified, the Apache Cordova logo is used as the default icon.
To change the application icon:
-
Save the icon in the <workspace>
/www/res/icondirectory of your project. In the IDE, in the
Project Explorerview, locate theconfig.xmlfile.NoteIf you are using Cordova 4.0.0 or lower, the
config.xmlfile is located in thewwwdirectory. For Cordova versions higher than 4.0.0 theconfig.xmlfile is located, a level higher, in the project directory.-
Double-click
config.xmlto open it in the config.xml editor. -
Click the
config.xmltab to edit the file. To define a single default icon for all platforms, add the following code anywhere withing the widget tag in the
config.xmlfile:<icon src="www/res/icon[image name].png" />
<icon src="www/res/icon[image name].png" />Copy to Clipboard Copied! Toggle word wrap Toggle overflow Figure 2.37. Icon Tag Added to the config.xml File
Alternatively,
-
To define a pixel-perfect icon for Android, add the following code in the
config.xmlfile:
Copy to Clipboard Copied! Toggle word wrap Toggle overflow -
To define a pixel-perfect icon for iOS, add the following code in the
config.xmlfile:
<platform name="ios">
<icon src="www/res/ios/[image name].png" width="180" height="180" >
</platform>
<platform name="ios">
<icon src="www/res/ios/[image name].png" width="180" height="180" >
</platform>
Copy to Clipboard Copied! Toggle word wrap Toggle overflow -
To define a pixel-perfect icon for Android, add the following code in the
-
Save the
config.xmlfile. -
Right-click the application and click
. -
On the emulator, click the
Homebutton and then click theApplicationsbutton to view the modified icon for the application.
Result: The icon for the application is modified.
Figure 2.38. Modified Icon for the Application Displayed on the Android Emulator
2.6.11. Edit an Application Splash Screen
You can edit the splash screen associated with your application using the splash tag within the platform tag in the config.xml file. If you are using Cordova 4.0.0 or higher, you must first install the new cordova-plugin-splashscreen to continue to use the splash screen and then use the steps below to edit the splash screen. For Cordova versions lower than 4.0.0, simply follow the steps below to edit the splash screen.
To change the application splash screen:
-
Save the image for the splash screen in the <workspace>
/www/resdirectory of your project. In the IDE, in the
Project Explorerview, locate theconfig.xmlfile.NoteIf you are using Cordova 4.0.0 or lower, the
config.xmlfile is located in the >wwwdirectory. For Cordova versions higher than 4.0.0, theconfig.xmlfile is located, a level higher, in the project directory.-
Double-click
config.xmlto open it in the config.xml editor. -
Click the
config.xmltab to edit the file. To define the splash screen add the following code within the widget tag in the
config.xmlfile:NoteYou can use any density that exists in the Android project.
Copy to Clipboard Copied! Toggle word wrap Toggle overflow -
Save the
config.xmlfile. -
Right-click the application and click
.
Result: The edited splash screen appears while the application is starting.
2.6.12. Did You Know?
-
You can manually initiate installation of JBoss Hybrid Mobile Tools and CordovaSim by locating them in the JBoss Central
Software/Updatetab or by dragging the following link into JBoss Central: https://devstudio.jboss.com/central/install?connectors=org.jboss.tools.aerogear.hybrid -
You can change the Cordova engine associated with the project after it is created. In the
Project Explorerview, right-click the project and clickProperties. ClickHybrid Mobile Engineand select the engine you want to use. ClickOKto save the engine change and close thePropertieswindow. -
You can download multiple Cordova engines to your system with which to build your projects. The
Downloadwizard can be accessed from theHybrid Mobile Enginepane in the projectPropertieswindow, in addition to theHybrid Mobile Projectwizard. - From the IDE you can also initiate testing of Cordova projects with a connected Android device, system Android Emulator, and system iOS Simulator. The project is built in the necessary native format during the process.
- With the CordovaSim control panel, you can generate simulated data for a range of device hardware, including geolocation and battery status. CordovaSim also manages camera actions, enabling you to upload system images to simulate receiving camera data.
-
A
Shakebutton underAccelerometerin the CordovaSim control panel enables you to simulate a hardware-shake gesture and test the impact on your application.
2.7. Importing and Developing an Existing FeedHenry Application
The IDE includes an Import wizard to allow users to quickly and easily import previously created FeedHenry applications. Once the application is imported, you can change or enhance the application, test the changes, and then push it back to the FeedHenry server.
Before attempting to install or create a hybrid mobile project with JBoss Tools, ensure that the Android SDK is installed and up to date. Creating or installing hybrid mobile projects without a working and updated installation of Android SDK can result in unexpected errors.
Follow the provided steps to import and make changes to a FeedHenry application in your workspace:
2.7.1. Prerequisites
Ensure that the following prerequisites are met to enable the FeedHenry feature:
2.7.2. Installing Android SDK
To install Android SDK:
- Download Android SDK and then unzip the file at a desired location.
-
In the IDE, click
WindowPreferences. -
In the
Preferenceswindow,type filter textfield, typeHybrid Mobile. -
In the
Hybrid Mobilecategory, clickAndroid. Click
Browseto locate and select the Android SDK directory on your machine.Figure 2.39. Select the Android SDK Location
-
Click
Applyand then clickOK.
2.7.3. Enable the FeedHenry Feature
To enable the FeedHenry feature:
-
In JBoss Central, click the
Software/Updatetab. In the
Features Availablelist, select theHybrid Mobile Tools + CordovaSimcheck box and then clickInstall/Update.Figure 2.40. Hybrid Mobile Tools + CordovaSim Check Box Selected
- Follow the on-screen instructions to complete the installation.

2.7.4. Set the Preferences for Your Application Import
To set the preferences:
-
Click
WindowPreferences. -
In the
Preferenceswindow, in the search field type,FeedHenryand press Enter. Complete the following fields in the
Preferenceswindow:-
Ensure that the
Target URLfield displays the URL to your FeedHenry server. The URL to your FeedHenry server should be something like:https://[your-studio-domain].feedhenry.com. In the
API Keyfield, copy and paste the API key from the FeedHenry website.Figure 2.41. Setting Preferences for FeedHenry
NoteThe user can either use an existing API key or generate a new one to set the preferences. To obtain the API key from the FeedHenry website click
SettingsAPI Key Management. To generate a new API key, clickSettingsAPI Key Management, and then clickAdd New Key.
-
Ensure that the
-
Click
Applyand then clickOKto close thePreferenceswindow.

2.7.5. Import Your FeedHenry Application
Ensure that your Preferences are set before importing a FeedHenry application. If not set yet, you are prompted to set the preferences. These preferences are set once when importing an application for the first time and the configured preferences are used for all imports in the future.
To import your FeedHenry application:
-
Click
FileImport. -
Expand
FeedHenry, click Import Cordova Application, and clickNext. -
The
Importwizard displays the projects that you can import. Expand the project to import an application from and select the FeedHenry application to be imported. -
In the
Directoryfield, enter the location where you want to clone the application locally. -
Click
Finish.
Figure 2.42. Selecting an Application to be Imported

If you have set a password for the SSH keys, you are prompted to enter the password so that it can import the application.
Result: The FeedHenry project is successfully imported and appears in the Project Explorer view. The Cordova config.xml file for this project opens in the Editor.
2.7.6. Test the Application Import
To test the application import:
In the
Project Explorerview, right-click the application and then clickRun AsRun w/remote FeedHenry server. A CordovaSim simulated device displaying the application appears.Figure 2.43. Simulated Device Displaying the Imported Application
-
In the
Enter Your Name Herefield on the simulated device, type your name. -
Click
Say Hello From The Cloud.

Result: The simulated device displays the “Hello [Your Name]” string.
2.7.7. Change the Application
After successfully importing the FeedHenry application, follow the instructions to change the application:
-
In the
Project Explorerview, expand[application name]wwwand then double-clickindex.htmlto open it using the Editor. In the code, locate and delete the following line:
This is a basic Cordova App that can take in your name, send it to a cloud app and display the response.
This is a basic Cordova App that can take in your name, send it to a cloud app and display the response.Copy to Clipboard Copied! Toggle word wrap Toggle overflow Replace the deleted text with the following line:
Hello from Hybrid Mobile Tools!
Hello from Hybrid Mobile Tools!Copy to Clipboard Copied! Toggle word wrap Toggle overflow -
Save the
index.htmlfile by pressing Ctrl+S. Alternatively, to save clickFileSaveor click theSaveicon.
Figure 2.44. The Edited index.html File

2.7.8. Test the Application
To test the imported application, right-click the application and then click
Figure 2.45. The Edited FeedHenry Application

The changes made to the index.html file are reflected on the simulated device. Click a corner of the displayed device to rotate it in that direction. Alternatively, right-click the simulated device and click Rotate Right or Rotate Left as to rotate it in the desired direction. To view the application on a different CordovaSim simulated device, right-click the device and click Skin. From the list of skins, select a skin to view the application.
2.7.9. Push the Changes Back to the FeedHenry Server
Use the following instructions to push changes to the application back to the FeedHenry server:
-
In the
Project Explorerview, right-click the application name. -
Click
TeamCommit. -
In the
Commit Changeswindow,Commit messagefield, type a message for the commit. -
In the
Filesfield, select the files that you have edited and want to push to the server and then clickCommit and Push. -
In the
Push Results [application name]window, ensure all the details are correct and clickOK. -
Log into FeedHenry at
https://[your-studio-domain].feedhenry.com. -
Click
Projects. -
Click the
Project Titleunder which your application is located and then click the application.
Result: The simulated device in the App Preview section displays the change that you have just pushed to the FeedHenry server.
Figure 2.46. FeedHenry Application Edited and Displayed on the FeedHenry Server

2.7.10. Did You Know
-
Add a new API key to your FeedHenry account by clicking
Add New Keyand then following the on-screen instructions. -
Set up your SSH key in the FeedHenry account by clicking
SettingsSSH Key Managementand then following the on-screen instructions.
2.7.11. Troubleshooting
2.7.11.1. Git Communication Error
Figure 2.47. Git Communication Error

Error Message
Problem when cloning the application. This can be due to a network problem or missing security credentials. Refer to error log for details.
Issue
When a FeedHenry account is set up, the user’s API Keys are configured by default, but the SSH Public key must be manually configured. Importing a FeedHenry application means that the application repository is accessed via Git. Without a Public SSH key, the tools are unable to complete the action and this error appears.
Resolution
-
Click
OKto close theGit Communication Errorwindow. -
Log into FeedHenry at:
https://[your-studio-domain].feedhenry.com. - Click the icon located in the uppermost right-side corner of the screen to display the context menu.
-
Click
SettingsSSH Key Managementand then clickAdd New Key. In the
Public Keyfield, enter your SSH Public key. An existing Public SSH key is available at~/.ssh/id_rsa.pub. Alternatively, generate a new Public SSH key with the following command:ssh-keygen -t rsa -C "username@example.com"
$ ssh-keygen -t rsa -C "username@example.com"Copy to Clipboard Copied! Toggle word wrap Toggle overflow
2.7.11.2. Invalid Preferences
Figure 2.48. Invalid Preferences

Issue
When the user logs into FeedHenry for the first time, the Invalid Preferences dialog box appears informing the user that the FeedHenry connection preferences are unidentified or invalid and that the user must correct the preferences. Refer to the Set the Preferences section for details to set the connection preferences.