Este conteúdo não está disponível no idioma selecionado.
Chapter 6. Channels
6.1. Channels and subscriptions
Channels are custom resources that define a single event-forwarding and persistence layer. After events have been sent to a channel from an event source or producer, these events can be sent to multiple Knative services or other sinks by using a subscription.

You can create channels by instantiating a supported Channel object, and configure re-delivery attempts by modifying the delivery spec in a Subscription object.
6.1.1. Understanding channelTemplate and backing channels
Learn how Knative populates channelTemplate properties and creates backing channels for Channel objects.
After you create a Channel object, a mutating admission webhook adds spec.channelTemplate properties based on the default channel implementation. For example, with an InMemoryChannel default implementation, the Channel object is displayed as follows:
apiVersion: messaging.knative.dev/v1
kind: Channel
metadata:
  name: example-channel
  namespace: default
spec:
  channelTemplate:
    apiVersion: messaging.knative.dev/v1
    kind: InMemoryChannel
The channel controller creates a backing channel instance based on the spec.channelTemplate configuration.
You cannot change the spec.channelTemplate properties after creation because the default channel mechanism sets them.
This process creates two objects: a generic backing channel and an implementation-specific channel, such as InMemoryChannel. If you use a different default channel implementation, Knative creates the corresponding channel type, for example, a KafkaChannel.
The backing channel acts as a proxy. It copies subscriptions to the user-created channel object and updates its status to match the backing channel.
6.1.2. Channel implementation types
Learn the supported channel implementations in OpenShift Serverless and their use cases.
OpenShift Serverless supports InMemoryChannel and KafkaChannel implementations. Use InMemoryChannel for development environments and KafkaChannel for production workloads.
InMemoryChannel has the following limitations:
- It does not persist events. If a pod goes down, events on that pod are lost.
- It does not guarantee event ordering. Events received at the same time can be delivered in any order.
-
It does not retry delivery by default if a subscriber rejects an event. Configure retries by modifying the
deliveryspec in theSubscriptionobject.
6.2. Creating channels
Channels are custom resources that define a single event-forwarding and persistence layer. After events have been sent to a channel from an event source or producer, these events can be sent to multiple Knative services or other sinks by using a subscription.
You can create channels by instantiating a supported Channel object, and configure re-delivery attempts by modifying the delivery spec in a Subscription object.
6.2.1. Creating a channel
Using the OpenShift Container Platform web console provides a streamlined and intuitive user interface to create a channel. After installing Knative Eventing on your cluster, create a channel in the web console.
Prerequisites
- You have logged in to the OpenShift Container Platform web console.
- You have installed the OpenShift Serverless Operator and Knative Eventing on your OpenShift Container Platform cluster.
- You have created a project or have access to a project with the appropriate roles and permissions to create applications and other workloads in OpenShift Container Platform.
Procedure
-
Navigate to +Add
Channel. Select the type of
Channelobject that you want to create in the Type list.NoteCurrently only
InMemoryChannelchannel objects are supported by default. Knative channels for Apache Kafka are available if you have installed the Knative broker implementation for Apache Kafka on OpenShift Serverless.- Click Create.
Verification
Confirm that the channel now exists by navigating to the Topology page.
6.2.2. Creating a channel by using the Knative CLI
Using the Knative (kn) CLI to create channels provides a more streamlined and intuitive user interface than modifying YAML files directly. You can use the kn channel create command to create a channel.
Prerequisites
- You have installed the OpenShift Serverless Operator and Knative Eventing on the cluster.
-
You have installed the Knative (
kn) CLI. - You have created a project or have access to a project with the appropriate roles and permissions to create applications and other workloads in OpenShift Container Platform.
Procedure
Create a channel:
$ kn channel create <channel_name> --type <channel_type>The channel type is optional. If you specify it, you must use the
Group:Version:Kindformat. For example, you can create anInMemoryChannelobject:$ kn channel create mychannel --type messaging.knative.dev:v1:InMemoryChannelYou get an output similar to the following example:
Channel 'mychannel' created in namespace 'default'.
Verification
To confirm that the channel now exists, list the existing channels and inspect the output:
$ kn channel listYou get an output similar to the following example:
kn channel list
NAME        TYPE              URL                                                     AGE   READY   REASON
mychannel   InMemoryChannel   http://mychannel-kn-channel.default.svc.cluster.local   93s   True
6.2.3. Deleting a channel by using the Knative CLI
You can delete a channel by using the kn command-line interface.
Prerequisites
- You have installed the OpenShift Serverless Operator and Knative Eventing on the cluster.
-
You have installed the Knative (
kn) CLI. - You have created a project or have access to a project with the appropriate roles and permissions to create applications and other workloads in OpenShift Container Platform.
Procedure
Delete the channel by running the following command:
$ kn channel delete <channel_name>
6.2.4. Creating a default implementation channel by using YAML
You can use YAML files to create Knative resources through a declarative API. Define channels declaratively and reproduce the configuration consistently. To create a serverless channel by using YAML, you must create a YAML file that defines a Channel object, then apply it by using the oc apply command.
Prerequisites
- You have installed the OpenShift Serverless Operator and Knative Eventing on the cluster.
-
Install the OpenShift CLI (
oc). - You have created a project or have access to a project with the appropriate roles and permissions to create applications and other workloads in OpenShift Container Platform.
Procedure
Create a
Channelobject as a YAML file:apiVersion: messaging.knative.dev/v1 kind: Channel metadata: name: example-channel namespace: defaultApply the YAML file by running the following command:
$ oc apply -f <filename>
6.2.5. Creating a channel for Apache Kafka by using YAML
You can use YAML files to create Knative resources through a declarative API. Define channels declaratively and reproduce the configuration consistently. You can create a Knative Eventing channel that uses Kafka topics by creating a Kafka channel. To create a Kafka channel with YAML, define a KafkaChannel object in a YAML file and apply the file by using the oc apply command.
Prerequisites
-
You have installed the OpenShift Serverless Operator, Knative Eventing, and the
KnativeKafkacustom resource on your OpenShift Container Platform cluster. -
You have installed the OpenShift CLI (
oc). - You have created a project or have access to a project with the appropriate roles and permissions to create applications and other workloads in OpenShift Container Platform.
Procedure
Create a
KafkaChannelobject as a YAML file:apiVersion: messaging.knative.dev/v1beta1 kind: KafkaChannel metadata: name: example-channel namespace: default spec: numPartitions: 3 replicationFactor: 1ImportantOnly the
v1beta1version of the API forKafkaChannelobjects on OpenShift Serverless is supported. Do not use thev1alpha1version of this API, as this version is now deprecated.Apply the
KafkaChannelYAML file by running the following command:$ oc apply -f <filename>
6.3. Connecting channels to sinks
You can send events from an event source or producer to a channel, then forward them to one or more sinks by using subscriptions. Create subscriptions by configuring a Subscription object that specifies the channel and the sink (also known as a subscriber) that consumes the events.
6.3.1. Creating a subscription
After you have created a channel and an event sink, you can create a subscription to enable event delivery. Using the OpenShift Container Platform web console provides a streamlined and intuitive user interface to create a subscription.
Prerequisites
- You have installed the OpenShift Serverless Operator, Knative Serving, and Knative Eventing on your OpenShift Container Platform cluster.
- You have logged in to the web console.
- You have created an event sink, such as a Knative service, and a channel.
- You have created a project or have access to a project with the appropriate roles and privileges to create applications and other workloads in OpenShift Container Platform.
Procedure
- Navigate to the Topology page.
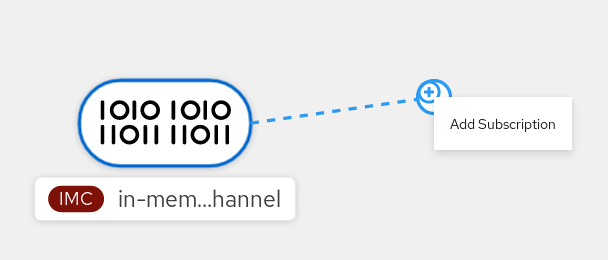
Create a subscription using one of the following methods:
Hover over the channel that you want to create a subscription for, and drag the arrow. The Add Subscription option is displayed.
- Select your sink in the Subscriber list.
- Click Add.
- If the service is available in the Topology view under the same namespace or project as the channel, click the channel that you want to create a subscription for, and drag the arrow directly to a service to immediately create a subscription from the channel to that service.
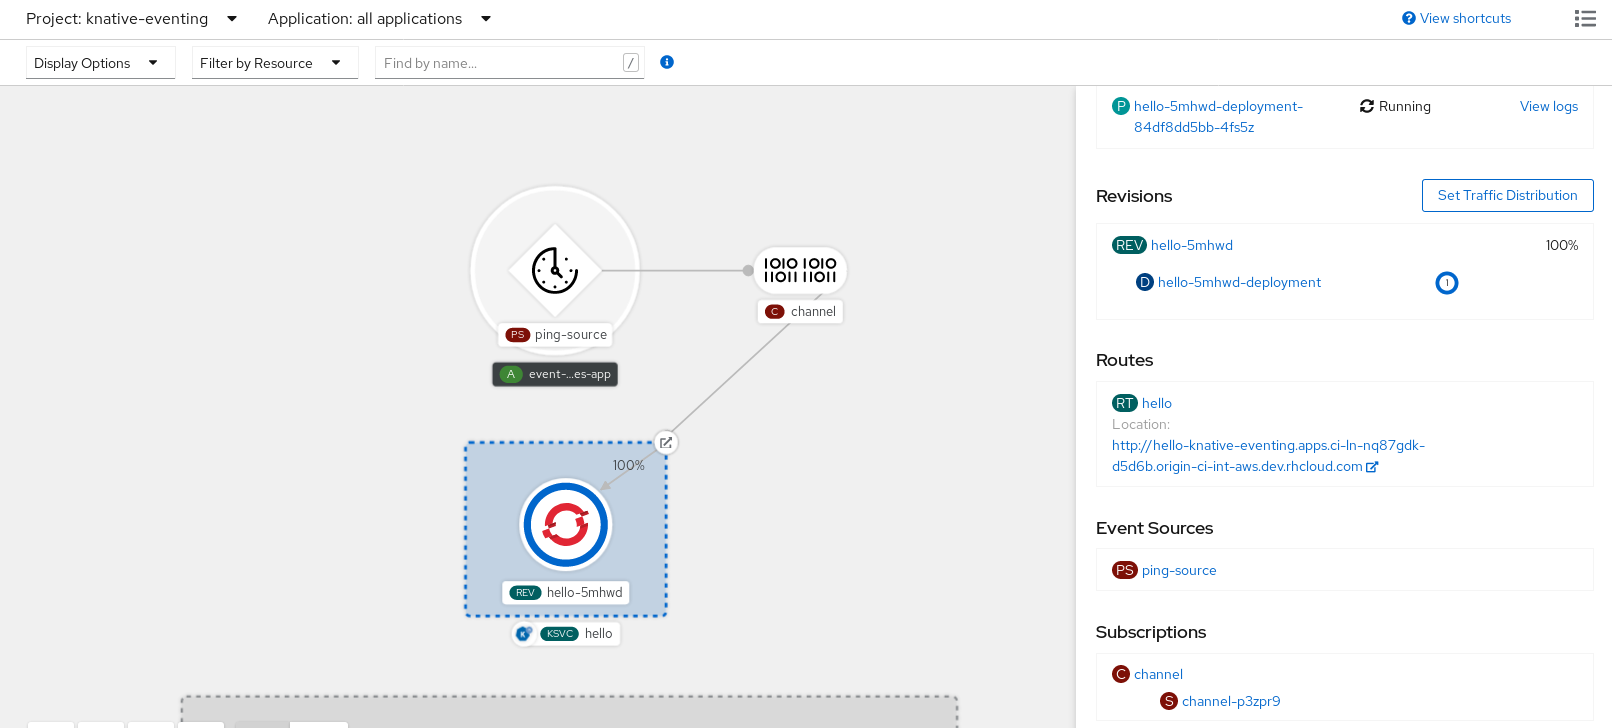
Verification
After you create the subscription, the Topology view shows it as a line that connects the channel to the service.
6.3.2. Creating a subscription by using YAML
After you create a channel and an event sink, create a subscription to deliver events. You can define Knative resources declaratively by using YAML files. To create a subscription, create a YAML file that defines a Subscription object, and then apply the file by using the oc apply command.
Prerequisites
- You have installed the OpenShift Serverless Operator and Knative Eventing on the cluster.
-
Install the OpenShift CLI (
oc). - You have created a project or have access to a project with the appropriate roles and permissions to create applications and other workloads in OpenShift Container Platform.
Procedure
Create a
Subscriptionobject:Create a YAML file and copy the following sample code into it:
apiVersion: messaging.knative.dev/v1 kind: Subscription metadata: name: my-subscription namespace: default spec: channel: apiVersion: messaging.knative.dev/v1 kind: Channel name: example-channel delivery: deadLetterSink: ref: apiVersion: serving.knative.dev/v1 kind: Service name: error-handler subscriber: ref: apiVersion: serving.knative.dev/v1 kind: Service name: event-display-
name: my-subscription: Name of the subscription. -
spec.channel: Configuration settings for the channel that the subscription connects to. -
spec.delivery: Configuration settings for event delivery. These settings define how the subscription handles events that the subscriber cannot receive. When you configure this option, the system sends failed events to thedeadLetterSink. The system drops the event, does not try redelivery, and logs an error. ThedeadLetterSinkvalue must be aDestination. -
spec.subscriber: Configuration settings for the subscriber. The subscriber is the event sink that receives events from the channel.
-
Apply the YAML file by running the following command:
$ oc apply -f <filename>
6.3.3. Creating a subscription by using the Knative CLI
After you have created a channel and an event sink, you can create a subscription to enable event delivery. Using the Knative (kn) CLI to create subscriptions provides a more streamlined and intuitive user interface than modifying YAML files directly. You can use the kn subscription create command with the appropriate flags to create a subscription.
Prerequisites
- You have installed the OpenShift Serverless Operator and Knative Eventing on your OpenShift Container Platform cluster.
-
You have installed the Knative (
kn) CLI. - You have created a project or have access to a project with the appropriate roles and permissions to create applications and other workloads in OpenShift Container Platform.
Procedure
Create a subscription to connect a sink to a channel:
$ kn subscription create <subscription_name> \
  --channel <group:version:kind>:<channel_name> \
  --sink <sink_prefix>:<sink_name> \
  --sink-dead-letter <sink_prefix>:<sink_name>
You get an output similar to the following example command:
$ kn subscription create mysubscription --channel mychannel --sink ksvc:event-displayYou get an output similar to the following example:
Subscription 'mysubscription' created in namespace 'default'.
Verification
To confirm that a subscription connects the channel to the event sink, or subscriber, list the existing subscriptions and inspect the output by running the following command:
$ kn subscription listYou get an output similar to the following example:
NAME            CHANNEL             SUBSCRIBER           REPLY   DEAD LETTER SINK   READY   REASON
mysubscription   Channel:mychannel   ksvc:event-display                              True
6.3.4. Creating a subscription with administrator privileges
After you have created a channel and an event sink, also known as a subscriber, you can create a subscription to enable event delivery. You can create subscriptions by configuring a Subscription object that specifies the channel and the subscriber that receives events. You can also specify some subscriber-specific options, such as how to handle failures.
Prerequisites
- You have installed the OpenShift Serverless Operator and Knative Eventing on your OpenShift Container Platform cluster.
- You have logged in to the web console.
-
You have
cluster-adminprivileges on OpenShift Container Platform, or you have cluster or dedicated administrator privileges on Red Hat OpenShift Service on AWS or OpenShift Dedicated. - You have created an event sink, such as a Knative service, and a channel.
Procedure
-
In the OpenShift Container Platform web console, navigate to Serverless
Eventing. -
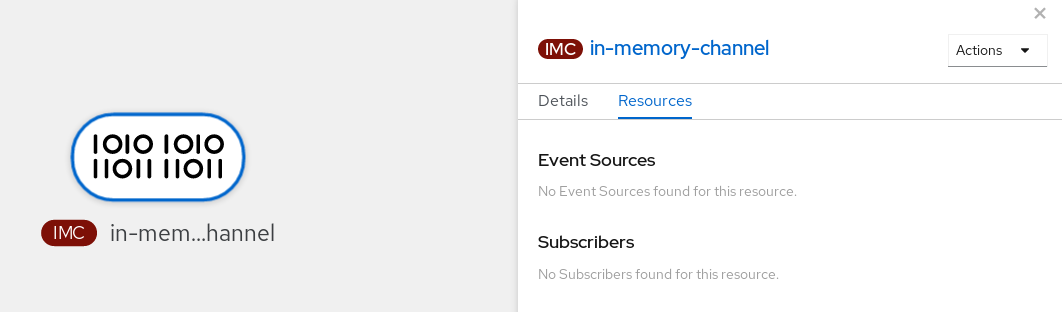
In the Channel tab, select the Options menu
 for the channel that you want to add a subscription to.
- Click Add Subscription in the list.
- In the Add Subscription dialogue box, select a Subscriber for the subscription. The subscriber is the Knative service that receives events from the channel.
- Click Add.
6.4. Default channel implementation
You can use the default-ch-webhook config map to specify the default channel implementation of Knative Eventing. You can specify the default channel implementation for the entire cluster or for one or more namespaces. Currently the InMemoryChannel and KafkaChannel channel types are supported.
6.4.1. Configuring the default channel implementation
You can configure the default channel implementation for Knative Eventing at the cluster or namespace level by using the KnativeEventing custom resource (CR). Specify the default channel implementation, such as InMemoryChannel, KafkaChannel, or other supported implementations, for newly created channels.
Prerequisites
- You have administrator permissions on OpenShift Container Platform.
- You have installed the OpenShift Serverless Operator and Knative Eventing on your cluster.
-
If you want to use Knative channels for Apache Kafka as the default channel implementation, you must also install the
KnativeKafkaCR on your cluster.
Procedure
Change the
KnativeEventingcustom resource to add configuration details for thedefault-ch-webhookconfig map:apiVersion: operator.knative.dev/v1beta1 kind: KnativeEventing metadata: name: knative-eventing namespace: knative-eventing spec: config:1 default-ch-webhook:2 default-ch-config: | clusterDefault:3 apiVersion: messaging.knative.dev/v1 kind: InMemoryChannel spec: delivery: backoffDelay: PT0.5S backoffPolicy: exponential retry: 5 namespaceDefaults:4 my-namespace: apiVersion: messaging.knative.dev/v1beta1 kind: KafkaChannel spec: numPartitions: 1 replicationFactor: 1-
In
spec.config, you can specify the config maps that you want to add modified configurations for. -
You can use the
default-ch-webhookconfig map to specify the default channel implementation for the cluster or for one or more namespaces. -
clusterDefault: The cluster-wide default channel type configuration. In this example, the default channel implementation for the cluster isInMemoryChannel. -
namespaceDefaults: The namespace-scoped default channel type configuration. In this example, the default channel implementation for themy-namespacenamespace isKafkaChannel.
ImportantConfiguring a namespace-specific default overrides any cluster-wide settings.
-
In
6.5. Security configuration for channels
You can configure Transport Layer Security (TLS) and Simple Authentication and Security Layer (SASL) settings to secure channel communication in OpenShift Serverless.
6.5.1. Configuring TLS authentication for Knative channels for Apache Kafka
Transport Layer Security (TLS) is used by Apache Kafka clients and servers to encrypt traffic between Knative and Kafka, as well as for authentication. TLS is the only supported method of traffic encryption for the Knative broker implementation for Apache Kafka.
Prerequisites
- You have cluster or dedicated administrator permissions on OpenShift Container Platform.
-
You have installed the OpenShift Serverless Operator, Knative Eventing, and the
KnativeKafkaCR on your OpenShift Container Platform cluster. - You have created a project or have access to a project with the appropriate roles and permissions to create applications and other workloads in OpenShift Container Platform.
-
You have a Kafka cluster CA certificate stored as a
.pemfile. -
You have a Kafka cluster client certificate and a key stored as
.pemfiles. -
Install the OpenShift CLI (
oc).
Procedure
Create the certificate files as secrets in your chosen namespace by running the following command:
$ oc create secret -n <namespace> generic <kafka_auth_secret> \ --from-file=ca.crt=caroot.pem \ --from-file=user.crt=certificate.pem \ --from-file=user.key=key.pemImportantUse the key names
ca.crt,user.crt, anduser.key. Do not change them.Start editing the
KnativeKafkacustom resource by running the following command:$ oc edit knativekafkaReference your secret and the namespace of the secret:
apiVersion: operator.serverless.openshift.io/v1alpha1 kind: KnativeKafka metadata: namespace: knative-eventing name: knative-kafka spec: channel: authSecretName: <kafka_auth_secret> authSecretNamespace: <kafka_auth_secret_namespace> bootstrapServers: <bootstrap_servers> enabled: true source: enabled: trueNoteMake sure to specify the matching port in the bootstrap server.
For example:
apiVersion: operator.serverless.openshift.io/v1alpha1
kind: KnativeKafka
metadata:
  namespace: knative-eventing
  name: knative-kafka
spec:
  channel:
    authSecretName: tls-user
    authSecretNamespace: kafka
    bootstrapServers: eventing-kafka-bootstrap.kafka.svc:9094
    enabled: true
  source:
    enabled: true
6.5.2. Configuring SASL authentication for Knative channels for Apache Kafka
Simple Authentication and Security Layer (SASL) is used by Apache Kafka for authentication. If you use SASL authentication on your cluster, users must provide credentials to Knative for communicating with the Kafka cluster; otherwise events cannot be produced or consumed.
Prerequisites
- You have cluster or dedicated administrator permissions on OpenShift Container Platform.
-
You have installed the OpenShift Serverless Operator, Knative Eventing, and the
KnativeKafkaCR on your OpenShift Container Platform cluster. - You have created a project or have access to a project with the appropriate roles and permissions to create applications and other workloads in OpenShift Container Platform.
- You have a username and password for a Kafka cluster.
-
You have chosen the SASL mechanism to use, for example,
PLAIN,SCRAM-SHA-256, orSCRAM-SHA-512. -
If TLS is enabled, you also need the
ca.crtcertificate file for the Kafka cluster. -
Install the OpenShift CLI (
oc).
Procedure
Create the certificate files as secrets in your chosen namespace:
$ oc create secret -n <namespace> generic <kafka_auth_secret> \
  --from-literal=protocol="SASL_SSL"
  --from-literal=sasl.mechanism="SCRAM-SHA-512" \
  --from-file=ca.crt=caroot.pem \
  --from-literal=password="SecretPassword" \
  --from-literal=user="my-sasl-user"
Use the key names
protocol,sasl.mechanism,ca.crt,password, anduser. Do not change them.NoteThe
ca.crtkey is optional if the Kafka cluster uses a certificate signed by a public CA whose certificate is already in the system truststore.
Start editing the
KnativeKafkacustom resource by running the following command:$ oc edit knativekafkaReference your secret and the namespace of the secret:
apiVersion: operator.serverless.openshift.io/v1alpha1 kind: KnativeKafka metadata: namespace: knative-eventing name: knative-kafka spec: channel: authSecretName: <kafka_auth_secret> authSecretNamespace: <kafka_auth_secret_namespace> bootstrapServers: <bootstrap_servers> enabled: true source: enabled: trueNoteMake sure to specify the matching port in the bootstrap server.
For example:
apiVersion: operator.serverless.openshift.io/v1alpha1
kind: KnativeKafka
metadata:
  namespace: knative-eventing
  name: knative-kafka
spec:
  channel:
    authSecretName: scram-user
    authSecretNamespace: kafka
    bootstrapServers: eventing-kafka-bootstrap.kafka.svc:9093
    enabled: true
  source:
    enabled: true