Este conteúdo não está disponível no idioma selecionado.
Chapter 1. Installing and running the employee rostering demonstration on OpenShift
You can deploy the Red Hat Business Optimizer Employee Rostering starter application to an OpenShift instance.
Preparing deployment files
-
Unzip the add-ons distribution (
rhpam-7.0.0-add-ons.zip). Unzip the employee rostering zip file (
rhpam-7.0-employee-rostering.zip) that is extracted from the add-ons archive.NoteWhen you unzip the employee rostering zip file, the
optashift-employee-rostering-7.7.0.Final-redhat-7folder is created. This folder is the base folder in subsequent steps. File and folder names may have higher version numbers than specifically noted in this document.
There are two options for quickly deploying this application to OpenShift:
-
Using the
provision.shshell script that is provided in the add-ons distribution. In this case, the application source code is built and packaged locally and uploaded to the OpenShift environment for deployment. Use this preferred method when Java developer tools (Java Development Kit and Maven) and a bash shell command line are available. -
Using the provided Source to Image (S2I) template. This template pulls the source for the application from a Git repository and builds it during the deployment. In this case, the compilation and packaging of the application occurs within the OpenShift environment. Use this option when the prerequisites for using
provision.share not available.
The S2I approach requires significantly more OpenShift resources to complete than the shell script deployment. If your OpenShift environment has less than 2GB of memory available, you must follow the shell script deployment approach. The application will not deploy successfully with any method to the OpenShift Online Starter tier at the time of this writing because of memory requirements.
1.1. Deploying using the provided script
Prerequisite
- You have logged in to the target OpenShift environment using the oc command line tool.
Procedure
Running the script
-
Using the command line, change to the
optashift-employee-rostering-7.7.0.Final-redhat-7/sourcesfolder. Run the provision script to build and deploy the application:
./provision.sh setup employee-rostering --binary
./provision.sh setup employee-rostering --binaryCopy to Clipboard Copied! Toggle word wrap Toggle overflow NoteIf the current OpenShift user name contains characters that are not letters or numbers, the deployment might fail. This can be fixed by providing an additional parameter:
./provision.sh setup employee-rostering --binary --project-suffix optashift. This example uses "optashift", but the actual value has no impact on the deployment.
-
Using the command line, change to the
Verify the compilation status
- Compilation and packaging may take several minutes to complete, and should continually show progress on the command line output.
-
Once completed, the following message is displayed:
Uploading file "target/ROOT.war" as binary input for the build ….
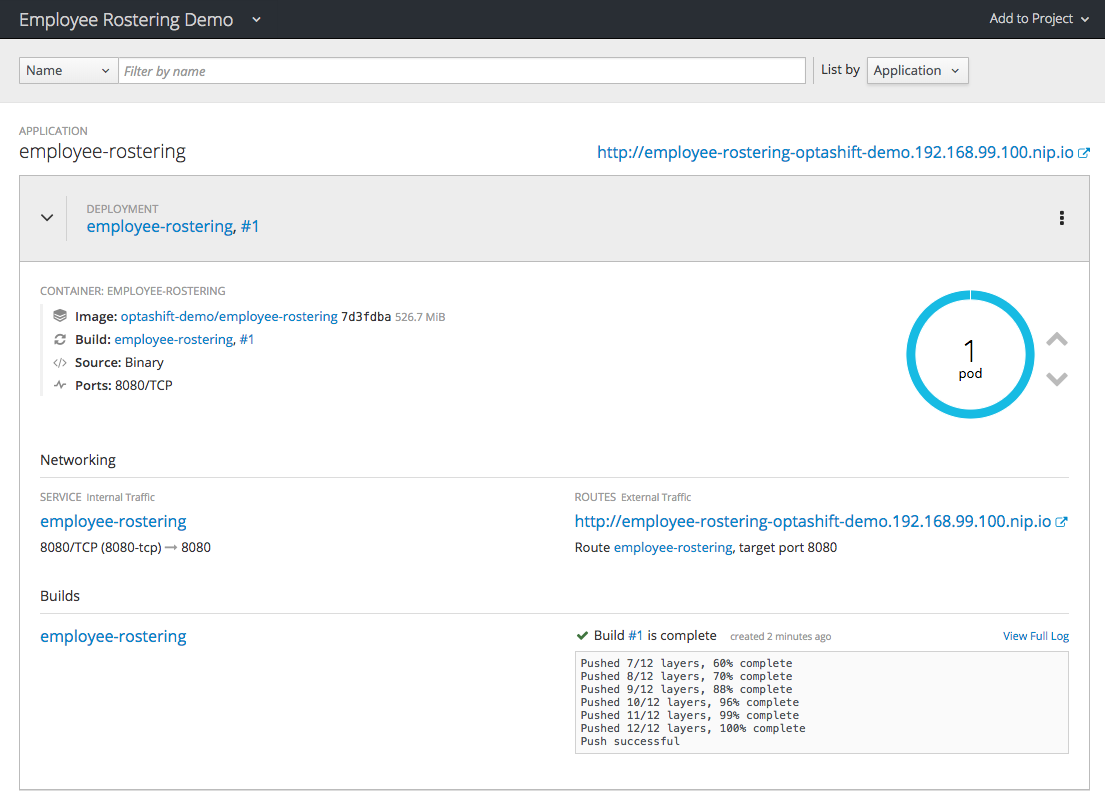
Use the OpenShift web UI to view the details for the deployed application. Click the link in the Routes section to open the starter application.
The build can take up to 30 seconds to complete. The application container can take an additional 30 seconds to start up completely.
NotePerform a hard refresh of your browser page if the web app does not open after clicking the link.
Figure 1.1. OpenShift web console with deployed Employee Rostering starter application
Optionally, you can use other actions provided by the provision script:
-
Deploy updates to the code to an existing deployment:
./provision.sh deploy employee-rostering --binary -
Remove the application:
./provision.sh delete employee-rostering
-
Deploy updates to the code to an existing deployment:
1.2. Deploying using the Source to Image (S2I) template
Procedure
- Log in to the OpenShift web console and click Import YAML/JSON in the upper right corner.
- Select the project to add to from the Add to Project drop down menu, or select Create Project to create a new one. If creating a new project, enter a new project name, display name, and description.
-
Click the Browse button and navigate to the
optashift-employee-rostering-template.yamlfile. Starting from theoptashift-employee-rostering-7.7.0.Final-redhat-7folder, access the file by clicking sources > openshift > templates. Click Create.
Figure 1.2. Upload template window
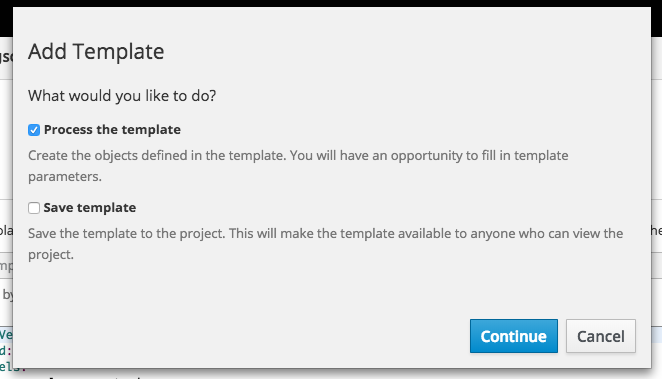
In the Add Template dialog box, click Continue to accept the default settings.
Figure 1.3. Add template window
In the Import YAML/JSON dialog box, click Create to accept the default settings.
Figure 1.4. Configure template window
- In the Success dialog box, click Close.
Wait for the build and deployment to complete. This might take several minutes. When the deployment completes, click the link in the upper right corner above the shaded bar to open the application.
Figure 1.5. Completed deployment and resulting link
NotePerform a hard refresh of your browser page if the web app does not open after clicking the link.