Este conteúdo não está disponível no idioma selecionado.
Chapter 27. Adding columns to guided decision tables
After you have created the guided decision table, you can define and add various types of columns within the guided decision tables designer.
Prerequisites
-
Any data objects that will be used for column parameters, such as Facts and Fields, have been created within the same package where the guided decision table is found, or have been imported from another package in Data Objects
New item of the guided decision tables designer.
For descriptions of these column parameters, see the "Required column parameters" segments for each column type in Chapter 28, Types of columns in guided decision tables.
For details about creating data objects, see Section 24.1, “Creating data objects”.
Procedure
-
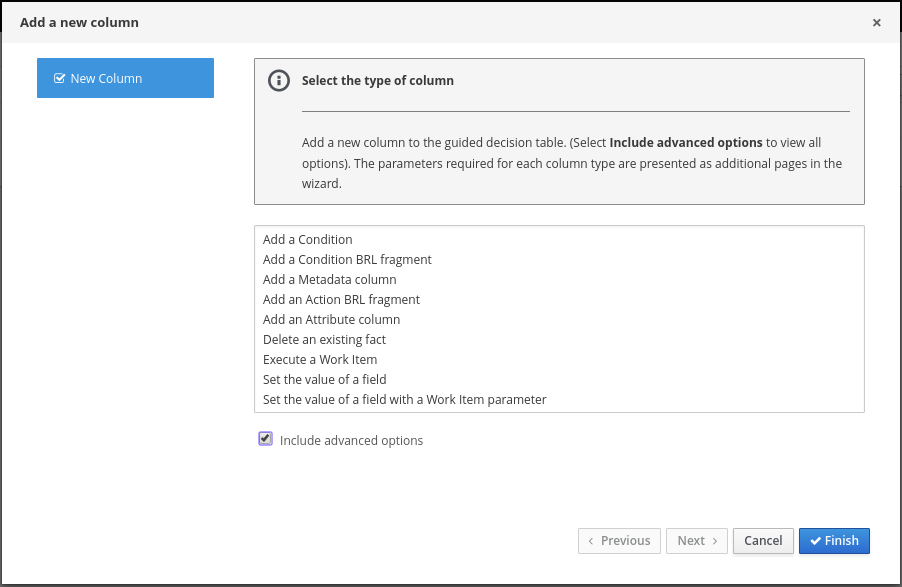
In the guided decision tables designer, click Columns
Insert Column. Click Include advanced options to view the full list of column options.
Figure 27.1. Add columns
Select the column type that you want to add, click Next, and follow the steps in the wizard to specify the data required to add the column.
For descriptions of each column type and required parameters for setup, see Chapter 28, Types of columns in guided decision tables.
- Click Finish to add the configured column.
After all columns are added, you can begin adding rows of rules correlating to your columns to complete the decision table. For details, see Chapter 31, Adding rows and defining rules in guided decision tables.
The following is an example decision table for a loan application decision service:
Figure 27.2. Example of complete guided decision table
