Este conteúdo não está disponível no idioma selecionado.
Chapter 6. Adding a printer to CUPS by using the web interface
Before users can print through CUPS, you must add printers. You can use both network printers and printers that are directly attached to the CUPS host, for example over USB.
You can add printers by using the CUPS driverless feature or by using a PostScript Printer Description (PPD) file.
CUPS prefers driverless printing, and using drivers is deprecated.
Red Hat Enterprise Linux (RHEL) does not provide the name service switch multicast DNS plug-in (nss-mdns), which resolves requests by querying an mDNS responder. Consequently, automatic discovery and installation for local driverless printers by using mDNS is not available in RHEL. To work around this problem, install single printers manually or use cups-browsed to automatically install a high amount of print queues that are available on a remote print server.
Prerequisites
- CUPS is configured.
- You have permissions in CUPS to manage printers.
- If you use CUPS as a print server, you configured TLS encryption to securely transmit data over the network.
- The printer supports driverless printing, if you want to use this feature.
Procedure
Use a browser, and access
https://<hostname>:631/admin/.You must connect to the web interface by using the HTTPS protocol. Otherwise, CUPS prevents you from authenticating in a later step for security reasons.
- Click .
- If you are not already authenticated, CUPS prompts for credentials of an administrative user. Enter the username and password of an authorized user.
- If you decide to not use driverless printing and the printer you want to add is detected automatically, select it, and click .
If the printer was not detected:
Select the protocol that the printer supports.
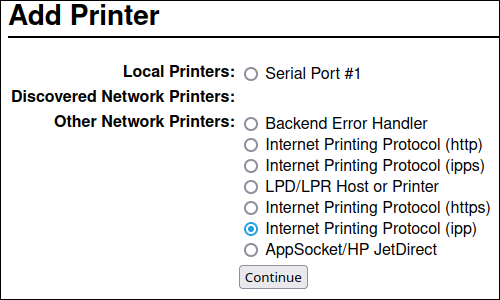
If your printer supports driverless printing and you want to use this feature, select the
ipporippsprotocol.- Click .
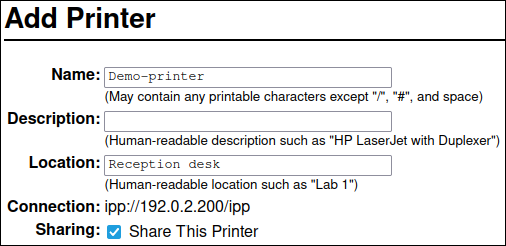
Enter the URL to the printer or to the queue on a remote print server.

- Click .
Enter a name and, optionally, a description and location. If you use CUPS as a print server, and other clients should be able to print through CUPS on this printer, select also Share this printer.
Select the printer manufacturer in the Make list. If the printer manufacturer is not on the list, select Generic or upload a PPD file for the printer.
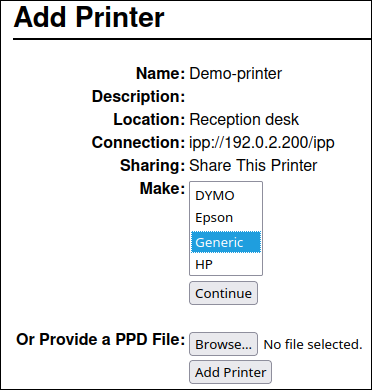
- Click .
Select the printer model:
- If the printer supports driverless printing, select IPP Everywhere. Note that, if you previously installed printer-specific drivers locally, it is possible that the list also contains entries such as <printer_name> - IPP Everywhere.
- If the printer does not support driverless printing, select the model or upload the PPD file for the printer.
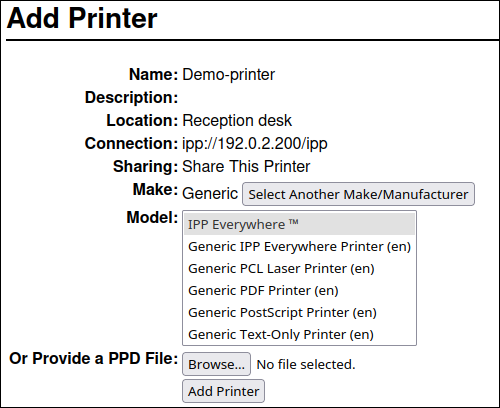
- Click
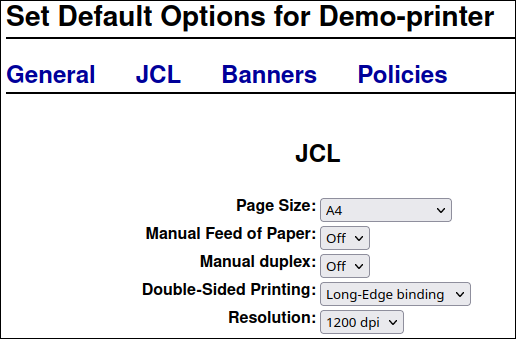
The settings and tabs on the Set printer options page depend on the driver and the features the printer supports. Use this page to set default options, such as for the paper size.
- Click .
Verification
- Open the Printers tab in the web interface.
- Click on the printer’s name.
In the Maintenance list, select Print test page.

Troubleshooting
-
If you use driverless printing, and printing does not work, use the
lpadminutility to add the printer on the command line. For details, see Adding a printer to CUPS by using the lpadmin utility.