此内容没有您所选择的语言版本。
7.2. Creating Enterprise Bean Projects
This task describes how to create an Enterprise JavaBeans (EJB) project in Red Hat JBoss Developer Studio.
Prerequisites
- A server and server runtime for JBoss EAP 6 has been set up.
Procedure 7.1. Create an EJB Project in Red Hat JBoss Developer Studio
Create new project
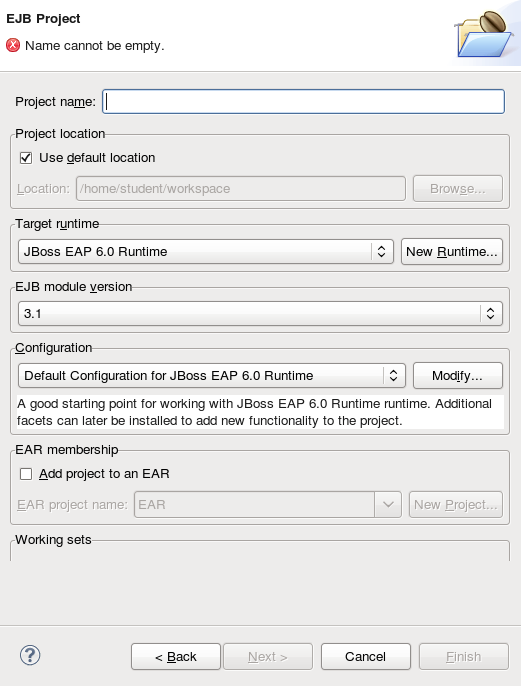
To open the New EJB Project wizard, navigate to the menu, select , and then .Figure 7.1. New EJB Project wizard
Specify Details
Supply the following details:- Project name.As well as the being the name of the project that appears in Red Hat JBoss Developer Studio this is also the default filename for the deployed JAR file.
- Project location.The directory where the project's files will be saved. The default is a directory in the current workspace.
- Target Runtime.This is the server runtime used for the project. This will need to be set to the same JBoss EAP 6 runtime used by the server that you will be deploying to.
- EJB module version. This is the version of the EJB specification that your enterprise beans will comply with. Red Hat recommends using
3.1. - Configuration. This allows you to adjust the supported features in your project. Use the default configuration for your selected runtime.
Click to continue.Java Build Configuration
This screen allows you to customize the directories will contain Java source files and the directory where the built output is placed.Leave this configuration unchanged and click .EJB Module settings
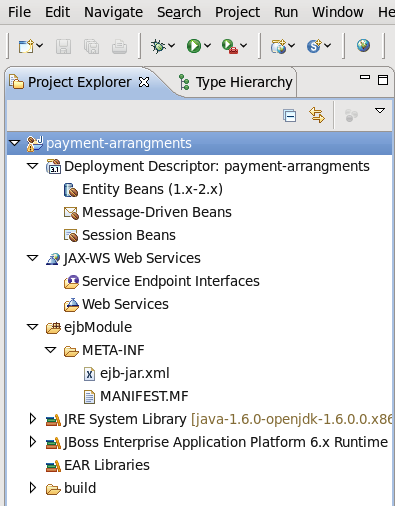
Check the Generate ejb-jar.xml deployment descriptor checkbox if a deployment descriptor is required. The deployment descriptor is optional in EJB 3.1 and can be added later if required.Click and the project is created and will be displayed in the Project Explorer.Figure 7.2. Newly created EJB Project in the Project Explorer
Add Build Artifact to Server for Deployment
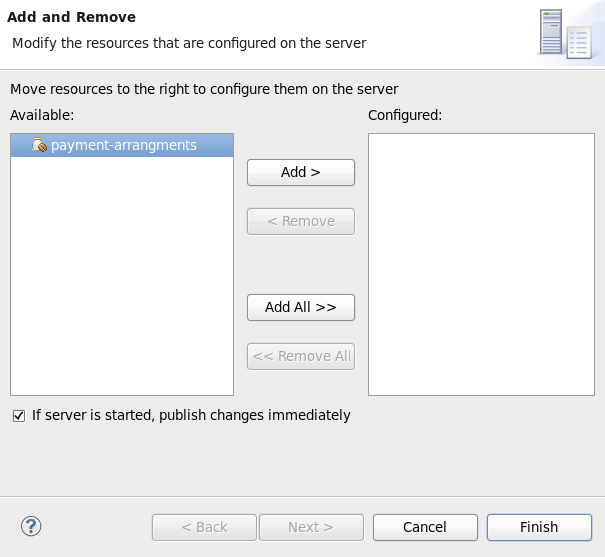
Open the Add and Remove dialog by right-clicking on the server you want to deploy the built artifact to in the server tab, and select "Add and Remove".Select the resource to deploy from the Available column and click the button. The resource will be moved to the Configured column. Click to close the dialog.Figure 7.3. Add and Remove dialog
Result
You now have an EJB Project in Red Hat JBoss Developer Studio that can build and deploy to the specified server.
If no enterprise beans are added to the project then Red Hat JBoss Developer Studio will display the warning "An EJB module must contain one or more enterprise beans." This warning will disappear once one or more enterprise beans have been added to the project.