此内容没有您所选择的语言版本。
Chapter 4. Post-install Instructions
4.1. Set Up the Development Environment
复制链接链接已复制到粘贴板!
This guide provides instructions for the simplest install path for Red Hat JBoss Developer Studio. For complete installation procedures, see the Installation Guide for Red Hat JBoss Developer Studio on https://access.redhat.com/site/documentation/en-US/Red_Hat_JBoss_Developer_Studio/.
4.1.2. Download Red Hat JBoss Developer Studio
复制链接链接已复制到粘贴板!
- Click the button. You are prompted to save the ZIP file to a directory of your choice.
4.1.3. Install Red Hat JBoss Developer Studio
复制链接链接已复制到粘贴板!
- Open a terminal and navigate to the directory containing the downloaded
.jarfile. - Run the following command to launch the GUI installation program:
java -jar jbdevstudio-build_version.jar
java -jar jbdevstudio-build_version.jarCopy to Clipboard Copied! Toggle word wrap Toggle overflow Note
Alternatively, you may be able to double-click the.jarfile to launch the installation program. - Click to start the installation process.
- Select I accept the terms of this license agreement and click .
- Adjust the installation path and click .
Note
If the installation path folder does not exist, a prompt will appear. Click to create the folder. - Choose a JVM, or leave the default JVM selected, and click .
- Red Hat JBoss Developer Studio includes Red Hat JBoss Enterprise Application Platform. If it was previously installed, choose . Otherwise, choose to install and configure it for use with Red Hat JBoss Developer Studio.
- Review the installation details, and click .
- Click when the installation process is complete.
- Configure the desktop shortcuts for Red Hat JBoss Developer Studio, and click .
- Click .
4.1.4. Start Red Hat JBoss Developer Studio
复制链接链接已复制到粘贴板!
To start Red Hat JBoss Developer Studio, you can double-click on the desktop shortcut created during the installation, or you can start it in a command line. This topic describes how to start Red Hat JBoss Developer Studio using the command line.
Procedure 4.1. Command to start Red Hat JBoss Developer Studio
- Open a terminal and navigate to the Red Hat JBoss Developer Studio installation directory.
- Run the following command to start Red Hat JBoss Developer Studio:For Linux:
./jbdevstudio
[localhost]$ ./jbdevstudioCopy to Clipboard Copied! Toggle word wrap Toggle overflow For Microsoft Windows:jbdevstudio.bat
C:\JBDS_INSTALL_DIRECTORY > jbdevstudio.batCopy to Clipboard Copied! Toggle word wrap Toggle overflow
4.1.5. Add the JBoss EAP Server Using Define New Server
复制链接链接已复制到粘贴板!
These instructions assume this is your first introduction to Red Hat JBoss Developer Studio 7.x and you have not yet added any JBoss EAP servers. The procedure below adds the JBoss server using the Define New Server wizard.
Procedure 4.2. Add the server
- Open the Servers tab. If there is no Servers tab, add it to the panel as follows:
- Click
. - Select Servers from the Server folder and click .
- Click on the link to create a new server or right-click within the blank Server panel and select
. Figure 4.1. Add a new server - No servers available
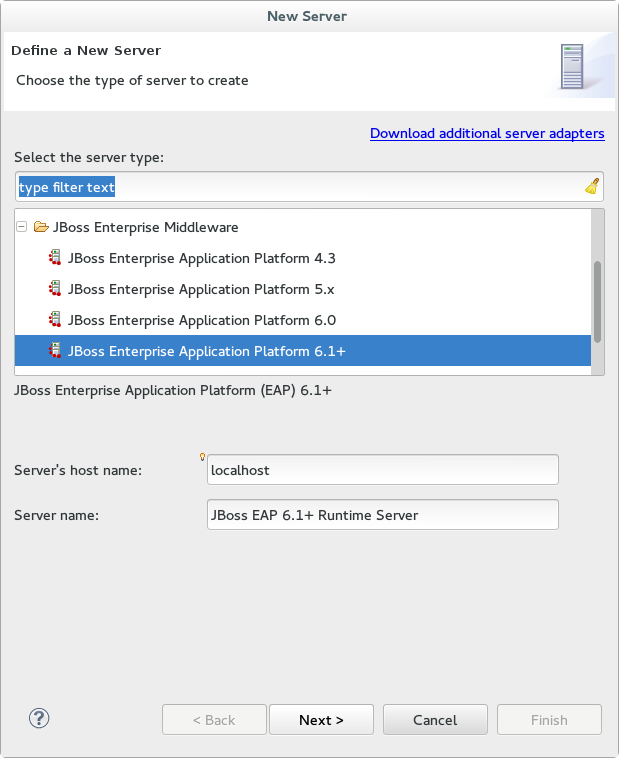
- Expand JBoss Enterprise Middleware and choose . Click to create the JBoss runtime and define the server. The next time you define a new server, this dialog displays a Server runtime environment selection with the new runtime definition.
Figure 4.2. Define a New Server
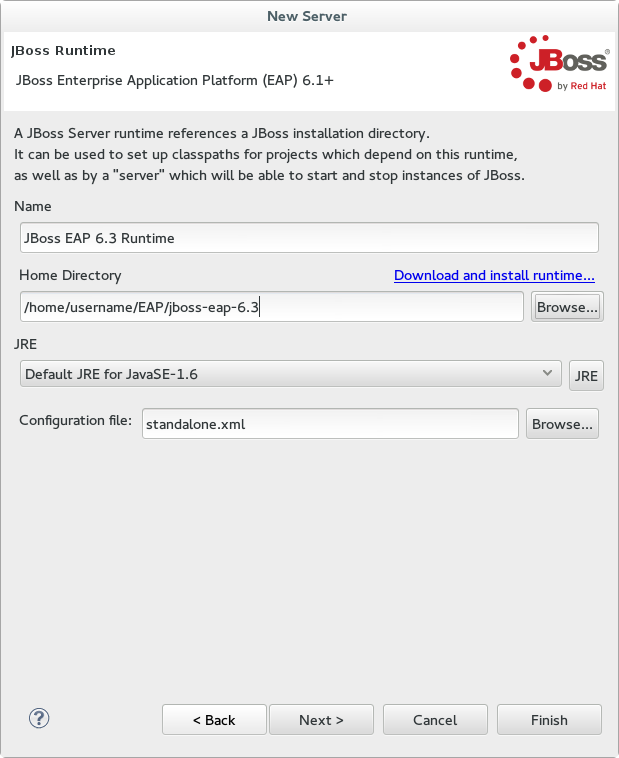
- Enter a name, for example "JBoss EAP 6.3 Runtime". Under Home Directory, click and navigate to your JBoss EAP install location. Then click .
Figure 4.3. Add New Server Runtime Environment
Note
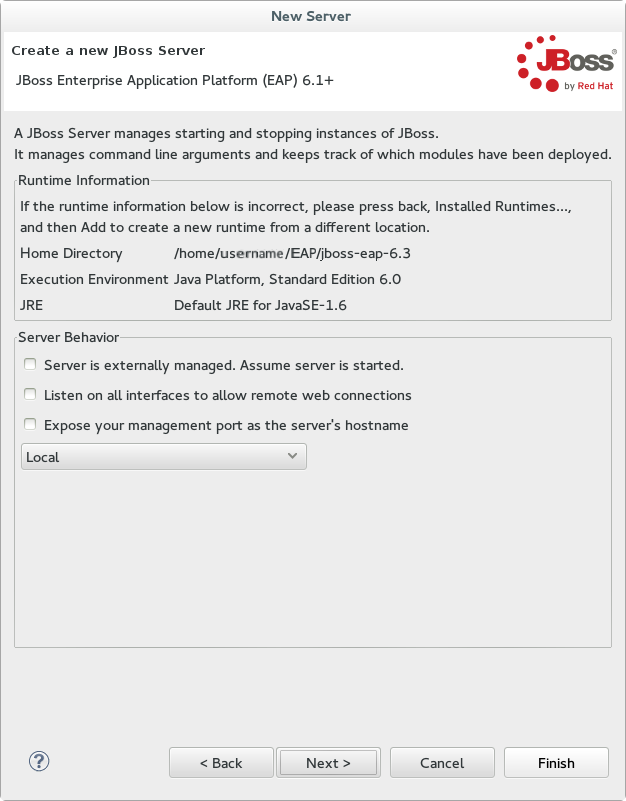
Some quickstarts require that you run the server with a different profile or additional arguments. To deploy a quickstart that requires thefullprofile, you must define a new server and add a Server Runtime Environment that specifiesstandalone-full.xmlfor the Configuration file. Be sure to give the new server a descriptive name. - On this screen you define the server behavior. You can start the server manually or let Red Hat JBoss Developer Studio manage it for you. You can also define a remote server for deployment and determine if you want to expose the management port for that server, for example, if you need connect to it using JMX. In this example, we assume the server is local and you want Red Hat JBoss Developer Studio to manage your server so you do not need to check anything. Click .
Figure 4.4. Define the New JBoss Server Behavior
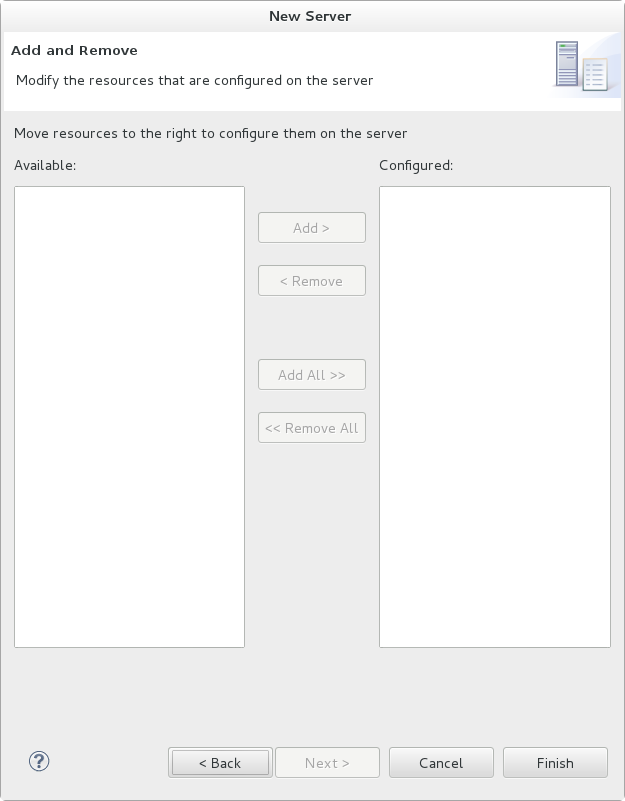
- This screen allows you to configure existing projects for the new server. Because you do not have any projects at this point, click .
Figure 4.5. Modify resources for the new JBoss server
Result
The JBoss EAP Runtime Server is listed in the Servers tab.
Figure 4.6. Server appears in the server list


