此内容没有您所选择的语言版本。
11.4.2. Creating the LVM Physical Volumes
Once the boot partition is created, the remainder of all disk space can be allocated to LVM partitions. The first step in creating a successful LVM implementation is the creation of the physical volume(s).
- Select .
- Select physical volume (LVM) from the File System Type pulldown menu as shown in Figure 11.7, “Creating a Physical Volume”.
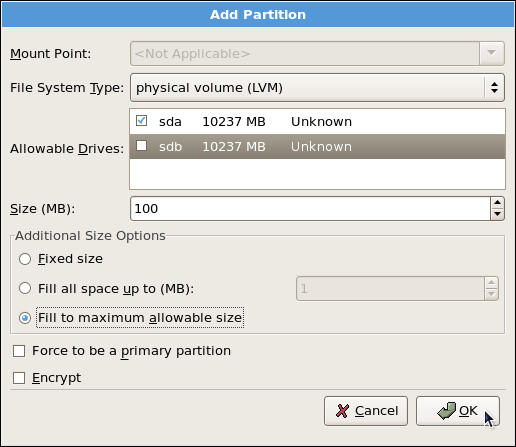
Figure 11.7. Creating a Physical Volume
- You cannot enter a mount point yet (you can once you have created all your physical volumes and then all volume groups).
- A physical volume must be constrained to one drive. For , select the drive on which the physical volume are created. If you have multiple drives, all drives are selected, and you must deselect all but one drive.
- Enter the size that you want the physical volume to be.
- Select Fixed size to make the physical volume the specified size, select Fill all space up to (MB) and enter a size in MBs to give range for the physical volume size, or select Fill to maximum allowable size to make it grow to fill all available space on the hard disk. If you make more than one growable, they share the available free space on the disk.
- Select Force to be a primary partition if you want the partition to be a primary partition.
- Click to return to the main screen.
Repeat these steps to create as many physical volumes as needed for your LVM setup. For example, if you want the volume group to span over more than one drive, create a physical volume on each of the drives. The following figure shows both drives completed after the repeated process:
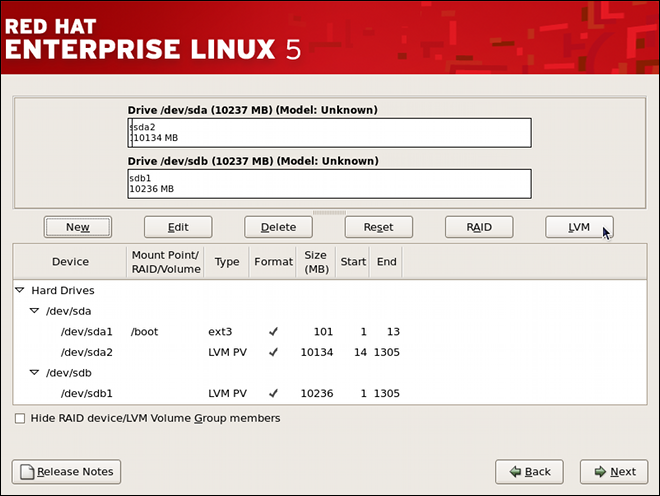
Figure 11.8. Two Physical Volumes Created