第 8 章 自定义桌面外观和品牌
作为系统管理员,您可以为系统上的所有用户配置默认的外观和品牌。
8.1. 自定义桌面背景
作为系统管理员,您可以配置默认的桌面背景、添加额外的背景或向系统的所有用户添加多个背景。
如果用户不允许更改默认的背景,则必须使用 locks 目录锁定设置。否则,每个用户都可以根据自己的偏好自定义背景。
8.1.1. 自定义默认的桌面背景
您可以通过在 org.gnome.desktop.background 模式中设置相关的 GSettings 键来配置默认的桌面背景及其外观。
流程
在
/etc/dconf/db/local.d/00-background中为机器范围的设置创建一个本地数据库:[org/gnome/desktop/background] picture-uri='file:///usr/local/share/backgrounds/wallpaper.jpg' picture-options='scaled' primary-color='000000' secondary-color='FFFFFF'-
picture-uri: 桌面背景图像文件的路径. -
picture-options:如何呈现背景图像。有效值:none,wallpaper,centered, Extended ,扩展的,zoom,span. -
primary-color: 当绘制 gradients 或固色时,标上或顶色。 -
second-color:绘制升级时的右色或底部色.
-
可选:如果要阻止用户更改默认背景,请覆盖
/etc/dconf/db/local.d/locks/background文件中用户的设置:# List the keys used to configure the desktop background /org/gnome/desktop/background/picture-uri /org/gnome/desktop/background/picture-options /org/gnome/desktop/background/primary-color /org/gnome/desktop/background/secondary-color更新系统数据库:
[subs="+quotes"]# dconf update
. Users must log out and back in again before the system-wide settings take effect.


:leveloffset: 2

:leveloffset: +1

:_mod-docs-content-type: PROCEDURE
// Module included in the following assemblies:
//
// <List assemblies here, each on a new line>

// This module can be included from assemblies using the following include statement:
// include::<path>/proc_adding-extra-backgounds.adoc[leveloffset=+1]

// The file name and the ID are based on the module title. For example:
// * file name: proc_doing-procedure-a.adoc
// * ID: [id='proc_doing-procedure-a_{context}']
// * Title: = Doing procedure A
//
// The ID is used as an anchor for linking to the module. Avoid changing
// it after the module has been published to ensure existing links are not
// broken.
//
// The `context` attribute enables module reuse. Every module's ID includes
// {context}, which ensures that the module has a unique ID even if it is
// reused multiple times in a guide.
//
// Start the title with a verb, such as Creating or Create. See also
// _Wording of headings_ in _The IBM Style Guide_.
[id="adding-extra-backgrounds_{context}"]
= Adding extra backgrounds

You can make extra backgrounds available to users on your system.

.Procedure

. Create the `/usr/share/gnome-background-properties/extra-backgrounds.xml` file.

. In the new file, specify the extra background files and their appearance in the following format:
+
[source,xml, subs="+quotes"]
<?XML version="1.0" encoding="UTF-8"?> <!DOCTYPE wallpapers SYSTEM "gnome-wp-list.dtd"> <wallpapers> <wallpaper deleted="false"> <name>Background name</name> <filename>full-path-to-the-image<filename> <options> display-option </options> <shade_type>background-shade</shade_type> <pcolor>primary-color</pcolor> <scolor> secondary-color </scolor> </wallpapers> </wallpapers>
. The new backgrounds are now available to all users in the *Background* section of the *Settings* application.

:leveloffset: 3

:leveloffset: +1

:_mod-docs-content-type: REFERENCE

[id="frequently-used-background-schema-keys_{context}"]
= Frequently used background schema keys

[role="_abstract"]
The following configuration controls the behavior of desktop backgrounds in the GSettings system.

.Frequently used GSettings and XML background keys
[options="header", cols="2,2,2a,3"]
|=======
|Key name |XML name |Possible values |Description
|`picture-options`
|`options` |
* `none`
* `wallpaper`
* `centered`
* `scaled`
* `stretched`
* `zoom`
* `spanned`
|Determines how the image set by `wallpaper_filename` is rendered.
|`color-shading-type`
|`shade_type` |
* `horizontal`
* `vertical`
* `solid`
|Determines the shade of the background color.
|`primary-color` |`pcolor` |default: `#023c88` |Left or Top color when drawing gradients, or the solid color.
|`secondary-color` |`scolor` |default: `#5789ca` |Right or Bottom color when drawing gradients, not used for solid color.
|=======

.An extra backgrounds file with one `<wallpaper>` element
====
[source,xml]
<?XML version="1.0" encoding="UTF-8"?> <!DOCTYPE wallpapers SYSTEM "gnome-wp-list.dtd"> <wallpapers> <wallpaper deleted="false"> <name>Company Background</name> <name xml:lang="de">Firmenhintergrund</name> <filename>/usr/local/share/backgrounds/company-wallpaper.jpg</filename> <options>zoom</options> <shade_type>solid</shade_type> <pcolor> problemffffff</pcolor> <scolor> manual000000</scolor> </wallpaper> </wallpapers>
====

.An extra backgrounds file with two `<wallpaper>` elements
====
In one configuration file, you can specify multiple `<wallpaper>` elements to add more backgrounds as shown in the following example with two `<wallpaper>` elements, adding two different backgrounds.

[source,xml]
<?XML version="1.0" encoding="UTF-8"?> <!DOCTYPE wallpapers SYSTEM "gnome-wp-list.dtd"> <wallpapers> <wallpaper deleted="false"> <name>Company Background</name> <name xml:lang="de">Firmenhintergrund</name> <filename>/usr/local/share/backgrounds/company-wallpaper.jpg</filename> <options>zoom</options> <shade_type>solid</shade_type> <pcolor>#ffffff</pcolor> <scolor> manual000000</scolor> </wallpaper> <wallpaper deleted="false"> <name>Company Background 2</name> <name xml:lang="de">Firmenhintergrund 2</name> <filename>/usr/local/share/backgrounds/company-wallpaper-2.jpg</filename> <options>zoom</options> <shade_type>solid</shade_type> <pcolor>#ff0000</pcolor> <scolor>"00ffff</scolor> </wallpaper> </wallpapers>
====

:leveloffset: 3

:leveloffset: +1

:_mod-docs-content-type: PROCEDURE
[id="setting-the-screenshield_{context}"]
= Setting the screen shield

Screen shield is the screen that slides down when you lock the system. You can set a default screen shield picture for all users on the system.

.Procedure

. Create the [filename]`/etc/dconf/db/gdm.d/01-screensaver` file:
+
[subs="+quotes"]
....
[org/gnome/desktop/screensaver]
picture-uri='file://__/opt/corp/background.jpg__'
....
+
Replace [filename]`__/opt/corp/background.jpg__` with the absolute path to the image file that you want to use as the default screen shield. Supported formats are PNG, JPG, JPEG, and TGA. Note that the screen shield scales your image if necessary to fit the screen.

. Update the system databases:
+
8.1.2. dconf update
. Users must log out and back in again before the system-wide settings take effect.

// Next time you lock the screen, the new Screen Shield will show in the background. In the foreground, time, date and the current day of the week will be displayed.

.Troubleshooting

* If the screen shield does not update:

.. Verify that you have updated the system databases:
+
8.1.3. dconf update
.. Try restarting GDM:
+
8.1.4. systemctl restart gdm.service
+
:leveloffset: +1

[WARNING]
--
////
Restarting GDM

This snippet explains the risks of restarting the `gdm` service. Include it next to all procedure steps that restart `gdm`.

This comment must stay inside the admonition block so that you can nest the snippet inside procedures.
////

Restarting the `gdm` service terminates all currently running GNOME sessions of all desktop users who are logged in. This might result in users losing unsaved data.
--

:leveloffset: 3


:leveloffset: 3

:context: {parent-context-of-customizing-desktop-backgrounds}


:leveloffset: 1

:leveloffset: +1

:_mod-docs-content-type: PROCEDURE

[id="customizing-the-branding-of-the-login-screen_{context}"]
= Customizing the branding of the login screen

[role="_abstract"]
You can change the logo that appears on the GNOME login screen (GDM) using a `dconf` profile.

.Prerequisites

* Prepare an image file in any of the supported formats: ANI, BPM, GIF, GTIFF, ICNS, ICO, JPEG, JPEG 2000, PCX, PNM, PBM, PGM, PPM, RAS, SVG, TGA, TIFF, WBMP, XBM, or XPM.
* The image must be around 48 pixels in height. If it is significantly larger, it will exceed the logo area.
* Store the image file in a location that the `gdm` user can access. For example, select a universally readable system directory such as `/opt/` or `/usr/local/`.

.Procedure

. Create the `/etc/dconf/db/gdm.d/01-override-logo` configuration file with the following content:
+
....
[org/gnome/login-screen]
logo='/path/to/logo.png'
....
+
Replace `__/path/to/logo.png__` with the full path to the image file that you want to use as the login screen logo.

. Update the system databases:
+
8.1.5. dconf update
.Verification

. Log out or otherwise switch to the login screen.

. Check if it displays the logo that you selected.

. If the logo does not update, restart GDM:
+
8.1.6. systemctl restart gdm
+
:leveloffset: +1

[WARNING]
--
////
Restarting GDM

This snippet explains the risks of restarting the `gdm` service. Include it next to all procedure steps that restart `gdm`.

This comment must stay inside the admonition block so that you can nest the snippet inside procedures.
////

Restarting the `gdm` service terminates all currently running GNOME sessions of all desktop users who are logged in. This might result in users losing unsaved data.
--

:leveloffset: 3

////
[role="_additional-resources"]
.Additional resources

* This section is optional.
* Provide a bulleted list of links to other closely-related material. These links can include `link:` and `xref:` macros.
* Use an unnumbered bullet (*) if the list includes only one step.
////

:leveloffset: 3

////
[role="_additional-resources"]
== Additional resources

* This section is optional.
* Provide a bulleted list of links to other closely-related material. These links can include `link:` and `xref:` macros.
* Use an unnumbered bullet (*) if the list includes only one step.
////

:context: {parent-context-of-customizing-desktop-appearance-and-branding}


:leveloffset!:

:leveloffset: +1

:parent-context-of-restricting-the-desktop-session: {context}

:_mod-docs-content-type: ASSEMBLY

[id="restricting-the-desktop-session_{context}"]
= Restricting the desktop session

:context: restricting-the-desktop-session

You can restrict and control various functionalities on the GNOME desktop environment. You can enforce specific configurations and restrictions to maintain system integrity and prevent unauthorized access.

:leveloffset: +1

:_mod-docs-content-type: PROCEDURE

[id="disabling-user-logout-and-user-switching_{context}"]
= Disabling user logout and user switching


Disabling user logout and user switching can improve security, prevent user errors, and enforce a specific workflow. This can mitigate unauthorized access to sensitive data and disruptions to the workflow caused by users accidentally logging out or switching to another user.

.Prerequisites

* Administrative access.

.Procedure

. Create a plain text `/etc/dconf/db/local.d/00-logout` keyfile in the `/etc/dconf/db/local.d/` directory with the following content:
+
....
[org/gnome/desktop/lockdown]
# Disable user logut
disable-log-out=true

# Disable user switching
disable-user-switching=true
....

. Create a new file under the `/etc/dconf/db/local.d/locks/` directory and list the keys or subpaths you want to lock down:
+
8.1.7. 锁定用户退出
/org/gnome/desktop/lockdown/disable-log-out
8.1.8. 锁定用户切换
/org/gnome/desktop/lockdown/disable-user-switching
. Apply the changes to the system databases:
+
8.1.9. dconf update
:leveloffset: 3

:leveloffset: +1

:_mod-docs-content-type: PROCEDURE

[id="disabling-printing_{context}"]
= Disabling printing

Disabling printing can prevent unauthorized access to sensitive documents and potential breaches and safeguard confidential information.

.Prerequisites

* Administrative access.

.Procedure

. Create a plain text `/etc/dconf/db/local.d/00-printing` keyfile in the `/etc/dconf/db/local.d/` directory with the following content:
+
....
[org/gnome/desktop/lockdown]
# Disable printing
disable-printing=true
....

. Create a new file under the `/etc/dconf/db/local.d/locks/` directory and list the keys or subpaths you want to lock down:
+
....
# Lock printing
/org/gnome/desktop/lockdown/disable-printing
....

. Apply the changes to the system databases:
+
....
# dconf update
....

:leveloffset: 3

:leveloffset: +1

:_mod-docs-content-type: PROCEDURE

[id="disabling-filesaving_{context}"]
= Disabling filesaving

Disabling file saving can help to protect sensitive data from unauthorized access and protect against potential data leaks.

.Prerequisites

* Administrative access.

.Procedure

. Create a plain text `/etc/dconf/db/local.d/00-filesaving` keyfile in the `/etc/dconf/db/local.d/` directory with the following content:
+
....
[org/gnome/desktop/lockdown]
# Disable saving files on disk
disable-save-to-disk=true
....

. Create a new file under the `/etc/dconf/db/local.d/locks/` directory and list the keys or subpaths you want to lock down:
+
....
# Lock file saving
/org/gnome/desktop/lockdown/disable-save-to-disk
....

. Apply the changes to the system databases:
+
....
# dconf update
....

:leveloffset: 3

:leveloffset: +1

:_mod-docs-content-type: PROCEDURE

[id="disabling-the-command-prompt_{context}"]
= Disabling the command prompt

Disabling the command prompt can simplify user interactions with the system, prevent inexperienced users from executing potentially harmful commands that might cause system instability or data loss, and  reduce the risk of unauthorized changes to system settings or configurations.

.Prerequisites

* Administrative access.

.Procedure

. Create a plain text `/etc/dconf/db/local.d/00-lockdown` keyfile in the `/etc/dconf/db/local.d/` directory with the following content:
+
....
[org/gnome/desktop/lockdown]

# Disable command prompt
disable-command-line=true
在
/etc/dconf/db/local.d/locks/目录下创建一个新文件,并列出您要锁住的密钥或子路径:# Lock command prompt /org/gnome/desktop/lockdown/disable-command-line将更改应用到系统数据库:
# dconf update- 要使此设置生效,用户需要退出并重新登录。
8.1.9.1. 禁用重新分区
您可以覆盖控制磁盘管理的默认系统设置。
避免直接修改 /usr/share/polkit-1/actions/org.freedesktop.udisks2.policy 文件。您所做的任何更改都将在下一次软件包更新过程中被替换。
前提条件
- 管理访问权限.
流程
复制
/etc/share/polkit-1/actions/目录下的/usr/share/polkit-1/actions/org.freedesktop.udisks2.policy文件:# cp /usr/share/polkit-1/actions/org.freedesktop.udisks2.policy /etc/share/polkit-1/actions/org.freedesktop.udisks2.policy在
/etc/polkit-1/actions/org.freedesktop.udisks2.policy文件中,删除您不需要的任何操作,并添加以下行:<action id="org.freedesktop.udisks2.modify-device"> <message>Authentication is required to modify the disks settings</message> <defaults> <allow_any>no</allow_any> <allow_inactive>no</allow_inactive> <allow_active>yes</allow_active> </defaults> </action>如果您只想限制对 root 用户的访问,请将
<allow_any>no</allow_any>替换为<allow_any>auth_admin</allow_any>。
8.1.9.2. 将会话限制为单个应用程序
您可以在单应用模式下启动 GNOME 会话,也称为 kiosk 模式。在此会话中,GNOME 只会显示您选择的应用程序的完整屏幕窗口。
8.1.9.2.1. 单应用模式
单应用模式是一种修改后的 GNOME 会话,它将 Mutter 窗口管理器重新配置为交互式 kiosk。该会话会锁定某些行为,从而使标准桌面更具限制。用户只能与管理员所选择的单个应用进行交互。
您可以为几个用例设置单应用程序模式,例如:
- 在通信、娱乐或教育领域
- 作为自助服务机器
- 作为事件管理器
- 作为注册点
GNOME Kiosk 工具提供单应用程序模式配置和会话。
可用的单应用程序会话如下:
- 搜索设备会话
-
此会话总会在
www.google.com网站启动 Mozilla Firefox Web 浏览器。 - Kiosk 脚本会话
- 此会话将启动一个您在 shell 脚本中指定的任意一个应用程序。
8.1.9.2.2. 启用搜索设备模式
此流程安装并启用搜索设备会话,它会在 Web 浏览器中将 GNOME 会话限制为 Google 搜索引擎。
流程
安装 GNOME Kiosk 软件包:
# dnf install gnome-kiosk gnome-kiosk-search-appliance- 在 GNOME 登录屏幕中,从齿轮按钮菜单中选择 Search Appliance Session,并以单应用程序用户身份登录。
- Mozilla Firefox 浏览器在其 kiosk 模式中以全屏窗口形式打开。它显示 Google 搜索页面。
8.1.9.2.3. 启用单应用模式
这个流程安装并启用 Kiosk 脚本会话,它将 GNOME 会话限制为所选的单应用程序。
流程
安装 GNOME Kiosk 软件包:
# dnf install gnome-kiosk gnome-kiosk-script-session- 在 GNOME 登录屏幕中,从齿轮按钮菜单中选择 Kiosk Script Session,并以单应用程序用户身份登录。
gedit 文本编辑器以全屏窗口形式打开。它显示配置应用程序在单应用程序会话中运行的 shell 脚本。
编辑 shell 脚本,并输入您要在单应用程序会话中启动的应用程序。
例如,要启动 Mozilla Firefox 浏览器,请输入以下内容:
#!/usr/bin/sh firefox --kiosk https://example.org- 保存脚本文件。
关闭 gedit 窗口。
会话会终止并重启您选择的应用程序。
- 当下次登录到单应用程序会话时,您选择的应用程序将运行。
8.1.9.3. 在 GNOME 中配置声音
您可以在 GNOME 中配置音量和其他声音选项。
8.1.9.3.1. GNOME 中的声音配置工具
在 RHEL 9 中,PipeWire 声音服务器处理声音输出和输入。PipeWire 允许程序使用 pipewire 守护进程输出音频。
要配置声音,您可以在 GNOME 中使用以下图形应用程序之一:
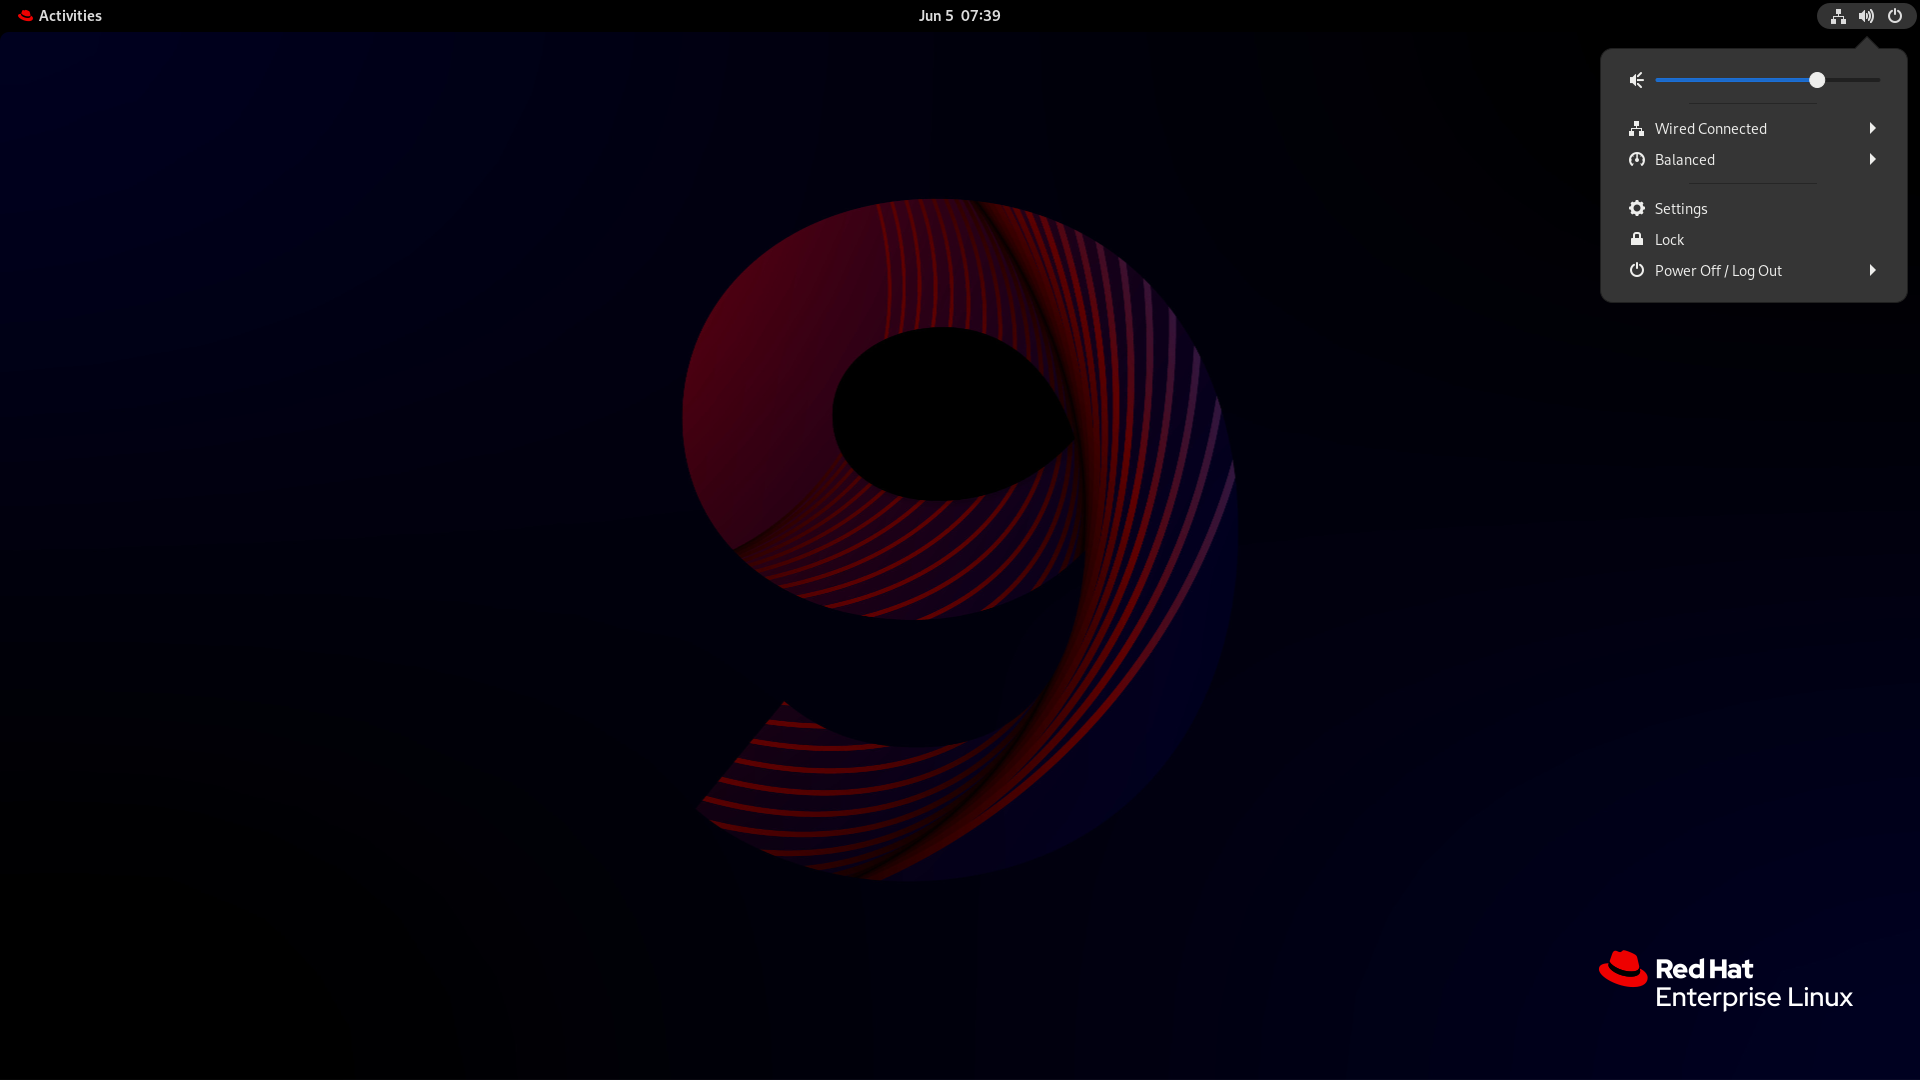
System menu
system menu 位于屏幕右上角。它只允许您通过声音条设置声音输出或声音输入的强度。只有在您运行使用内部麦克风(内置音频)的应用程序(如一些电话会议工具)时,输入声音的声音条才可用。
设置
Settings 提供其他配置声音的常用选项。
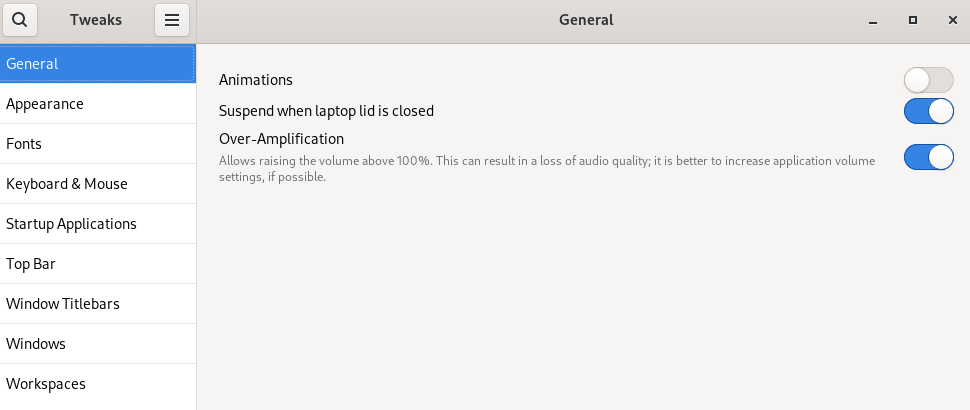
Tweaks
Tweaks 应用程序使您只能配置音量过大。
8.1.9.3.2. 在设置中访问声音配置
此流程在 Settings 中打开声音配置屏幕。
启动 设置.
您可以使用 在 GNOME 中启动应用程序 中描述的方法之一。或者,您也可以从 system menu 点击其图标来启动它。
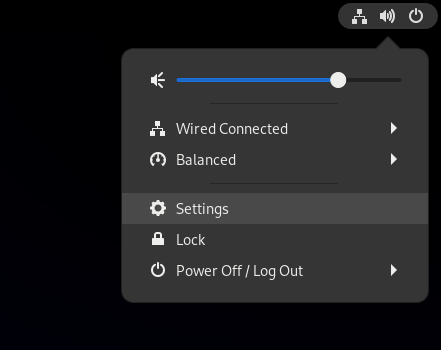
- 在 Settings 中,从左边栏中选择 Sound。
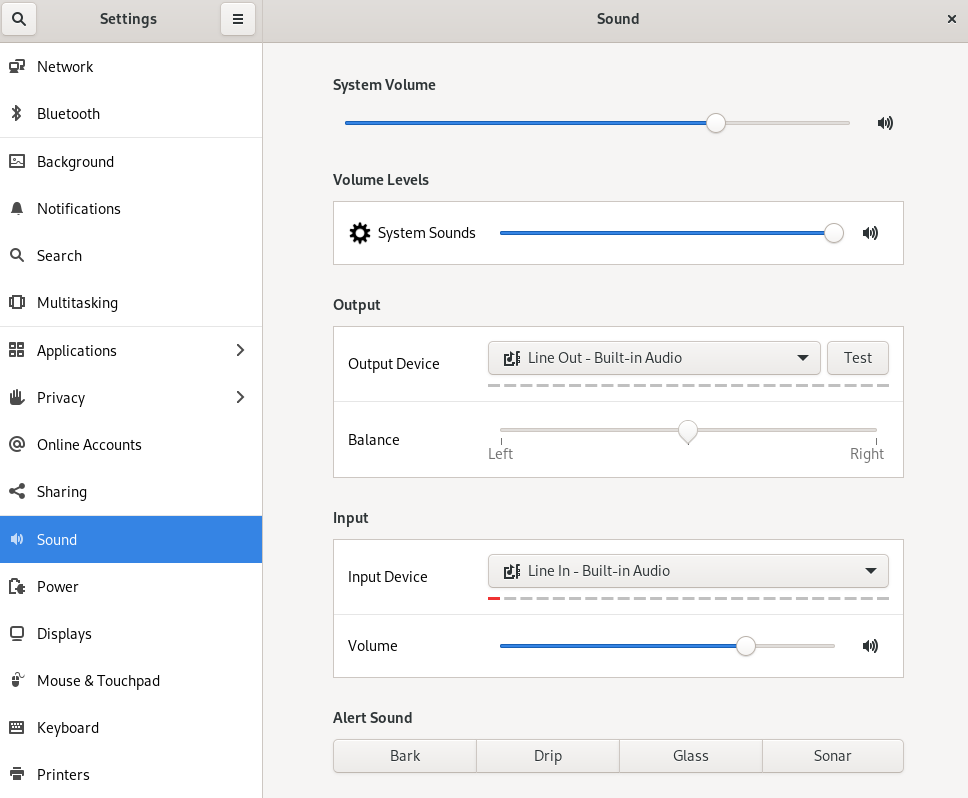
8.1.9.3.3. 设置中的声音选项
通过 Settings 中的 Sound 菜单,您可以配置以下声音选项:
- 音量级
- 音量级 部分显示目前运行的可处理声音的应用程序,并允许您扩大或降低特定应用程序的声音。
- Output 和 Input
- Output 和 Input 部分显示所有当前连接的内置音频设备和外部音频设备。
- 警报声音
- Alert sound 部分中显示系统音频警报的不同主题。
声音配置屏幕上的输出部分
8.1.9.4. 为视障用户启用可访问性
作为系统管理员,您可以配置桌面环境来支持视障用户。
要启用可访问性,请执行以下流程。
8.1.9.4.1. 提供可访问性功能的组件
在 RHEL 9 桌面上,Or ca 屏幕阅读器可确保视障用户的可访问性。Orca 包括在默认的 RHEL 安装中。
Orca 从屏幕读取信息,并使用以下组件与您进行沟通:
- 语音分配器
- Orca 使用 语音分配器 与语音合成器进行通信。语音分配器 支持各种语音合成后端,确保来自其他应用程序的消息不会中断 Orca 的消息,并提供其他功能。
- 语音合成器
- 提供语音输出。默认的语音合成器是 eSpeak-NG。
- 盲文显示器
- 提供触觉输出。BRLTTY 服务启用此功能。
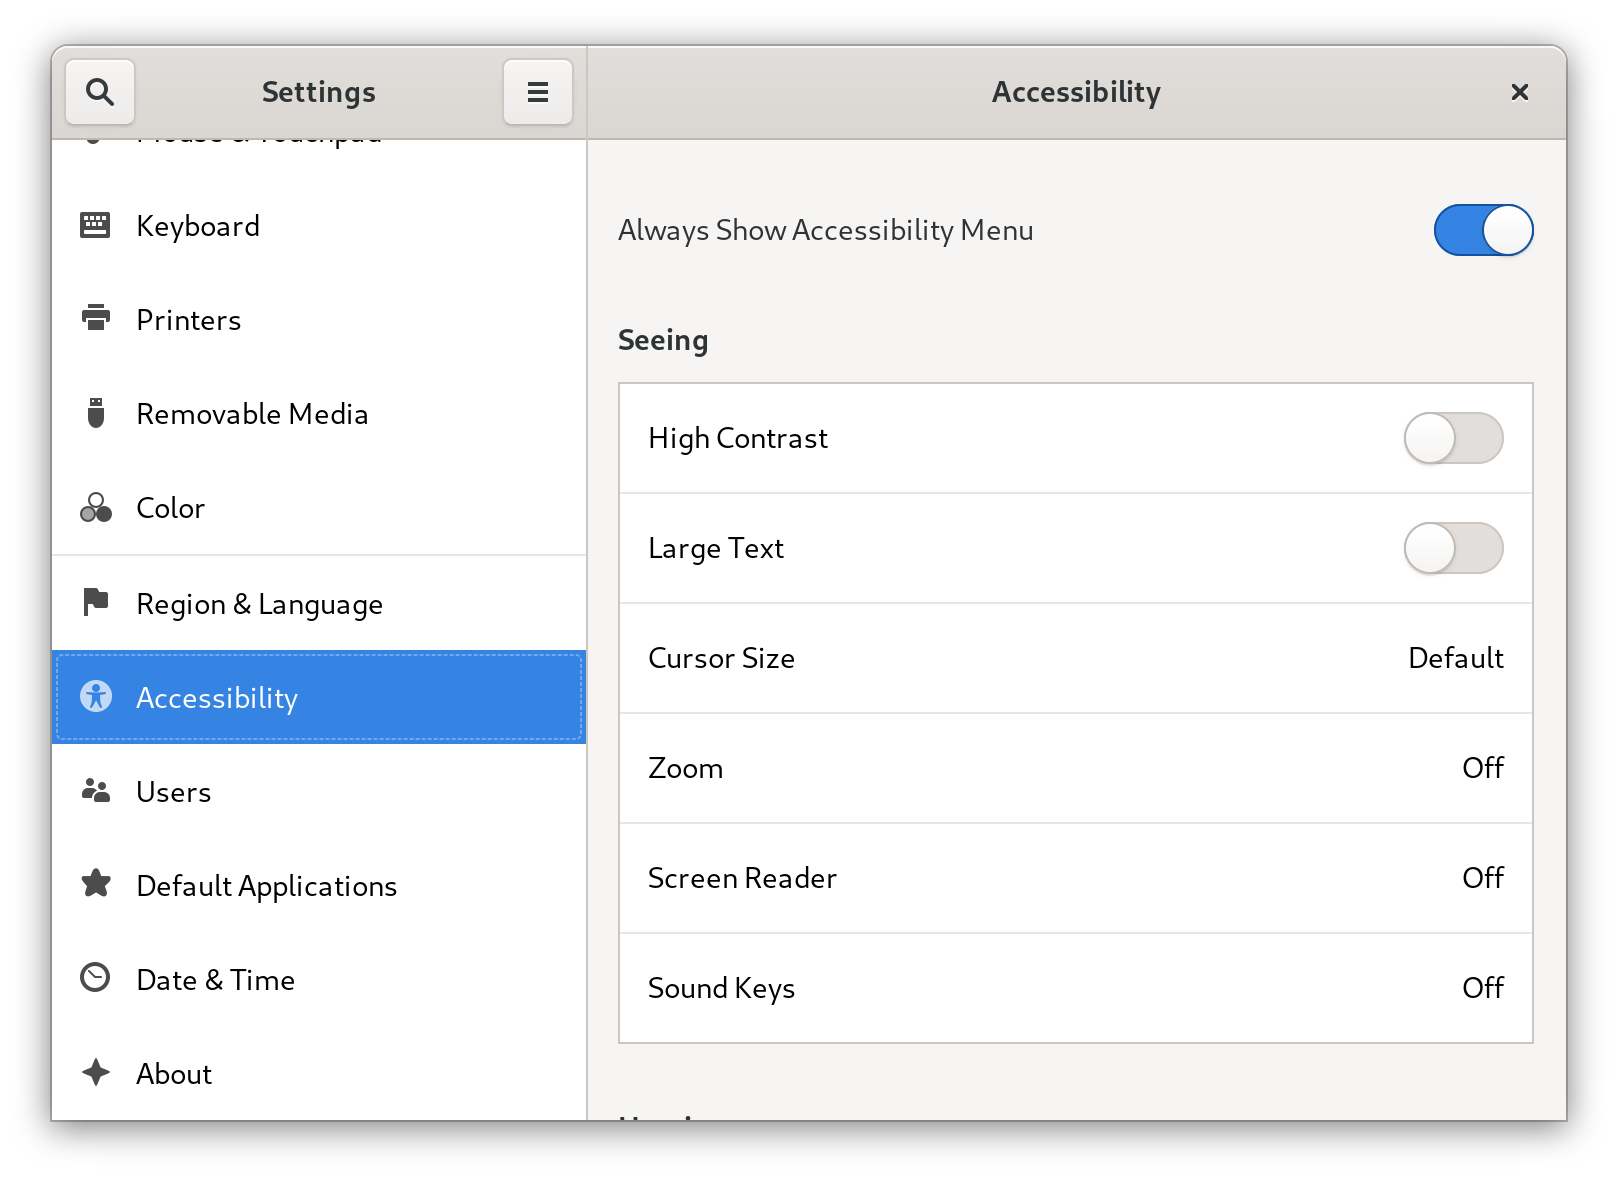
8.1.9.4.2. 启用可访问性菜单
您可以启用顶部面板中的 Accessibility menu 图标,它提供了一个带有几个可访问性选项的菜单。
流程
- 打开 Settings 应用程序。
- 选择 Accessibility。
启用 Always Show Accessibility Menu 项。
在 Settings 中启用 Accessibility menu
验证
检查顶栏中是否显示 Accessibility menu 图标,即使此菜单中的所有选项都已关闭。

8.1.9.4.3. 启用屏幕阅读器
您可以在桌面环境中启用 Orca 屏幕阅读器。然后,屏幕阅读器读取屏幕上显示的文本,以提高可访问性。
流程
使用以下任一方法启用屏幕阅读器:
- 按 Super+Alt+S 快捷键。
- 如果顶部面板显示 Universal Access 菜单,请在菜单中选择 Screen Reader。
验证
- 打开包含文本内容的应用程序。
- 检查屏幕阅读器是否可读取应用程序中的文本。
8.1.9.4.4. 启用盲文显示设备
盲文显示器是一个使用 brltty 服务为视障用户提供触觉输出的设备。
要让盲文显示可以正常工作,请执行以下流程。
8.1.9.4.4.1. 支持的盲文显示设备类型
RHEL 9 支持以下类型的盲文显示设备。
| 盲文设备类型 | 类型的语法 | 备注 |
|---|---|---|
| 串行设备 |
|
相对路径是 |
| USB 设备 |
|
此处的括号( |
| 蓝牙设备 |
|
8.1.9.4.4.2. 启用 brltty 服务
要启用盲文显示,请启用 brltty 服务,以在引导时自动启动。默认情况下,brltty 被禁用。
前提条件
确保
brltty软件包已安装:# dnf install brltty另外,您可以安装对
brltty的语音合成支持:# dnf install brltty-espeak-ng
流程
启用
brltty服务,以在引导时启动:# systemctl enable --now brltty
验证
- 重启系统:
检查
brltty服务是否正在运行:# systemctl status brltty ● brltty.service - Braille display driver for Linux/Unix Loaded: loaded (/usr/lib/systemd/system/brltty.service; enabled; vendor pres> Active: active (running) since Tue 2019-09-10 14:13:02 CEST; 39s ago Process: 905 ExecStart=/usr/bin/brltty (code=exited, status=0/SUCCESS) Main PID: 914 (brltty) Tasks: 3 (limit: 11360) Memory: 4.6M CGroup: /system.slice/brltty.service └─914 /usr/bin/brltty
8.1.9.4.4.3. 授权盲文显示设备的用户
要使用盲文显示设备,您必须设置有权使用盲文显示设备的用户。
流程
在
/etc/brltty.conf文件中,确保keyfile设为/etc/brlapi.key:api-parameters Auth=keyfile:/etc/brlapi.key这是默认值。您的机构可能覆盖了它。
通过将他们添加到
brlapi组来授权所选用户:# usermod --append -G brlapi user-name
8.1.9.4.4.4. 为盲文显示设备设置驱动程序
brltty 服务会自动为您的盲文显示设备选择驱动程序。如果自动检测失败或者用时过长,您可以手动设置驱动程序。
前提条件
- 自动驱动程序检测失败或用时过长。
流程
-
打开
/etc/brltty.conf配置文件。 -
找到
braille-driver指令,它指定了您的盲文显示设备的驱动程序。 在
braille-driver指令中指定所需驱动程序的识别码。从
/etc/brltty.conf中提供的列表中选择所需驱动程序的识别码。例如,要使用 XWindow 驱动程序:# XWindow braille-driver xw要设置多个驱动程序,请将它们以逗号分隔的形式列出。然后,自动检测列出的驱动程序中选择。
8.1.9.4.4.5. 连接盲文显示设备
brltty 服务自动连接到您的盲文显示设备。如果自动检测失败,您可以手动设置连接方法。
前提条件
- 盲文显示设备物理连接到您的系统。
- 自动连接已失败。
流程
如果该设备由串口到 USB 适配器连接,请在设备插件中的内核信息中找到实际设备名称:
# journalctl --dmesg | fgrep ttyUSB-
打开
/etc/brltty.conf配置文件。 -
查找
braille-device指令。 在
braille-device指令中,指定连接。您还可以设置多个设备,用逗号分开,每个设备将被依次探测。
例如:
例 8.1. 第一个串行设备的设置
braille-device serial:ttyS0例 8.2. 匹配盲文驱动程序的第一个 USB 设备的设置
braille-device usb:例 8.3. 按序列号排列的特定 USB 设备的设置
braille-device usb:nnnnn例 8.4. 串口到 USB 适配器的设置
使用您之前在内核信息中发现的设备名称:
braille-device serial:ttyUSB0注意将
braille-device设为usb:不适用于串口到 USB 适配器。例 8.5. 按地址排列的特定蓝牙设备的设置
braille-device bluetooth:xx:xx:xx:xx:xx:xx
8.1.9.4.4.6. 设置文本表
brltty 服务会根据您的系统语言自动选择一个文本表。如果您的系统语言与您要读取的文档语言不匹配,您可以手动设置文本表。
流程
-
编辑
/etc/brltty.conf文件。 确定您选择的文本表的代码。
您可以在
/etc/brltty/Text/目录中找到所有可用的文本表。代码是没有文件后缀的文本表的文件名。在
text-table指令中指定所选文本表的代码。例如,要使用美国英语的文本表:
text-table en_US # English (United States)
8.1.9.4.4.7. 设置缩写表
您可以选择使用盲文显示设备对缩写进行编码的表。特定缩写表的相对路径存储在 /etc/brltty/Contraction/ 目录中。
如果没有指定表,brltty 服务不使用缩写表。
流程
从
/etc/brltty.conf文件中的列表中选择缩写表。例如,要使用美国英语二级的缩写表:
contraction-table en-us-g2 # English (US, grade 2)
8.1.9.5. 在 GNOME 中使用特殊字符
在 GNOME 中,您可以使用组合键从不同的语言和符号集中输入特殊字符,包括键盘上没有的特殊字符。您可以使用不同语言和符号集输入和查看特殊字符,从而可以轻松地在 GNOME 中使用各种字符集。
要输入这些特殊字符,您可以将键盘上一个现有的键定义为组合键。启用后,组合键允许您通过以特定顺序按多个键来输入特殊字符和符号。
8.1.9.5.1. 为单个用户启用组合键
您可以在以用户身份登录时从 Settings 菜单中启用组合键。
流程
- 单击屏幕左上角的 Activities 按钮。
- 输入 Settings 并点 Settings 图标打开 Settings 应用程序。
- 在 Settings 窗口中,单击左侧栏中的 Keyboard。
- 向下滚动并选择 Compose Key 选项。
- 切换滑块以启用 Compose Key。
- 选择您要用作组合键的键。
- 选择了组合键后,关闭 Settings 窗口。
现在,会启用组合键,您可以通过按组合键使用它来输入特殊字符和符号,后跟相应的键序列。
要查看组成特殊字符的可用的多键序列,请使用:
$ grep "<Multi_key>" /usr/share/X11/locale/en_US.UTF-8/Compose验证
-
按组合键,然后输入您要输入的特殊字符的键序列。例如,要输入
©,请按 Compose Key,然后按 o 和 c。
8.1.9.5.2. 为另一个用户启用组合键
您可以使用 gsettings 工具为另一用户启用组合键。
前提条件
- 管理访问权限.
流程
允许所有客户端连接到 X 服务器:
# xhost +运行以下命令来设置组合键:
# su - <username> -c "gsettings set org.gnome.desktop.input-sources xkb-options \"['compose:<compose_key>']\""将
<username>替换为您要启用组合键的用户的用户名。将<compose_key>替换为您要用作组合键的键。您可以使用ralt选项将右 Alt 键指定为组合键。要查看您可以在键盘上设置组合键的其他组合键选项,请使用:
$ grep compose /usr/share/X11/xkb/rules/evdev.lst重置访问控制:
# xhost -
验证
要检查其他用户的组合键设置,请使用:
# su - <username> -c "gsettings get org.gnome.desktop.input-sources xkb-options"将
<username>替换为您要为其检查组合键设置的用户的用户名。
8.1.9.5.3. 为所有用户启用组合键
您可以通过创建一个 dconf 配置文件来为所有用户启用组合键。
前提条件
- 管理访问权限.
流程
使用以下内容创建
/etc/dconf/db/local.d/00-compose-key配置文件:[org/gnome/desktop/input-sources] xkb-options=['compose:<compose_key>']将
<compose_key>替换为您要用作组合键的键。您可以使用ralt选项将右 Alt 键指定为组合键。要查看您可以在键盘上设置组合键的其他组合键选项,请使用:
$ grep compose /usr/share/X11/xkb/rules/evdev.lst使用新配置更新
dconf数据库:# dconf update- 重启您的系统或登出,然后再重新登录 GNOME 会话以使更改生效。
现在,为系统上的所有用户都启用了组合键,他们可以使用它来输入特殊字符和符号,然后按组合键,后跟对应的键序列。
验证
-
按组合键,然后输入您要输入的特殊字符的键序列。例如,要输入
©,请按 Compose Key,然后按 o 和 c。
8.1.9.5.4. 特殊字符的组合键序列
表展示了在 GNOME 中用于输入带有变音符或重音的特殊字符的组合键序列。每行显示一个组合键序列及其相应的结果
| 组合键序列 | 结果 |
|---|---|
| compose+'+letter | 锐音字母((é, á, ñ) |
| compose+'+letter | 重音字母(è, ù, ò) |
| compose+"+letter | 元音或变音字母(ë, ö, ü) |
| compose+-+letter | 长音符字母(ā, ē, ō) |
| compose+/+letter | 笔画或变音符字母(ø, ł, ǿ) |
| compose+=+letter | 双锐音符字母(ő, ű, ȁ) |
| compose+.+letter | 上面带点的字母(ȧ, ċ, ḋ) |
| compose+,+letter | 变音符号字母 (ç, ş, ņ) |
| compose+^+letter | 圆润口音字母 (â, ê, î) |
| compose+~+letter | 波浪形重音字母(ã, ñ, õ) |
8.1.9.6. 使用命令行管理 GNOME Shell 扩展
gnome-extensions 工具是一个命令行工具,允许您从终端管理 GNOME Shell 扩展。它提供了各种命令来列出、安装、启用、禁用、删除和获取有关扩展的信息。
每个 GNOME Shell 扩展都有一个 UUID (相对唯一标识符),它由 gnome-extensions list 命令列出。
流程
要列出已安装的 GNOME Shell 扩展,请使用:
$ gnome-extensions list要安装 GNOME Shell 扩展,请使用以下命令,它使用扩展名存档的文件名(从从 GNOME扩展下载的
.zip文件中下载):$ gnome-extensions install <zip_file>要启用 GNOME Shell 扩展,请使用:
$ gnome-extensions enable <UUID>要显示 GNOME Shell 扩展的信息,请使用:
$ gnome-extensions info <UUID>要禁用 GNOME Shell 扩展,请使用:
$ gnome-extensions disable <UUID>要删除 GNOME Shell 扩展,请使用:
$ gnome-extensions uninstall <UUID>
将 <UUIDs> 替换为分配给您要安装的 GNOME Shell 扩展的唯一标识符。
8.1.9.7. 启用并强制实施 GNOME Shell 扩展
GNOME Shell 扩展是增强 GNOME 桌面环境的功能和外观的附加组件。用户可以为自己的桌面会话或系统上的所有用户启用扩展。
8.1.9.7.1. 启用系统范围的 GNOME Shell 扩展
您可以为所有用户自动启用 GNOME 扩展,从而无需单独安装。具有个性化扩展的现有用户不会受到影响。
前提条件
- 管理权限
流程
- 从 GNOME 扩展网站下载扩展存档。
将存档提取到
/usr/share/gnome-shell/extensions/目录中:# unzip -q <extension-file.zip> -d /usr/share/gnome-shell/extensions/使用扩展 zip 文件的名称替换
<extension-file.zip>。调整权限,以确保扩展文件对任何人可读和可执行:
# chmod -R 755 /usr/share/gnome-shell/extensions/<extension-directory>/使用扩展目录的名称替换
<extension-directory>。创建一个具有以下内容的新的
/etc/dconf/db/local.d/00-extensions文件:[org/gnome/shell] enabled-extensions=['myextension1@myname.example.com', 'myextension2@myname.example.com']将 UUID (
myextension1@myname.example.com、myextension2@myname.example.com)替换为您要启用的 UUID。您可以在其 GNOME Shell 扩展网页上找到扩展的 UUID。将更改应用到系统数据库:
# dconf update
完成这些步骤后,默认为系统上所有新用户启用指定的扩展。
8.1.9.7.2. 限制 GNOME Shell 扩展
通过锁定特定的 GNOME Shell 扩展,您可以确保为所有用户提供预定义的扩展集合。您可以配置一组强制扩展,并防止用户修改它们。指定的扩展对所有用户是强制的,并且禁用了 Looking Glass 工具,以确保符合预定义的配置。
前提条件
- 管理权限
流程
创建一个具有以下内容的新的
/etc/dconf/db/local.d/00-extensions文件:[org/gnome/shell] enabled-extensions=['myextension1@myname.example.com', 'myextension2@myname.example.com'] development-tools=false将 UUID (
myextension1@myname.example.com、myextension2@myname.example.com)替换为您要启用的 UUID。您可以在其 GNOME Shell 扩展网页上找到扩展的 UUID。要防止用户更改这些设置,请使用以下内容创建一个新的
/etc/dconf/db/local.d/locks/extensions文件:/org/gnome/shell/enabled-extensions /org/gnome/shell/development-tools将更改应用到系统数据库:
# dconf update
org.gnome.shell.enabled-extensions 文件中未列出的扩展不会被 GNOME Shell 加载 ,阻止用户使用它们。