CLI 工具
如何使用 OpenShift Container Platform 的命令行工具
摘要
第 1 章 OpenShift Container Platform CLI 工具概述
用户在操作 OpenShift Container Platform 时执行一系列操作,例如:
- 管理集群
- 构建、部署和管理应用程序
- 管理部署过程
- 开发 Operator
- 创建和维护 Operator 目录
OpenShift Container Platform 提供了一组命令行界面 (CLI) 工具,通过允许用户从终端执行各种管理和开发操作来简化这些任务。这些工具提供简单的命令来管理应用,并与系统的每个组件交互。
1.1. CLI 工具列表
OpenShift Container Platform 中提供了以下一组 CLI 工具:
-
OpenShift CLI (
oc) :这是 OpenShift Container Platform 用户最常用的 CLI 工具。它帮助集群管理员和开发人员使用终端在 OpenShift Container Platform 间执行端到端操作。与 Web 控制台不同,它允许用户使用命令脚本直接处理项目源代码。 -
Knative CLI(kn) :Knative (
kn) CLI 工具提供简单直观的终端命令,可用于与 OpenShift Serverless 组件(如 Knative Serving 和 Eventing)交互。 -
Pipelines CLI(tkn) :OpenShift Pipelines 是 OpenShift Container Platform 中的持续集成和持续交付 (CI/CD) 解决方案,内部使用 Tekton。
tknCLI 工具提供简单直观的命令,以便使用终端与 OpenShift Pipelines 进行交互。 -
opm CLI :
opmCLI 工具可帮助 Operator 开发人员和集群管理员从终端创建和维护 Operator 目录。 - Operator SDK :Operator SDK 是 Operator Framework 的一个组件,它提供了一个 CLI 工具,可供 Operator 开发人员用于从终端构建、测试和部署 Operator。它简化了 Kubernetes 原生应用程序的构建流程,这些应用程序需要深入掌握特定于应用程序的操作知识。
第 2 章 OpenShift CLI (oc)
2.1. OpenShift CLI 入门
2.1.1. 关于 OpenShift CLI
借助 OpenShift CLI(oc),您可以从终端创建应用程序并管理 OpenShift Container Platform 项目。OpenShift CLI 在以下情况下是理想的选择:
- 直接使用项目源代码
- 编写 OpenShift Container Platform 操作脚本
- 在管理项目时,受带宽资源的限制,Web 控制台无法使用
2.1.2. 安装 OpenShift CLI
您可以通过下载二进制文件或使用 RPM 来安装 OpenShift CLI(oc)。
2.1.2.1. 通过下载二进制文件安装 OpenShift CLI
您可以安装 OpenShift CLI(oc)来使用命令行界面与 OpenShift Container Platform 进行交互。您可以在 Linux、Windows 或 macOS 上安装 oc。
如果安装了旧版本的 oc,则无法使用 OpenShift Container Platform 4.14 中的所有命令。下载并安装新版本的 oc。
2.1.2.1.1. 在 Linux 上安装 OpenShift CLI
您可以按照以下流程在 Linux 上安装 OpenShift CLI(oc)二进制文件。
流程
- 导航到红帽客户门户网站上的 OpenShift Container Platform 下载页面。
- 从 产品变体 下拉列表中选择架构。
- 从 版本 下拉列表中选择适当的版本。
- 点 OpenShift v4.14 Linux Client 条目旁的 Download Now 来保存文件。
解包存档:
$ tar xvf <file>将
oc二进制文件放到PATH 中的目录中。要查看您的
PATH,请执行以下命令:$ echo $PATH
验证
安装 OpenShift CLI 后,可以使用
oc命令:$ oc <command>
2.1.2.1.2. 在 Windows 上安装 OpenShift CLI
您可以按照以下流程在 Windows 上安装 OpenShift CLI(oc)二进制文件。
流程
- 导航到红帽客户门户网站上的 OpenShift Container Platform 下载页面。
- 从 版本 下拉列表中选择适当的版本。
- 点 OpenShift v4.14 Windows Client 条目旁的 Download Now 来保存文件。
- 使用 ZIP 程序解压存档。
将
oc二进制文件移到PATH 中的目录中。要查看您的
PATH,请打开命令提示并执行以下命令:C:\> path
验证
安装 OpenShift CLI 后,可以使用
oc命令:C:\> oc <command>
2.1.2.1.3. 在 macOS 上安装 OpenShift CLI
您可以按照以下流程在 macOS 上安装 OpenShift CLI(oc)二进制文件。
流程
- 导航到红帽客户门户网站上的 OpenShift Container Platform 下载页面。
- 从 版本 下拉列表中选择适当的版本。
点 OpenShift v4.14 macOS Client 条目旁的 Download Now 来保存文件。
注意对于 macOS arm64,请选择 OpenShift v4.14 macOS arm64 Client 条目。
- 解包和解压存档。
将
oc二进制文件移到 PATH 的目录中。要查看您的
PATH,请打开终端并执行以下命令:$ echo $PATH
验证
使用
oc命令验证安装:$ oc <command>
2.1.2.2. 使用 Web 控制台安装 OpenShift CLI
您可以安装 OpenShift CLI(oc)来通过 Web 控制台与 OpenShift Container Platform 进行交互。您可以在 Linux、Windows 或 macOS 上安装 oc。
如果安装了旧版本的 oc,则无法使用 OpenShift Container Platform 4.14 中的所有命令。下载并安装新版本的 oc。
2.1.2.2.1. 使用 Web 控制台在 Linux 上安装 OpenShift CLI
您可以按照以下流程在 Linux 上安装 OpenShift CLI(oc)二进制文件。
流程
从 Web 控制台,单击 ?。
单击 Command Line Tools。
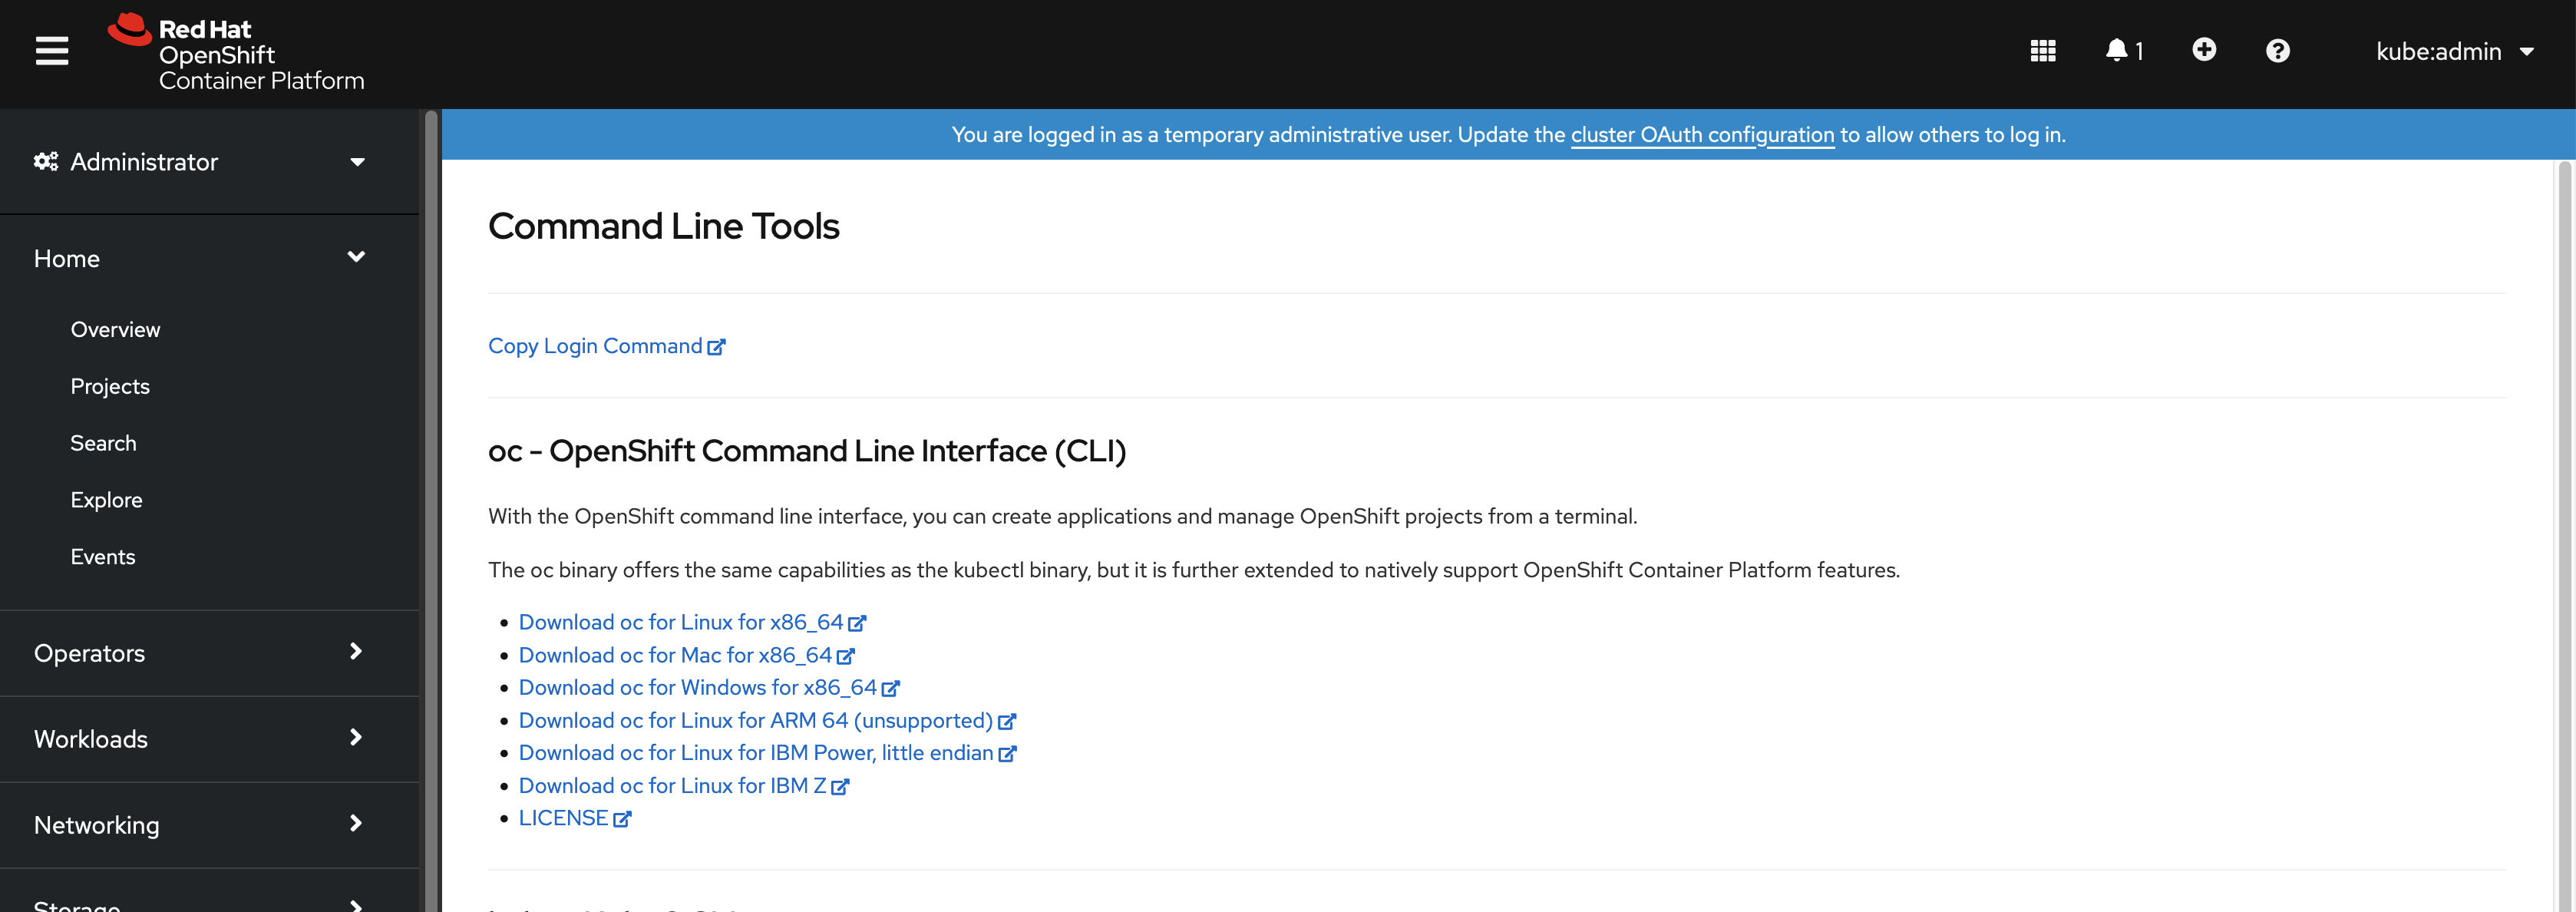
-
为您的 Linux 平台选择适当的
oc二进制文件,然后点 Download oc for Linux。 - 保存该文件。
解包存档。
$ tar xvf <file>将
oc二进制文件移到PATH 中的目录中。要查看您的
PATH,请执行以下命令:$ echo $PATH
安装 OpenShift CLI 后,可以使用 oc 命令:
$ oc <command>2.1.2.2.2. 使用 Web 控制台在 Windows 上安装 OpenShift CLI
您可以按照以下流程在 Windows 上安装 OpenShift CLI(oc)二进制文件。
流程
从 Web 控制台,单击 ?。
单击 Command Line Tools。
-
为 Windows 平台选择
oc二进制文件,然后单击 Download oc for Windows for x86_64。 - 保存该文件。
- 使用 ZIP 程序解压存档。
将
oc二进制文件移到PATH 中的目录中。要查看您的
PATH,请打开命令提示并执行以下命令:C:\> path
安装 OpenShift CLI 后,可以使用 oc 命令:
C:\> oc <command>2.1.2.2.3. 使用 Web 控制台在 macOS 上安装 OpenShift CLI
您可以按照以下流程在 macOS 上安装 OpenShift CLI(oc)二进制文件。
流程
从 Web 控制台,单击 ?。
单击 Command Line Tools。
为 macOS 平台选择
oc二进制文件,然后单击 Download oc for Mac for x86_64。注意对于 macOS arm64,点 Download oc for ARM 64。
- 保存该文件。
- 解包和解压存档。
将
oc二进制文件移到 PATH 的目录中。要查看您的
PATH,请打开终端并执行以下命令:$ echo $PATH
安装 OpenShift CLI 后,可以使用 oc 命令:
$ oc <command>2.1.2.3. 使用 RPM 安装 OpenShift CLI
对于 Red Hat Enterprise Linux (RHEL),如果您的红帽帐户中包括有效的 OpenShift Container Platform 订阅,则可将通过 RPM 安装 OpenShift CLI (oc)。
您需要下载二进制文件,为 RHEL 9 安装 oc。Red Hat Enterprise Linux (RHEL) 9 不支持使用 RPM 软件包安装 oc。
先决条件
- 必须具有 root 或 sudo 权限。
流程
使用 Red Hat Subscription Manager 注册:
# subscription-manager register获取最新的订阅数据:
# subscription-manager refresh列出可用的订阅:
# subscription-manager list --available --matches '*OpenShift*'在上一命令的输出中,找到 OpenShift Container Platform 订阅的池 ID,并把订阅附加到注册的系统:
# subscription-manager attach --pool=<pool_id>启用 OpenShift Container Platform 4.14 所需的存储库:
# subscription-manager repos --enable="rhocp-4.14-for-rhel-8-x86_64-rpms"安装
openshift-clients软件包:# yum install openshift-clients
验证
-
使用
oc命令验证安装:
$ oc <command>2.1.2.4. 使用 Homebrew 安装 OpenShift CLI
对于 macOS,您可以使用 Homebrew 软件包管理器安装 OpenShift CLI(oc)。
先决条件
-
已安装 Homebrew(
brew)。
流程
运行以下命令来安装 openshift-cli 软件包:
$ brew install openshift-cli
验证
-
使用
oc命令验证安装:
$ oc <command>2.1.3. 登录到 OpenShift CLI
您可以登录到 OpenShift CLI(oc)以访问和管理集群。
先决条件
- 有访问 OpenShift Container Platform 集群的权限。
-
已安装 OpenShift CLI (
oc)。
要访问只能通过 HTTP 代理服务器访问的集群,可以设置 HTTP_PROXY、HTTPS_PROXY 和 NO_PROXY 变量。oc CLI 会使用这些环境变量以便所有与集群的通信都通过 HTTP 代理进行。
只有在使用 HTTPS 传输时,才会发送身份验证标头。
流程
输入
oc login命令并传递用户名:$ oc login -u user1提示时,请输入所需信息:
输出示例
Server [https://localhost:8443]: https://openshift.example.com:64431 The server uses a certificate signed by an unknown authority. You can bypass the certificate check, but any data you send to the server could be intercepted by others. Use insecure connections? (y/n): y2 Authentication required for https://openshift.example.com:6443 (openshift) Username: user1 Password:3 Login successful. You don't have any projects. You can try to create a new project, by running oc new-project <projectname> Welcome! See 'oc help' to get started.
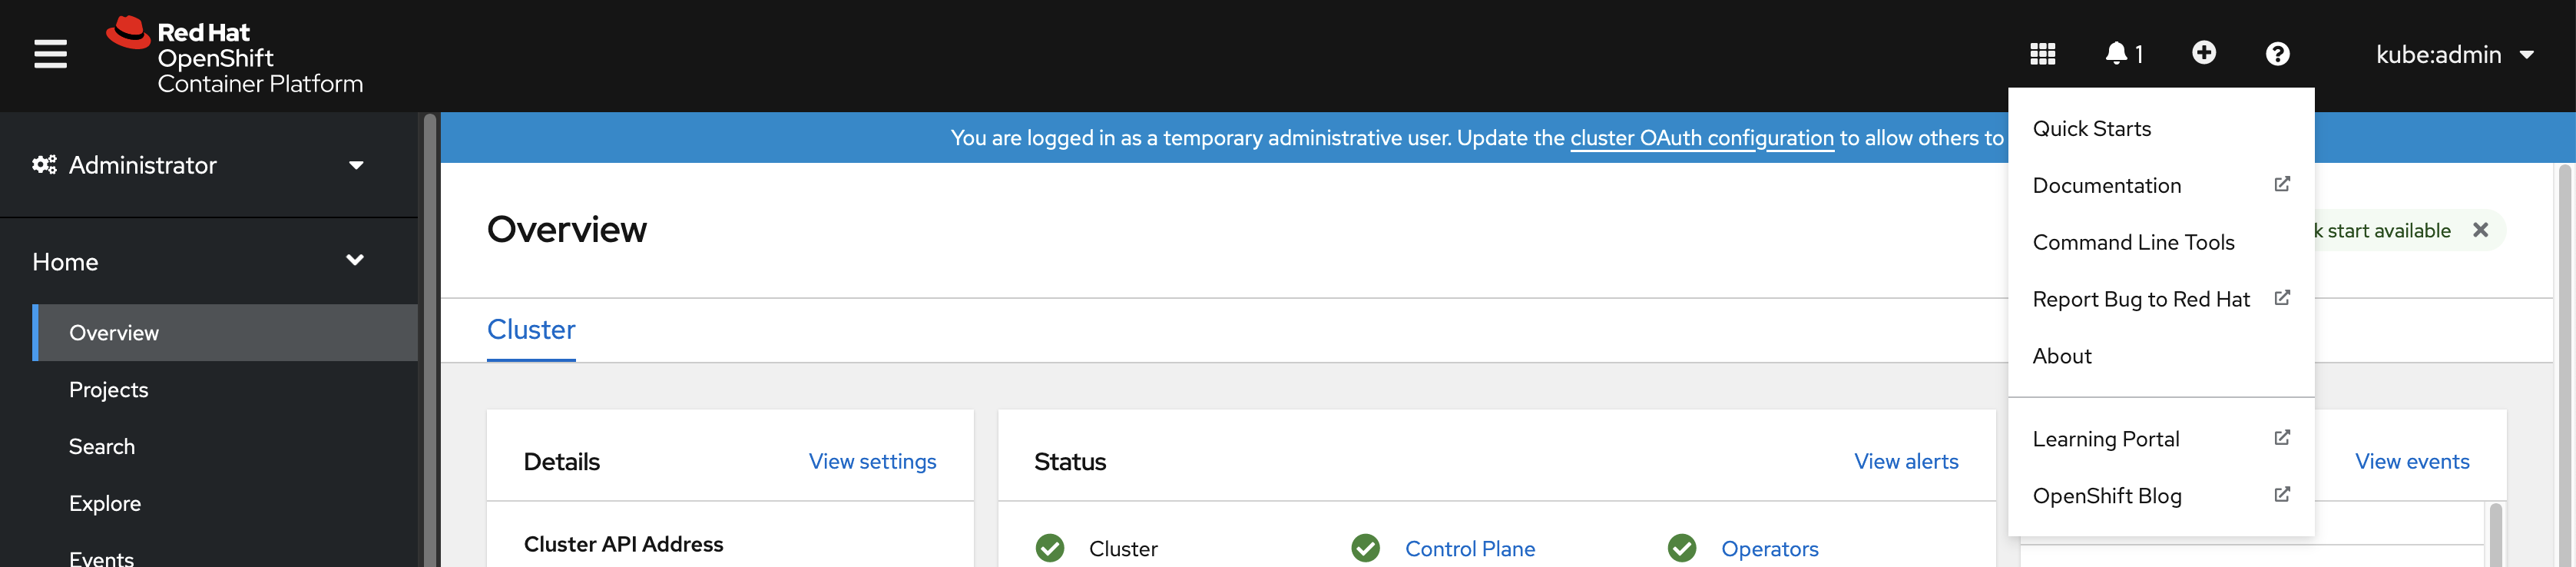
如果登录到 web 控制台,您可以生成包含令牌和服务器信息的 oc login 命令。您可以使用命令来登录 OpenShift Container Platform CLI,而无需交互式的提示。要生成 命令,请从 web 控制台右上角的用户名下拉菜单中选择 Copy login command。
您现在可以创建项目或执行其他命令来管理集群。
2.1.4. 使用 Web 浏览器登录 OpenShift CLI
您可以使用 Web 浏览器访问和管理集群来登录 OpenShift CLI (oc)。这可以使用户避免将其访问令牌插入到命令行中。
通过 Web 浏览器登录 CLI,在 localhost 上使用 HTTP (而非 HTTPS)运行服务器;在多用户工作站中请谨慎使用。
先决条件
- 有访问 OpenShift Container Platform 集群的权限。
-
已安装 OpenShift CLI(
oc)。 - 已安装浏览器。
流程
输入
oc login命令,使用--web标志:$ oc login <cluster_url> --web1 - 1
- 另外,您可以指定服务器 URL 和回调端口。例如,
oc login <cluster_url> --web --callback-port 8280 localhost:8443。
Web 浏览器会自动打开。如果没有,请点命令输出中的链接。如果没有指定 OpenShift Container Platform 服务器
oc会尝试打开当前oc配置文件中指定的集群的 Web 控制台。如果没有oc配置,oc会以交互方式提示输入服务器 URL。输出示例
Opening login URL in the default browser: https://openshift.example.com Opening in existing browser session.- 如果有多个身份提供程序可用,请从提供的选项中选择您的选择。
-
在对应的浏览器字段中输入您的用户名和密码。登录后,浏览器会显示
access token received successfully; please return to your terminal。 检查 CLI 是否有登录确认。
输出示例
Login successful. You don't have any projects. You can try to create a new project, by running oc new-project <projectname>
Web 控制台默认为前面会话中使用的配置集。要在 Administrator 和 Developer 配置集间切换,请从 OpenShift Container Platform Web 控制台注销并清除缓存。
您现在可以创建项目或执行其他命令来管理集群。
2.1.5. 使用 OpenShift CLI
参阅以下部分以了解如何使用 CLI 完成常见任务。
2.1.5.1. 创建一个项目
使用oc new-project命令创建新项目。
$ oc new-project my-project输出示例
Now using project "my-project" on server "https://openshift.example.com:6443".2.1.5.2. 创建一个新的应用程序
使用oc new-app命令创建新应用程序。
$ oc new-app https://github.com/sclorg/cakephp-ex输出示例
--> Found image 40de956 (9 days old) in imagestream "openshift/php" under tag "7.2" for "php"
...
Run 'oc status' to view your app.2.1.5.3. 查看 pod
使用oc get pods命令查看当前项目的 pod。
当您在 pod 中运行 oc 且没有指定命名空间时,默认使用 pod 的命名空间。
$ oc get pods -o wide输出示例
NAME READY STATUS RESTARTS AGE IP NODE NOMINATED NODE
cakephp-ex-1-build 0/1 Completed 0 5m45s 10.131.0.10 ip-10-0-141-74.ec2.internal <none>
cakephp-ex-1-deploy 0/1 Completed 0 3m44s 10.129.2.9 ip-10-0-147-65.ec2.internal <none>
cakephp-ex-1-ktz97 1/1 Running 0 3m33s 10.128.2.11 ip-10-0-168-105.ec2.internal <none>2.1.5.4. 查看 pod 日志
使用oc logs命令查看特定 pod 的日志。
$ oc logs cakephp-ex-1-deploy输出示例
--> Scaling cakephp-ex-1 to 1
--> Success2.1.5.5. 查看当前项目
使用oc project命令查看当前项目。
$ oc project输出示例
Using project "my-project" on server "https://openshift.example.com:6443".2.1.5.6. 查看当前项目的状态
使用 oc status 命令查看有关当前项目的信息,如服务、部署和构建配置。
$ oc status输出示例
In project my-project on server https://openshift.example.com:6443
svc/cakephp-ex - 172.30.236.80 ports 8080, 8443
dc/cakephp-ex deploys istag/cakephp-ex:latest <-
bc/cakephp-ex source builds https://github.com/sclorg/cakephp-ex on openshift/php:7.2
deployment #1 deployed 2 minutes ago - 1 pod
3 infos identified, use 'oc status --suggest' to see details.2.1.5.7. 列出支持的 API 资源
使用oc api-resources命令查看服务器上支持的 API 资源列表。
$ oc api-resources输出示例
NAME SHORTNAMES APIGROUP NAMESPACED KIND
bindings true Binding
componentstatuses cs false ComponentStatus
configmaps cm true ConfigMap
...2.1.6. 获得帮助
您可以使用以下方法获取 CLI 命令和 OpenShift Container Platform 资源的帮助信息:
使用
oc help获取所有可用 CLI 命令的列表和描述:示例:获取 CLI 的常规帮助信息
$ oc help输出示例
OpenShift Client This client helps you develop, build, deploy, and run your applications on any OpenShift or Kubernetes compatible platform. It also includes the administrative commands for managing a cluster under the 'adm' subcommand. Usage: oc [flags] Basic Commands: login Log in to a server new-project Request a new project new-app Create a new application ...使用
--help标志获取有关特定CLI命令的帮助信息:示例:获取
oc create命令的帮助信息$ oc create --help输出示例
Create a resource by filename or stdin JSON and YAML formats are accepted. Usage: oc create -f FILENAME [flags] ...使用
oc explain命令查看特定资源的描述信息和项信息:示例:查看
Pod资源的文档$ oc explain pods输出示例
KIND: Pod VERSION: v1 DESCRIPTION: Pod is a collection of containers that can run on a host. This resource is created by clients and scheduled onto hosts. FIELDS: apiVersion <string> APIVersion defines the versioned schema of this representation of an object. Servers should convert recognized schemas to the latest internal value, and may reject unrecognized values. More info: https://git.k8s.io/community/contributors/devel/api-conventions.md#resources ...
2.1.7. 注销 OpenShift CLI
您可以注销 OpenShift CLI 以结束当前会话。
使用
oc logout命令。$ oc logout输出示例
Logged "user1" out on "https://openshift.example.com"
这将从服务器中删除已保存的身份验证令牌,并将其从配置文件中删除。
2.2. 配置 OpenShift CLI
2.2.1. 启用 tab 自动完成功能
您可以为 Bash 或 Zsh shell 启用 tab 自动完成功能。
2.2.1.1. 为 Bash 启用 tab 自动完成
安装 OpenShift CLI (oc)后,您可以启用 tab 自动完成功能,以便在按 Tab 键时自动完成 oc 命令或建议选项。以下流程为 Bash shell 启用 tab 自动完成功能。
先决条件
-
已安装 OpenShift CLI (
oc)。 -
已安装软件包
bash-completion。
流程
将 Bash 完成代码保存到一个文件中:
$ oc completion bash > oc_bash_completion将文件复制到
/etc/bash_completion.d/:$ sudo cp oc_bash_completion /etc/bash_completion.d/您也可以将文件保存到一个本地目录,并从您的
.bashrc文件中 source 这个文件。
开新终端时 tab 自动完成功能将被启用。
2.2.1.2. 为 Zsh 启用 tab 自动完成功能
安装 OpenShift CLI (oc)后,您可以启用 tab 自动完成功能,以便在按 Tab 键时自动完成 oc 命令或建议选项。以下流程为 Zsh shell 启用 tab 自动完成功能。
先决条件
-
已安装 OpenShift CLI (
oc)。
流程
要在
.zshrc文件中为oc添加 tab 自动完成功能,请运行以下命令:$ cat >>~/.zshrc<<EOF autoload -Uz compinit compinit if [ $commands[oc] ]; then source <(oc completion zsh) compdef _oc oc fi EOF
开新终端时 tab 自动完成功能将被启用。
2.3. oc 和 kubectl 命令的使用方法
Kubernetes 命令行界面(CLI)kubectl 可以用来对 Kubernetes 集群运行命令。由于 OpenShift Container Platform 是经过认证的 Kubernetes 发行版本,因此您可以使用 OpenShift Container Platform 附带的受支持的 kubectl 二进制文件,或者使用 oc 二进制文件来获得扩展的功能。
2.3.1. oc 二进制文件
oc 二进制文件提供与 kubectl 二进制文件相同的功能,但它经过扩展,可原生支持额外的 OpenShift Container Platform 功能,包括:
对 OpenShift Container Platform 资源的完整支持
DeploymentConfig、BuildConfig、Route、ImageStream和ImageStreamTag对象等资源特定于 OpenShift Container Platform 发行版本,并基于标准 Kubernetes 原语构建。身份验证
oc二进制文件提供了一个用于身份验证的内置login命令,并可让您使用项目,将 Kubernetes 命名空间映射到经过身份验证的用户。如需更多信息,请阅读了解身份验证。附加命令
例如,借助附加命令
oc new-app可以更轻松地使用现有源代码或预构建镜像来启动新的应用程序。同样,附加命令oc new-project让您可以更轻松地启动一个项目并切换到该项目作为您的默认项目。
如果安装了旧版本的 oc 二进制文件,则无法使用 OpenShift Container Platform 4.14 中的所有命令。如果要使用最新的功能,您必须下载并安装与 OpenShift Container Platform 服务器版本对应的 oc 二进制文件的最新版本。
非安全 API 更改至少涉及两个次发行版本(例如,4.1 到 4.2 到 4.3)来更新旧的 oc 二进制文件。使用新功能可能需要较新的 oc 二进制文件。一个 4.3 服务器可能会带有版本 4.2 oc 二进制文件无法使用的功能,而一个 4.3 oc 二进制文件可能会带有 4.2 服务器不支持的功能。
|
X.Y ( |
X.Y+N footnote:versionpolicyn[其中 N 是一个大于或等于 1 的数字] ( | |
| X.Y (Server) |
|
|
| X.Y+N footnote:versionpolicyn[] (Server) |
|
|
 完全兼容。
完全兼容。

oc 客户端可能无法访问服务器的功能。

oc 客户端可能会提供与要访问的服务器不兼任的选项和功能。
2.3.2. kubectl 二进制文件
提供 kubectl 二进制文件的目的是为来自标准 Kubernetes 环境的新 OpenShift Container Platform 用户或者希望使用 kubectl CLI 的用户支持现有工作流和脚本。kubectl 的现有用户可以继续使用二进制文件与 Kubernetes 原语交互,而不需要对 OpenShift Container Platform 集群进行任何更改。
您可以按照安装 OpenShift CLI 的步骤安装受支持的 kubectl 二进制文件。如果您下载二进制文件,或者在使用 RPM 安装 CLI 时安装,则 kubectl 二进制文件会包括在存档中。
如需更多信息,请参阅 kubectl 文档。
2.4. 管理 CLI 配置集
CLI 配置文件允许您配置不同的配置文件或上下文,以用于 CLI 工具概述。上下文由与 nickname 关联的 OpenShift Container Platform 服务器信息进行用户身份验证。
2.4.1. 关于 CLI 配置集间的切换
通过上下文,您可以在多个 OpenShift Container Platform 服务器或使用 CLI 操作时轻松地切换多个用户。nicknames 通过提供对上下文、用户凭证和集群详情的简短参考来更轻松地管理 CLI 配置。在用户第一次使用 oc CLI 登录后,OpenShift Container Platform 会创建一个 ~/.kube/config 文件(如果尚不存在)。随着更多身份验证和连接详情被提供给 CLI,可以在 oc login 操作或手动配置 CLI 配置集过程中自动提供,更新的信息会存储在配置文件中:
CLI 配置文件
apiVersion: v1
clusters:
- cluster:
insecure-skip-tls-verify: true
server: https://openshift1.example.com:8443
name: openshift1.example.com:8443
- cluster:
insecure-skip-tls-verify: true
server: https://openshift2.example.com:8443
name: openshift2.example.com:8443
contexts:
- context:
cluster: openshift1.example.com:8443
namespace: alice-project
user: alice/openshift1.example.com:8443
name: alice-project/openshift1.example.com:8443/alice
- context:
cluster: openshift1.example.com:8443
namespace: joe-project
user: alice/openshift1.example.com:8443
name: joe-project/openshift1/alice
current-context: joe-project/openshift1.example.com:8443/alice
kind: Config
preferences: {}
users:
- name: alice/openshift1.example.com:8443
user:
token: xZHd2piv5_9vQrg-SKXRJ2Dsl9SceNJdhNTljEKTb8k- 1
clusters部分定义 OpenShift Container Platform 集群的连接详情,包括其 master 服务器的地址。在本例中,一个集群的别名为openshift1.example.com:8443,另一个别名是openshift2.example.com:8443。- 2
- 这个
contexts项定义了两个上下文:一个别名是alice-project/openshift1.example.com:8443/alice,使用alice-project项目,openshift1.example.com:8443集群以及alice用户,另外一个别名是joe-project/openshift1.example.com:8443/alice,使用joe-project项目,openshift1.example.com:8443集群以及alice用户。 - 3
current-context参数显示joe-project/openshift1.example.com:8443/alice上下文当前正在使用中,允许alice用户在openshift1.example.com:8443集群上的joe-project项目中工作。- 4
users部分定义用户凭据。在本例中,用户别名alice/openshift1.example.com:8443使用访问令牌。
CLI 可以支持多个在运行时加载的配置文件,并合并在一起,以及从命令行指定的覆盖选项。登录后,您可以使用 oc status 或 oc project 命令验证您当前的环境:
验证当前工作环境
$ oc status输出示例
oc status
In project Joe's Project (joe-project)
service database (172.30.43.12:5434 -> 3306)
database deploys docker.io/openshift/mysql-55-centos7:latest
#1 deployed 25 minutes ago - 1 pod
service frontend (172.30.159.137:5432 -> 8080)
frontend deploys origin-ruby-sample:latest <-
builds https://github.com/openshift/ruby-hello-world with joe-project/ruby-20-centos7:latest
#1 deployed 22 minutes ago - 2 pods
To see more information about a service or deployment, use 'oc describe service <name>' or 'oc describe dc <name>'.
You can use 'oc get all' to see lists of each of the types described in this example.列出当前项目
$ oc project输出示例
Using project "joe-project" from context named "joe-project/openshift1.example.com:8443/alice" on server "https://openshift1.example.com:8443".
您可以再次运行 oc login 命令,并在互动过程中提供所需的信息,使用用户凭证和集群详情的任何其他组合登录。基于提供的信息构建上下文(如果尚不存在)。如果您已经登录,并希望切换到当前用户已有权访问的另一个项目,请使用 oc project 命令并输入项目名称:
$ oc project alice-project输出示例
Now using project "alice-project" on server "https://openshift1.example.com:8443".
在任何时候,您可以使用 oc config view 命令查看当前的 CLI 配置,如输出中所示。其他 CLI 配置命令也可用于更高级的用法。
如果您可以访问管理员凭证,但不再作为默认系统用户 system:admin 登录,只要仍存在于 CLI 配置文件中,您可以随时以这个用户身份登录。以下命令登录并切换到默认项目:
$ oc login -u system:admin -n default2.4.2. 手动配置 CLI 配置集
本节介绍 CLI 配置的更多高级用法。在大多数情况下,您可以使用 oc login 和 oc project 命令登录并在上下文和项目间切换。
如果要手动配置 CLI 配置文件,您可以使用 oc config 命令,而不是直接修改这些文件。oc config 命令包括很多有用的子命令来实现这一目的:
| 子命令 | 使用方法 |
|---|---|
|
| 在 CLI 配置文件中设置集群条目。如果引用的 cluster nickname 已存在,则指定的信息将合并到其中。 |
|
| 在 CLI 配置文件中设置上下文条目。如果引用的上下文 nickname 已存在,则指定的信息将合并在. |
|
| 使用指定上下文 nickname 设置当前上下文。 |
|
| 在 CLI 配置文件中设置单个值。
|
|
| 在 CLI 配置文件中取消设置单个值。
|
|
| 显示当前正在使用的合并 CLI 配置。 显示指定 CLI 配置文件的结果。 |
用法示例
-
以使用访问令牌的用户身份登录。
alice用户使用此令牌:
$ oc login https://openshift1.example.com --token=ns7yVhuRNpDM9cgzfhhxQ7bM5s7N2ZVrkZepSRf4LC0- 查看自动创建的集群条目:
$ oc config view输出示例
apiVersion: v1
clusters:
- cluster:
insecure-skip-tls-verify: true
server: https://openshift1.example.com
name: openshift1-example-com
contexts:
- context:
cluster: openshift1-example-com
namespace: default
user: alice/openshift1-example-com
name: default/openshift1-example-com/alice
current-context: default/openshift1-example-com/alice
kind: Config
preferences: {}
users:
- name: alice/openshift1.example.com
user:
token: ns7yVhuRNpDM9cgzfhhxQ7bM5s7N2ZVrkZepSRf4LC0- 更新当前上下文以便用户登录到所需的命名空间:
$ oc config set-context `oc config current-context` --namespace=<project_name>- 检查当前上下文,确认是否实施了更改:
$ oc whoami -c所有后续 CLI 操作都使用新的上下文,除非通过覆盖 CLI 选项或直至上下文切换为止。
2.4.3. 载入和合并规则
您可以在为 CLI 配置发出加载和合并顺序的 CLI 操作时遵循这些规则:
使用以下层次结构和合并规则从工作站检索 CLI 配置文件:
-
如果设置了
--config选项,则只加载该文件。标志会被设置一次,且不会发生合并。 -
如果设置了
$KUBECONFIG环境变量,则会使用它。变量可以是路径列表,如果将路径合并在一起。修改值后,会在定义该节的文件中对其进行修改。创建值时,会在存在的第一个文件中创建它。如果链中不存在任何文件,则会在列表中创建最后一个文件。 -
否则,将使用
~/.kube/config文件,且不会发生合并。
-
如果设置了
使用的上下文根据以下流程中的第一个匹配项决定:
-
--context选项的值。 -
CLI 配置文件中的
current-context值。 - 此阶段允许一个空值。
-
要使用的用户和集群是决定的。此时,您可能也可能没有上下文;它们基于以下流程中的第一个匹配项构建,该流中为用户运行一次,一次用于集群:
-
用于用户名的
--user的值,以及集群名称的--cluster选项。 -
如果存在
--context选项,则使用上下文的值。 - 此阶段允许一个空值。
-
用于用户名的
要使用的实际集群信息决定。此时,您可能没有集群信息。集群信息的每个信息根据以下流程中的第一个匹配项构建:
以下命令行选项中的任何值:
-
--server, -
--api-version -
--certificate-authority -
--insecure-skip-tls-verify
-
- 如果集群信息和属性的值存在,则使用它。
- 如果您没有服务器位置,则出现错误。
要使用的实际用户信息是确定的。用户使用与集群相同的规则构建,但每个用户只能有一个身份验证技术;冲突的技术会导致操作失败。命令行选项优先于配置文件值。有效命令行选项包括:
-
--auth-path -
--client-certificate -
--client-key -
--token
-
- 对于仍缺失的任何信息,将使用默认值,并提示提供其他信息。
2.5. 使用插件扩展 OpenShift CLI
您可以针对默认的oc命令编写并安装插件,从而可以使用OpenShift Container Platform CLI执行新的及更复杂的任务。
2.5.1. 编写 CLI 插件
您可以使用任何可以编写命令行命令的编程语言或脚本为OpenShift Container Platform CLI编写插件。请注意,您无法使用插件来覆盖现有的 oc 命令。
流程
此过程创建一个简单的Bash插件,它的功能是在执行oc foo命令时将消息输出到终端。
创建一个名为
oc-foo的文件。在命名插件文件时,请记住以下几点:
-
该文件必须以
oc-或kubectl-开头,才能被识别为插件。 -
文件名决定了调用该插件的命令。例如,可以通过
oc foo bar命令调用文件名为oc-foo-bar的插件。如果希望命令中包含破折号,也可以使用下划线。例如,可以通过oc foo-bar命令调用文件名为oc-foo_bar的插件。
-
该文件必须以
将以下内容添加到该文件中。
#!/bin/bash # optional argument handling if [[ "$1" == "version" ]] then echo "1.0.0" exit 0 fi # optional argument handling if [[ "$1" == "config" ]] then echo $KUBECONFIG exit 0 fi echo "I am a plugin named kubectl-foo"
为 OpenShift Container Platform CLI 安装此插件后,可以使用 oc foo 命令调用。
2.5.2. 安装和使用 CLI 插件
为 OpenShift Container Platform CLI 编写自定义插件后,您必须使用前安装插件。
先决条件
-
已安装
ocCLI工具。 -
您必须具有以
oc-或kubectl-开头的 CLI 插件文件。
流程
如有必要,将插件文件更新为可执行。
$ chmod +x <plugin_file>将文件放在
PATH中的任何位置,例如/usr/local/bin/。$ sudo mv <plugin_file> /usr/local/bin/.运行
oc plugin list以确保列出了插件。$ oc plugin list输出示例
The following compatible plugins are available: /usr/local/bin/<plugin_file>如果您的插件没有被列出,请验证文件是否以
oc-或kubectl-开头,是否可执行,且位于PATH中。调用插件引入的新命令或选项。
例如,如果您从 Sample plug-in repository 构建并安装了
kubectl-ns插件,则可以使用以下命令查看当前命名空间。$ oc ns请注意,调用插件的命令取决于插件文件名。例如,文件名为
oc-foo-bar的插件会被oc foo bar命令调用。
2.6. 使用 Krew 管理 CLI 插件
您可以使用 Krew 为 OpenShift CLI (oc)安装和管理插件。
使用 Krew 为 OpenShift CLI 安装和管理插件只是一个技术预览功能。技术预览功能不受红帽产品服务等级协议(SLA)支持,且功能可能并不完整。红帽不推荐在生产环境中使用它们。这些技术预览功能可以使用户提早试用新的功能,并有机会在开发阶段提供反馈意见。
有关红帽技术预览功能支持范围的更多信息,请参阅技术预览功能支持范围。
2.6.1. 使用 Krew 安装 CLI 插件
您可以使用 Krew 为 OpenShift CLI (oc)安装插件。
先决条件
- 您已按照 Krew 文档中的 安装过程安装 Krew。
流程
要列出所有可用插件,请运行以下命令:
$ oc krew search要获取插件的信息,请运行以下命令:
$ oc krew info <plugin_name>要安装插件,请运行以下命令:
$ oc krew install <plugin_name>要列出 Krew 安装的所有插件,请运行以下命令:
$ oc krew list
2.6.2. 使用 Krew 更新 CLI 插件
您可以使用 Krew 更新为 OpenShift CLI (oc) 安装的插件。
先决条件
- 您已按照 Krew 文档中的 安装过程安装 Krew。
- 您已使用 Krew 为 OpenShift CLI 安装了一个插件。
流程
要更新单个插件,请运行以下命令:
$ oc krew upgrade <plugin_name>要更新 Krew 安装的所有插件,请运行以下命令:
$ oc krew upgrade
2.6.3. 使用 Krew 卸载 CLI 插件
您可以使用 Krew 卸载为 OpenShift CLI (oc)安装的插件。
先决条件
- 您已按照 Krew 文档中的 安装过程安装 Krew。
- 您已使用 Krew 为 OpenShift CLI 安装了一个插件。
流程
要卸载插件,请运行以下命令:
$ oc krew uninstall <plugin_name>
2.7. OpenShift CLI 开发人员命令参考
本参考提供了 OpenShift CLI(oc)开发人员命令的描述和示例命令。有关管理员命令,请参阅 OpenShift CLI 管理员命令参考。
运行 oc help 来列出所有命令或运行 oc <command> --help 获取特定命令的附加详情。
2.7.1. OpenShift CLI(oc)开发人员命令
2.7.1.1. oc annotate
更新资源上的注解
用法示例
# Update pod 'foo' with the annotation 'description' and the value 'my frontend'
# If the same annotation is set multiple times, only the last value will be applied
oc annotate pods foo description='my frontend'
# Update a pod identified by type and name in "pod.json"
oc annotate -f pod.json description='my frontend'
# Update pod 'foo' with the annotation 'description' and the value 'my frontend running nginx', overwriting any existing value
oc annotate --overwrite pods foo description='my frontend running nginx'
# Update all pods in the namespace
oc annotate pods --all description='my frontend running nginx'
# Update pod 'foo' only if the resource is unchanged from version 1
oc annotate pods foo description='my frontend running nginx' --resource-version=1
# Update pod 'foo' by removing an annotation named 'description' if it exists
# Does not require the --overwrite flag
oc annotate pods foo description-2.7.1.2. oc api-resources
在服务器上显示支持的 API 资源
用法示例
# Print the supported API resources
oc api-resources
# Print the supported API resources with more information
oc api-resources -o wide
# Print the supported API resources sorted by a column
oc api-resources --sort-by=name
# Print the supported namespaced resources
oc api-resources --namespaced=true
# Print the supported non-namespaced resources
oc api-resources --namespaced=false
# Print the supported API resources with a specific APIGroup
oc api-resources --api-group=rbac.authorization.k8s.io2.7.1.3. oc api-versions
以"group/version"的形式输出服务器上支持的 API 版本。
用法示例
# Print the supported API versions
oc api-versions2.7.1.4. oc apply
通过文件名或 stdin 将配置应用到资源
用法示例
# Apply the configuration in pod.json to a pod
oc apply -f ./pod.json
# Apply resources from a directory containing kustomization.yaml - e.g. dir/kustomization.yaml
oc apply -k dir/
# Apply the JSON passed into stdin to a pod
cat pod.json | oc apply -f -
# Apply the configuration from all files that end with '.json' - i.e. expand wildcard characters in file names
oc apply -f '*.json'
# Note: --prune is still in Alpha
# Apply the configuration in manifest.yaml that matches label app=nginx and delete all other resources that are not in the file and match label app=nginx
oc apply --prune -f manifest.yaml -l app=nginx
# Apply the configuration in manifest.yaml and delete all the other config maps that are not in the file
oc apply --prune -f manifest.yaml --all --prune-allowlist=core/v1/ConfigMap2.7.1.5. oc apply edit-last-applied
编辑资源/对象的最新 last-applied-configuration 注解
用法示例
# Edit the last-applied-configuration annotations by type/name in YAML
oc apply edit-last-applied deployment/nginx
# Edit the last-applied-configuration annotations by file in JSON
oc apply edit-last-applied -f deploy.yaml -o json2.7.1.6. oc apply set-last-applied
设置 live 对象上的 last-applied-configuration 注释,以匹配文件的内容。
用法示例
# Set the last-applied-configuration of a resource to match the contents of a file
oc apply set-last-applied -f deploy.yaml
# Execute set-last-applied against each configuration file in a directory
oc apply set-last-applied -f path/
# Set the last-applied-configuration of a resource to match the contents of a file; will create the annotation if it does not already exist
oc apply set-last-applied -f deploy.yaml --create-annotation=true2.7.1.7. oc apply view-last-applied
查看资源/对象最新的最后应用配置注解
用法示例
# View the last-applied-configuration annotations by type/name in YAML
oc apply view-last-applied deployment/nginx
# View the last-applied-configuration annotations by file in JSON
oc apply view-last-applied -f deploy.yaml -o json2.7.1.8. oc attach
附加到正在运行的容器
用法示例
# Get output from running pod mypod; use the 'oc.kubernetes.io/default-container' annotation
# for selecting the container to be attached or the first container in the pod will be chosen
oc attach mypod
# Get output from ruby-container from pod mypod
oc attach mypod -c ruby-container
# Switch to raw terminal mode; sends stdin to 'bash' in ruby-container from pod mypod
# and sends stdout/stderr from 'bash' back to the client
oc attach mypod -c ruby-container -i -t
# Get output from the first pod of a replica set named nginx
oc attach rs/nginx2.7.1.9. oc auth can-i
检查是否允许操作
用法示例
# Check to see if I can create pods in any namespace
oc auth can-i create pods --all-namespaces
# Check to see if I can list deployments in my current namespace
oc auth can-i list deployments.apps
# Check to see if service account "foo" of namespace "dev" can list pods
# in the namespace "prod".
# You must be allowed to use impersonation for the global option "--as".
oc auth can-i list pods --as=system:serviceaccount:dev:foo -n prod
# Check to see if I can do everything in my current namespace ("*" means all)
oc auth can-i '*' '*'
# Check to see if I can get the job named "bar" in namespace "foo"
oc auth can-i list jobs.batch/bar -n foo
# Check to see if I can read pod logs
oc auth can-i get pods --subresource=log
# Check to see if I can access the URL /logs/
oc auth can-i get /logs/
# List all allowed actions in namespace "foo"
oc auth can-i --list --namespace=foo2.7.1.10. oc auth reconcile
协调 RBAC 角色、角色绑定、集群角色和集群角色绑定对象的规则
用法示例
# Reconcile RBAC resources from a file
oc auth reconcile -f my-rbac-rules.yaml2.7.1.11. oc auth whoami
实验性:检查自我主题属性
用法示例
# Get your subject attributes.
oc auth whoami
# Get your subject attributes in JSON format.
oc auth whoami -o json2.7.1.12. oc autoscale
自动缩放部署配置、部署、副本集、有状态集或复制控制器
用法示例
# Auto scale a deployment "foo", with the number of pods between 2 and 10, no target CPU utilization specified so a default autoscaling policy will be used
oc autoscale deployment foo --min=2 --max=10
# Auto scale a replication controller "foo", with the number of pods between 1 and 5, target CPU utilization at 80%
oc autoscale rc foo --max=5 --cpu-percent=802.7.1.13. oc cancel-build
取消正在运行、待处理或新的构建
用法示例
# Cancel the build with the given name
oc cancel-build ruby-build-2
# Cancel the named build and print the build logs
oc cancel-build ruby-build-2 --dump-logs
# Cancel the named build and create a new one with the same parameters
oc cancel-build ruby-build-2 --restart
# Cancel multiple builds
oc cancel-build ruby-build-1 ruby-build-2 ruby-build-3
# Cancel all builds created from the 'ruby-build' build config that are in the 'new' state
oc cancel-build bc/ruby-build --state=new2.7.1.14. oc cluster-info
显示集群信息
用法示例
# Print the address of the control plane and cluster services
oc cluster-info2.7.1.15. oc cluster-info dump
转储用于调试和诊断的相关信息
用法示例
# Dump current cluster state to stdout
oc cluster-info dump
# Dump current cluster state to /path/to/cluster-state
oc cluster-info dump --output-directory=/path/to/cluster-state
# Dump all namespaces to stdout
oc cluster-info dump --all-namespaces
# Dump a set of namespaces to /path/to/cluster-state
oc cluster-info dump --namespaces default,kube-system --output-directory=/path/to/cluster-state2.7.1.16. oc completion
输出指定 shell 的 shell 完成代码 (bash、zsh、fish 或 powershell)
用法示例
# Installing bash completion on macOS using homebrew
## If running Bash 3.2 included with macOS
brew install bash-completion
## or, if running Bash 4.1+
brew install bash-completion@2
## If oc is installed via homebrew, this should start working immediately
## If you've installed via other means, you may need add the completion to your completion directory
oc completion bash > $(brew --prefix)/etc/bash_completion.d/oc
# Installing bash completion on Linux
## If bash-completion is not installed on Linux, install the 'bash-completion' package
## via your distribution's package manager.
## Load the oc completion code for bash into the current shell
source <(oc completion bash)
## Write bash completion code to a file and source it from .bash_profile
oc completion bash > ~/.kube/completion.bash.inc
printf "
# Kubectl shell completion
source '$HOME/.kube/completion.bash.inc'
" >> $HOME/.bash_profile
source $HOME/.bash_profile
# Load the oc completion code for zsh[1] into the current shell
source <(oc completion zsh)
# Set the oc completion code for zsh[1] to autoload on startup
oc completion zsh > "${fpath[1]}/_oc"
# Load the oc completion code for fish[2] into the current shell
oc completion fish | source
# To load completions for each session, execute once:
oc completion fish > ~/.config/fish/completions/oc.fish
# Load the oc completion code for powershell into the current shell
oc completion powershell | Out-String | Invoke-Expression
# Set oc completion code for powershell to run on startup
## Save completion code to a script and execute in the profile
oc completion powershell > $HOME\.kube\completion.ps1
Add-Content $PROFILE "$HOME\.kube\completion.ps1"
## Execute completion code in the profile
Add-Content $PROFILE "if (Get-Command oc -ErrorAction SilentlyContinue) {
oc completion powershell | Out-String | Invoke-Expression
}"
## Add completion code directly to the $PROFILE script
oc completion powershell >> $PROFILE2.7.1.17. oc config current-context
显示 current-context
用法示例
# Display the current-context
oc config current-context2.7.1.18. oc config delete-cluster
从 kubeconfig 删除指定的集群
用法示例
# Delete the minikube cluster
oc config delete-cluster minikube2.7.1.19. oc config delete-context
从 kubeconfig 删除指定的上下文
用法示例
# Delete the context for the minikube cluster
oc config delete-context minikube2.7.1.20. oc config delete-user
从 kubeconfig 删除指定用户
用法示例
# Delete the minikube user
oc config delete-user minikube2.7.1.21. oc config get-clusters
显示 kubeconfig 中定义的集群
用法示例
# List the clusters that oc knows about
oc config get-clusters2.7.1.22. oc config get-contexts
描述一个或多个上下文
用法示例
# List all the contexts in your kubeconfig file
oc config get-contexts
# Describe one context in your kubeconfig file
oc config get-contexts my-context2.7.1.23. oc config get-users
显示 kubeconfig 中定义的用户
用法示例
# List the users that oc knows about
oc config get-users2.7.1.24. oc config new-admin-kubeconfig
生成,使服务器信任并显示新的 admin.kubeconfig。
用法示例
# Generate a new admin kubeconfig
oc config new-admin-kubeconfig2.7.1.25. oc config new-kubelet-bootstrap-kubeconfig
生成,使服务器信任并显示新的 kubelet /etc/kubernetes/kubeconfig。
用法示例
# Generate a new kubelet bootstrap kubeconfig
oc config new-kubelet-bootstrap-kubeconfig2.7.1.26. oc config refresh-ca-bundle
通过联系 apiserver 来更新 OpenShift CA 捆绑包。
用法示例
# Refresh the CA bundle for the current context's cluster
oc config refresh-ca-bundle
# Refresh the CA bundle for the cluster named e2e in your kubeconfig
oc config refresh-ca-bundle e2e
# Print the CA bundle from the current OpenShift cluster's apiserver.
oc config refresh-ca-bundle --dry-run2.7.1.27. oc config rename-context
从 kubeconfig 文件中重命名上下文
用法示例
# Rename the context 'old-name' to 'new-name' in your kubeconfig file
oc config rename-context old-name new-name2.7.1.28. oc config set
在 kubeconfig 文件中设置单个值
用法示例
# Set the server field on the my-cluster cluster to https://1.2.3.4
oc config set clusters.my-cluster.server https://1.2.3.4
# Set the certificate-authority-data field on the my-cluster cluster
oc config set clusters.my-cluster.certificate-authority-data $(echo "cert_data_here" | base64 -i -)
# Set the cluster field in the my-context context to my-cluster
oc config set contexts.my-context.cluster my-cluster
# Set the client-key-data field in the cluster-admin user using --set-raw-bytes option
oc config set users.cluster-admin.client-key-data cert_data_here --set-raw-bytes=true2.7.1.29. oc config set-cluster
在 kubeconfig 中设置集群条目
用法示例
# Set only the server field on the e2e cluster entry without touching other values
oc config set-cluster e2e --server=https://1.2.3.4
# Embed certificate authority data for the e2e cluster entry
oc config set-cluster e2e --embed-certs --certificate-authority=~/.kube/e2e/kubernetes.ca.crt
# Disable cert checking for the e2e cluster entry
oc config set-cluster e2e --insecure-skip-tls-verify=true
# Set custom TLS server name to use for validation for the e2e cluster entry
oc config set-cluster e2e --tls-server-name=my-cluster-name
# Set proxy url for the e2e cluster entry
oc config set-cluster e2e --proxy-url=https://1.2.3.42.7.1.30. oc config set-context
在 kubeconfig 中设置上下文条目
用法示例
# Set the user field on the gce context entry without touching other values
oc config set-context gce --user=cluster-admin2.7.1.31. oc config set-credentials
在 kubeconfig 中设置用户条目
用法示例
# Set only the "client-key" field on the "cluster-admin"
# entry, without touching other values
oc config set-credentials cluster-admin --client-key=~/.kube/admin.key
# Set basic auth for the "cluster-admin" entry
oc config set-credentials cluster-admin --username=admin --password=uXFGweU9l35qcif
# Embed client certificate data in the "cluster-admin" entry
oc config set-credentials cluster-admin --client-certificate=~/.kube/admin.crt --embed-certs=true
# Enable the Google Compute Platform auth provider for the "cluster-admin" entry
oc config set-credentials cluster-admin --auth-provider=gcp
# Enable the OpenID Connect auth provider for the "cluster-admin" entry with additional args
oc config set-credentials cluster-admin --auth-provider=oidc --auth-provider-arg=client-id=foo --auth-provider-arg=client-secret=bar
# Remove the "client-secret" config value for the OpenID Connect auth provider for the "cluster-admin" entry
oc config set-credentials cluster-admin --auth-provider=oidc --auth-provider-arg=client-secret-
# Enable new exec auth plugin for the "cluster-admin" entry
oc config set-credentials cluster-admin --exec-command=/path/to/the/executable --exec-api-version=client.authentication.k8s.io/v1beta1
# Define new exec auth plugin args for the "cluster-admin" entry
oc config set-credentials cluster-admin --exec-arg=arg1 --exec-arg=arg2
# Create or update exec auth plugin environment variables for the "cluster-admin" entry
oc config set-credentials cluster-admin --exec-env=key1=val1 --exec-env=key2=val2
# Remove exec auth plugin environment variables for the "cluster-admin" entry
oc config set-credentials cluster-admin --exec-env=var-to-remove-2.7.1.32. oc config unset
在 kubeconfig 文件中取消设置单个值
用法示例
# Unset the current-context
oc config unset current-context
# Unset namespace in foo context
oc config unset contexts.foo.namespace2.7.1.33. oc config use-context
在 kubeconfig 文件中设置 current-context
用法示例
# Use the context for the minikube cluster
oc config use-context minikube2.7.1.34. oc config view
显示合并的 kubeconfig 设置或指定的 kubeconfig 文件
用法示例
# Show merged kubeconfig settings
oc config view
# Show merged kubeconfig settings and raw certificate data and exposed secrets
oc config view --raw
# Get the password for the e2e user
oc config view -o jsonpath='{.users[?(@.name == "e2e")].user.password}'2.7.1.35. oc cp
将文件和目录复制到容器或从容器中复制
用法示例
# !!!Important Note!!!
# Requires that the 'tar' binary is present in your container
# image. If 'tar' is not present, 'oc cp' will fail.
#
# For advanced use cases, such as symlinks, wildcard expansion or
# file mode preservation, consider using 'oc exec'.
# Copy /tmp/foo local file to /tmp/bar in a remote pod in namespace <some-namespace>
tar cf - /tmp/foo | oc exec -i -n <some-namespace> <some-pod> -- tar xf - -C /tmp/bar
# Copy /tmp/foo from a remote pod to /tmp/bar locally
oc exec -n <some-namespace> <some-pod> -- tar cf - /tmp/foo | tar xf - -C /tmp/bar
# Copy /tmp/foo_dir local directory to /tmp/bar_dir in a remote pod in the default namespace
oc cp /tmp/foo_dir <some-pod>:/tmp/bar_dir
# Copy /tmp/foo local file to /tmp/bar in a remote pod in a specific container
oc cp /tmp/foo <some-pod>:/tmp/bar -c <specific-container>
# Copy /tmp/foo local file to /tmp/bar in a remote pod in namespace <some-namespace>
oc cp /tmp/foo <some-namespace>/<some-pod>:/tmp/bar
# Copy /tmp/foo from a remote pod to /tmp/bar locally
oc cp <some-namespace>/<some-pod>:/tmp/foo /tmp/bar2.7.1.36. oc create
从文件或 stdin 创建资源
用法示例
# Create a pod using the data in pod.json
oc create -f ./pod.json
# Create a pod based on the JSON passed into stdin
cat pod.json | oc create -f -
# Edit the data in registry.yaml in JSON then create the resource using the edited data
oc create -f registry.yaml --edit -o json2.7.1.37. oc create build
创建一个新构建
用法示例
# Create a new build
oc create build myapp2.7.1.38. oc create clusterresourcequota
创建集群资源配额
用法示例
# Create a cluster resource quota limited to 10 pods
oc create clusterresourcequota limit-bob --project-annotation-selector=openshift.io/requester=user-bob --hard=pods=102.7.1.39. oc create clusterrole
创建集群角色
用法示例
# Create a cluster role named "pod-reader" that allows user to perform "get", "watch" and "list" on pods
oc create clusterrole pod-reader --verb=get,list,watch --resource=pods
# Create a cluster role named "pod-reader" with ResourceName specified
oc create clusterrole pod-reader --verb=get --resource=pods --resource-name=readablepod --resource-name=anotherpod
# Create a cluster role named "foo" with API Group specified
oc create clusterrole foo --verb=get,list,watch --resource=rs.apps
# Create a cluster role named "foo" with SubResource specified
oc create clusterrole foo --verb=get,list,watch --resource=pods,pods/status
# Create a cluster role name "foo" with NonResourceURL specified
oc create clusterrole "foo" --verb=get --non-resource-url=/logs/*
# Create a cluster role name "monitoring" with AggregationRule specified
oc create clusterrole monitoring --aggregation-rule="rbac.example.com/aggregate-to-monitoring=true"2.7.1.40. oc create clusterrolebinding
为特定集群角色创建集群角色绑定
用法示例
# Create a cluster role binding for user1, user2, and group1 using the cluster-admin cluster role
oc create clusterrolebinding cluster-admin --clusterrole=cluster-admin --user=user1 --user=user2 --group=group12.7.1.41. oc create configmap
从本地文件、目录或字面值创建配置映射
用法示例
# Create a new config map named my-config based on folder bar
oc create configmap my-config --from-file=path/to/bar
# Create a new config map named my-config with specified keys instead of file basenames on disk
oc create configmap my-config --from-file=key1=/path/to/bar/file1.txt --from-file=key2=/path/to/bar/file2.txt
# Create a new config map named my-config with key1=config1 and key2=config2
oc create configmap my-config --from-literal=key1=config1 --from-literal=key2=config2
# Create a new config map named my-config from the key=value pairs in the file
oc create configmap my-config --from-file=path/to/bar
# Create a new config map named my-config from an env file
oc create configmap my-config --from-env-file=path/to/foo.env --from-env-file=path/to/bar.env2.7.1.42. oc create cronjob
使用指定名称创建 cron 作业
用法示例
# Create a cron job
oc create cronjob my-job --image=busybox --schedule="*/1 * * * *"
# Create a cron job with a command
oc create cronjob my-job --image=busybox --schedule="*/1 * * * *" -- date2.7.1.43. oc create deployment
使用指定名称创建部署
用法示例
# Create a deployment named my-dep that runs the busybox image
oc create deployment my-dep --image=busybox
# Create a deployment with a command
oc create deployment my-dep --image=busybox -- date
# Create a deployment named my-dep that runs the nginx image with 3 replicas
oc create deployment my-dep --image=nginx --replicas=3
# Create a deployment named my-dep that runs the busybox image and expose port 5701
oc create deployment my-dep --image=busybox --port=57012.7.1.44. oc create deploymentconfig
使用给定镜像的默认选项创建部署配置
用法示例
# Create an nginx deployment config named my-nginx
oc create deploymentconfig my-nginx --image=nginx2.7.1.45. oc create identity
手动创建身份(仅在禁用自动创建时才需要)
用法示例
# Create an identity with identity provider "acme_ldap" and the identity provider username "adamjones"
oc create identity acme_ldap:adamjones2.7.1.46. oc create imagestream
创建新的空镜像流
用法示例
# Create a new image stream
oc create imagestream mysql2.7.1.47. oc create imagestreamtag
创建新镜像流标签
用法示例
# Create a new image stream tag based on an image in a remote registry
oc create imagestreamtag mysql:latest --from-image=myregistry.local/mysql/mysql:5.02.7.1.48. oc create ingress
使用指定名称创建入口
用法示例
# Create a single ingress called 'simple' that directs requests to foo.com/bar to svc
# svc1:8080 with a tls secret "my-cert"
oc create ingress simple --rule="foo.com/bar=svc1:8080,tls=my-cert"
# Create a catch all ingress of "/path" pointing to service svc:port and Ingress Class as "otheringress"
oc create ingress catch-all --class=otheringress --rule="/path=svc:port"
# Create an ingress with two annotations: ingress.annotation1 and ingress.annotations2
oc create ingress annotated --class=default --rule="foo.com/bar=svc:port" \
--annotation ingress.annotation1=foo \
--annotation ingress.annotation2=bla
# Create an ingress with the same host and multiple paths
oc create ingress multipath --class=default \
--rule="foo.com/=svc:port" \
--rule="foo.com/admin/=svcadmin:portadmin"
# Create an ingress with multiple hosts and the pathType as Prefix
oc create ingress ingress1 --class=default \
--rule="foo.com/path*=svc:8080" \
--rule="bar.com/admin*=svc2:http"
# Create an ingress with TLS enabled using the default ingress certificate and different path types
oc create ingress ingtls --class=default \
--rule="foo.com/=svc:https,tls" \
--rule="foo.com/path/subpath*=othersvc:8080"
# Create an ingress with TLS enabled using a specific secret and pathType as Prefix
oc create ingress ingsecret --class=default \
--rule="foo.com/*=svc:8080,tls=secret1"
# Create an ingress with a default backend
oc create ingress ingdefault --class=default \
--default-backend=defaultsvc:http \
--rule="foo.com/*=svc:8080,tls=secret1"2.7.1.49. oc create job
使用指定名称创建作业
用法示例
# Create a job
oc create job my-job --image=busybox
# Create a job with a command
oc create job my-job --image=busybox -- date
# Create a job from a cron job named "a-cronjob"
oc create job test-job --from=cronjob/a-cronjob2.7.1.50. oc create namespace
使用指定名称创建命名空间
用法示例
# Create a new namespace named my-namespace
oc create namespace my-namespace2.7.1.51. oc create poddisruptionBudget
使用指定名称创建 pod 中断预算
用法示例
# Create a pod disruption budget named my-pdb that will select all pods with the app=rails label
# and require at least one of them being available at any point in time
oc create poddisruptionbudget my-pdb --selector=app=rails --min-available=1
# Create a pod disruption budget named my-pdb that will select all pods with the app=nginx label
# and require at least half of the pods selected to be available at any point in time
oc create pdb my-pdb --selector=app=nginx --min-available=50%2.7.1.52. oc create priorityclass
创建具有指定名称的优先级类
用法示例
# Create a priority class named high-priority
oc create priorityclass high-priority --value=1000 --description="high priority"
# Create a priority class named default-priority that is considered as the global default priority
oc create priorityclass default-priority --value=1000 --global-default=true --description="default priority"
# Create a priority class named high-priority that cannot preempt pods with lower priority
oc create priorityclass high-priority --value=1000 --description="high priority" --preemption-policy="Never"2.7.1.53. oc create quota
使用指定名称创建配额
用法示例
# Create a new resource quota named my-quota
oc create quota my-quota --hard=cpu=1,memory=1G,pods=2,services=3,replicationcontrollers=2,resourcequotas=1,secrets=5,persistentvolumeclaims=10
# Create a new resource quota named best-effort
oc create quota best-effort --hard=pods=100 --scopes=BestEffort2.7.1.54. oc create role
创建具有单一规则的角色
用法示例
# Create a role named "pod-reader" that allows user to perform "get", "watch" and "list" on pods
oc create role pod-reader --verb=get --verb=list --verb=watch --resource=pods
# Create a role named "pod-reader" with ResourceName specified
oc create role pod-reader --verb=get --resource=pods --resource-name=readablepod --resource-name=anotherpod
# Create a role named "foo" with API Group specified
oc create role foo --verb=get,list,watch --resource=rs.apps
# Create a role named "foo" with SubResource specified
oc create role foo --verb=get,list,watch --resource=pods,pods/status2.7.1.55. oc create rolebinding
为特定角色或集群角色创建角色绑定
用法示例
# Create a role binding for user1, user2, and group1 using the admin cluster role
oc create rolebinding admin --clusterrole=admin --user=user1 --user=user2 --group=group1
# Create a role binding for serviceaccount monitoring:sa-dev using the admin role
oc create rolebinding admin-binding --role=admin --serviceaccount=monitoring:sa-dev2.7.1.56. oc create route edge
创建使用边缘 TLS 终止的路由
用法示例
# Create an edge route named "my-route" that exposes the frontend service
oc create route edge my-route --service=frontend
# Create an edge route that exposes the frontend service and specify a path
# If the route name is omitted, the service name will be used
oc create route edge --service=frontend --path /assets2.7.1.57. oc create route passthrough
创建使用 passthrough TLS 终止的路由
用法示例
# Create a passthrough route named "my-route" that exposes the frontend service
oc create route passthrough my-route --service=frontend
# Create a passthrough route that exposes the frontend service and specify
# a host name. If the route name is omitted, the service name will be used
oc create route passthrough --service=frontend --hostname=www.example.com2.7.1.58. oc create route reencrypt
创建使用重新加密 TLS 终止的路由
用法示例
# Create a route named "my-route" that exposes the frontend service
oc create route reencrypt my-route --service=frontend --dest-ca-cert cert.cert
# Create a reencrypt route that exposes the frontend service, letting the
# route name default to the service name and the destination CA certificate
# default to the service CA
oc create route reencrypt --service=frontend2.7.1.59. oc create secret docker-registry
创建用于 Docker registry 的 secret
用法示例
# If you don't already have a .dockercfg file, you can create a dockercfg secret directly by using:
oc create secret docker-registry my-secret --docker-server=DOCKER_REGISTRY_SERVER --docker-username=DOCKER_USER --docker-password=DOCKER_PASSWORD --docker-email=DOCKER_EMAIL
# Create a new secret named my-secret from ~/.docker/config.json
oc create secret docker-registry my-secret --from-file=.dockerconfigjson=path/to/.docker/config.json2.7.1.60. oc create secret generic
从本地文件、目录或字面值创建 secret
用法示例
# Create a new secret named my-secret with keys for each file in folder bar
oc create secret generic my-secret --from-file=path/to/bar
# Create a new secret named my-secret with specified keys instead of names on disk
oc create secret generic my-secret --from-file=ssh-privatekey=path/to/id_rsa --from-file=ssh-publickey=path/to/id_rsa.pub
# Create a new secret named my-secret with key1=supersecret and key2=topsecret
oc create secret generic my-secret --from-literal=key1=supersecret --from-literal=key2=topsecret
# Create a new secret named my-secret using a combination of a file and a literal
oc create secret generic my-secret --from-file=ssh-privatekey=path/to/id_rsa --from-literal=passphrase=topsecret
# Create a new secret named my-secret from env files
oc create secret generic my-secret --from-env-file=path/to/foo.env --from-env-file=path/to/bar.env2.7.1.61. oc create secret tls
创建 TLS secret
用法示例
# Create a new TLS secret named tls-secret with the given key pair
oc create secret tls tls-secret --cert=path/to/tls.cert --key=path/to/tls.key2.7.1.62. oc create service clusterip
创建 ClusterIP 服务
用法示例
# Create a new ClusterIP service named my-cs
oc create service clusterip my-cs --tcp=5678:8080
# Create a new ClusterIP service named my-cs (in headless mode)
oc create service clusterip my-cs --clusterip="None"2.7.1.63. oc create service externalname
创建 ExternalName 服务
用法示例
# Create a new ExternalName service named my-ns
oc create service externalname my-ns --external-name bar.com2.7.1.64. oc create service loadbalancer
创建 LoadBalancer 服务
用法示例
# Create a new LoadBalancer service named my-lbs
oc create service loadbalancer my-lbs --tcp=5678:80802.7.1.65. oc create service nodeport
创建 NodePort 服务
用法示例
# Create a new NodePort service named my-ns
oc create service nodeport my-ns --tcp=5678:80802.7.1.66. oc create serviceaccount
使用指定名称创建服务帐户
用法示例
# Create a new service account named my-service-account
oc create serviceaccount my-service-account2.7.1.67. oc create token
请求服务帐户令牌
用法示例
# Request a token to authenticate to the kube-apiserver as the service account "myapp" in the current namespace
oc create token myapp
# Request a token for a service account in a custom namespace
oc create token myapp --namespace myns
# Request a token with a custom expiration
oc create token myapp --duration 10m
# Request a token with a custom audience
oc create token myapp --audience https://example.com
# Request a token bound to an instance of a Secret object
oc create token myapp --bound-object-kind Secret --bound-object-name mysecret
# Request a token bound to an instance of a Secret object with a specific uid
oc create token myapp --bound-object-kind Secret --bound-object-name mysecret --bound-object-uid 0d4691ed-659b-4935-a832-355f77ee47cc2.7.1.68. oc create user
手动创建用户(仅在禁用自动创建时才需要)
用法示例
# Create a user with the username "ajones" and the display name "Adam Jones"
oc create user ajones --full-name="Adam Jones"2.7.1.69. oc create useridentitymapping
手动将身份映射到用户
用法示例
# Map the identity "acme_ldap:adamjones" to the user "ajones"
oc create useridentitymapping acme_ldap:adamjones ajones2.7.1.70. oc debug
启动用于调试的 pod 的新实例
用法示例
# Start a shell session into a pod using the OpenShift tools image
oc debug
# Debug a currently running deployment by creating a new pod
oc debug deploy/test
# Debug a node as an administrator
oc debug node/master-1
# Launch a shell in a pod using the provided image stream tag
oc debug istag/mysql:latest -n openshift
# Test running a job as a non-root user
oc debug job/test --as-user=1000000
# Debug a specific failing container by running the env command in the 'second' container
oc debug daemonset/test -c second -- /bin/env
# See the pod that would be created to debug
oc debug mypod-9xbc -o yaml
# Debug a resource but launch the debug pod in another namespace
# Note: Not all resources can be debugged using --to-namespace without modification. For example,
# volumes and service accounts are namespace-dependent. Add '-o yaml' to output the debug pod definition
# to disk. If necessary, edit the definition then run 'oc debug -f -' or run without --to-namespace
oc debug mypod-9xbc --to-namespace testns2.7.1.71. oc delete
通过文件名、stdin、资源和名称或者资源和标签选择器删除资源
用法示例
# Delete a pod using the type and name specified in pod.json
oc delete -f ./pod.json
# Delete resources from a directory containing kustomization.yaml - e.g. dir/kustomization.yaml
oc delete -k dir
# Delete resources from all files that end with '.json' - i.e. expand wildcard characters in file names
oc delete -f '*.json'
# Delete a pod based on the type and name in the JSON passed into stdin
cat pod.json | oc delete -f -
# Delete pods and services with same names "baz" and "foo"
oc delete pod,service baz foo
# Delete pods and services with label name=myLabel
oc delete pods,services -l name=myLabel
# Delete a pod with minimal delay
oc delete pod foo --now
# Force delete a pod on a dead node
oc delete pod foo --force
# Delete all pods
oc delete pods --all2.7.1.72. oc describe
显示特定资源或一组资源的详情
用法示例
# Describe a node
oc describe nodes kubernetes-node-emt8.c.myproject.internal
# Describe a pod
oc describe pods/nginx
# Describe a pod identified by type and name in "pod.json"
oc describe -f pod.json
# Describe all pods
oc describe pods
# Describe pods by label name=myLabel
oc describe po -l name=myLabel
# Describe all pods managed by the 'frontend' replication controller
# (rc-created pods get the name of the rc as a prefix in the pod name)
oc describe pods frontend2.7.1.73. oc diff
针对 would-be 应用的版本对 live 版本进行 diff 操作
用法示例
# Diff resources included in pod.json
oc diff -f pod.json
# Diff file read from stdin
cat service.yaml | oc diff -f -2.7.1.74. oc edit
编辑服务器上的资源
用法示例
# Edit the service named 'registry'
oc edit svc/registry
# Use an alternative editor
KUBE_EDITOR="nano" oc edit svc/registry
# Edit the job 'myjob' in JSON using the v1 API format
oc edit job.v1.batch/myjob -o json
# Edit the deployment 'mydeployment' in YAML and save the modified config in its annotation
oc edit deployment/mydeployment -o yaml --save-config
# Edit the deployment/mydeployment's status subresource
oc edit deployment mydeployment --subresource='status'2.7.1.75. oc events
列出事件
用法示例
# List recent events in the default namespace.
oc events
# List recent events in all namespaces.
oc events --all-namespaces
# List recent events for the specified pod, then wait for more events and list them as they arrive.
oc events --for pod/web-pod-13je7 --watch
# List recent events in given format. Supported ones, apart from default, are json and yaml.
oc events -oyaml
# List recent only events in given event types
oc events --types=Warning,Normal2.7.1.76. oc exec
在容器中执行命令
用法示例
# Get output from running the 'date' command from pod mypod, using the first container by default
oc exec mypod -- date
# Get output from running the 'date' command in ruby-container from pod mypod
oc exec mypod -c ruby-container -- date
# Switch to raw terminal mode; sends stdin to 'bash' in ruby-container from pod mypod
# and sends stdout/stderr from 'bash' back to the client
oc exec mypod -c ruby-container -i -t -- bash -il
# List contents of /usr from the first container of pod mypod and sort by modification time
# If the command you want to execute in the pod has any flags in common (e.g. -i),
# you must use two dashes (--) to separate your command's flags/arguments
# Also note, do not surround your command and its flags/arguments with quotes
# unless that is how you would execute it normally (i.e., do ls -t /usr, not "ls -t /usr")
oc exec mypod -i -t -- ls -t /usr
# Get output from running 'date' command from the first pod of the deployment mydeployment, using the first container by default
oc exec deploy/mydeployment -- date
# Get output from running 'date' command from the first pod of the service myservice, using the first container by default
oc exec svc/myservice -- date2.7.1.77. oc explain
获取资源的文档
用法示例
# Get the documentation of the resource and its fields
oc explain pods
# Get the documentation of a specific field of a resource
oc explain pods.spec.containers2.7.1.78. oc expose
将复制的应用程序作为服务或路由公开
用法示例
# Create a route based on service nginx. The new route will reuse nginx's labels
oc expose service nginx
# Create a route and specify your own label and route name
oc expose service nginx -l name=myroute --name=fromdowntown
# Create a route and specify a host name
oc expose service nginx --hostname=www.example.com
# Create a route with a wildcard
oc expose service nginx --hostname=x.example.com --wildcard-policy=Subdomain
# This would be equivalent to *.example.com. NOTE: only hosts are matched by the wildcard; subdomains would not be included
# Expose a deployment configuration as a service and use the specified port
oc expose dc ruby-hello-world --port=8080
# Expose a service as a route in the specified path
oc expose service nginx --path=/nginx2.7.1.79. oc extract
将 secret 或配置映射提取到磁盘
用法示例
# Extract the secret "test" to the current directory
oc extract secret/test
# Extract the config map "nginx" to the /tmp directory
oc extract configmap/nginx --to=/tmp
# Extract the config map "nginx" to STDOUT
oc extract configmap/nginx --to=-
# Extract only the key "nginx.conf" from config map "nginx" to the /tmp directory
oc extract configmap/nginx --to=/tmp --keys=nginx.conf2.7.1.80. oc get
显示一个或多个资源
用法示例
# List all pods in ps output format
oc get pods
# List all pods in ps output format with more information (such as node name)
oc get pods -o wide
# List a single replication controller with specified NAME in ps output format
oc get replicationcontroller web
# List deployments in JSON output format, in the "v1" version of the "apps" API group
oc get deployments.v1.apps -o json
# List a single pod in JSON output format
oc get -o json pod web-pod-13je7
# List a pod identified by type and name specified in "pod.yaml" in JSON output format
oc get -f pod.yaml -o json
# List resources from a directory with kustomization.yaml - e.g. dir/kustomization.yaml
oc get -k dir/
# Return only the phase value of the specified pod
oc get -o template pod/web-pod-13je7 --template={{.status.phase}}
# List resource information in custom columns
oc get pod test-pod -o custom-columns=CONTAINER:.spec.containers[0].name,IMAGE:.spec.containers[0].image
# List all replication controllers and services together in ps output format
oc get rc,services
# List one or more resources by their type and names
oc get rc/web service/frontend pods/web-pod-13je7
# List status subresource for a single pod.
oc get pod web-pod-13je7 --subresource status2.7.1.81. oc idle
闲置可扩展资源
用法示例
# Idle the scalable controllers associated with the services listed in to-idle.txt
$ oc idle --resource-names-file to-idle.txt2.7.1.82. oc image append
向镜像添加层并将其推送到 registry
用法示例
# Remove the entrypoint on the mysql:latest image
oc image append --from mysql:latest --to myregistry.com/myimage:latest --image '{"Entrypoint":null}'
# Add a new layer to the image
oc image append --from mysql:latest --to myregistry.com/myimage:latest layer.tar.gz
# Add a new layer to the image and store the result on disk
# This results in $(pwd)/v2/mysql/blobs,manifests
oc image append --from mysql:latest --to file://mysql:local layer.tar.gz
# Add a new layer to the image and store the result on disk in a designated directory
# This will result in $(pwd)/mysql-local/v2/mysql/blobs,manifests
oc image append --from mysql:latest --to file://mysql:local --dir mysql-local layer.tar.gz
# Add a new layer to an image that is stored on disk (~/mysql-local/v2/image exists)
oc image append --from-dir ~/mysql-local --to myregistry.com/myimage:latest layer.tar.gz
# Add a new layer to an image that was mirrored to the current directory on disk ($(pwd)/v2/image exists)
oc image append --from-dir v2 --to myregistry.com/myimage:latest layer.tar.gz
# Add a new layer to a multi-architecture image for an os/arch that is different from the system's os/arch
# Note: The first image in the manifest list that matches the filter will be returned when --keep-manifest-list is not specified
oc image append --from docker.io/library/busybox:latest --filter-by-os=linux/s390x --to myregistry.com/myimage:latest layer.tar.gz
# Add a new layer to a multi-architecture image for all the os/arch manifests when keep-manifest-list is specified
oc image append --from docker.io/library/busybox:latest --keep-manifest-list --to myregistry.com/myimage:latest layer.tar.gz
# Add a new layer to a multi-architecture image for all the os/arch manifests that is specified by the filter, while preserving the manifestlist
oc image append --from docker.io/library/busybox:latest --filter-by-os=linux/s390x --keep-manifest-list --to myregistry.com/myimage:latest layer.tar.gz2.7.1.83. oc image extract
将文件从镜像复制到文件系统
用法示例
# Extract the busybox image into the current directory
oc image extract docker.io/library/busybox:latest
# Extract the busybox image into a designated directory (must exist)
oc image extract docker.io/library/busybox:latest --path /:/tmp/busybox
# Extract the busybox image into the current directory for linux/s390x platform
# Note: Wildcard filter is not supported with extract; pass a single os/arch to extract
oc image extract docker.io/library/busybox:latest --filter-by-os=linux/s390x
# Extract a single file from the image into the current directory
oc image extract docker.io/library/centos:7 --path /bin/bash:.
# Extract all .repo files from the image's /etc/yum.repos.d/ folder into the current directory
oc image extract docker.io/library/centos:7 --path /etc/yum.repos.d/*.repo:.
# Extract all .repo files from the image's /etc/yum.repos.d/ folder into a designated directory (must exist)
# This results in /tmp/yum.repos.d/*.repo on local system
oc image extract docker.io/library/centos:7 --path /etc/yum.repos.d/*.repo:/tmp/yum.repos.d
# Extract an image stored on disk into the current directory ($(pwd)/v2/busybox/blobs,manifests exists)
# --confirm is required because the current directory is not empty
oc image extract file://busybox:local --confirm
# Extract an image stored on disk in a directory other than $(pwd)/v2 into the current directory
# --confirm is required because the current directory is not empty ($(pwd)/busybox-mirror-dir/v2/busybox exists)
oc image extract file://busybox:local --dir busybox-mirror-dir --confirm
# Extract an image stored on disk in a directory other than $(pwd)/v2 into a designated directory (must exist)
oc image extract file://busybox:local --dir busybox-mirror-dir --path /:/tmp/busybox
# Extract the last layer in the image
oc image extract docker.io/library/centos:7[-1]
# Extract the first three layers of the image
oc image extract docker.io/library/centos:7[:3]
# Extract the last three layers of the image
oc image extract docker.io/library/centos:7[-3:]2.7.1.84. oc image info
显示镜像的信息
用法示例
# Show information about an image
oc image info quay.io/openshift/cli:latest
# Show information about images matching a wildcard
oc image info quay.io/openshift/cli:4.*
# Show information about a file mirrored to disk under DIR
oc image info --dir=DIR file://library/busybox:latest
# Select which image from a multi-OS image to show
oc image info library/busybox:latest --filter-by-os=linux/arm642.7.1.85. oc image mirror
将镜像从一个存储库镜像到另一个存储库
用法示例
# Copy image to another tag
oc image mirror myregistry.com/myimage:latest myregistry.com/myimage:stable
# Copy image to another registry
oc image mirror myregistry.com/myimage:latest docker.io/myrepository/myimage:stable
# Copy all tags starting with mysql to the destination repository
oc image mirror myregistry.com/myimage:mysql* docker.io/myrepository/myimage
# Copy image to disk, creating a directory structure that can be served as a registry
oc image mirror myregistry.com/myimage:latest file://myrepository/myimage:latest
# Copy image to S3 (pull from <bucket>.s3.amazonaws.com/image:latest)
oc image mirror myregistry.com/myimage:latest s3://s3.amazonaws.com/<region>/<bucket>/image:latest
# Copy image to S3 without setting a tag (pull via @<digest>)
oc image mirror myregistry.com/myimage:latest s3://s3.amazonaws.com/<region>/<bucket>/image
# Copy image to multiple locations
oc image mirror myregistry.com/myimage:latest docker.io/myrepository/myimage:stable \
docker.io/myrepository/myimage:dev
# Copy multiple images
oc image mirror myregistry.com/myimage:latest=myregistry.com/other:test \
myregistry.com/myimage:new=myregistry.com/other:target
# Copy manifest list of a multi-architecture image, even if only a single image is found
oc image mirror myregistry.com/myimage:latest=myregistry.com/other:test \
--keep-manifest-list=true
# Copy specific os/arch manifest of a multi-architecture image
# Run 'oc image info myregistry.com/myimage:latest' to see available os/arch for multi-arch images
# Note that with multi-arch images, this results in a new manifest list digest that includes only
# the filtered manifests
oc image mirror myregistry.com/myimage:latest=myregistry.com/other:test \
--filter-by-os=os/arch
# Copy all os/arch manifests of a multi-architecture image
# Run 'oc image info myregistry.com/myimage:latest' to see list of os/arch manifests that will be mirrored
oc image mirror myregistry.com/myimage:latest=myregistry.com/other:test \
--keep-manifest-list=true
# Note the above command is equivalent to
oc image mirror myregistry.com/myimage:latest=myregistry.com/other:test \
--filter-by-os=.*
# Copy specific os/arch manifest of a multi-architecture image
# Run 'oc image info myregistry.com/myimage:latest' to see available os/arch for multi-arch images
# Note that the target registry may reject a manifest list if the platform specific images do not all
# exist. You must use a registry with sparse registry support enabled.
oc image mirror myregistry.com/myimage:latest=myregistry.com/other:test \
--filter-by-os=os/arch \
--keep-manifest-list=true2.7.1.86. oc import-image
从容器镜像 registry 中导入镜像
用法示例
# Import tag latest into a new image stream
oc import-image mystream --from=registry.io/repo/image:latest --confirm
# Update imported data for tag latest in an already existing image stream
oc import-image mystream
# Update imported data for tag stable in an already existing image stream
oc import-image mystream:stable
# Update imported data for all tags in an existing image stream
oc import-image mystream --all
# Update imported data for a tag that points to a manifest list to include the full manifest list
oc import-image mystream --import-mode=PreserveOriginal
# Import all tags into a new image stream
oc import-image mystream --from=registry.io/repo/image --all --confirm
# Import all tags into a new image stream using a custom timeout
oc --request-timeout=5m import-image mystream --from=registry.io/repo/image --all --confirm2.7.1.87. oc kustomize
从目录或 URL 构建 kustomization 目标
用法示例
# Build the current working directory
oc kustomize
# Build some shared configuration directory
oc kustomize /home/config/production
# Build from github
oc kustomize https://github.com/kubernetes-sigs/kustomize.git/examples/helloWorld?ref=v1.0.62.7.1.88. oc label
更新资源上的标签
用法示例
# Update pod 'foo' with the label 'unhealthy' and the value 'true'
oc label pods foo unhealthy=true
# Update pod 'foo' with the label 'status' and the value 'unhealthy', overwriting any existing value
oc label --overwrite pods foo status=unhealthy
# Update all pods in the namespace
oc label pods --all status=unhealthy
# Update a pod identified by the type and name in "pod.json"
oc label -f pod.json status=unhealthy
# Update pod 'foo' only if the resource is unchanged from version 1
oc label pods foo status=unhealthy --resource-version=1
# Update pod 'foo' by removing a label named 'bar' if it exists
# Does not require the --overwrite flag
oc label pods foo bar-2.7.1.89. oc login
登录到服务器
用法示例
# Log in interactively
oc login --username=myuser
# Log in to the given server with the given certificate authority file
oc login localhost:8443 --certificate-authority=/path/to/cert.crt
# Log in to the given server with the given credentials (will not prompt interactively)
oc login localhost:8443 --username=myuser --password=mypass
# Log in to the given server through a browser
oc login localhost:8443 --web --callback-port 82802.7.1.90. oc logout
结束当前服务器会话
用法示例
# Log out
oc logout2.7.1.91. oc logs
显示 pod 中容器的日志
用法示例
# Start streaming the logs of the most recent build of the openldap build config
oc logs -f bc/openldap
# Start streaming the logs of the latest deployment of the mysql deployment config
oc logs -f dc/mysql
# Get the logs of the first deployment for the mysql deployment config. Note that logs
# from older deployments may not exist either because the deployment was successful
# or due to deployment pruning or manual deletion of the deployment
oc logs --version=1 dc/mysql
# Return a snapshot of ruby-container logs from pod backend
oc logs backend -c ruby-container
# Start streaming of ruby-container logs from pod backend
oc logs -f pod/backend -c ruby-container2.7.1.92. oc new-app
创建新应用程序
用法示例
# List all local templates and image streams that can be used to create an app
oc new-app --list
# Create an application based on the source code in the current git repository (with a public remote) and a container image
oc new-app . --image=registry/repo/langimage
# Create an application myapp with Docker based build strategy expecting binary input
oc new-app --strategy=docker --binary --name myapp
# Create a Ruby application based on the provided [image]~[source code] combination
oc new-app centos/ruby-25-centos7~https://github.com/sclorg/ruby-ex.git
# Use the public container registry MySQL image to create an app. Generated artifacts will be labeled with db=mysql
oc new-app mysql MYSQL_USER=user MYSQL_PASSWORD=pass MYSQL_DATABASE=testdb -l db=mysql
# Use a MySQL image in a private registry to create an app and override application artifacts' names
oc new-app --image=myregistry.com/mycompany/mysql --name=private
# Use an image with the full manifest list to create an app and override application artifacts' names
oc new-app --image=myregistry.com/mycompany/image --name=private --import-mode=PreserveOriginal
# Create an application from a remote repository using its beta4 branch
oc new-app https://github.com/openshift/ruby-hello-world#beta4
# Create an application based on a stored template, explicitly setting a parameter value
oc new-app --template=ruby-helloworld-sample --param=MYSQL_USER=admin
# Create an application from a remote repository and specify a context directory
oc new-app https://github.com/youruser/yourgitrepo --context-dir=src/build
# Create an application from a remote private repository and specify which existing secret to use
oc new-app https://github.com/youruser/yourgitrepo --source-secret=yoursecret
# Create an application based on a template file, explicitly setting a parameter value
oc new-app --file=./example/myapp/template.json --param=MYSQL_USER=admin
# Search all templates, image streams, and container images for the ones that match "ruby"
oc new-app --search ruby
# Search for "ruby", but only in stored templates (--template, --image-stream and --image
# can be used to filter search results)
oc new-app --search --template=ruby
# Search for "ruby" in stored templates and print the output as YAML
oc new-app --search --template=ruby --output=yaml2.7.1.93. oc new-build
创建新构建配置
用法示例
# Create a build config based on the source code in the current git repository (with a public
# remote) and a container image
oc new-build . --image=repo/langimage
# Create a NodeJS build config based on the provided [image]~[source code] combination
oc new-build centos/nodejs-8-centos7~https://github.com/sclorg/nodejs-ex.git
# Create a build config from a remote repository using its beta2 branch
oc new-build https://github.com/openshift/ruby-hello-world#beta2
# Create a build config using a Dockerfile specified as an argument
oc new-build -D $'FROM centos:7\nRUN yum install -y httpd'
# Create a build config from a remote repository and add custom environment variables
oc new-build https://github.com/openshift/ruby-hello-world -e RACK_ENV=development
# Create a build config from a remote private repository and specify which existing secret to use
oc new-build https://github.com/youruser/yourgitrepo --source-secret=yoursecret
# Create a build config using an image with the full manifest list to create an app and override application artifacts' names
oc new-build --image=myregistry.com/mycompany/image --name=private --import-mode=PreserveOriginal
# Create a build config from a remote repository and inject the npmrc into a build
oc new-build https://github.com/openshift/ruby-hello-world --build-secret npmrc:.npmrc
# Create a build config from a remote repository and inject environment data into a build
oc new-build https://github.com/openshift/ruby-hello-world --build-config-map env:config
# Create a build config that gets its input from a remote repository and another container image
oc new-build https://github.com/openshift/ruby-hello-world --source-image=openshift/jenkins-1-centos7 --source-image-path=/var/lib/jenkins:tmp2.7.1.94. oc new-project
请求新项目
用法示例
# Create a new project with minimal information
oc new-project web-team-dev
# Create a new project with a display name and description
oc new-project web-team-dev --display-name="Web Team Development" --description="Development project for the web team."2.7.1.95. oc observe
观察资源的变化并对其做出反应(实验性)
用法示例
# Observe changes to services
oc observe services
# Observe changes to services, including the clusterIP and invoke a script for each
oc observe services --template '{ .spec.clusterIP }' -- register_dns.sh
# Observe changes to services filtered by a label selector
oc observe services -l regist-dns=true --template '{ .spec.clusterIP }' -- register_dns.sh2.7.1.96. oc patch
更新资源字段
用法示例
# Partially update a node using a strategic merge patch, specifying the patch as JSON
oc patch node k8s-node-1 -p '{"spec":{"unschedulable":true}}'
# Partially update a node using a strategic merge patch, specifying the patch as YAML
oc patch node k8s-node-1 -p $'spec:\n unschedulable: true'
# Partially update a node identified by the type and name specified in "node.json" using strategic merge patch
oc patch -f node.json -p '{"spec":{"unschedulable":true}}'
# Update a container's image; spec.containers[*].name is required because it's a merge key
oc patch pod valid-pod -p '{"spec":{"containers":[{"name":"kubernetes-serve-hostname","image":"new image"}]}}'
# Update a container's image using a JSON patch with positional arrays
oc patch pod valid-pod --type='json' -p='[{"op": "replace", "path": "/spec/containers/0/image", "value":"new image"}]'
# Update a deployment's replicas through the scale subresource using a merge patch.
oc patch deployment nginx-deployment --subresource='scale' --type='merge' -p '{"spec":{"replicas":2}}'2.7.1.97. oc plugin list
列出用户 PATH 中的所有可见插件可执行文件
用法示例
# List all available plugins
oc plugin list2.7.1.98. oc policy add-role-to-user
为当前项目的用户或服务帐户添加角色
用法示例
# Add the 'view' role to user1 for the current project
oc policy add-role-to-user view user1
# Add the 'edit' role to serviceaccount1 for the current project
oc policy add-role-to-user edit -z serviceaccount12.7.1.99. oc policy scc-review
检查哪个服务帐户可以创建 pod
用法示例
# Check whether service accounts sa1 and sa2 can admit a pod with a template pod spec specified in my_resource.yaml
# Service Account specified in myresource.yaml file is ignored
oc policy scc-review -z sa1,sa2 -f my_resource.yaml
# Check whether service accounts system:serviceaccount:bob:default can admit a pod with a template pod spec specified in my_resource.yaml
oc policy scc-review -z system:serviceaccount:bob:default -f my_resource.yaml
# Check whether the service account specified in my_resource_with_sa.yaml can admit the pod
oc policy scc-review -f my_resource_with_sa.yaml
# Check whether the default service account can admit the pod; default is taken since no service account is defined in myresource_with_no_sa.yaml
oc policy scc-review -f myresource_with_no_sa.yaml2.7.1.100. oc policy scc-subject-review
检查用户或服务帐户是否可以创建 pod
用法示例
# Check whether user bob can create a pod specified in myresource.yaml
oc policy scc-subject-review -u bob -f myresource.yaml
# Check whether user bob who belongs to projectAdmin group can create a pod specified in myresource.yaml
oc policy scc-subject-review -u bob -g projectAdmin -f myresource.yaml
# Check whether a service account specified in the pod template spec in myresourcewithsa.yaml can create the pod
oc policy scc-subject-review -f myresourcewithsa.yaml2.7.1.101. oc port-forward
将一个或多个本地端口转发到一个 pod
用法示例
# Listen on ports 5000 and 6000 locally, forwarding data to/from ports 5000 and 6000 in the pod
oc port-forward pod/mypod 5000 6000
# Listen on ports 5000 and 6000 locally, forwarding data to/from ports 5000 and 6000 in a pod selected by the deployment
oc port-forward deployment/mydeployment 5000 6000
# Listen on port 8443 locally, forwarding to the targetPort of the service's port named "https" in a pod selected by the service
oc port-forward service/myservice 8443:https
# Listen on port 8888 locally, forwarding to 5000 in the pod
oc port-forward pod/mypod 8888:5000
# Listen on port 8888 on all addresses, forwarding to 5000 in the pod
oc port-forward --address 0.0.0.0 pod/mypod 8888:5000
# Listen on port 8888 on localhost and selected IP, forwarding to 5000 in the pod
oc port-forward --address localhost,10.19.21.23 pod/mypod 8888:5000
# Listen on a random port locally, forwarding to 5000 in the pod
oc port-forward pod/mypod :50002.7.1.102. oc process
将模板处理为资源列表
用法示例
# Convert the template.json file into a resource list and pass to create
oc process -f template.json | oc create -f -
# Process a file locally instead of contacting the server
oc process -f template.json --local -o yaml
# Process template while passing a user-defined label
oc process -f template.json -l name=mytemplate
# Convert a stored template into a resource list
oc process foo
# Convert a stored template into a resource list by setting/overriding parameter values
oc process foo PARM1=VALUE1 PARM2=VALUE2
# Convert a template stored in different namespace into a resource list
oc process openshift//foo
# Convert template.json into a resource list
cat template.json | oc process -f -2.7.1.103. oc project
切换到另一个项目
用法示例
# Switch to the 'myapp' project
oc project myapp
# Display the project currently in use
oc project2.7.1.104. oc projects
显示现有项目
用法示例
# List all projects
oc projects2.7.1.105. oc proxy
运行到 Kubernetes API 服务器的代理
用法示例
# To proxy all of the Kubernetes API and nothing else
oc proxy --api-prefix=/
# To proxy only part of the Kubernetes API and also some static files
# You can get pods info with 'curl localhost:8001/api/v1/pods'
oc proxy --www=/my/files --www-prefix=/static/ --api-prefix=/api/
# To proxy the entire Kubernetes API at a different root
# You can get pods info with 'curl localhost:8001/custom/api/v1/pods'
oc proxy --api-prefix=/custom/
# Run a proxy to the Kubernetes API server on port 8011, serving static content from ./local/www/
oc proxy --port=8011 --www=./local/www/
# Run a proxy to the Kubernetes API server on an arbitrary local port
# The chosen port for the server will be output to stdout
oc proxy --port=0
# Run a proxy to the Kubernetes API server, changing the API prefix to k8s-api
# This makes e.g. the pods API available at localhost:8001/k8s-api/v1/pods/
oc proxy --api-prefix=/k8s-api2.7.1.106. oc registry info
输出有关集成 registry 的信息
用法示例
# Display information about the integrated registry
oc registry info2.7.1.107. oc registry login
登录到集成的 registry
用法示例
# Log in to the integrated registry
oc registry login
# Log in to different registry using BASIC auth credentials
oc registry login --registry quay.io/myregistry --auth-basic=USER:PASS2.7.1.108. oc replace
使用文件名或 stdin 替换资源
用法示例
# Replace a pod using the data in pod.json
oc replace -f ./pod.json
# Replace a pod based on the JSON passed into stdin
cat pod.json | oc replace -f -
# Update a single-container pod's image version (tag) to v4
oc get pod mypod -o yaml | sed 's/\(image: myimage\):.*$/\1:v4/' | oc replace -f -
# Force replace, delete and then re-create the resource
oc replace --force -f ./pod.json2.7.1.109. oc rollback
将应用程序的一部分还原回以前的部署
用法示例
# Perform a rollback to the last successfully completed deployment for a deployment config
oc rollback frontend
# See what a rollback to version 3 will look like, but do not perform the rollback
oc rollback frontend --to-version=3 --dry-run
# Perform a rollback to a specific deployment
oc rollback frontend-2
# Perform the rollback manually by piping the JSON of the new config back to oc
oc rollback frontend -o json | oc replace dc/frontend -f -
# Print the updated deployment configuration in JSON format instead of performing the rollback
oc rollback frontend -o json2.7.1.110. oc rollout cancel
取消进行中的部署
用法示例
# Cancel the in-progress deployment based on 'nginx'
oc rollout cancel dc/nginx2.7.1.111. oc rollout history
查看推出(rollout)历史记录
用法示例
# View the rollout history of a deployment
oc rollout history dc/nginx
# View the details of deployment revision 3
oc rollout history dc/nginx --revision=32.7.1.112. oc rollout latest
使用来自触发器的最新状态为部署配置启动一个新的 rollout 操作
用法示例
# Start a new rollout based on the latest images defined in the image change triggers
oc rollout latest dc/nginx
# Print the rolled out deployment config
oc rollout latest dc/nginx -o json2.7.1.113. oc rollout pause
将提供的资源标记为暂停
用法示例
# Mark the nginx deployment as paused. Any current state of
# the deployment will continue its function, new updates to the deployment will not
# have an effect as long as the deployment is paused
oc rollout pause dc/nginx2.7.1.114. oc rollout restart
重启资源
用法示例
# Restart a deployment
oc rollout restart deployment/nginx
# Restart a daemon set
oc rollout restart daemonset/abc
# Restart deployments with the app=nginx label
oc rollout restart deployment --selector=app=nginx2.7.1.115. oc rollout resume
恢复暂停的资源
用法示例
# Resume an already paused deployment
oc rollout resume dc/nginx2.7.1.116. oc rollout retry
重试最新失败的 rollout 操作
用法示例
# Retry the latest failed deployment based on 'frontend'
# The deployer pod and any hook pods are deleted for the latest failed deployment
oc rollout retry dc/frontend2.7.1.117. oc rollout status
显示推出部署的状态
用法示例
# Watch the status of the latest rollout
oc rollout status dc/nginx2.7.1.118. oc rollout undo
撤消之前的推出部署
用法示例
# Roll back to the previous deployment
oc rollout undo dc/nginx
# Roll back to deployment revision 3. The replication controller for that version must exist
oc rollout undo dc/nginx --to-revision=32.7.1.119. oc rsh
在容器中启动 shell 会话
用法示例
# Open a shell session on the first container in pod 'foo'
oc rsh foo
# Open a shell session on the first container in pod 'foo' and namespace 'bar'
# (Note that oc client specific arguments must come before the resource name and its arguments)
oc rsh -n bar foo
# Run the command 'cat /etc/resolv.conf' inside pod 'foo'
oc rsh foo cat /etc/resolv.conf
# See the configuration of your internal registry
oc rsh dc/docker-registry cat config.yml
# Open a shell session on the container named 'index' inside a pod of your job
oc rsh -c index job/scheduled2.7.1.120. oc rsync
在本地文件系统和 pod 间复制文件
用法示例
# Synchronize a local directory with a pod directory
oc rsync ./local/dir/ POD:/remote/dir
# Synchronize a pod directory with a local directory
oc rsync POD:/remote/dir/ ./local/dir2.7.1.121. oc run
在集群中运行特定镜像
用法示例
# Start a nginx pod
oc run nginx --image=nginx
# Start a hazelcast pod and let the container expose port 5701
oc run hazelcast --image=hazelcast/hazelcast --port=5701
# Start a hazelcast pod and set environment variables "DNS_DOMAIN=cluster" and "POD_NAMESPACE=default" in the container
oc run hazelcast --image=hazelcast/hazelcast --env="DNS_DOMAIN=cluster" --env="POD_NAMESPACE=default"
# Start a hazelcast pod and set labels "app=hazelcast" and "env=prod" in the container
oc run hazelcast --image=hazelcast/hazelcast --labels="app=hazelcast,env=prod"
# Dry run; print the corresponding API objects without creating them
oc run nginx --image=nginx --dry-run=client
# Start a nginx pod, but overload the spec with a partial set of values parsed from JSON
oc run nginx --image=nginx --overrides='{ "apiVersion": "v1", "spec": { ... } }'
# Start a busybox pod and keep it in the foreground, don't restart it if it exits
oc run -i -t busybox --image=busybox --restart=Never
# Start the nginx pod using the default command, but use custom arguments (arg1 .. argN) for that command
oc run nginx --image=nginx -- <arg1> <arg2> ... <argN>
# Start the nginx pod using a different command and custom arguments
oc run nginx --image=nginx --command -- <cmd> <arg1> ... <argN>2.7.1.122. oc scale
为部署、副本集或复制控制器设置新大小
用法示例
# Scale a replica set named 'foo' to 3
oc scale --replicas=3 rs/foo
# Scale a resource identified by type and name specified in "foo.yaml" to 3
oc scale --replicas=3 -f foo.yaml
# If the deployment named mysql's current size is 2, scale mysql to 3
oc scale --current-replicas=2 --replicas=3 deployment/mysql
# Scale multiple replication controllers
oc scale --replicas=5 rc/foo rc/bar rc/baz
# Scale stateful set named 'web' to 3
oc scale --replicas=3 statefulset/web2.7.1.123. oc secrets link
将 secret 链接到服务帐户
用法示例
# Add an image pull secret to a service account to automatically use it for pulling pod images
oc secrets link serviceaccount-name pull-secret --for=pull
# Add an image pull secret to a service account to automatically use it for both pulling and pushing build images
oc secrets link builder builder-image-secret --for=pull,mount2.7.1.124. oc secrets unlink
从服务帐户分离 secret
用法示例
# Unlink a secret currently associated with a service account
oc secrets unlink serviceaccount-name secret-name another-secret-name ...2.7.1.125. oc set build-hook
更新构建配置上的构建 hook
用法示例
# Clear post-commit hook on a build config
oc set build-hook bc/mybuild --post-commit --remove
# Set the post-commit hook to execute a test suite using a new entrypoint
oc set build-hook bc/mybuild --post-commit --command -- /bin/bash -c /var/lib/test-image.sh
# Set the post-commit hook to execute a shell script
oc set build-hook bc/mybuild --post-commit --script="/var/lib/test-image.sh param1 param2 && /var/lib/done.sh"2.7.1.126. oc set build-secret
更新构建配置上的构建 secret
用法示例
# Clear the push secret on a build config
oc set build-secret --push --remove bc/mybuild
# Set the pull secret on a build config
oc set build-secret --pull bc/mybuild mysecret
# Set the push and pull secret on a build config
oc set build-secret --push --pull bc/mybuild mysecret
# Set the source secret on a set of build configs matching a selector
oc set build-secret --source -l app=myapp gitsecret2.7.1.127. oc set data
更新配置映射或 secret 中的数据
用法示例
# Set the 'password' key of a secret
oc set data secret/foo password=this_is_secret
# Remove the 'password' key from a secret
oc set data secret/foo password-
# Update the 'haproxy.conf' key of a config map from a file on disk
oc set data configmap/bar --from-file=../haproxy.conf
# Update a secret with the contents of a directory, one key per file
oc set data secret/foo --from-file=secret-dir2.7.1.128. oc set deployment-hook
更新部署配置上的部署 hook
用法示例
# Clear pre and post hooks on a deployment config
oc set deployment-hook dc/myapp --remove --pre --post
# Set the pre deployment hook to execute a db migration command for an application
# using the data volume from the application
oc set deployment-hook dc/myapp --pre --volumes=data -- /var/lib/migrate-db.sh
# Set a mid deployment hook along with additional environment variables
oc set deployment-hook dc/myapp --mid --volumes=data -e VAR1=value1 -e VAR2=value2 -- /var/lib/prepare-deploy.sh2.7.1.129. oc set env
更新 pod 模板上的环境变量
用法示例
# Update deployment config 'myapp' with a new environment variable
oc set env dc/myapp STORAGE_DIR=/local
# List the environment variables defined on a build config 'sample-build'
oc set env bc/sample-build --list
# List the environment variables defined on all pods
oc set env pods --all --list
# Output modified build config in YAML
oc set env bc/sample-build STORAGE_DIR=/data -o yaml
# Update all containers in all replication controllers in the project to have ENV=prod
oc set env rc --all ENV=prod
# Import environment from a secret
oc set env --from=secret/mysecret dc/myapp
# Import environment from a config map with a prefix
oc set env --from=configmap/myconfigmap --prefix=MYSQL_ dc/myapp
# Remove the environment variable ENV from container 'c1' in all deployment configs
oc set env dc --all --containers="c1" ENV-
# Remove the environment variable ENV from a deployment config definition on disk and
# update the deployment config on the server
oc set env -f dc.json ENV-
# Set some of the local shell environment into a deployment config on the server
oc set env | grep RAILS_ | oc env -e - dc/myapp2.7.1.130. oc set image
更新 pod 模板的镜像
用法示例
# Set a deployment config's nginx container image to 'nginx:1.9.1', and its busybox container image to 'busybox'.
oc set image dc/nginx busybox=busybox nginx=nginx:1.9.1
# Set a deployment config's app container image to the image referenced by the imagestream tag 'openshift/ruby:2.3'.
oc set image dc/myapp app=openshift/ruby:2.3 --source=imagestreamtag
# Update all deployments' and rc's nginx container's image to 'nginx:1.9.1'
oc set image deployments,rc nginx=nginx:1.9.1 --all
# Update image of all containers of daemonset abc to 'nginx:1.9.1'
oc set image daemonset abc *=nginx:1.9.1
# Print result (in YAML format) of updating nginx container image from local file, without hitting the server
oc set image -f path/to/file.yaml nginx=nginx:1.9.1 --local -o yaml2.7.1.131. oc set image-lookup
更改部署应用程序时镜像的解析方式
用法示例
# Print all of the image streams and whether they resolve local names
oc set image-lookup
# Use local name lookup on image stream mysql
oc set image-lookup mysql
# Force a deployment to use local name lookup
oc set image-lookup deploy/mysql
# Show the current status of the deployment lookup
oc set image-lookup deploy/mysql --list
# Disable local name lookup on image stream mysql
oc set image-lookup mysql --enabled=false
# Set local name lookup on all image streams
oc set image-lookup --all2.7.1.132. oc set probe
更新 pod 模板上的探测
用法示例
# Clear both readiness and liveness probes off all containers
oc set probe dc/myapp --remove --readiness --liveness
# Set an exec action as a liveness probe to run 'echo ok'
oc set probe dc/myapp --liveness -- echo ok
# Set a readiness probe to try to open a TCP socket on 3306
oc set probe rc/mysql --readiness --open-tcp=3306
# Set an HTTP startup probe for port 8080 and path /healthz over HTTP on the pod IP
oc set probe dc/webapp --startup --get-url=http://:8080/healthz
# Set an HTTP readiness probe for port 8080 and path /healthz over HTTP on the pod IP
oc set probe dc/webapp --readiness --get-url=http://:8080/healthz
# Set an HTTP readiness probe over HTTPS on 127.0.0.1 for a hostNetwork pod
oc set probe dc/router --readiness --get-url=https://127.0.0.1:1936/stats
# Set only the initial-delay-seconds field on all deployments
oc set probe dc --all --readiness --initial-delay-seconds=302.7.1.133. oc set resources
使用 pod 模板更新对象上的资源请求/限制
用法示例
# Set a deployments nginx container CPU limits to "200m and memory to 512Mi"
oc set resources deployment nginx -c=nginx --limits=cpu=200m,memory=512Mi
# Set the resource request and limits for all containers in nginx
oc set resources deployment nginx --limits=cpu=200m,memory=512Mi --requests=cpu=100m,memory=256Mi
# Remove the resource requests for resources on containers in nginx
oc set resources deployment nginx --limits=cpu=0,memory=0 --requests=cpu=0,memory=0
# Print the result (in YAML format) of updating nginx container limits locally, without hitting the server
oc set resources -f path/to/file.yaml --limits=cpu=200m,memory=512Mi --local -o yaml2.7.1.134. oc set route-backends
更新路由的后端
用法示例
# Print the backends on the route 'web'
oc set route-backends web
# Set two backend services on route 'web' with 2/3rds of traffic going to 'a'
oc set route-backends web a=2 b=1
# Increase the traffic percentage going to b by 10%% relative to a
oc set route-backends web --adjust b=+10%%
# Set traffic percentage going to b to 10%% of the traffic going to a
oc set route-backends web --adjust b=10%%
# Set weight of b to 10
oc set route-backends web --adjust b=10
# Set the weight to all backends to zero
oc set route-backends web --zero2.7.1.135. oc set selector
在资源上设置选择器
用法示例
# Set the labels and selector before creating a deployment/service pair.
oc create service clusterip my-svc --clusterip="None" -o yaml --dry-run | oc set selector --local -f - 'environment=qa' -o yaml | oc create -f -
oc create deployment my-dep -o yaml --dry-run | oc label --local -f - environment=qa -o yaml | oc create -f -2.7.1.136. oc set serviceaccount
更新资源的服务帐户
用法示例
# Set deployment nginx-deployment's service account to serviceaccount1
oc set serviceaccount deployment nginx-deployment serviceaccount1
# Print the result (in YAML format) of updated nginx deployment with service account from a local file, without hitting the API server
oc set sa -f nginx-deployment.yaml serviceaccount1 --local --dry-run -o yaml2.7.1.137. oc set subject
更新角色绑定或集群角色绑定中的用户、组或服务帐户
用法示例
# Update a cluster role binding for serviceaccount1
oc set subject clusterrolebinding admin --serviceaccount=namespace:serviceaccount1
# Update a role binding for user1, user2, and group1
oc set subject rolebinding admin --user=user1 --user=user2 --group=group1
# Print the result (in YAML format) of updating role binding subjects locally, without hitting the server
oc create rolebinding admin --role=admin --user=admin -o yaml --dry-run | oc set subject --local -f - --user=foo -o yaml2.7.1.138. oc set triggers
更新一个或多个对象上的触发器
用法示例
# Print the triggers on the deployment config 'myapp'
oc set triggers dc/myapp
# Set all triggers to manual
oc set triggers dc/myapp --manual
# Enable all automatic triggers
oc set triggers dc/myapp --auto
# Reset the GitHub webhook on a build to a new, generated secret
oc set triggers bc/webapp --from-github
oc set triggers bc/webapp --from-webhook
# Remove all triggers
oc set triggers bc/webapp --remove-all
# Stop triggering on config change
oc set triggers dc/myapp --from-config --remove
# Add an image trigger to a build config
oc set triggers bc/webapp --from-image=namespace1/image:latest
# Add an image trigger to a stateful set on the main container
oc set triggers statefulset/db --from-image=namespace1/image:latest -c main2.7.1.139. oc set volumes
更新 pod 模板中的卷
用法示例
# List volumes defined on all deployment configs in the current project
oc set volume dc --all
# Add a new empty dir volume to deployment config (dc) 'myapp' mounted under
# /var/lib/myapp
oc set volume dc/myapp --add --mount-path=/var/lib/myapp
# Use an existing persistent volume claim (PVC) to overwrite an existing volume 'v1'
oc set volume dc/myapp --add --name=v1 -t pvc --claim-name=pvc1 --overwrite
# Remove volume 'v1' from deployment config 'myapp'
oc set volume dc/myapp --remove --name=v1
# Create a new persistent volume claim that overwrites an existing volume 'v1'
oc set volume dc/myapp --add --name=v1 -t pvc --claim-size=1G --overwrite
# Change the mount point for volume 'v1' to /data
oc set volume dc/myapp --add --name=v1 -m /data --overwrite
# Modify the deployment config by removing volume mount "v1" from container "c1"
# (and by removing the volume "v1" if no other containers have volume mounts that reference it)
oc set volume dc/myapp --remove --name=v1 --containers=c1
# Add new volume based on a more complex volume source (AWS EBS, GCE PD,
# Ceph, Gluster, NFS, ISCSI, ...)
oc set volume dc/myapp --add -m /data --source=<json-string>2.7.1.140. oc start-build
启动新构建
用法示例
# Starts build from build config "hello-world"
oc start-build hello-world
# Starts build from a previous build "hello-world-1"
oc start-build --from-build=hello-world-1
# Use the contents of a directory as build input
oc start-build hello-world --from-dir=src/
# Send the contents of a Git repository to the server from tag 'v2'
oc start-build hello-world --from-repo=../hello-world --commit=v2
# Start a new build for build config "hello-world" and watch the logs until the build
# completes or fails
oc start-build hello-world --follow
# Start a new build for build config "hello-world" and wait until the build completes. It
# exits with a non-zero return code if the build fails
oc start-build hello-world --wait2.7.1.141. oc status
显示当前项目的概述
用法示例
# See an overview of the current project
oc status
# Export the overview of the current project in an svg file
oc status -o dot | dot -T svg -o project.svg
# See an overview of the current project including details for any identified issues
oc status --suggest2.7.1.142. oc tag
将现有镜像标记到镜像流中
用法示例
# Tag the current image for the image stream 'openshift/ruby' and tag '2.0' into the image stream 'yourproject/ruby with tag 'tip'
oc tag openshift/ruby:2.0 yourproject/ruby:tip
# Tag a specific image
oc tag openshift/ruby@sha256:6b646fa6bf5e5e4c7fa41056c27910e679c03ebe7f93e361e6515a9da7e258cc yourproject/ruby:tip
# Tag an external container image
oc tag --source=docker openshift/origin-control-plane:latest yourproject/ruby:tip
# Tag an external container image and request pullthrough for it
oc tag --source=docker openshift/origin-control-plane:latest yourproject/ruby:tip --reference-policy=local
# Tag an external container image and include the full manifest list
oc tag --source=docker openshift/origin-control-plane:latest yourproject/ruby:tip --import-mode=PreserveOriginal
# Remove the specified spec tag from an image stream
oc tag openshift/origin-control-plane:latest -d2.7.1.143. oc version
输出客户端和服务器版本信息
用法示例
# Print the OpenShift client, kube-apiserver, and openshift-apiserver version information for the current context
oc version
# Print the OpenShift client, kube-apiserver, and openshift-apiserver version numbers for the current context
oc version --short
# Print the OpenShift client version information for the current context
oc version --client2.7.1.144. oc wait
实验性:等待一个或多个资源上的特定条件
用法示例
# Wait for the pod "busybox1" to contain the status condition of type "Ready"
oc wait --for=condition=Ready pod/busybox1
# The default value of status condition is true; you can wait for other targets after an equal delimiter (compared after Unicode simple case folding, which is a more general form of case-insensitivity):
oc wait --for=condition=Ready=false pod/busybox1
# Wait for the pod "busybox1" to contain the status phase to be "Running".
oc wait --for=jsonpath='{.status.phase}'=Running pod/busybox1
# Wait for the pod "busybox1" to be deleted, with a timeout of 60s, after having issued the "delete" command
oc delete pod/busybox1
oc wait --for=delete pod/busybox1 --timeout=60s2.7.1.145. oc whoami
返回有关当前会话的信息
用法示例
# Display the currently authenticated user
oc whoami2.8. OpenShift CLI 管理员命令参考
本参考提供了 OpenShift CLI(oc)管理员命令的描述和示例命令。您必须具有 cluster-admin 或同等权限才能使用这些命令。
如需开发人员命令,请参阅 OpenShift CLI 开发人员命令参考。
运行 oc adm -h 以列出所有管理员命令或运行 oc <command> --help 获取特定命令的更多详情。
2.8.1. OpenShift CLI(oc)管理员命令
2.8.1.1. oc adm build-chain
输出构建的输入和依赖项
用法示例
# Build the dependency tree for the 'latest' tag in <image-stream>
oc adm build-chain <image-stream>
# Build the dependency tree for the 'v2' tag in dot format and visualize it via the dot utility
oc adm build-chain <image-stream>:v2 -o dot | dot -T svg -o deps.svg
# Build the dependency tree across all namespaces for the specified image stream tag found in the 'test' namespace
oc adm build-chain <image-stream> -n test --all2.8.1.2. oc adm catalog mirror
镜像 operator-registry 目录
用法示例
# Mirror an operator-registry image and its contents to a registry
oc adm catalog mirror quay.io/my/image:latest myregistry.com
# Mirror an operator-registry image and its contents to a particular namespace in a registry
oc adm catalog mirror quay.io/my/image:latest myregistry.com/my-namespace
# Mirror to an airgapped registry by first mirroring to files
oc adm catalog mirror quay.io/my/image:latest file:///local/index
oc adm catalog mirror file:///local/index/my/image:latest my-airgapped-registry.com
# Configure a cluster to use a mirrored registry
oc apply -f manifests/imageDigestMirrorSet.yaml
# Edit the mirroring mappings and mirror with "oc image mirror" manually
oc adm catalog mirror --manifests-only quay.io/my/image:latest myregistry.com
oc image mirror -f manifests/mapping.txt
# Delete all ImageDigestMirrorSets generated by oc adm catalog mirror
oc delete imagedigestmirrorset -l operators.openshift.org/catalog=true2.8.1.3. oc adm 证书批准
批准证书签名请求
用法示例
# Approve CSR 'csr-sqgzp'
oc adm certificate approve csr-sqgzp2.8.1.4. oc adm 证书拒绝
拒绝证书签名请求
用法示例
# Deny CSR 'csr-sqgzp'
oc adm certificate deny csr-sqgzp2.8.1.5. oc adm copy-to-node
将指定的文件复制到节点。
2.8.1.6. oc adm cordon
将节点标记为不可调度
用法示例
# Mark node "foo" as unschedulable
oc adm cordon foo2.8.1.7. oc adm create-bootstrap-project-template
创建 bootstrap 项目模板
用法示例
# Output a bootstrap project template in YAML format to stdout
oc adm create-bootstrap-project-template -o yaml2.8.1.8. oc adm create-error-template
创建错误页面模板
用法示例
# Output a template for the error page to stdout
oc adm create-error-template2.8.1.9. oc adm create-login-template
创建登录模板
用法示例
# Output a template for the login page to stdout
oc adm create-login-template2.8.1.10. oc adm create-provider-selection-template
创建供应商选择模板
用法示例
# Output a template for the provider selection page to stdout
oc adm create-provider-selection-template2.8.1.11. oc adm drain
排空节点以准备进行维护
用法示例
# Drain node "foo", even if there are pods not managed by a replication controller, replica set, job, daemon set or stateful set on it
oc adm drain foo --force
# As above, but abort if there are pods not managed by a replication controller, replica set, job, daemon set or stateful set, and use a grace period of 15 minutes
oc adm drain foo --grace-period=9002.8.1.12. oc adm groups add-users
将用户添加到组
用法示例
# Add user1 and user2 to my-group
oc adm groups add-users my-group user1 user22.8.1.13. oc adm groups new
创建一个新组
用法示例
# Add a group with no users
oc adm groups new my-group
# Add a group with two users
oc adm groups new my-group user1 user2
# Add a group with one user and shorter output
oc adm groups new my-group user1 -o name2.8.1.14. oc adm groups prune
从外部提供程序中删除引用缺失记录的旧 OpenShift 组
用法示例
# Prune all orphaned groups
oc adm groups prune --sync-config=/path/to/ldap-sync-config.yaml --confirm
# Prune all orphaned groups except the ones from the denylist file
oc adm groups prune --blacklist=/path/to/denylist.txt --sync-config=/path/to/ldap-sync-config.yaml --confirm
# Prune all orphaned groups from a list of specific groups specified in an allowlist file
oc adm groups prune --whitelist=/path/to/allowlist.txt --sync-config=/path/to/ldap-sync-config.yaml --confirm
# Prune all orphaned groups from a list of specific groups specified in a list
oc adm groups prune groups/group_name groups/other_name --sync-config=/path/to/ldap-sync-config.yaml --confirm2.8.1.15. oc adm groups remove-users
从组中删除用户
用法示例
# Remove user1 and user2 from my-group
oc adm groups remove-users my-group user1 user22.8.1.16. oc adm groups sync
将 OpenShift 组与来自外部提供程序的记录同步
用法示例
# Sync all groups with an LDAP server
oc adm groups sync --sync-config=/path/to/ldap-sync-config.yaml --confirm
# Sync all groups except the ones from the blacklist file with an LDAP server
oc adm groups sync --blacklist=/path/to/blacklist.txt --sync-config=/path/to/ldap-sync-config.yaml --confirm
# Sync specific groups specified in an allowlist file with an LDAP server
oc adm groups sync --whitelist=/path/to/allowlist.txt --sync-config=/path/to/sync-config.yaml --confirm
# Sync all OpenShift groups that have been synced previously with an LDAP server
oc adm groups sync --type=openshift --sync-config=/path/to/ldap-sync-config.yaml --confirm
# Sync specific OpenShift groups if they have been synced previously with an LDAP server
oc adm groups sync groups/group1 groups/group2 groups/group3 --sync-config=/path/to/sync-config.yaml --confirm2.8.1.17. oc adm inspect
为给定资源收集调试数据
用法示例
# Collect debugging data for the "openshift-apiserver" clusteroperator
oc adm inspect clusteroperator/openshift-apiserver
# Collect debugging data for the "openshift-apiserver" and "kube-apiserver" clusteroperators
oc adm inspect clusteroperator/openshift-apiserver clusteroperator/kube-apiserver
# Collect debugging data for all clusteroperators
oc adm inspect clusteroperator
# Collect debugging data for all clusteroperators and clusterversions
oc adm inspect clusteroperators,clusterversions2.8.1.18. oc adm migrate icsp
将 imagecontentsourcepolicy 文件更新为 imagedigestmirrorset 文件
用法示例
# Update the imagecontentsourcepolicy.yaml file to a new imagedigestmirrorset file under the mydir directory
oc adm migrate icsp imagecontentsourcepolicy.yaml --dest-dir mydir2.8.1.19. oc adm migrate template-instances
更新模板实例以指向最新的 group-version-kinds
用法示例
# Perform a dry-run of updating all objects
oc adm migrate template-instances
# To actually perform the update, the confirm flag must be appended
oc adm migrate template-instances --confirm2.8.1.20. oc adm must-gather
启动用于收集调试信息的 pod 的新实例
用法示例
# Gather information using the default plug-in image and command, writing into ./must-gather.local.<rand>
oc adm must-gather
# Gather information with a specific local folder to copy to
oc adm must-gather --dest-dir=/local/directory
# Gather audit information
oc adm must-gather -- /usr/bin/gather_audit_logs
# Gather information using multiple plug-in images
oc adm must-gather --image=quay.io/kubevirt/must-gather --image=quay.io/openshift/origin-must-gather
# Gather information using a specific image stream plug-in
oc adm must-gather --image-stream=openshift/must-gather:latest
# Gather information using a specific image, command, and pod directory
oc adm must-gather --image=my/image:tag --source-dir=/pod/directory -- myspecial-command.sh2.8.1.21. oc adm new-project
创建新项目
用法示例
# Create a new project using a node selector
oc adm new-project myproject --node-selector='type=user-node,region=east'2.8.1.22. oc adm node-logs
显示和过滤节点日志
用法示例
# Show kubelet logs from all masters
oc adm node-logs --role master -u kubelet
# See what logs are available in masters in /var/log
oc adm node-logs --role master --path=/
# Display cron log file from all masters
oc adm node-logs --role master --path=cron2.8.1.23. oc adm ocp-certificates monitor-certificates
观察平台证书。
用法示例
# Watch platform certificates.
oc adm ocp-certificates monitor-certificates2.8.1.24. oc adm ocp-certificates regenerate-leaf
重新生成 OpenShift 集群的客户端和提供证书
在 OpenShift 集群中重新生成机器配置 Operator 证书
2.8.1.26. oc adm ocp-certificates regenerate-top-level
在 OpenShift 集群中重新生成顶级证书
2.8.1.27. oc adm ocp-certificates remove-old-trust
从代表 OpenShift 集群中平台信任捆绑包的 ConfigMap 中删除旧的 CA
用法示例
# Remove only CA certificates created before a certain date from all trust bundles
oc adm ocp-certificates remove-old-trust configmaps -A --all --created-before 2023-06-05T14:44:06Z更新 OpenShift 集群中的 user-data secret,以使用更新的 MCO certfs
用法示例
# Regenerate the MCO certs without modifying user-data secrets
oc adm certificates regenerate-machine-config-server-serving-cert --update-ignition=false
# Update the user-data secrets to use new MCS certs
oc adm certificates update-ignition-ca-bundle-for-machine-config-server2.8.1.29. oc adm pod-network isolate-projects
隔离项目网络
用法示例
# Provide isolation for project p1
oc adm pod-network isolate-projects <p1>
# Allow all projects with label name=top-secret to have their own isolated project network
oc adm pod-network isolate-projects --selector='name=top-secret'2.8.1.30. oc adm pod-network join-projects
加入项目网络
用法示例
# Allow project p2 to use project p1 network
oc adm pod-network join-projects --to=<p1> <p2>
# Allow all projects with label name=top-secret to use project p1 network
oc adm pod-network join-projects --to=<p1> --selector='name=top-secret'2.8.1.31. oc adm pod-network make-projects-global
使项目网络为全局有效
用法示例
# Allow project p1 to access all pods in the cluster and vice versa
oc adm pod-network make-projects-global <p1>
# Allow all projects with label name=share to access all pods in the cluster and vice versa
oc adm pod-network make-projects-global --selector='name=share'2.8.1.32. oc adm policy add-role-to-user
为当前项目的用户或服务帐户添加角色
用法示例
# Add the 'view' role to user1 for the current project
oc adm policy add-role-to-user view user1
# Add the 'edit' role to serviceaccount1 for the current project
oc adm policy add-role-to-user edit -z serviceaccount12.8.1.33. oc adm policy add-scc-to-group
为组添加安全性上下文约束
用法示例
# Add the 'restricted' security context constraint to group1 and group2
oc adm policy add-scc-to-group restricted group1 group22.8.1.34. oc adm policy add-scc-to-user
为用户或服务帐户添加安全性上下文约束
用法示例
# Add the 'restricted' security context constraint to user1 and user2
oc adm policy add-scc-to-user restricted user1 user2
# Add the 'privileged' security context constraint to serviceaccount1 in the current namespace
oc adm policy add-scc-to-user privileged -z serviceaccount12.8.1.35. oc adm policy scc-review
检查哪个服务帐户可以创建 pod
用法示例
# Check whether service accounts sa1 and sa2 can admit a pod with a template pod spec specified in my_resource.yaml
# Service Account specified in myresource.yaml file is ignored
oc adm policy scc-review -z sa1,sa2 -f my_resource.yaml
# Check whether service accounts system:serviceaccount:bob:default can admit a pod with a template pod spec specified in my_resource.yaml
oc adm policy scc-review -z system:serviceaccount:bob:default -f my_resource.yaml
# Check whether the service account specified in my_resource_with_sa.yaml can admit the pod
oc adm policy scc-review -f my_resource_with_sa.yaml
# Check whether the default service account can admit the pod; default is taken since no service account is defined in myresource_with_no_sa.yaml
oc adm policy scc-review -f myresource_with_no_sa.yaml2.8.1.36. oc adm policy scc-subject-review
检查用户或服务帐户是否可以创建 pod
用法示例
# Check whether user bob can create a pod specified in myresource.yaml
oc adm policy scc-subject-review -u bob -f myresource.yaml
# Check whether user bob who belongs to projectAdmin group can create a pod specified in myresource.yaml
oc adm policy scc-subject-review -u bob -g projectAdmin -f myresource.yaml
# Check whether a service account specified in the pod template spec in myresourcewithsa.yaml can create the pod
oc adm policy scc-subject-review -f myresourcewithsa.yaml2.8.1.37. oc adm prune builds
删除旧的完成和失败的构建
用法示例
# Dry run deleting older completed and failed builds and also including
# all builds whose associated build config no longer exists
oc adm prune builds --orphans
# To actually perform the prune operation, the confirm flag must be appended
oc adm prune builds --orphans --confirm2.8.1.38. oc adm prune deployments
删除旧的完成和失败的部署配置
用法示例
# Dry run deleting all but the last complete deployment for every deployment config
oc adm prune deployments --keep-complete=1
# To actually perform the prune operation, the confirm flag must be appended
oc adm prune deployments --keep-complete=1 --confirm2.8.1.39. oc adm prune groups
从外部提供程序中删除引用缺失记录的旧 OpenShift 组
用法示例
# Prune all orphaned groups
oc adm prune groups --sync-config=/path/to/ldap-sync-config.yaml --confirm
# Prune all orphaned groups except the ones from the denylist file
oc adm prune groups --blacklist=/path/to/denylist.txt --sync-config=/path/to/ldap-sync-config.yaml --confirm
# Prune all orphaned groups from a list of specific groups specified in an allowlist file
oc adm prune groups --whitelist=/path/to/allowlist.txt --sync-config=/path/to/ldap-sync-config.yaml --confirm
# Prune all orphaned groups from a list of specific groups specified in a list
oc adm prune groups groups/group_name groups/other_name --sync-config=/path/to/ldap-sync-config.yaml --confirm2.8.1.40. oc adm prune images
删除未引用的镜像
用法示例
# See what the prune command would delete if only images and their referrers were more than an hour old
# and obsoleted by 3 newer revisions under the same tag were considered
oc adm prune images --keep-tag-revisions=3 --keep-younger-than=60m
# To actually perform the prune operation, the confirm flag must be appended
oc adm prune images --keep-tag-revisions=3 --keep-younger-than=60m --confirm
# See what the prune command would delete if we are interested in removing images
# exceeding currently set limit ranges ('openshift.io/Image')
oc adm prune images --prune-over-size-limit
# To actually perform the prune operation, the confirm flag must be appended
oc adm prune images --prune-over-size-limit --confirm
# Force the insecure HTTP protocol with the particular registry host name
oc adm prune images --registry-url=http://registry.example.org --confirm
# Force a secure connection with a custom certificate authority to the particular registry host name
oc adm prune images --registry-url=registry.example.org --certificate-authority=/path/to/custom/ca.crt --confirm2.8.1.41. oc adm reboot-machine-config-pool
启动指定的 MachineConfigPool 重启。
用法示例
# Reboot all MachineConfigPools
oc adm reboot-machine-config-pool mcp/worker mcp/master
# Reboot all MachineConfigPools that inherit from worker. This include all custom MachineConfigPools and infra.
oc adm reboot-machine-config-pool mcp/worker
# Reboot masters
oc adm reboot-machine-config-pool mcp/master2.8.1.42. oc adm release extract
将更新有效负载的内容提取到磁盘
用法示例
# Use git to check out the source code for the current cluster release to DIR
oc adm release extract --git=DIR
# Extract cloud credential requests for AWS
oc adm release extract --credentials-requests --cloud=aws
# Use git to check out the source code for the current cluster release to DIR from linux/s390x image
# Note: Wildcard filter is not supported; pass a single os/arch to extract
oc adm release extract --git=DIR quay.io/openshift-release-dev/ocp-release:4.11.2 --filter-by-os=linux/s390x2.8.1.43. oc adm release info
显示发行版本的信息
用法示例
# Show information about the cluster's current release
oc adm release info
# Show the source code that comprises a release
oc adm release info 4.11.2 --commit-urls
# Show the source code difference between two releases
oc adm release info 4.11.0 4.11.2 --commits
# Show where the images referenced by the release are located
oc adm release info quay.io/openshift-release-dev/ocp-release:4.11.2 --pullspecs
# Show information about linux/s390x image
# Note: Wildcard filter is not supported; pass a single os/arch to extract
oc adm release info quay.io/openshift-release-dev/ocp-release:4.11.2 --filter-by-os=linux/s390x2.8.1.44. oc adm release mirror
将发行版本 mirror 到不同的镜像 registry 位置
用法示例
# Perform a dry run showing what would be mirrored, including the mirror objects
oc adm release mirror 4.11.0 --to myregistry.local/openshift/release \
--release-image-signature-to-dir /tmp/releases --dry-run
# Mirror a release into the current directory
oc adm release mirror 4.11.0 --to file://openshift/release \
--release-image-signature-to-dir /tmp/releases
# Mirror a release to another directory in the default location
oc adm release mirror 4.11.0 --to-dir /tmp/releases
# Upload a release from the current directory to another server
oc adm release mirror --from file://openshift/release --to myregistry.com/openshift/release \
--release-image-signature-to-dir /tmp/releases
# Mirror the 4.11.0 release to repository registry.example.com and apply signatures to connected cluster
oc adm release mirror --from=quay.io/openshift-release-dev/ocp-release:4.11.0-x86_64 \
--to=registry.example.com/your/repository --apply-release-image-signature2.8.1.45. oc adm release new
创建新的 OpenShift 发行版本
用法示例
# Create a release from the latest origin images and push to a DockerHub repository
oc adm release new --from-image-stream=4.11 -n origin --to-image docker.io/mycompany/myrepo:latest
# Create a new release with updated metadata from a previous release
oc adm release new --from-release registry.ci.openshift.org/origin/release:v4.11 --name 4.11.1 \
--previous 4.11.0 --metadata ... --to-image docker.io/mycompany/myrepo:latest
# Create a new release and override a single image
oc adm release new --from-release registry.ci.openshift.org/origin/release:v4.11 \
cli=docker.io/mycompany/cli:latest --to-image docker.io/mycompany/myrepo:latest
# Run a verification pass to ensure the release can be reproduced
oc adm release new --from-release registry.ci.openshift.org/origin/release:v4.112.8.1.46. oc adm restart-kubelet
在指定节点上重启 kubelet
2.8.1.47. oc adm taint
更新一个或多个节点上的污点
用法示例
# Update node 'foo' with a taint with key 'dedicated' and value 'special-user' and effect 'NoSchedule'
# If a taint with that key and effect already exists, its value is replaced as specified
oc adm taint nodes foo dedicated=special-user:NoSchedule
# Remove from node 'foo' the taint with key 'dedicated' and effect 'NoSchedule' if one exists
oc adm taint nodes foo dedicated:NoSchedule-
# Remove from node 'foo' all the taints with key 'dedicated'
oc adm taint nodes foo dedicated-
# Add a taint with key 'dedicated' on nodes having label mylabel=X
oc adm taint node -l myLabel=X dedicated=foo:PreferNoSchedule
# Add to node 'foo' a taint with key 'bar' and no value
oc adm taint nodes foo bar:NoSchedule2.8.1.48. oc adm top images
显示镜像的用量统计
用法示例
# Show usage statistics for images
oc adm top images2.8.1.49. oc adm top imagestreams
显示镜像流的用量统计
用法示例
# Show usage statistics for image streams
oc adm top imagestreams2.8.1.50. oc adm top node
显示节点的资源(CPU/内存)使用情况
用法示例
# Show metrics for all nodes
oc adm top node
# Show metrics for a given node
oc adm top node NODE_NAME2.8.1.51. oc adm top pod
显示 pod 的资源(CPU/内存)使用情况
用法示例
# Show metrics for all pods in the default namespace
oc adm top pod
# Show metrics for all pods in the given namespace
oc adm top pod --namespace=NAMESPACE
# Show metrics for a given pod and its containers
oc adm top pod POD_NAME --containers
# Show metrics for the pods defined by label name=myLabel
oc adm top pod -l name=myLabel2.8.1.52. oc adm uncordon
将节点标记为可调度
用法示例
# Mark node "foo" as schedulable
oc adm uncordon foo2.8.1.53. oc adm upgrade
升级集群或调整升级频道
用法示例
# View the update status and available cluster updates
oc adm upgrade
# Update to the latest version
oc adm upgrade --to-latest=true2.8.1.54. oc adm verify-image-signature
验证镜像签名中包含的镜像身份
用法示例
# Verify the image signature and identity using the local GPG keychain
oc adm verify-image-signature sha256:c841e9b64e4579bd56c794bdd7c36e1c257110fd2404bebbb8b613e4935228c4 \
--expected-identity=registry.local:5000/foo/bar:v1
# Verify the image signature and identity using the local GPG keychain and save the status
oc adm verify-image-signature sha256:c841e9b64e4579bd56c794bdd7c36e1c257110fd2404bebbb8b613e4935228c4 \
--expected-identity=registry.local:5000/foo/bar:v1 --save
# Verify the image signature and identity via exposed registry route
oc adm verify-image-signature sha256:c841e9b64e4579bd56c794bdd7c36e1c257110fd2404bebbb8b613e4935228c4 \
--expected-identity=registry.local:5000/foo/bar:v1 \
--registry-url=docker-registry.foo.com
# Remove all signature verifications from the image
oc adm verify-image-signature sha256:c841e9b64e4579bd56c794bdd7c36e1c257110fd2404bebbb8b613e4935228c4 --remove-all2.8.1.55. oc adm wait-for-node-reboot
在运行 oc adm reboot-machine-config-pool 后等待节点重新引导
用法示例
# Wait for all nodes to complete a requested reboot from 'oc adm reboot-machine-config-pool mcp/worker mcp/master'
oc adm wait-for-node-reboot nodes --all
# Wait for masters to complete a requested reboot from 'oc adm reboot-machine-config-pool mcp/master'
oc adm wait-for-node-reboot nodes -l node-role.kubernetes.io/master
# Wait for masters to complete a specific reboot
oc adm wait-for-node-reboot nodes -l node-role.kubernetes.io/master --reboot-number=42.8.1.56. oc adm wait-for-stable-cluster
等待平台 operator 变得稳定
第 3 章 odo 的重要更新
红帽没有在 OpenShift Container Platform 文档站点上提供有关 odo 的信息。请参阅由红帽维护的文档,以及上游社区的与 odo 相关的文档。
对于上游社区维护的材料,红帽在合作社区支持下提供支持。
第 4 章 用于 OpenShift Serverless 的 Knative CLI
Knative (kn) CLI 在 OpenShift Container Platform 上启用了与 Knative 组件的简单交互。
4.1. 主要特性
Knative (kn) CLI 旨在使无服务器计算任务简单明确。Knative CLI 的主要功能包括:
- 从命令行部署无服务器应用程序。
- 管理 Knative Serving 的功能,如服务、修订和流量分割。
- 创建和管理 Knative Eventing 组件,如事件源和触发器。
- 创建 sink 绑定来连接现有的 Kubernetes 应用程序和 Knative 服务。
-
使用灵活的插件架构扩展 Knative CLI,类似于
kubectlCLI。 - 为 Knative 服务配置 autoscaling 参数。
- 脚本化使用,如等待一个操作的结果,或部署自定义推出和回滚策略。
4.2. 安装 Knative CLI
请参阅安装 Knative CLI。
第 5 章 Pipelines CLI (tkn)
5.1. 安装 tkn
使用 CLI 工具从终端管理 Red Hat OpenShift Pipelines。下面的部分论述了如何在不同的平台中安装 CLI 工具。
在 OpenShift Container Platform web 控制台中,点右上角的 ? 图标并选 Command Line Tools。
归档和 RPM 都包含以下可执行文件:
-
tkn -
tkn-pac -
opc
使用 opc CLI 工具运行 Red Hat OpenShift Pipelines 只是一个技术预览功能。技术预览功能不受红帽产品服务等级协议(SLA)支持,且功能可能并不完整。红帽不推荐在生产环境中使用它们。这些技术预览功能可以使用户提早试用新的功能,并有机会在开发阶段提供反馈意见。
有关红帽技术预览功能支持范围的更多信息,请参阅技术预览功能支持范围。
5.1.1. 在 Linux 上安装 Red Hat OpenShift Pipelines CLI
对于 Linux 发行版,您可以将 CLI 下载为 tar.gz 存档。
流程
下载相关的 CLI 工具。
解包存档:
$ tar xvzf <file>-
将您的
tkn,tkn-pac, 和opc文件添加到PATH环境变量中。 要查看您的
PATH,请运行以下命令:$ echo $PATH
对于 Red Hat Enterprise Linux (RHEL) 版本 8,您可以使用 RPM 安装 Red Hat OpenShift Pipelines CLI。
先决条件
- 您的红帽帐户必须具有有效的 OpenShift Container Platform 订阅。
- 您在本地系统中有 root 或者 sudo 权限。
流程
使用 Red Hat Subscription Manager 注册:
# subscription-manager register获取最新的订阅数据:
# subscription-manager refresh列出可用的订阅:
# subscription-manager list --available --matches '*pipelines*'在上一命令的输出中,找到 OpenShift Container Platform 订阅的池 ID,并把订阅附加到注册的系统:
# subscription-manager attach --pool=<pool_id>启用 Red Hat OpenShift Pipelines 所需的仓库:
Linux (x86_64, amd64)
# subscription-manager repos --enable="pipelines-1.13-for-rhel-8-x86_64-rpms"Linux on IBM Z® 和 IBM® LinuxONE (s390x)
# subscription-manager repos --enable="pipelines-1.13-for-rhel-8-s390x-rpms"Linux on IBM Power® (ppc64le)
# subscription-manager repos --enable="pipelines-1.13-for-rhel-8-ppc64le-rpms"Linux on ARM (aarch64, arm64)
# subscription-manager repos --enable="pipelines-1.13-for-rhel-8-aarch64-rpms"
安装
openshift-pipelines-client软件包:# yum install openshift-pipelines-client
安装 CLI 后,就可以使用tkn命令:
$ tkn version5.1.3. 在 Windows 上安装 Red Hat OpenShift Pipelines CLI
对于 Windows,您可以将 CLI 下载为 zip 存档。
流程
- 下载 CLI 工具。
- 使用 ZIP 程序解压存档。
-
将您的
tkn,tkn-pac, 和opc文件添加到PATH环境变量中。 要查看您的
PATH,请运行以下命令:C:\> path
5.1.4. 在 macOS 上安装 Red Hat OpenShift Pipelines CLI
对于 macOS,您可以将 CLI 下载为 tar.gz 存档。
流程
下载相关的 CLI 工具。
- 解包并提取存档。
-
将您的
tkn,tkn-pac, 和opc文件添加到PATH环境变量中。 要查看您的
PATH,请运行以下命令:$ echo $PATH
5.2. 配置 OpenShift Pipelines tkn CLI
配置 Red Hat OpenShift Pipelines tkn CLI 以启用 tab 自动完成功能。
5.2.1. 启用 tab 自动完成功能
在安装tkn CLI,可以启用 tab 自动完成功能,以便在按 Tab 键时自动完成tkn命令或显示建议选项。
先决条件
-
已安装
tknCLI。 -
需要在本地系统中安装了
bash-completion。
流程
以下过程为 Bash 启用 tab 自动完成功能。
将 Bash 完成代码保存到一个文件中:
$ tkn completion bash > tkn_bash_completion将文件复制到
/etc/bash_completion.d/:$ sudo cp tkn_bash_completion /etc/bash_completion.d/您也可以将文件保存到一个本地目录,并从您的
.bashrc文件中 source 这个文件。
开新终端时 tab 自动完成功能将被启用。
5.3. OpenShift Pipelines tkn 参考
本节列出了基本的 tkn CLI 命令。
5.3.1. 基本语法
tkn [command or options] [arguments…]
5.3.2. 全局选项
--help, -h
5.3.3. 工具命令
5.3.3.1. tkn
tkn CLI 的主命令。
示例: 显示所有选项
$ tkn5.3.3.2. completion [shell]
输出 shell 完成代码,必须经过评估方可提供互动完成。支持的 shell 是 bash 和 zsh。
示例:bash shell 完成代码
$ tkn completion bash5.3.3.3. version
输出 tkn CLI 的版本信息。
示例: 检查 tkn 版本
$ tkn version5.3.4. Pipelines 管理命令
5.3.4.1. pipeline
管理管道。
示例: 显示帮助信息
$ tkn pipeline --help5.3.4.2. pipeline delete
删除管道。
示例:从命名空间中删除 mypipeline 管道
$ tkn pipeline delete mypipeline -n myspace5.3.4.3. pipeline describe
描述管道。
示例:描述 mypipeline 管道
$ tkn pipeline describe mypipeline5.3.4.4. pipeline list
显示管道列表。
示例:显示管道列表
$ tkn pipeline list5.3.4.5. pipeline logs
显示特定管道的日志。
示例:将 mypipeline 管道的 live 日志流
$ tkn pipeline logs -f mypipeline5.3.4.6. pipeline start
启动管道。
示例:启动 mypipeline 管道
$ tkn pipeline start mypipeline5.3.5. pipeline run 命令
5.3.5.1. pipelinerun
管理管道运行。
示例: 显示帮助信息
$ tkn pipelinerun -h5.3.5.2. pipelinerun cancel
取消管道运行。
示例:取消从命名空间中运行的 mypipelinerun 管道
$ tkn pipelinerun cancel mypipelinerun -n myspace5.3.5.3. pipelinerun delete
删除管道运行。
示例:删除管道从命名空间中运行
$ tkn pipelinerun delete mypipelinerun1 mypipelinerun2 -n myspace示例:删除所有管道从命名空间中运行,但最近执行的管道运行除外
$ tkn pipelinerun delete -n myspace --keep 5 - 1
- 使用您要保留的最新执行的管道运行数量替换
5。
示例:删除所有管道
$ tkn pipelinerun delete --all
从 Red Hat OpenShift Pipelines 1.6 开始,tkn pipelinerun delete --all 命令不会删除处于 running 状态的任何资源。
5.3.5.4. pipelinerun describe
描述管道运行。
示例:描述在命名空间中运行的 mypipelinerun 管道
$ tkn pipelinerun describe mypipelinerun -n myspace5.3.5.5. pipelinerun list
列出管道运行。
示例: 显示在命名空间中运行的管道列表
$ tkn pipelinerun list -n myspace5.3.5.6. pipelinerun logs
显示管道运行的日志。
示例:显示 mypipelinerun 管道运行的日志,其中包含命名空间中的所有任务和步骤
$ tkn pipelinerun logs mypipelinerun -a -n myspace5.3.6. 任务管理命令
5.3.6.1. task
管理任务。
示例: 显示帮助信息
$ tkn task -h5.3.6.2. task delete
删除任务。
示例:从命名空间中删除 mytask1 和 mytask2 任务
$ tkn task delete mytask1 mytask2 -n myspace5.3.6.3. task describe
描述任务。
示例:描述命名空间中的 mytask 任务
$ tkn task describe mytask -n myspace5.3.6.4. task list
列出任务。
示例: 列出命名空间中的所有任务
$ tkn task list -n myspace5.3.6.5. task logs
显示任务日志。
示例:显示 mytask 任务的 mytaskrun 任务运行的日志
$ tkn task logs mytask mytaskrun -n myspace5.3.6.6. task start
启动一个任务。
示例: 在命名空间中启动 mytask 任务
$ tkn task start mytask -s <ServiceAccountName> -n myspace5.3.7. task run 命令
5.3.7.1. taskrun
管理任务运行。
示例: 显示帮助信息
$ tkn taskrun -h5.3.7.2. taskrun cancel
取消任务运行。
示例:取消从命名空间中运行的 mytaskrun 任务
$ tkn taskrun cancel mytaskrun -n myspace5.3.7.3. taskrun delete
删除一个 TaskRun。
示例:从命名空间中删除 mytaskrun1 和 mytaskrun2 任务
$ tkn taskrun delete mytaskrun1 mytaskrun2 -n myspace示例:删除除五个最近执行的任务外从命名空间中运行的所有任务
$ tkn taskrun delete -n myspace --keep 5 - 1
- 将
5替换为您要保留的最新执行任务数量。
5.3.7.4. taskrun describe
描述任务运行。
示例:描述在命名空间中运行的 mytaskrun 任务
$ tkn taskrun describe mytaskrun -n myspace5.3.7.5. taskrun list
列出任务运行。
示例:列出所有任务在命名空间中运行
$ tkn taskrun list -n myspace5.3.7.6. taskrun logs
显示任务运行日志.
示例:显示在命名空间中运行的 mytaskrun 任务的实时日志
$ tkn taskrun logs -f mytaskrun -n myspace5.3.8. 条件管理命令
5.3.8.1. 条件
管理条件(Condition)。
示例: 显示帮助信息
$ tkn condition --help5.3.8.2. 删除条件
删除一个条件。
示例:从命名空间中删除 mycondition1 Condition
$ tkn condition delete mycondition1 -n myspace5.3.8.3. condition describe
描述条件。
示例:在命名空间中描述 mycondition1 Condition
$ tkn condition describe mycondition1 -n myspace5.3.8.4. condition list
列出条件。
示例: 列出命名空间中的条件
$ tkn condition list -n myspace5.3.9. Pipeline 资源管理命令
5.3.9.1. resource
管理管道资源。
示例: 显示帮助信息
$ tkn resource -h5.3.9.2. resource create
创建一个 Pipeline 资源。
示例: 在命名空间中创建一个 Pipeline 资源
$ tkn resource create -n myspace这是一个交互式命令,它要求输入资源名称、资源类型以及基于资源类型的值。
5.3.9.3. resource delete
删除 Pipeline 资源。
示例:从命名空间中删除 myresource Pipeline 资源
$ tkn resource delete myresource -n myspace5.3.9.4. resource describe
描述管道资源。
示例:描述 myresource Pipeline 资源
$ tkn resource describe myresource -n myspace5.3.9.5. resource list
列出管道资源。
示例: 列出命名空间中的所有管道资源
$ tkn resource list -n myspace5.3.10. ClusterTask 管理命令
在 Red Hat OpenShift Pipelines 1.10 中,tkn 命令行工具的 ClusterTask 功能已弃用,计划在以后的发行版本中删除。
5.3.10.1. clustertask
管理 ClusterTasks。
示例: 显示帮助信息
$ tkn clustertask --help5.3.10.2. clustertask delete
删除集群中的 ClusterTask 资源。
示例: 删除 mytask1 和 mytask2 ClusterTasks
$ tkn clustertask delete mytask1 mytask25.3.10.3. clustertask describe
描述 ClusterTask。
示例: 描述 mytask ClusterTask
$ tkn clustertask describe mytask15.3.10.4. clustertask list
列出 ClusterTasks。
示例: 列出 ClusterTasks
$ tkn clustertask list5.3.10.5. clustertask start
启动 ClusterTasks。
示例: 启动 mytask ClusterTask
$ tkn clustertask start mytask5.3.11. 触发器管理命令
5.3.11.1. eventlistener
管理 EventListeners。
示例: 显示帮助信息
$ tkn eventlistener -h5.3.11.2. eventlistener delete
删除一个 EventListener。
示例:删除命令空间中的 mylistener1 和 mylistener2 EventListeners
$ tkn eventlistener delete mylistener1 mylistener2 -n myspace5.3.11.3. eventlistener describe
描述 EventListener。
示例:描述命名空间中的 mylistener EventListener
$ tkn eventlistener describe mylistener -n myspace5.3.11.4. eventlistener list
列出 EventListeners。
示例: 列出命名空间中的所有 EventListeners
$ tkn eventlistener list -n myspace5.3.11.5. eventListener 日志
显示 EventListener 的日志。
示例: 在一个命名空间中显示 mylistener EventListener 的日志
$ tkn eventlistener logs mylistener -n myspace5.3.11.6. triggerbinding
管理 TriggerBindings。
示例: 显示 TriggerBindings 帮助信息
$ tkn triggerbinding -h5.3.11.7. triggerbinding delete
删除 TriggerBinding。
示例:删除一个命名空间中的 mybinding1 和 mybinding2 TriggerBindings
$ tkn triggerbinding delete mybinding1 mybinding2 -n myspace5.3.11.8. triggerbinding describe
描述 TriggerBinding。
示例:描述命名空间中的 mybinding TriggerBinding
$ tkn triggerbinding describe mybinding -n myspace5.3.11.9. triggerbinding list
列出 TriggerBindings。
示例: 列出命名空间中的所有 TriggerBindings
$ tkn triggerbinding list -n myspace5.3.11.10. triggertemplate
管理 TriggerTemplates。
示例: 显示 TriggerTemplate 帮助
$ tkn triggertemplate -h5.3.11.11. triggertemplate delete
删除 TriggerTemplate。
示例:删除命名空间中的 mytemplate1 和 mytemplate2 TriggerTemplates
$ tkn triggertemplate delete mytemplate1 mytemplate2 -n `myspace`5.3.11.12. triggertemplate describe
描述 TriggerTemplate。
示例: 描述命名空间中的 mytemplate TriggerTemplate
$ tkn triggertemplate describe mytemplate -n `myspace`5.3.11.13. triggertemplate list
列出 TriggerTemplates。
示例: 列出命名空间中的所有 TriggerTemplates
$ tkn triggertemplate list -n myspace5.3.11.14. clustertriggerbinding
管理 ClusterTriggerBindings。
示例: 显示 ClusterTriggerBindings 帮助信息
$ tkn clustertriggerbinding -h5.3.11.15. clustertriggerbinding delete
删除 ClusterTriggerBinding。
示例: 删除 myclusterbinding1 和 myclusterbinding2 ClusterTriggerBindings
$ tkn clustertriggerbinding delete myclusterbinding1 myclusterbinding25.3.11.16. clustertriggerbinding describe
描述 ClusterTriggerBinding。
示例: 描述 myclusterbinding ClusterTriggerBinding
$ tkn clustertriggerbinding describe myclusterbinding5.3.11.17. clustertriggerbinding list
列出 ClusterTriggerBindings。
示例: 列出所有 ClusterTriggerBindings
$ tkn clustertriggerbinding list5.3.12. hub 互动命令
与 Tekton Hub 交互,以获取任务和管道等资源。
5.3.12.1. hub
与 hub 交互。
示例: 显示帮助信息
$ tkn hub -h示例:与 hub API 服务器交互
$ tkn hub --api-server https://api.hub.tekton.dev
对于每个示例,若要获取对应的子命令和标记,请运行 tkn hub <command> --help。
5.3.12.2. hub downgrade
对一个安装的资源进行降级。
示例:将 mynamespace 命名空间中的 mytask 任务降级到它的较旧版本
$ tkn hub downgrade task mytask --to version -n mynamespace5.3.12.3. hub get
按名称、类型、目录和版本获取资源清单。
示例:从 tekton 目录中获取 myresource 管道或任务的特定版本的清单
$ tkn hub get [pipeline | task] myresource --from tekton --version version5.3.12.4. hub info
按名称、类型、目录和版本显示资源的信息。
示例:显示 tekton 目录中有关 mytask 任务的特定版本的信息
$ tkn hub info task mytask --from tekton --version version5.3.12.5. hub install
按类型、名称和版本从目录安装资源。
示例:从 mynamespace 命名空间中的 tekton 目录安装 mytask 任务的特定版本
$ tkn hub install task mytask --from tekton --version version -n mynamespace5.3.12.6. hub reinstall
按类型和名称重新安装资源。
示例:从 mynamespace 命名空间中的 tekton 目录重新安装 mytask 任务的特定版本
$ tkn hub reinstall task mytask --from tekton --version version -n mynamespace5.3.12.7. hub search
按名称、类型和标签组合搜索资源。
示例:搜索带有标签 cli的资源
$ tkn hub search --tags cli5.3.12.8. hub upgrade
升级已安装的资源。
示例:将 mynamespace 命名空间中安装的 mytask 任务升级到新版本
$ tkn hub upgrade task mytask --to version -n mynamespace第 6 章 用于 Red Hat OpenShift GitOps 的 GitOps CLI
GitOps argocd CLI 是一个从终端配置和管理 Red Hat OpenShift GitOps 和 Argo CD 资源的工具。
使用 GitOps CLI,您可以使 GitOps 计算任务简单而简洁。您可以在不同的平台上安装此 CLI 工具。
6.1. 安装 GitOps CLI
请参阅安装 GitOps CLI。
第 7 章 opm CLI
7.1. 安装 opm CLI
7.1.1. 关于 opm CLI
opm CLI 工具由 Operator Framework 提供,用于 Operator 捆绑格式。您可以通过此工具从与软件存储库类似的 Operator 捆绑包列表中创建和维护 Operator 目录。其结果是一个容器镜像,它可以存储在容器的 registry 中,然后安装到集群中。
目录包含一个指向 Operator 清单内容的指针数据库,可通过在运行容器镜像时提供的已包含 API 进行查询。在 OpenShift Container Platform 中,Operator Lifecycle Manager (OLM) 可以引用由 CatalogSource 对象定义的目录源中的镜像,它会定期轮询镜像,以对集群上安装的 Operator 进行更新。
7.1.2. 安装 opm CLI
您可以在您的 Linux、macOS 或者 Windows 工作站上安装 opm CLI 工具。
先决条件
对于 Linux,您必须提供以下软件包:RHEL 8 满足以下要求:
-
podman1.9.3+(推荐版本 2.0+) -
glibc版本 2.28+
-
流程
- 进入到 OpenShift 镜像站点并下载与您的操作系统匹配的 tarball 的最新版本。
解包存档。
对于 Linux 或者 macOS:
$ tar xvf <file>- 对于 Windows,使用 ZIP 程序解压存档。
将文件放在
PATH中的任何位置。对于 Linux 或者 macOS:
检查
PATH:$ echo $PATH移动文件。例如:
$ sudo mv ./opm /usr/local/bin/
对于 Windows:
检查
PATH:C:\> path移动文件:
C:\> move opm.exe <directory>
验证
安装
opmCLI 后,验证是否可用:$ opm version
7.2. opm CLI 参考
opm 命令行界面 (CLI) 是用于创建和维护 Operator 目录的工具。
opm CLI 语法
$ opm <command> [<subcommand>] [<argument>] [<flags>]| 标记 | 描述 |
|---|---|
|
| 在拉取捆绑包或索引时跳过容器镜像 registry 的 TLS 证书验证。 |
|
| 在拉取捆绑包时,将普通 HTTP 用于容器镜像 registry。 |
基于 SQLite 的目录格式(包括相关的 CLI 命令)是一个弃用的功能。弃用的功能仍然包含在 OpenShift Container Platform 中,并将继续被支持。但是,这个功能会在以后的发行版本中被删除,且不建议在新的部署中使用。
有关 OpenShift Container Platform 中已弃用或删除的主要功能的最新列表,请参阅 OpenShift Container Platform 发行注记中已弃用和删除的功能部分。
7.2.1. generate
为声明性配置索引生成各种工件。
命令语法
$ opm generate <subcommand> [<flags>]| 子命令 | 描述 |
|---|---|
|
| 为声明性配置索引生成 Dockerfile。 |
| 标记 | 描述 |
|---|---|
|
| 生成帮助信息。 |
7.2.1.1. dockerfile
为声明性配置索引生成 Dockerfile。
此命令在与 <dcRootDir> (名为 <dcDirName>.Dockerfile)相同的目录中创建 Dockerfile,用于构建索引。如果存在具有相同名称的 Dockerfile,这个命令会失败。
当指定额外标签时,如果存在重复的键,则只有每个重复键的最后值都会添加到生成的 Dockerfile 中。
命令语法
$ opm generate dockerfile <dcRootDir> [<flags>]| 标记 | 描述 |
|---|---|
|
|
要构建目录的镜像。默认值为 |
|
|
生成的 Dockerfile 中包含的额外标签。标签的格式为 |
|
| Dockerfile 帮助。 |
要使用官方红帽镜像构建,请使用带有值为 registry.redhat.io/openshift4/ose-operator-registry:v4.14 的 -i 标志。
7.2.2. index
从预先存在的 Operator 捆绑包中为 SQLite 数据库格式容器镜像生成 Operator 索引。
从 OpenShift Container Platform 4.11 开始,默认的红帽提供的 Operator 目录以基于文件的目录格式发布。通过以过时的 SQLite 数据库格式发布的 4.10,用于 OpenShift Container Platform 4.6 的默认红帽提供的 Operator 目录。
与 SQLite 数据库格式相关的 opm 子命令、标志和功能已被弃用,并将在以后的版本中删除。功能仍被支持,且必须用于使用已弃用的 SQLite 数据库格式的目录。
许多 opm 子命令和标志都用于 SQLite 数据库格式,如 opm index prune,它们无法使用基于文件的目录格式。
有关使用基于文件的目录的更多信息,请参阅"添加资源"。
命令语法
$ opm index <subcommand> [<flags>]| 子命令 | 描述 |
|---|---|
|
| 将 Operator 捆绑包添加到索引中。 |
|
| 修剪除指定软件包以外的所有索引。 |
|
| 修剪没有与特定镜像关联的分级捆绑包索引。 |
|
| 从索引中删除整个 Operator。 |
7.2.2.1. add
将 Operator 捆绑包添加到索引中。
命令语法
$ opm index add [<flags>]| 标记 | 描述 |
|---|---|
|
|
on-image |
|
|
构建容器镜像的工具: |
|
| 要添加的捆绑包的逗号分隔列表。 |
|
|
与容器镜像交互的工具,如保存和构建: |
|
| 要添加到的上一个索引。 |
|
| 如果启用,则仅创建 Dockerfile 并将其保存到本地磁盘。 |
|
|
图形更新模式,用来定义通频道图形如何被更新: |
|
| 可选:如果生成 Dockerfile,请指定一个文件名。 |
|
| 允许 registry 加载错误。 |
|
|
拉取容器镜像的工具: |
|
| 正在构建的容器镜像的自定义标签。 |
7.2.2.2. prune
修剪除指定软件包以外的所有索引。
命令语法
$ opm index prune [<flags>]| 标记 | 描述 |
|---|---|
|
|
on-image |
|
|
与容器镜像交互的工具,如保存和构建: |
|
| 到修剪的索引。 |
|
| 如果启用,则仅创建 Dockerfile 并将其保存到本地磁盘。 |
|
| 可选:如果生成 Dockerfile,请指定一个文件名。 |
|
| 要保留的软件包用逗号隔开。 |
|
| 允许 registry 加载错误。 |
|
| 正在构建的容器镜像的自定义标签。 |
7.2.2.3. prune-stranded
修剪没有与特定镜像关联的分级捆绑包索引。
命令语法
$ opm index prune-stranded [<flags>]| 标记 | 描述 |
|---|---|
|
|
on-image |
|
|
与容器镜像交互的工具,如保存和构建: |
|
| 到修剪的索引。 |
|
| 如果启用,则仅创建 Dockerfile 并将其保存到本地磁盘。 |
|
| 可选:如果生成 Dockerfile,请指定一个文件名。 |
|
| 要保留的软件包用逗号隔开。 |
|
| 允许 registry 加载错误。 |
|
| 正在构建的容器镜像的自定义标签。 |
7.2.2.4. rm
从索引中删除整个 Operator。
命令语法
$ opm index rm [<flags>]| 标记 | 描述 |
|---|---|
|
|
on-image |
|
|
构建容器镜像的工具: |
|
|
与容器镜像交互的工具,如保存和构建: |
|
| 从中删除的以前索引。 |
|
| 如果启用,则仅创建 Dockerfile 并将其保存到本地磁盘。 |
|
| 要删除的用逗号分开的 Operator 列表。 |
|
| 可选:如果生成 Dockerfile,请指定一个文件名。 |
|
| 要保留的软件包用逗号隔开。 |
|
| 允许 registry 加载错误。 |
|
|
拉取容器镜像的工具: |
|
| 正在构建的容器镜像的自定义标签。 |
7.2.3. init
生成 olm.package 声明性配置 blob。
命令语法
$ opm init <package_name> [<flags>]| 标记 | 描述 |
|---|---|
|
| 如果未指定,订阅的频道将默认为。 |
|
|
Operator 的 |
|
| 软件包图标的路径. |
|
|
输出格式: |
7.2.4. migrate
将 SQLite 数据库格式索引镜像或数据库文件迁移到基于文件的目录。
基于 SQLite 的目录格式(包括相关的 CLI 命令)是一个弃用的功能。弃用的功能仍然包含在 OpenShift Container Platform 中,并将继续被支持。但是,这个功能会在以后的发行版本中被删除,且不建议在新的部署中使用。
有关 OpenShift Container Platform 中已弃用或删除的主要功能的最新列表,请参阅 OpenShift Container Platform 发行注记中已弃用和删除的功能部分。
命令语法
$ opm migrate <index_ref> <output_dir> [<flags>]| 标记 | 描述 |
|---|---|
|
|
输出格式: |
7.2.5. render
从提供的索引镜像、捆绑包镜像和 SQLite 数据库文件生成声明性配置 blob。
命令语法
$ opm render <index_image | bundle_image | sqlite_file> [<flags>]| 标记 | 描述 |
|---|---|
|
|
输出格式: |
7.2.6. serve
通过 GRPC 服务器提供声明配置。
声明性配置目录在启动时由 serving 命令加载。此命令启动后对声明配置所做的更改不会反映在提供的内容中。
命令语法
$ opm serve <source_path> [<flags>]| 标记 | 描述 |
|---|---|
|
| 如果设置了此标志,它会同步并保留服务器缓存目录。 |
|
|
如果缓存不存在或无效,则退出并显示错误。当设置了 |
|
| 同步服务缓存,并在没有服务的情况下退出。 |
|
| 启用调试日志记录。 |
|
| 服务帮助。 |
|
|
服务的端口号。默认值为 |
|
|
启动性能分析端点的地址。格式为 |
|
|
容器终止日志文件的路径。默认值为 |
7.2.7. validate
验证给定目录中声明性配置 JSON 文件。
命令语法
$ opm validate <directory> [<flags>]第 8 章 Operator SDK
8.1. 安装 Operator SDK CLI
Operator SDK 提供了一个命令行界面(CLI)工具,Operator 开发人员可使用它来构建、测试和部署 Operator。您可以在工作站上安装 Operator SDK CLI,以便准备开始编写自己的 Operator。
具有集群管理员访问权限的 operator 作者(如 OpenShift Container Platform)可以使用 Operator SDK CLI 根据 Go、Ansible、Java 或 Helm 开发自己的 Operator。Kubebuilder 作为基于 Go 的 Operator 的构建解决方案嵌入到 Operator SDK 中,这意味着现有的 Kubebuilder 项目可以象 Operator SDK 一样使用并继续工作。如需有关 Operator SDK 的完整文档,请参阅 Developing Operators。
OpenShift Container Platform 4.14 支持 Operator SDK 1.31.0。
8.1.1. 在 Linux 上安装 Operator SDK CLI
您可以在 Linux 上安装 OpenShift SDK CLI 工具。
先决条件
- Go v1.19+
-
dockerv17.03+、podmanv1.9.3+ 或buildahv1.7+
流程
- 进入到 OpenShift 镜像站点。
- 从最新的 4.14 目录中,下载适用于 Linux 的 tarball 的最新版本。
解包存档:
$ tar xvf operator-sdk-v1.31.0-ocp-linux-x86_64.tar.gz使文件可执行:
$ chmod +x operator-sdk将提取的
operator-sdk二进制文件移到PATH中的一个目录中。提示检查
PATH:$ echo $PATH$ sudo mv ./operator-sdk /usr/local/bin/operator-sdk
验证
安装 Operator SDK CLI 后,验证它是否可用:
$ operator-sdk version输出示例
operator-sdk version: "v1.31.0-ocp", ...
8.1.2. 在 macOS 上安装 Operator SDK CLI
您可以在 macOS 上安装 OpenShift SDK CLI 工具。
先决条件
- Go v1.19+
-
dockerv17.03+、podmanv1.9.3+ 或buildahv1.7+
流程
-
对于
amd64和arm64架构,分别进入amd64集成架构的 OpenShift 镜像站点和arm64基础架构的 OpenShift 镜像站点。 - 从最新的 4.14 目录中,下载 macOS 的 tarball 的最新版本。
运行以下命令,为
amd64架构解包 Operator SDK 归档:$ tar xvf operator-sdk-v1.31.0-ocp-darwin-x86_64.tar.gz运行以下命令,为
arm64架构解包 Operator SDK 归档:$ tar xvf operator-sdk-v1.31.0-ocp-darwin-aarch64.tar.gz运行以下命令使文件可执行:
$ chmod +x operator-sdk运行以下命令,将提取的
operator-sdk二进制文件移到PATH上的目录中:提示运行以下命令检查
PATH:$ echo $PATH$ sudo mv ./operator-sdk /usr/local/bin/operator-sdk
验证
安装 Operator SDK CLI 后,运行以下命令验证是否可用:
$ operator-sdk version输出示例
operator-sdk version: "v1.31.0-ocp", ...
8.2. Operator SDK CLI 参考
Operator SDK 命令行界面(CLI)是一个开发组件,旨在更轻松地编写 Operator。
operator SDK CLI 语法
$ operator-sdk <command> [<subcommand>] [<argument>] [<flags>]如需有关 Operator SDK 的完整文档,请参阅 Developing Operators。
8.2.1. bundle
operator-sdk bundle 命令管理 Operator 捆绑包元数据。
8.2.1.1. validate
bundle validate 子命令会验证 Operator 捆绑包。
| 标记 | 描述 |
|---|---|
|
|
|
|
|
拉取和解包捆绑包镜像的工具。仅在验证捆绑包镜像时使用。可用选项是 |
|
| 列出所有可用的可选验证器。设置后,不会运行验证器。 |
|
|
选择要运行的可选验证器的标签选择器。当使用 |
8.2.2. cleanup
operator-sdk cleanup 命令会销毁并删除为通过 run 命令部署的 Operator 创建的资源。
| 标记 | 描述 |
|---|---|
|
|
|
|
|
用于 CLI 请求的 |
|
| 如果存在,代表在其中运行 CLI 请求的命名空间。 |
|
|
失败前,等待命令完成的时间。默认值为 |
8.2.3. completion
operator-sdk completion 命令生成 shell completion,以便更迅速、更轻松地发出 CLI 命令。
| 子命令 | 描述 |
|---|---|
|
| 生成 bash completion。 |
|
| 生成 zsh completion。 |
| 标记 | 描述 |
|---|---|
|
| 使用方法帮助输出。 |
例如:
$ operator-sdk completion bash输出示例
# bash completion for operator-sdk -*- shell-script -*-
...
# ex: ts=4 sw=4 et filetype=sh8.2.4. create
operator-sdk create 命令用于创建或 scaffold Kubernetes API。
8.2.4.1. api
create api 子命令构建 Kubernetes API。子命令必须在 init 命令初始化的项目中运行。
| 标记 | 描述 |
|---|---|
|
|
|
8.2.5. generate
operator-sdk generate 命令调用特定的生成器来生成代码或清单。
8.2.5.1. bundle
generate bundle 子命令为您的 Operator 项目生成一组捆绑包清单、元数据和 bundle.Dockerfile 文件。
通常,您首先运行 generate kustomize manifests 子命令来生成由 generate bundle 子命令使用的输入 Kustomize 基础。但是,您可以使用初始项目中的 make bundle 命令按顺序自动运行这些命令。
| 标记 | 描述 |
|---|---|
|
|
捆绑包所属频道的以逗号分隔的列表。默认值为 |
|
|
|
|
| 捆绑包的默认频道。 |
|
|
Operator 清单的根目录,如部署和 RBAC。这个目录与传递给 |
|
|
|
|
|
从中读取现有捆绑包的目录。这个目录是捆绑包 |
|
|
包含 Kustomize 基础的目录以及用于捆绑包清单的 |
|
| 生成捆绑包清单。 |
|
| 生成捆绑包元数据和 Dockerfile。 |
|
| 将捆绑包写入的目录。 |
|
|
如果捆绑包元数据和 Dockerfile 存在,则覆盖它们。默认值为 |
|
| 捆绑包的软件包名称。 |
|
| 在静默模式下运行。 |
|
| 将捆绑包清单写入标准输出。 |
|
| 生成的捆绑包中的 Operator 语义版本。仅在创建新捆绑包或升级 Operator 时设置。 |
8.2.5.2. kustomize
generate kustomize 子命令包含为 Operator 生成 Kustomize 数据的子命令。
8.2.5.2.1. 清单
generate kustomize manifests 子命令生成或重新生成 Kustomize 基础以及 config/manifests 目录中的 kustomization.yaml 文件,用于其他 Operator SDK 命令构建捆绑包清单。在默认情况下,这个命令会以互动方式询问 UI 元数据,即清单基础的重要组件,除非基础已存在或设置了 --interactive=false 标志。
| 标记 | 描述 |
|---|---|
|
| API 类型定义的根目录。 |
|
|
|
|
| 包含现有 Kustomize 文件的目录。 |
|
|
当设置为 |
|
| 写入 Kustomize 文件的目录。 |
|
| 软件包名称。 |
|
| 在静默模式下运行。 |
8.2.6. init
operator-sdk init 命令初始化 Operator 项目,并为给定插件生成或 scaffolds 默认项目目录布局。
这个命令会写入以下文件:
- boilerplate 许可证文件
-
带有域和库的
PROJECT文件 -
构建项目的
Makefile -
go.mod文件带有项目依赖项 -
用于自定义清单的
kustomization.yaml文件 - 用于为管理器清单自定义镜像的补丁文件
- 启用 Prometheus 指标的补丁文件
-
运行的
main.go文件
| 标记 | 描述 |
|---|---|
|
|
|
|
|
插件的名称和可选版本,用于初始化项目。可用插件包括 |
|
|
项目版本。可用值为 |
8.2.7. run
operator-sdk run 命令提供可在各种环境中启动 Operator 的选项。
8.2.7.1. bundle
run bundle 子命令使用 Operator Lifecycle Manager(OLM)以捆绑包格式部署 Operator。
| 标记 | 描述 |
|---|---|
|
|
在其中注入捆绑包的索引镜像。默认镜像为 |
|
|
安装 Operator 的集群服务版本(CSV)支持的模式,如 |
|
|
安装超时。默认值为 |
|
|
用于 CLI 请求的 |
|
| 如果存在,代表在其中运行 CLI 请求的命名空间。 |
|
|
指定用于目录 pod 的安全上下文。允许的值包括 |
|
|
|
-
restricted安全上下文与default命名空间不兼容。要在生产环境中配置 Operator 的 pod 安全准入,请参阅"Complying with pod 安全准入"。如需有关 pod 安全准入的更多信息,请参阅"了解和管理 pod 安全准入"。
8.2.7.2. bundle-upgrade
run bundle-upgrade 子命令升级之前使用 Operator Lifecycle Manager(OLM)以捆绑包格式安装的 Operator。
| 标记 | 描述 |
|---|---|
|
|
升级超时。默认值为 |
|
|
用于 CLI 请求的 |
|
| 如果存在,代表在其中运行 CLI 请求的命名空间。 |
|
|
指定用于目录 pod 的安全上下文。允许的值包括 |
|
|
|
-
restricted安全上下文与default命名空间不兼容。要在生产环境中配置 Operator 的 pod 安全准入,请参阅"Complying with pod 安全准入"。如需有关 pod 安全准入的更多信息,请参阅"了解和管理 pod 安全准入"。
8.2.8. scorecard
operator-sdk scorecard 命令运行 scorecard 工具来验证 Operator 捆绑包并提供改进建议。该命令使用一个参数,可以是捆绑包镜像,也可以是包含清单和元数据的目录。如果参数包含镜像标签,则镜像必须远程存在。
| 标记 | 描述 |
|---|---|
|
|
scorecard 配置文件的路径。默认路径为 |
|
|
|
|
|
|
|
| 列出哪些测试可以运行。 |
|
| 运行测试镜像的命名空间。 |
|
|
结果的输出格式。可用值为 |
|
|
使用指定安全上下文运行 scorecard 的选项。允许的值包括 |
|
| 标识选择器以确定要运行哪个测试。 |
|
|
用于测试的服务帐户。默认值为 |
|
| 运行测试后禁用资源清理。 |
|
|
等待测试完成的时间,如 |
-
restricted安全上下文与default命名空间不兼容。要在生产环境中配置 Operator 的 pod 安全准入,请参阅"Complying with pod 安全准入"。如需有关 pod 安全准入的更多信息,请参阅"了解和管理 pod 安全准入"。
Legal Notice
Copyright © Red Hat
OpenShift documentation is licensed under the Apache License 2.0 (https://www.apache.org/licenses/LICENSE-2.0).
Modified versions must remove all Red Hat trademarks.
Portions adapted from https://github.com/kubernetes-incubator/service-catalog/ with modifications by Red Hat.
Red Hat, Red Hat Enterprise Linux, the Red Hat logo, the Shadowman logo, JBoss, OpenShift, Fedora, the Infinity logo, and RHCE are trademarks of Red Hat, Inc., registered in the United States and other countries.
Linux® is the registered trademark of Linus Torvalds in the United States and other countries.
Java® is a registered trademark of Oracle and/or its affiliates.
XFS® is a trademark of Silicon Graphics International Corp. or its subsidiaries in the United States and/or other countries.
MySQL® is a registered trademark of MySQL AB in the United States, the European Union and other countries.
Node.js® is an official trademark of the OpenJS Foundation.
The OpenStack® Word Mark and OpenStack logo are either registered trademarks/service marks or trademarks/service marks of the OpenStack Foundation, in the United States and other countries and are used with the OpenStack Foundation’s permission. We are not affiliated with, endorsed or sponsored by the OpenStack Foundation, or the OpenStack community.
All other trademarks are the property of their respective owners.