此内容没有您所选择的语言版本。
Chapter 2. Using AMQ Management Console
AMQ Management Console is a web console included in the AMQ Broker installation that enables you to use a web browser to manage AMQ Broker.
AMQ Management Console is based on hawtio.
2.1. Overview
AMQ Broker is a full-featured, message-oriented middleware broker. It offers specialized queueing behaviors, message persistence, and manageability. It supports multiple protocols and client languages, freeing you to use many of your application assets.
AMQ Broker’s key features allow you to:
monitor your AMQ brokers and clients
- view the topology
- view network health at a glance
manage AMQ brokers using:
- AMQ Management Console
- Command-line Interface (CLI)
- Management API
The supported web browsers for AMQ Management Console are Firefox, Chrome, and Internet Explorer. For more information on supported browser versions, see AMQ 7 Supported Configurations.
The procedure in this section shows how to configure local and remote access to AMQ Management Console.
Remote access to the console can take one of two forms:
- Within a console session on a local broker, you use the Connect tab to connect to another, remote broker
- From a remote host, you connect to the console for the local broker, using an externally-reachable IP address for the local broker
Prerequisites
-
You must upgrade to at least AMQ Broker 7.1.0. As part of this upgrade, an access-management configuration file named
jolokia-access.xmlis added to the broker instance. For more information about upgrading, see Upgrading a Broker instance from 7.0.x to 7.1.0.
Procedure
-
Open the
<broker-instance-dir>/etc/bootstrap.xmlfile. Within the
webelement, observe that the web port is bound only tolocalhostby default.Copy to Clipboard Copied! Toggle word wrap Toggle overflow To enable connection to the console for the local broker from a remote host, change the web port binding to a network-reachable interface. For example:
<web bind="http://0.0.0.0:8161" path="web">
<web bind="http://0.0.0.0:8161" path="web">Copy to Clipboard Copied! Toggle word wrap Toggle overflow In the preceding example, by specifying
0.0.0.0, you bind the web port to all interfaces on the local broker.-
Save the
bootstrap.xmlfile. -
Open the
<broker-instance-dir>/etc/jolokia-access.xmlfile. Within the
<cors>(that is, Cross-Origin Resource Sharing) element, add anallow-originentry for each HTTP origin request header that you want to allow to access the console. For example:Copy to Clipboard Copied! Toggle word wrap Toggle overflow In the preceding configuration, you specify that the following connections are allowed:
Connection from the local host (that is, the host machine for your local broker instance) to the console.
-
The first wildcard character,
*, allows either thehttporhttpsscheme to be specified in the connection request, based on whether you have configured the console for secure connections. -
The second wildcard character,
*, allows any port on the host machine to be used for the connection.
-
The first wildcard character,
-
Connection from a remote host to the console for the local broker, using the externally-reachable IP address of the local broker. In this case, the externally-reachable IP address of the local broker is
192.168.0.49. -
Connection from within a console session opened on another, remote broker to the local broker. In this case, the IP address of the remote broker is
192.168.0.51.
-
Save the
jolokia-access.xmlfile. -
Open the
<broker-instance-dir>/etc/artemis.profilefile. Add a new argument,
Dhawtio.proxyWhitelist, to theJAVA_ARGSlist of Java system arguments. As a comma-separated list, specify IP addresses for any remote brokers that you want to connect to from the local broker (that is, by using the Connect tab within a console session running on the local broker). For example:-Dhawtio.proxyWhitelist=192.168.0.51
-Dhawtio.proxyWhitelist=192.168.0.51Copy to Clipboard Copied! Toggle word wrap Toggle overflow Based on the preceding configuration, you can use the Connect tab within a console session on the local broker to connect to another, remote broker with an IP address of
192.168.0.51.-
Save the
aretmis.profilefile.
Additional resources
- To learn how to access the console, see Section 2.3, “Accessing AMQ Management Console”.
For more information about:
- Cross-Origin Resource Sharing, see W3C Recommendations.
- Jolokia security, see Jolokia Protocols.
- Securing connections to the console, see Section 2.4.2, “Securing network access to AMQ Management Console”.
2.3. Accessing AMQ Management Console
The procedure in this section shows how to:
- Connect to the console from the local broker
- Connect to remote hosts (that is, other brokers) from within a console session on the local broker
- Connect to the console for the local broker from a remote host
Prerequisites
- You must have already configured local and remote access to the console. For more information, see Section 2.2, “Configuring local and remote access to AMQ Management Console”.
Procedure
In your web browser, navigate to the console address for the local broker.
The console address is
http://<host:port>/console/login. If you are using the default address, navigate to http://localhost:8161/console/login.- Log in to AMQ Management Console using the default user name and password that you created when you created the broker.
- To connect to another, remote broker from the console session of the local broker, click the Connect tab.
In the Connection Settings section, specify the following:
- Name
-
Name for the remote connection, for example,
my_other_broker. - Scheme
-
Protocol to use for the remote connection. Select
httpfor a non-secured connection, orhttpsfor a secured connection. - Host
- IP address of a remote host. You must have already configured console access for this remote host.
- Port
-
Port on the local host to use for the remote connection. You should use the default value of
8161. This is the default HTTP port in AMQ 7. - Path
-
Path to use for console access. Specify
console/jolokia. - User name
- User name for connection to the Jolokia endpoint on the remote host.
- Password
- Password for connection to the Jolokia endpoint on the remote host.
To connect to the console for the local broker from a remote host, specify the Jolokia endpoint for the local broker in a web browser. This endpoint includes the externally-reachable IP address that you specified for the local broker when configuring remote console access. For example:
http://192.168.0.49/console/jolokia
http://192.168.0.49/console/jolokiaCopy to Clipboard Copied! Toggle word wrap Toggle overflow
Additional resources
- For more information on getting started with the broker, see Starting the broker in Getting Started with AMQ Broker.
2.4. Configuring AMQ Management Console
Configure user access and request access to resources on the broker.
2.4.1. Setting up user access to AMQ Management Console
You can access AMQ Management Console using the broker login credentials. The following table provides information about different methods to add additional broker users to access AMQ Management Console:
| Authentication Method | Description |
|---|---|
| Guest authentication | Enables anonymous access. In this configuration, any user who connects without credentials or with the wrong credentials will be authenticated automatically and assigned a specific user and role. For more information, see Enabling Guest Access in Configuring AMQ Broker. |
| Basic user and password authentication | For each user, you must define a username and password and assign a security role. Users can only log into AMQ Management Console using these credentials. For more information, see Enabling Password Authentication in Configuring AMQ Broker. |
| LDAP authentication | Users are authenticated and authorized by checking the credentials against user data stored in a central X.500 directory server. For more information, see Adding Certificate-Based Authentication in Configuring AMQ Broker. |
2.4.2. Securing network access to AMQ Management Console
To secure AMQ Management Console when the console is being accessed over a WAN or the internet, use SSL to specify that network access uses https instead of http.
Prerequisites
The following should be located in the <broker-instance-dir>/etc/ directory:
- Java key store
- Java trust store (needed only if you require client authentication)
Procedure
-
Open the
<broker-instance-dir>/etc/bootstrap.xmlfile. In the
<web>element, add the following attributes:Copy to Clipboard Copied! Toggle word wrap Toggle overflow - bind
-
For secure connections to the console, change the URI scheme to
https. - keyStorePath
Path of the keystore file. For example:
keyStorePath="<broker-instance-dir>/etc/keystore.jks"
keyStorePath="<broker-instance-dir>/etc/keystore.jks"Copy to Clipboard Copied! Toggle word wrap Toggle overflow - keyStorePassword
- Key store password. This password can be encrypted.
- clientAuth
-
Specifies whether client authentication is required. The default value is
false. - trustStorePath
-
Path of the trust store file. You need to define this attribute only if
clientAuthis set totrue. - trustStorePassword
- Trust store password. This password can be encrypted.
Additional resources
-
For more information about encrypting passwords in broker configuration files, including
bootstrap.xml, see Encrypting Passwords in Configuration Files.
2.5. Monitoring your AMQ Broker deployment
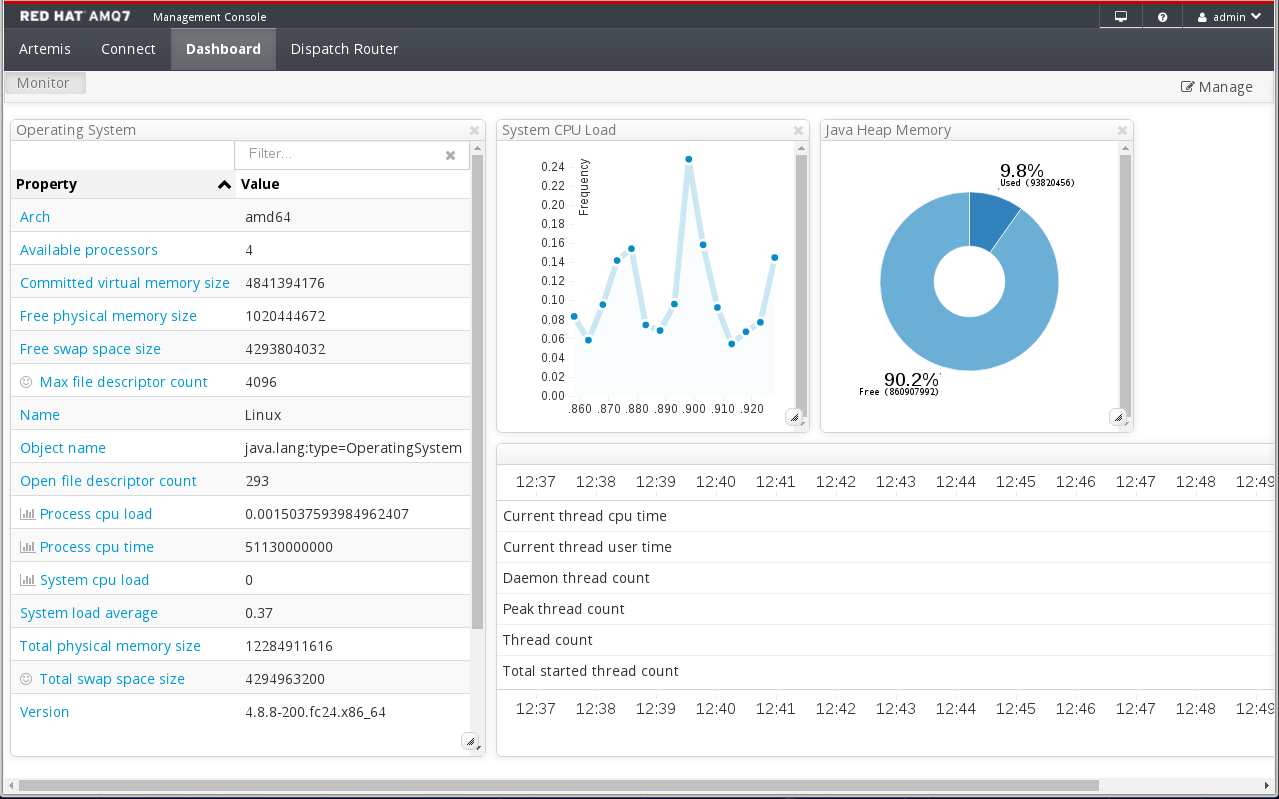
You can use the AMQ Management Console dashboard page to monitor the status of AMQ Broker. You can also create your own dashboards to display the real-time charts, diagrams, and metrics most important to you.
2.5.1. Viewing a dashboard
Dashboards provide you with real-time data about your AMQ Broker environment.
Procedure
In AMQ Management Console, click the Dashboard tab.
The
Monitordashboard appears, displaying real-time data about hawtio.- To switch to a different dashboard, click the dashboard tab.
2.5.2. Creating a new dashboard
Dashboards contain widgets, each of which can display a chart, diagram, or metrics. You can create as many dashboards as needed.
Procedure
- In AMQ Management Console, click the Dashboard tab.
On the navigation bar, click Manage.
NoteThe
Managepage appears displaying a list of existing dashboards.Do one of the following:
Expand To… Do this… Create a new, blank dashboard
Click Create.
Create a dashboard similar to an existing dashboard
- Click the checkbox next to an existing dashboard.
- Click Duplicate.
To change the name of the dashboard:
-
Hover over the dashboard name and click the pencil icon (
 ).
).
-
Enter a new name for the dashboard and then click the checkmark icon (
 ).
).
-
Hover over the dashboard name and click the pencil icon (
2.5.3. Creating AMQ Broker dashboards
You can create new dashboards to display real-time data for AMQ Broker.
Add any of the available queue and topic charts to a dashboard.
Procedure
- Click the Artemis tab.
On the navigation bar, click the add icon (
 ).
).
The
Dashboardtab appears, displaying a list of available dashboards.- Select the dashboard (or dashboards) which you want the chart to appear, and then click Add View To Dashboard. The chart is added to the dashboards you selected.
2.5.5. Changing the layout of a dashboard
Dashboards contain widgets, which display metrics, diagrams, and charts. You can change the way these widgets are displayed on a dashboard.
| To… | Do this… |
|---|---|
| Move or rearrange widgets | Click and drag a widget to a new position on the dashboard. |
| Change the title of a widget |
|
| Resize a widget |
In the bottom-right corner of the widget, click and drag the resize icon (
|
| Remove a widget from the dashboard |
In the widget’s title bar, click the close icon (
|
2.6. Managing AMQ Broker
You can use AMQ Management Console to view important information about AMQ Broker brokers and manage the following resources:
- Incoming network connections (acceptors)
- Addresses
- Queues
2.6.1. Viewing details about the broker
View configuration properties and their values to see how the broker is configured.
Procedure
On the Artemis tab, in the folder tree, select a broker.
A list of configuration properties are displayed for the broker.
Connections- Displays information about the client connections.
Sessions- Displays information about the client sessions.
Consumers- Displays information about the client consumers.
Producers- Displays information about the session producers.
Addresses- Displays information about the addresses.
Queues- Displays information about the queues.
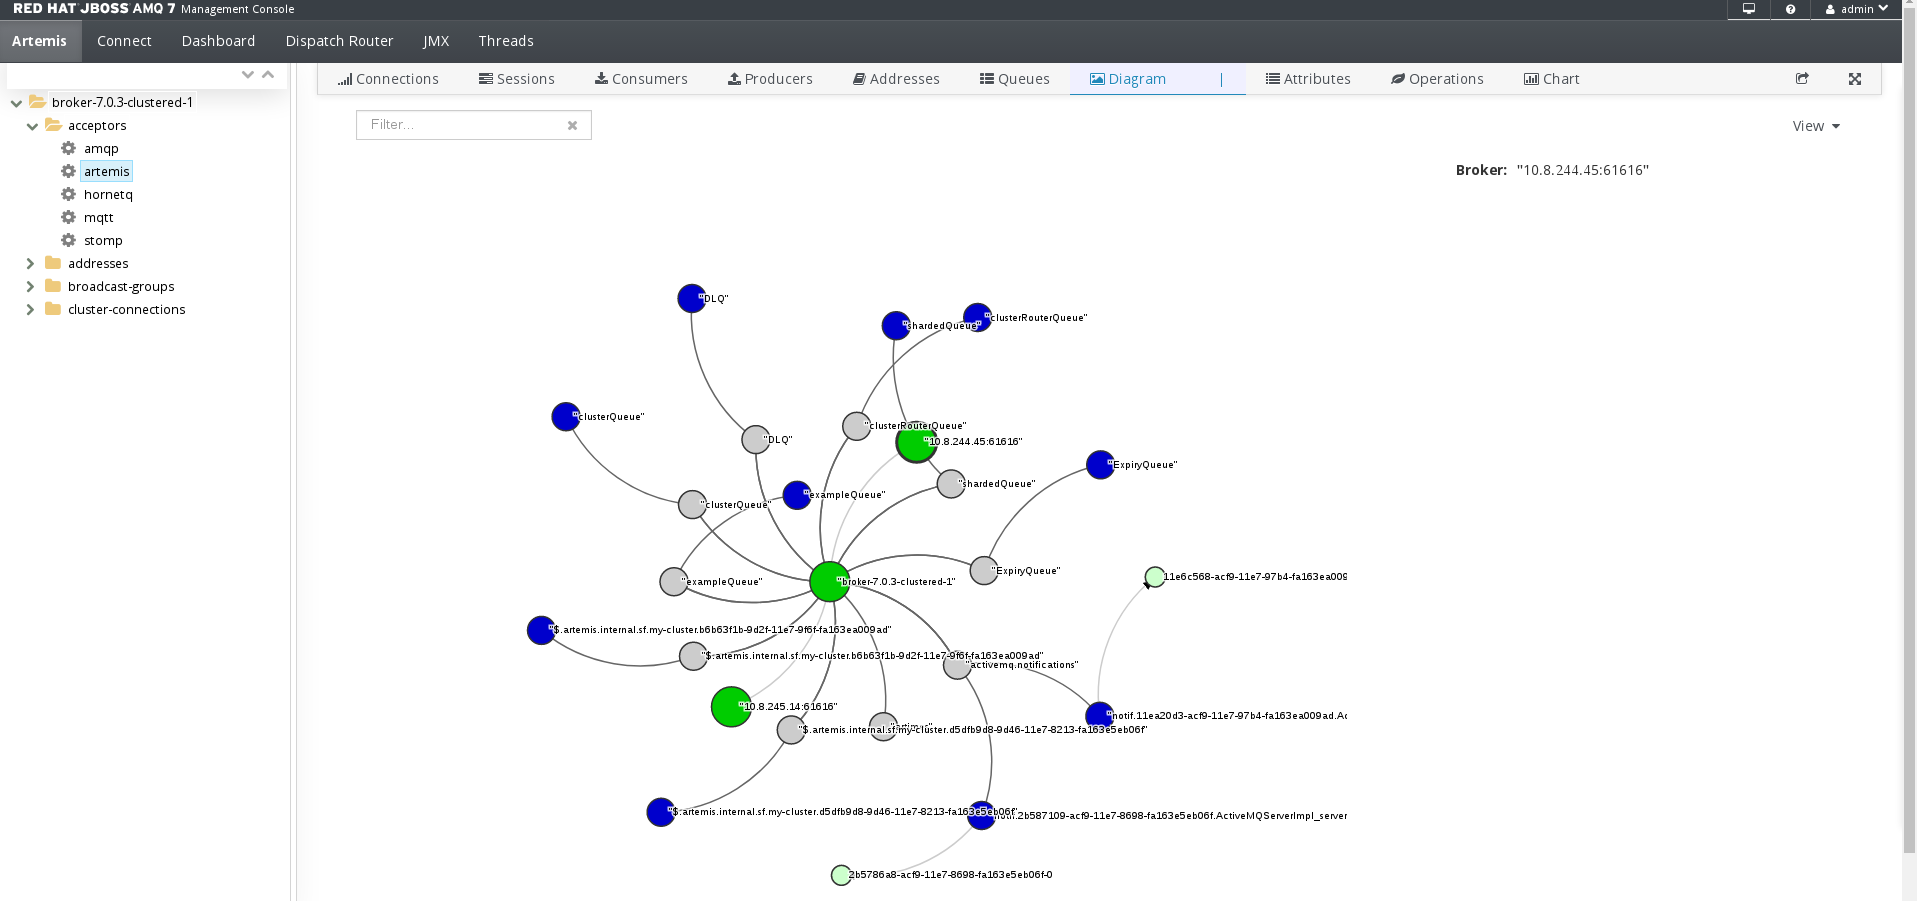
Diagrams- Displays diagram of all AMQ Broker resources in your topology, including brokers (masters and slaves), producers and consumers, addresses, and queues.
Attributes- Displays information about the configured attributes.
Operations- Displays information about the operations that can be executed on the server.
Chart- Displays real-time data for the selected attributes.
2.6.2. Viewing the broker diagram
You can view a diagram of all AMQ Broker resources in your topology, including brokers (masters and slaves), producers and consumers, addresses, and queues.
Procedure
On the Artemis tab, click Diagram.
This example shows three brokers with 10 queues.
- To change what objects are displayed on the diagram, click the View drop-down and select the items that you want to be displayed.
2.6.3. Viewing acceptors
You can view details about the acceptors configured for the broker.
Procedure
- On the Artemis tab, in the folder tree, expand the acceptors folder.
Click an acceptor to view details about how it is configured.
This example shows the configuration properties for the
amqpacceptor, which is the default acceptor provided for the AMQP protocol:
2.6.4. Managing addresses and queues
An address represents a messaging endpoint. Within the configuration, a typical address is given a unique name.
A queue is associated with an address. There can be multiple queues per address. Once an incoming message is matched to an address, the message is sent on to one or more of its queues, depending on the routing type configured. Queues can be configured to be automatically created and deleted.
2.6.4.1. Creating addresses
A typical address is given a unique name, 0 or more queues, and a routing type.
A routing type determines how messages are sent to the queues associated with an address. Addresses can be configured with two different routing types.
| If you want your messages routed to… | Use this routing type… |
| A single queue within the matching address, in a point-to-point manner. | Anycast |
| Every queue within the matching address, in a publish-subscribe manner. | Multicast |
You can create and configure addresses and queues, and then delete them when they are no longer in use.
Procedure
- In the folder tree, select a broker.
On the navigation bar, click
 drop-down icon, and then click Create.
A page appears for creating an address.
Complete the following fields:
Address name- The routing name of the address.
Routing type- Select one of the following options:
Multicast- Messages sent to this address will be distributed to all subscribers in a publish-subscribe manner.
Anycast- Messages sent to this address will be distributed to only one subscriber in a point-to-point manner.
Both- Enables you to define more than one routing type per address. This typically results in an anti-pattern and is therefore not recommended.
NoteIf an address does use both routing types, however, and the client does not show a preference for either one, the broker typically defaults to the
anycastrouting type. The one exception is when the client uses the MQTT protocol. In that case, the default routing type ismulticast.- Click Create Address.
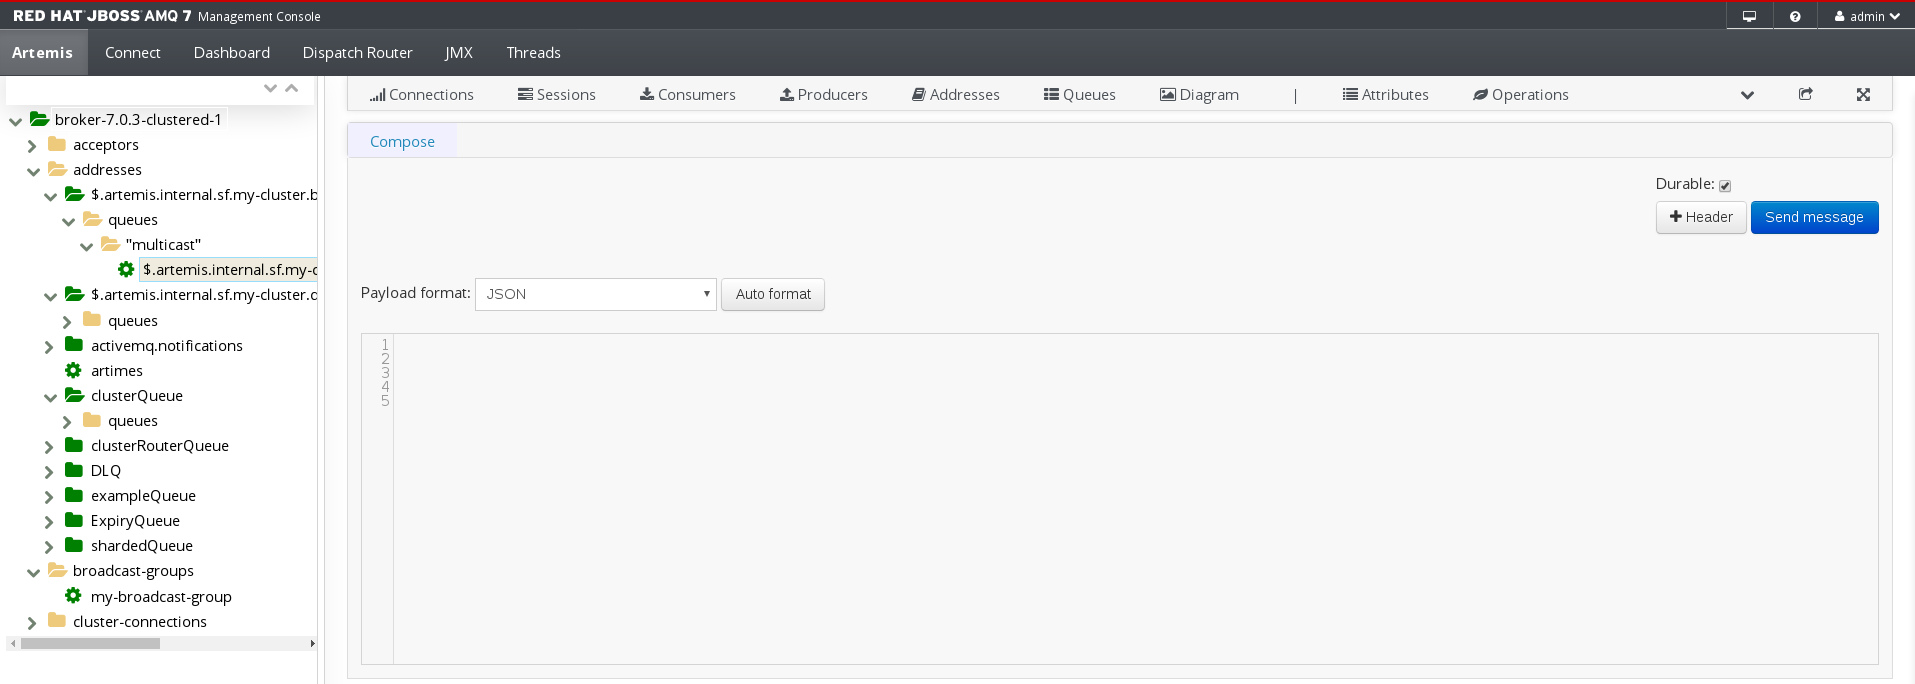
2.6.4.2. Sending messages to an address
The following procedure outlines the steps required to send a message to an address.
Procedure
- In the folder tree, select an address.
On the navigation bar, click
 drop-down icon, and then click Send.
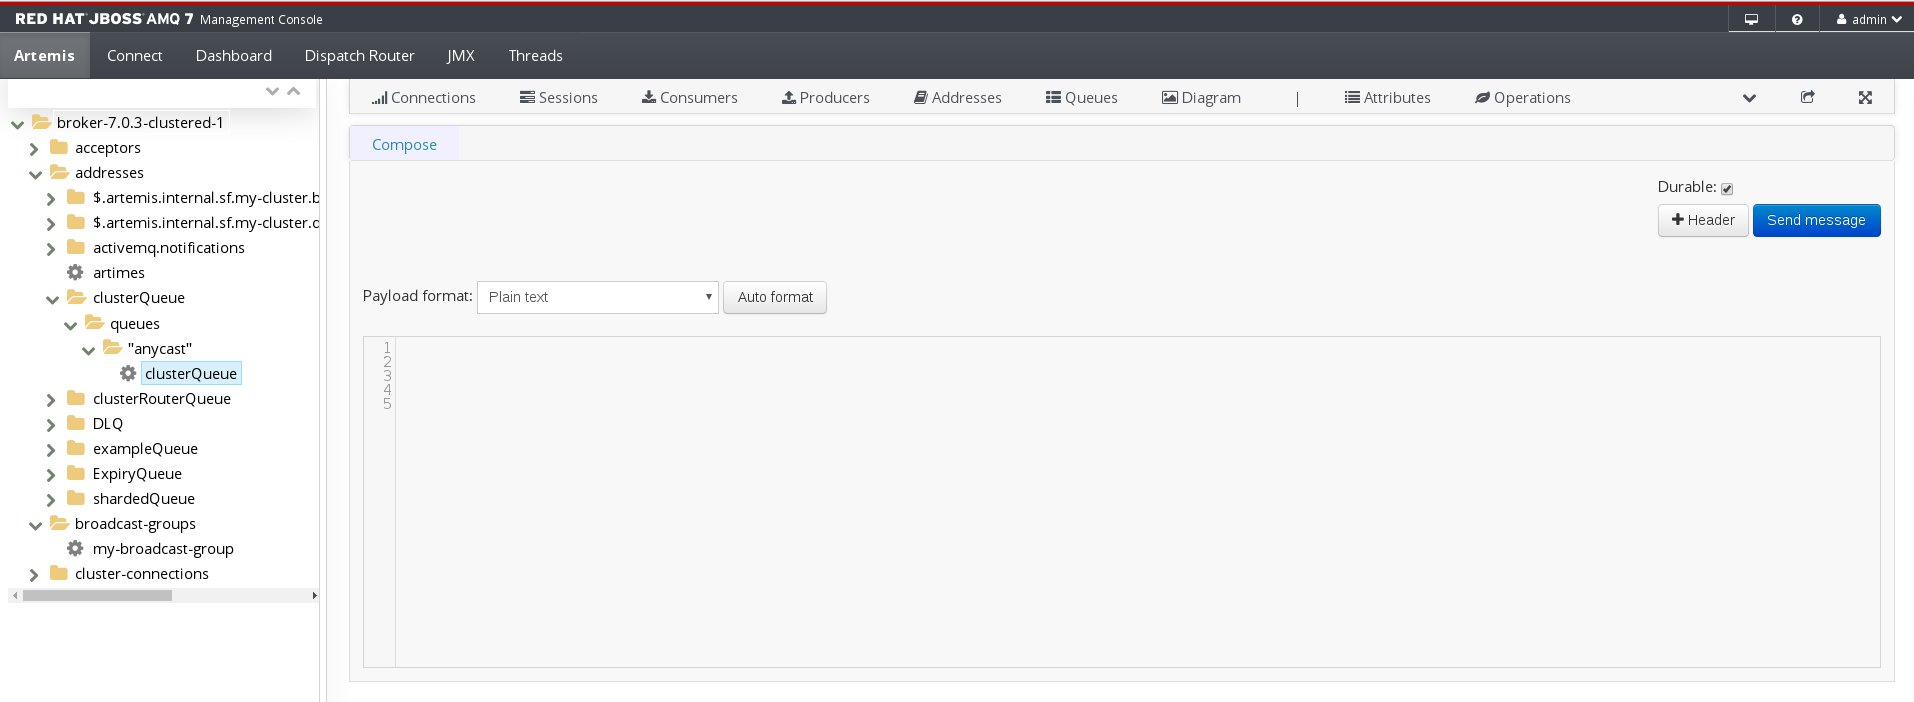
A page appears for you to compose the message.
- If necessary, click the Header button to add message header information.
- Enter the message body.
- In the Payload format drop-down, select an option for the format of the message body, and then click Auto format. The message body is formatted in a human-readable style for the format you selected.
- Click Send message. The message is sent.
- To send additional messages, change any of the information you entered, and then click Send message.
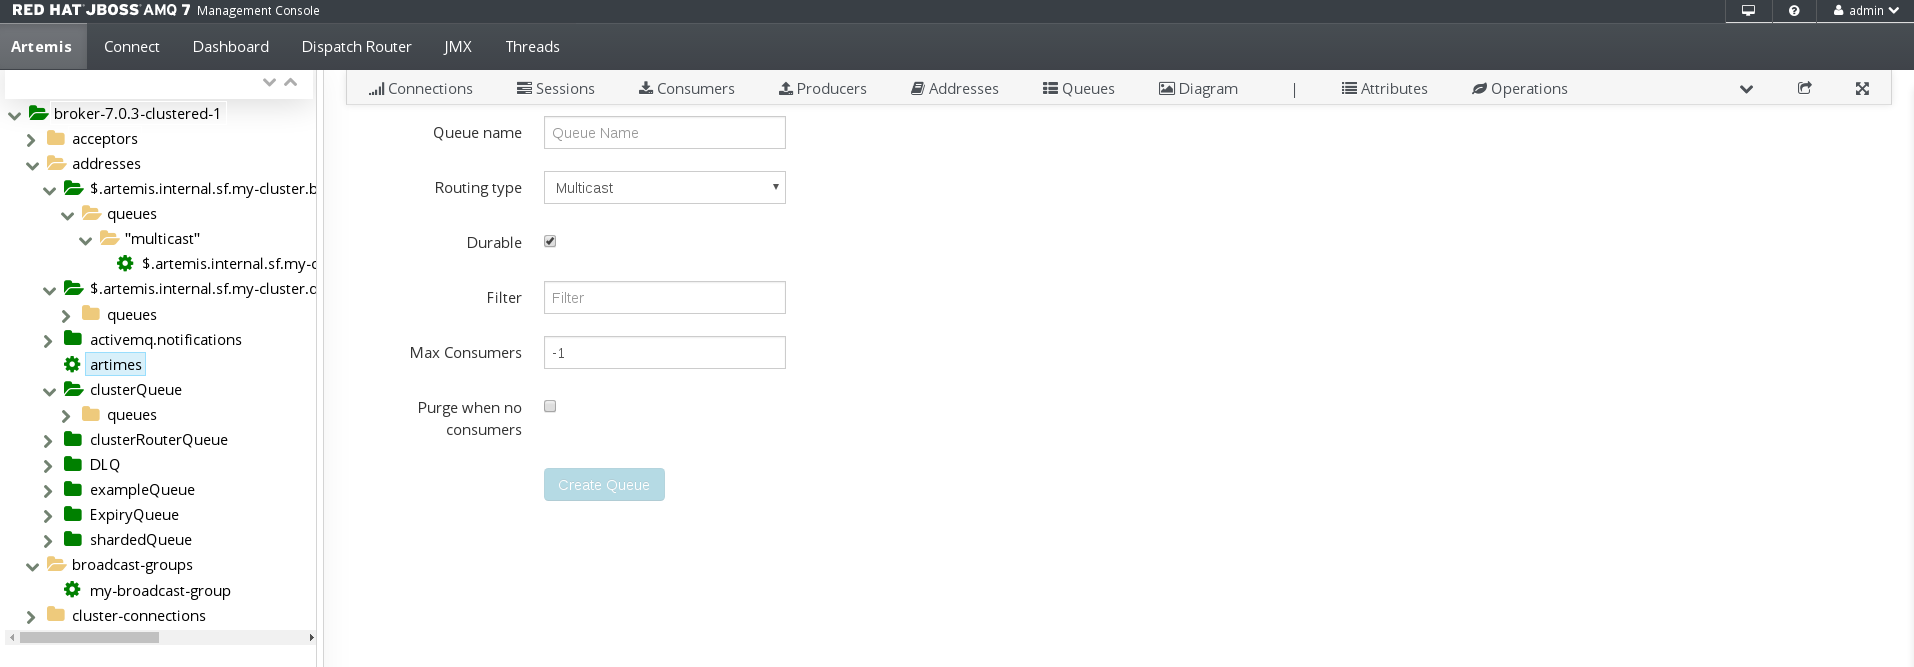
2.6.4.3. Creating queues
Queues provide a channel between a producer and a consumer.
Prerequisites
- The address to which you want to bind the queue must exist.
Procedure
- In the folder tree, select the address to which you want to bind the queue.
On the navigation bar, click
 drop-down icon, and then click Create.
A page appears for you to create the queue.
Complete the following fields:
Queue name- A unique name for the queue.
Routing type- Select one of the following options:
Multicast- Messages sent to this address will be distributed to all queues bound to the address.
Anycast- Only one queue bound to the parent address will receive a copy of the message. Messages will be distributed evenly among all of the queues bound to the address.
Durable- If you select this option, the queue and its messages will be persistent.
Filter- The username to be used when connecting to the broker.
Max Consumers- The maximum number of consumers that can access the queue at a given time.
Purge when no consumers- If selected, the queue will be purged when no consumers are connected.
Click Create Queue.
The queue is created. You can access it in the folder tree under the address to which it is bound. Queues for an address are organized into a
Queuesfolder. Within theQueuesfolder, queues are further organized by routing type (MULTICASTandANYCAST).In this example, the
clusterQueuequeue is located within theclusterQueueaddress:
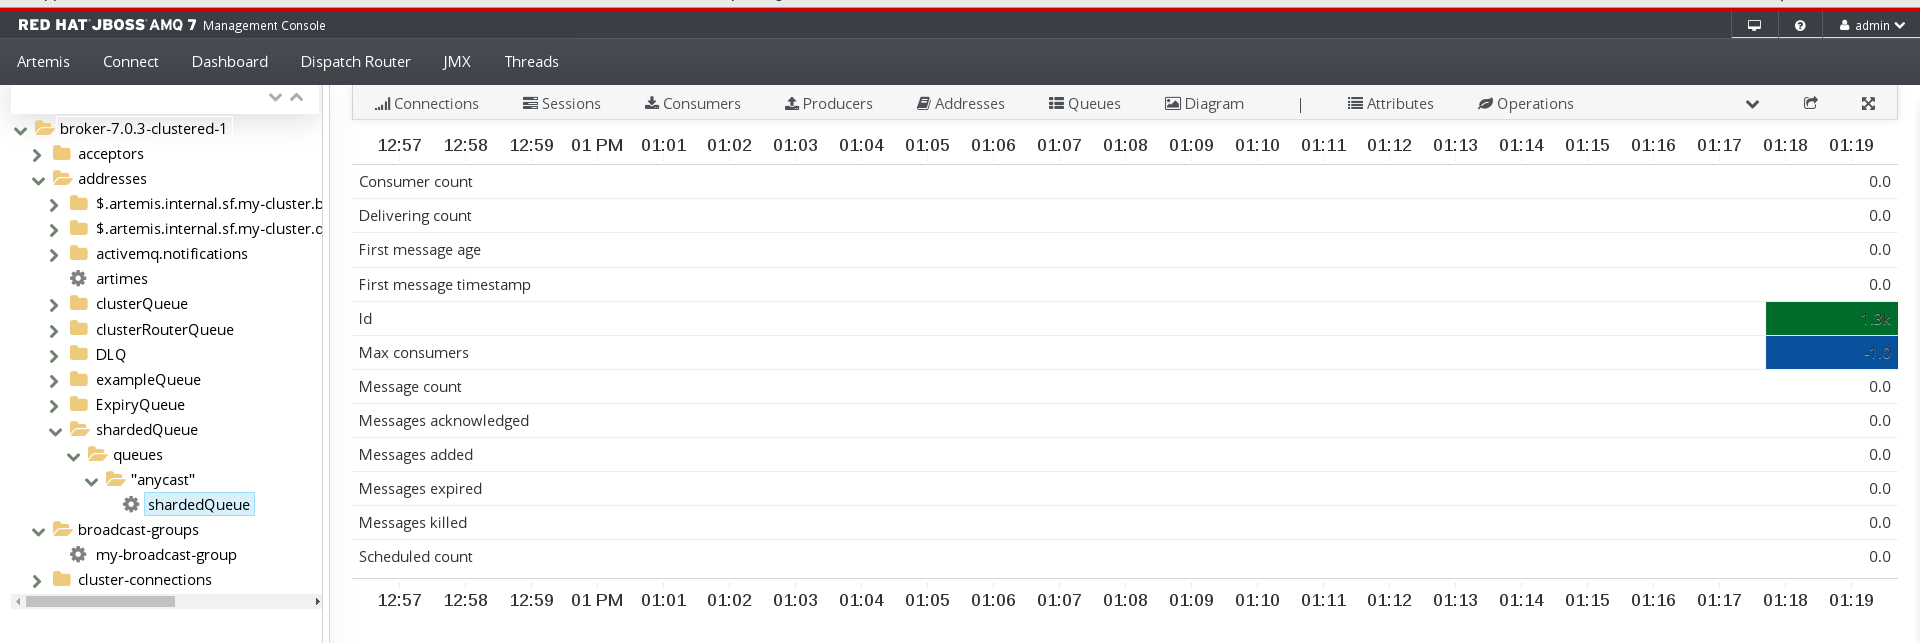
2.6.4.4. Checking the status of a queue
Charts provide a real-time view of the status of a queue on a broker.
Procedure
In the folder tree, navigate to a queue.
To view a chart for multiple queues for an address, select the
ANYCASTorMULTICASTfolder that contains the queues.On the navigation bar, click
 drop-down icon, and then click Chart.
A chart is displayed showing real-time data for all of the queue’s attributes.
If necessary, select different criteria for the chart:
-
On the navigation bar, click
 drop-down icon, and then click Edit Chart.
-
In the
Attributeslist, select one or more attributes that you want to include in the chart. To select multiple attributes, press and hold the Ctrl key and select each attribute. - Click the View Chart button. The chart is displayed based on the criteria you selected.
-
On the navigation bar, click
2.6.4.5. Browsing queues
Browsing a queue displays all of the messages in the queue. You can also filter and sort the list to find specific messages.
Procedure
In the folder tree, navigate to a queue.
Queues are located within the address to which they are bound.
On the navigation bar, click
 drop-down icon, and then click Browse.
The messages in the queue are displayed. By default, the first 200 messages are displayed.
To browse for a specific message or group of messages, do one of the following:
Expand To… Do this… Filter the list of messages
In the
Filter messagestext field, enter a filter criteria and then press Enter.Sort the list of messages
In the list of messages, click a column header. To sort the messages in descending order, click the header a second time.
To view the content of a message, click the message ID.
You can view the message header, properties, and body.
2.6.4.6. Sending messages to a queue
After creating a queue, you can send a message to it. The following procedure outlines the steps required to send a message to an existing queue.
Procedure
- In the folder tree, select the queue to which you want to send the message.
On the navigation bar, click
 drop-down icon, and then click Send.
A page appears for you to compose the message.
- If necessary, click the Header button to add message header information.
- Enter the message body.
- In the Payload format drop-down, select an option for the format of the message body, and then click Auto format. The message body is formatted in a human-readable style for the format you selected.
- Click Send message. The message is sent.
- To send additional messages, change any of the information you entered, and click Send message.
2.6.4.7. Resending messages to a queue
You can resend previously sent messages.
Procedure
- Browse for the message you want to resend.
- Click the checkbox next to the message that you want to resend.
- Click the Resend button. The message is displayed.
- Update the message header and body as needed, and then click Send message.
2.6.4.8. Moving messages to a different queue
You can move one or more messages in a queue to a different queue.
Procedure
- Browse for the messages you want to move.
- Click the checkbox next to each message that you want to move.
Click the Move button.
A confirmation dialog box appears.
- Enter the name of the queue to which you want to move the messages, and then click Move.
2.6.4.9. Deleting queues
You can delete a queue or purge all of the messages from a queue.
Procedure
- Browse for the queue you want to delete or purge.
Do one of the following:
Expand To… Do this… Delete a message from the queue
- Click the checkbox next to each message you want to delete.
- Click the Delete button.
Purge all messages from the queue
- On the navigation bar, click Delete.
- Click the Purge queue button.
Delete the queue
- On the navigation bar, click Delete.
- Click the Delete queue button.

