此内容没有您所选择的语言版本。
Chapter 3. Client Quick Start
Red Hat Ceph Storage supports three types of Ceph clients:
-
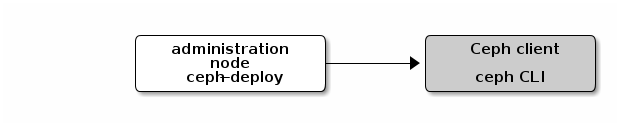
Ceph CLI: The
cephcommand-line interface (CLI) enables Ceph administrators to execute Ceph administrative commands such as creating a CRUSH hierarchy, monitoring cluster health, or managing users from the command line. -
Ceph Block Device: Red Hat Ceph Storage supports mounting a thin-provisioned, re-sizable block device. While the most popular use case for Ceph Block Device is to use its
librbdlibrary with QEMU andlibvirtto serve as a back end for cloud platforms like the Red Hat Open Stack Platform, we also support a kernel block device (RHEL 7.1 x86_64 and later releases only). - Ceph Object Gateway: Red Hat Ceph Storage supports a Ceph Object Gateway with its own user management and Swift- and S3-compliant APIs.
To use Ceph clients, you must first have a Ceph Storage Cluster running, preferably in the active + clean state.
Ceph clients typically run on nodes separate from the Ceph Storage Cluster. You can use ceph-deploy on your Calamari administration to configure a Ceph client node.
3.1. Execute the Pre-Installation Procedure
For streamlined installation and deployment, execute the pre-installation procedures on your Ceph client node. Specifically, disable requiretty, set SELinux to permissive mode (with Red Hat Ceph Storage 1.3.2 or later, SELinux can run in enforcing mode, see the SELinux and Install ceph-selinux sections for more details), and set up a Ceph Deploy user with password-less sudo (see the Create a Ceph Deploy User and Enable Password-less sudo sections). For Ceph Object Gateways, open the ports that Civetweb uses in production (by default port 80 and port 7480).
3.2. Enable Ceph Client Repository
Red Hat includes Ceph Storage clients in the rhel-7-server-rhceph-1.3-tools-rpms repository. To ensure you are using the same version of the Ceph client as your storage cluster, execute the following to enable the repository:
subscription-manager repos --enable=rhel-7-server-rhceph-1.3-tools-rpms
# subscription-manager repos --enable=rhel-7-server-rhceph-1.3-tools-rpms3.3. Install the Ceph Common Package
The Ceph Common packages provides the Ceph CLI tools, the Ceph Block Device and the Ceph Object Store daemon.
To install ceph-common CLI tools, go to the working directory of Calamari administration server and execute:
ceph-deploy install --cli <node-name>
ceph-deploy install --cli <node-name>
Using ceph-deploy requires you to execute the Pre Installation procedure first.
The ceph CLI tools are intended for administrators. To make your Ceph client node an administrator node, execute the following from the working directory of your administration server.
ceph-deploy admin <node-name>
ceph-deploy admin <node-name>The CLI tools include:
-
ceph -
ceph-authtool -
ceph-dencoder -
rados
3.4. Block Device Quick Start
The following quick start describes how to mount a thin-provisioned, resizable block device for RHEL 7.1 x86_64 and later releases only. You must install ceph-common first before using this procedure.
Execute the following procedures on a separate physical node (or within a VM) from the Ceph monitor and OSD nodes. Running Linux kernel clients and kernel server daemons on the same node can lead to kernel deadlocks.
Create a user for your block device. This step requires the Ceph CLI interface with administrative privileges. To create a user, execute
ceph auth get-or-createand output the result to a keyring file.ceph auth get-or-create USERTYPE.USERID {daemon} \ 'allow <r|w|x|*|...> [pool={pool-name}]' \ -o /etc/ceph/rbd.keyring# ceph auth get-or-create USERTYPE.USERID {daemon} \ 'allow <r|w|x|*|...> [pool={pool-name}]' \ -o /etc/ceph/rbd.keyringCopy to Clipboard Copied! Toggle word wrap Toggle overflow A block device user should have
rwxpermissions on OSDs, because block devices use classes and therefore require executexpermissions. The following example limits theclient.rbduser to the defaultrbdpool. For example, on theceph-clientnode, execute:ceph auth get-or-create client.rbd \ mon 'allow r' osd 'allow rwx pool=rbd' \ -o /etc/ceph/rbd.keyring
# ceph auth get-or-create client.rbd \
mon 'allow r' osd 'allow rwx pool=rbd' \
-o /etc/ceph/rbd.keyring
Copy to Clipboard Copied! Toggle word wrap Toggle overflow See the Red Hat Ceph Storage Administration Guide for additional details on user management.
On the
ceph-clientnode, create a block device image.rbd create foo --size 4096 --pool rbd \ --name client.rbd --keyring /etc/ceph/rbd.keyring
# rbd create foo --size 4096 --pool rbd \
--name client.rbd --keyring /etc/ceph/rbd.keyring
Copy to Clipboard Copied! Toggle word wrap Toggle overflow On the
ceph-clientnode, map the image to a block device.rbd map foo --pool rbd \ --name client.rbd --keyring /etc/ceph/rbd.keyring
# rbd map foo --pool rbd \
--name client.rbd --keyring /etc/ceph/rbd.keyring
Copy to Clipboard Copied! Toggle word wrap Toggle overflow ImportantKernel block devices currently only support the legacy
strawbucket algorithm in your CRUSH map. If you have set your CRUSH tunables tooptimal, you may have to set them tolegacyor an earlier major release; otherwise, you will not be able to map the image. Alternatively, refer to the Ceph Storage Strategies guide and the section on editing a CRUSH map to ensure that you are not usingstraw2(replacestraw2withstraw).Use the block device by creating a file system on the
ceph-clientnode.mkfs.ext4 -m0 /dev/rbd/rbd/foo
# mkfs.ext4 -m0 /dev/rbd/rbd/fooCopy to Clipboard Copied! Toggle word wrap Toggle overflow This may take a few moments.
Mount the file system on the
ceph-clientnode.mkdir /mnt/ceph-block-device mount /dev/rbd/rbd/foo /mnt/ceph-block-device
# mkdir /mnt/ceph-block-device
# mount /dev/rbd/rbd/foo /mnt/ceph-block-device
cd /mnt/ceph-block-device
Copy to Clipboard Copied! Toggle word wrap Toggle overflow
See the Red Hat Ceph Storage Block Device guide for additional details.
3.5. Object Gateway Quick Start
Red Hat Ceph Storage v1.3 dramatically simplifies installing and configuring a Ceph Object Gateway. The Gateway daemon embeds Civetweb, so you do not have to install a web server or configure FastCGI. Additionally, ceph-deploy can install the gateway package, generate a key, configure a data directory and create a gateway instance for you.
Civetweb uses port 7480 by default. You must either open port 7480, or set the port to a preferred port (typically port 80) in your Ceph configuration file.
To start a Ceph Object Gateway, follow this procedure:
-
Execute the pre-installation steps on your
client-node. If you intend to use Civetweb’s default port7480, you must open it usingfirewall-cmd. Enable the
rhel-7-server-rhceph-1.3-tools-rpmsrepository on theclient-nodenode, if you haven’t done so already.subscription-manager repos --enable=rhel-7-server-rhceph-1.3-tools-rpms
# subscription-manager repos --enable=rhel-7-server-rhceph-1.3-tools-rpmsCopy to Clipboard Copied! Toggle word wrap Toggle overflow From the working directory of your administration server, install the Ceph Object Gateway package on the
client-nodenode. For example:ceph-deploy install --rgw <client-node> [<client-node> ...]
ceph-deploy install --rgw <client-node> [<client-node> ...]Copy to Clipboard Copied! Toggle word wrap Toggle overflow From the working directory of your administration server, create an instance of the Ceph Object Gateway on the
client-node. For example:ceph-deploy rgw create <client-node>
ceph-deploy rgw create <client-node>Copy to Clipboard Copied! Toggle word wrap Toggle overflow Once the gateway is running, you should be able to access it on port
7480. (for example,http://client-node:7480).To change the default port (for example, to port
80), modify your Ceph configuration file. Add a section entitled[client.rgw.<client-node>], replacing<client-node>with the short node name of your Ceph client node ($ hostname -s). For example, if your node name isclient-node, add a section like this after the[global]section:[client.rgw.client-node] rgw_frontends = "civetweb port=80"
[client.rgw.client-node] rgw_frontends = "civetweb port=80"Copy to Clipboard Copied! Toggle word wrap Toggle overflow NoteEnsure that you leave no whitespace between
port=<port-number>in thergw_frontendskey/value pair.To make the new port setting take effect, restart the Ceph Object Gateway.
systemctl restart ceph-radosgw.service
# systemctl restart ceph-radosgw.serviceCopy to Clipboard Copied! Toggle word wrap Toggle overflow Finally, check to ensure that the port you selected is open on the node’s firewall (for example, port
80). If it is not open, add the port and reload the firewall configuration. For example:firewall-cmd --list-all firewall-cmd --zone=public --add-port 80/tcp firewall-cmd --zone=public --add-port 80/tcp --permanent
# firewall-cmd --list-all
# firewall-cmd --zone=public --add-port 80/tcp
# firewall-cmd --zone=public --add-port 80/tcp --permanent
Copy to Clipboard Copied! Toggle word wrap Toggle overflow
You should be able to make an unauthenticated request, and receive a response. For example, a request with no parameters like this:
http://<client-node>:80
http://<client-node>:80Should result in a response like this:
See the Ceph Object Storage Guide for RHEL x86_64 for additional administration and API details.