第 6 章 将另一个路由添加到路由上下文
本教程介绍了如何在 ZooOrderApp 项目的 blueprint.xml 文件中添加第二个路由到 camel 上下文。第二个路由:
- 直接从第一个路由的分支的终端端获取消息(valid orders)。
- 根据客户的国家/地区对有效消息进行排序。
-
将每个消息发送到
ZooOrderApp/target/messages文件夹中对应的国家文件夹。例如,来自 Chicago zoo 的顺序被复制到 USA 文件夹。
目标
在本教程中,您将完成以下任务:
- 重新配置现有路由以直接连接到第二个路由
- 向 Camel 上下文添加第二个路由
- 将第二个路由配置为直接从第一个路由的分支获取消息
- 将基于内容的路由器添加到第二个路由
- 将消息标头、日志记录和目标目的地添加到第二个路由基于内容的路由器的每个输出分支
先决条件
要启动此教程,您需要从以下之一生成的 ZooOrderApp 项目:
完成 第 5 章 添加基于内容的路由器 教程。
或
-
完成 第 2 章 设置您的环境 教程,并将项目的
blueprint.xml文件替换为提供的blueprintContexts/blueprint2.xml文件,如 “关于资源文件”一节 所述。
配置现有路由的端点
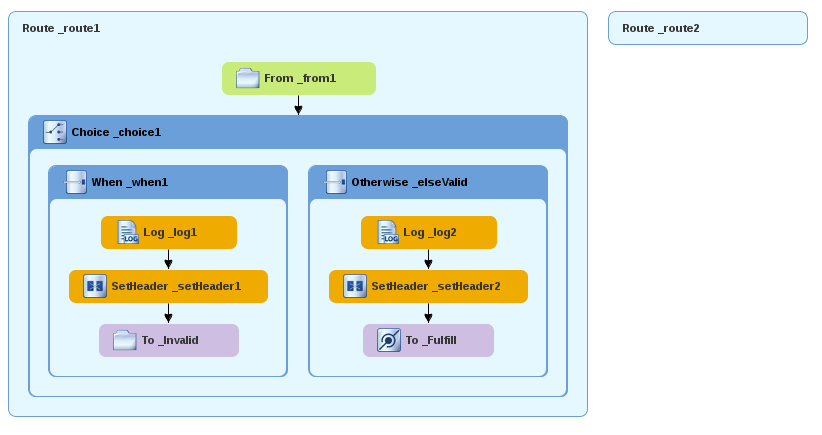
现有路由将所有有效的顺序发送到 target/messages/validOrders 文件夹。
在本节中,您要将现有路由的 Otherwise _elseValid 分支的端点重新配置为连接到第二个路由(您在下一节中创建)。
为与第二个路由直接连接配置现有路由:
-
在路由编辑器中打开
ZooOrderApp/src/main/resources/OSGI-INF/blueprint/blueprint.xml。 - 在 canvas 上,选择 Route_route1 容器,以在 Properties 视图中打开其属性。
- 向下滚动到 Shutdown Route 属性,然后选择 Default。
- 在 canvas 上,选择终端文件 node To_Valid 以在 Properties 视图中显示其属性。
-
在 Uri 字段中,删除现有文本,然后输入
direct:OrderFulfillment。 -
在 Id 字段中,输入
_Fulfill。
您可以将现有的 To_Valid 终端文件节点替换为 Components To_Valid 节点相同的属性值。
要了解有关 Direct 组件的更多信息,请参阅 Apache Camel 组件参考。
添加第二个路由
将另一个路由添加到路由上下文:
-
在 面板中,打开 Routing drawer,然后单击 Route (
 )模式。
)模式。
在 canvas 中,点击
Route_route1容器右侧:Route 模式成为 canvas 上的
Route_route2容器节点。-
单击
Route_route2容器节点,以在 Properties 视图中显示其属性。将属性保留原样。 - 保存文件。
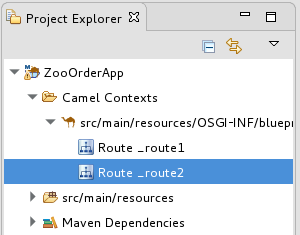
随着路由上下文变得复杂,您可能希望在处理单个路由时将路由编辑器专注于单独的路由。要做到这一点,在 Project Explorer 中,双击您希望路由编辑器在 canvas 上显示的路由;例如 Route_route2 :
要显示 canvas 上路由上下文中的所有路由,请双击 Camel Contexts 文件夹顶部的项目的 .xml 上下文文件条目(src/main/resources/OSGI-INF/…)。
配置选择分支来处理美国排序
在本小节中,您将 Choice 分支添加到路由,并将路由配置为发送美国订单到 新目标/消息/评估Orders/USA 文件夹。您还设置消息标头和日志文件组件。
-
在 面板中,打开 Components drawer,然后选择 Direct 组件(
 )。
)。
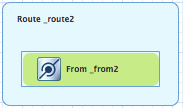
在 canvas 中,点
Route_route2容器:Route_route2容器会展开,以适应 Direct 组件(from_from2节点):-
在 canvas 上,单击
From_from2节点,以在 Properties 视图中打开其属性。 在 Uri 字段中,将
name(followingdirect:)替换为OrderFulfillment,然后在 Id 字段中输入_direct:OrderFulfillment。-
在 面板中,打开 Routing drawer,然后选择 Choice (
 )模式。
)模式。
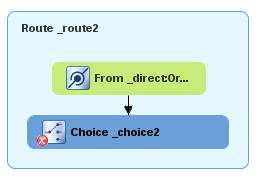
在 canvas 中,单击
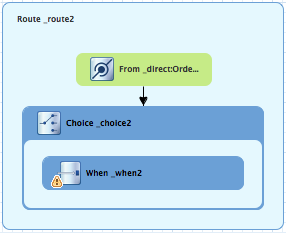
From _direct:OrderFulfillment节点。Route_route2容器会展开,以适应Choice_choice2节点:在 Properties 视图中,保留
Choice_choice2节点的属性。-
在面板中,打开 Routing drawer,然后选择 When (
 )模式。
)模式。
在 canvas 中,单击
Choice_choice2节点。Choice_choice2容器已展开,以适应When_when2节点。-
在 canvas 上,选择
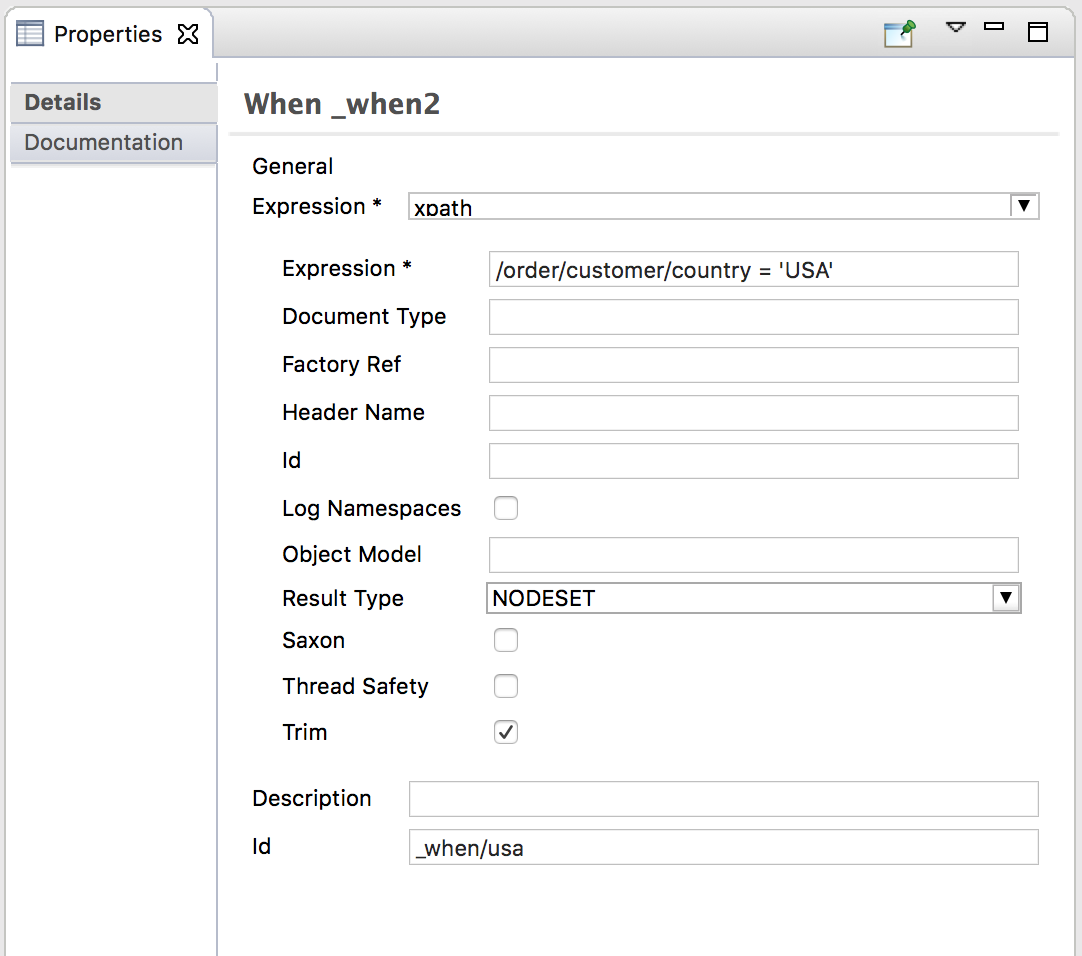
When_when2节点,以便在 Properties 视图中打开其属性。 设置
When_when2节点的属性,如下所示:- 从 Expression 下拉列表中选择 xpath。
-
在缩进 Expression 字段中,键入
/order/customer/country = 'USA'。 - 保持 Trim enabled。
在第二个 Id 字段中,键入
_when/usa
-
在 面板中,打开 Components drawer,然后选择 File 组件(
 )。
)。
在 canvas 中,点
When_when/usa容器。When_when/usa容器扩展以容纳To_to1节点。在 Properties 视图中:
-
在 Uri 字段中,将
directoryName替换为target/messages/validOrders/USA。 -
在 Id 字段中,键入
_US。
-
在 Uri 字段中,将
- 保存文件。
要设置消息标头并添加日志组件:
- 在 面板中,打开 Transformation drawer,然后选择 Set Header 模式。
在 canvas 中,点
When_when/usa节点。When_when/usa容器扩展以适应SetHeader_setHeader3节点:-
在 canvas 上,选择
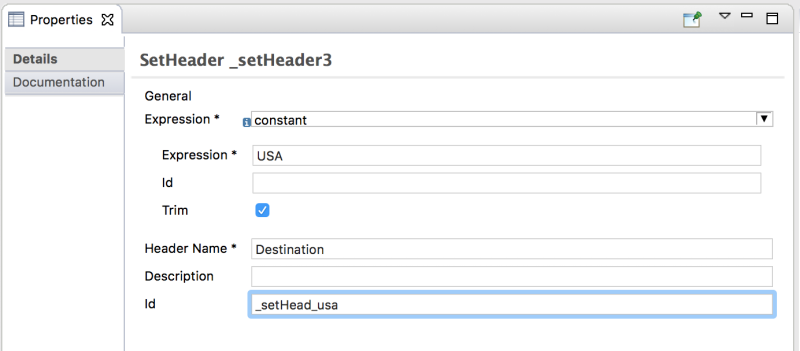
SetHeader_setHeader3节点,以便在 Properties 视图中打开其属性。 设置节点的属性,如下所示:
- 在 Expression 下拉菜单中选择 constant。
-
在缩进 Expression 字段中,键入:
USA - 保持 Trim enabled。
-
在 Header Name 字段中,输入:
Destination 在第二个 Id 字段中,键入:
_setHead_usa
-
在 面板中,打开 Components drawer,然后选择 Log 组件(
 )。
)。
在 canvas 中,点
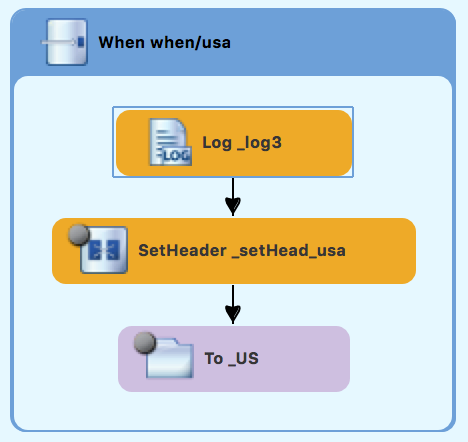
SetHeadernode。When_when/usa容器扩展以适应Log_log3节点。在 canvas 上,选择
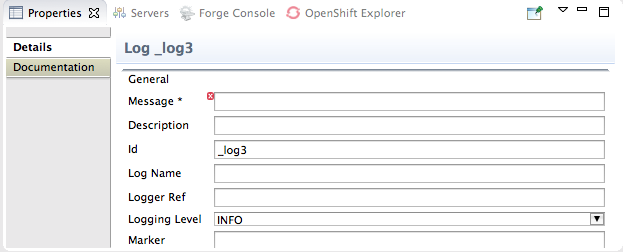
Log_log3节点在 Properties 视图中打开其属性:在 Properties 视图中:
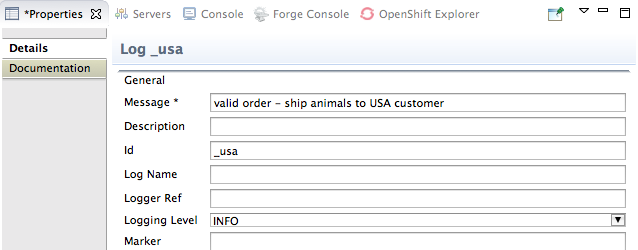
-
在 Message 字段中,键入
Valid order - 向美国客户发运的 aimals。 -
在 Id 字段中,键入
_usa。 将 日志记录级别 保留原样。
-
在 Message 字段中,键入
保存文件。
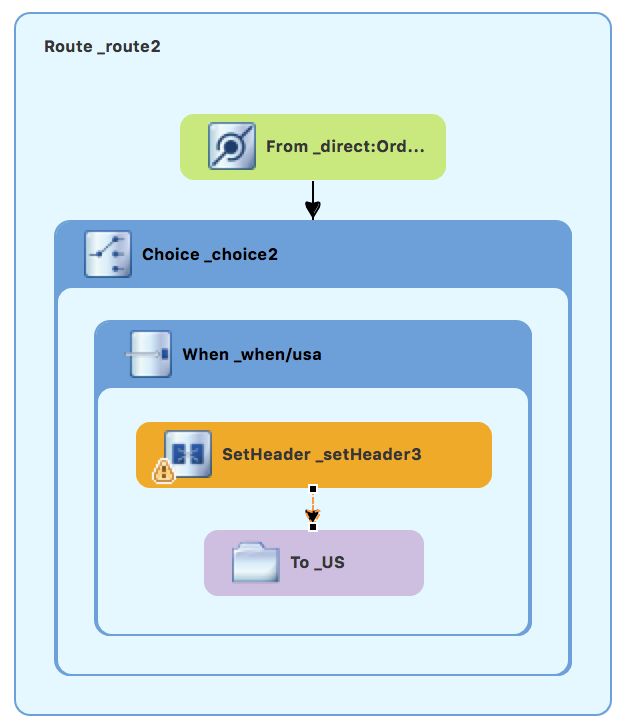
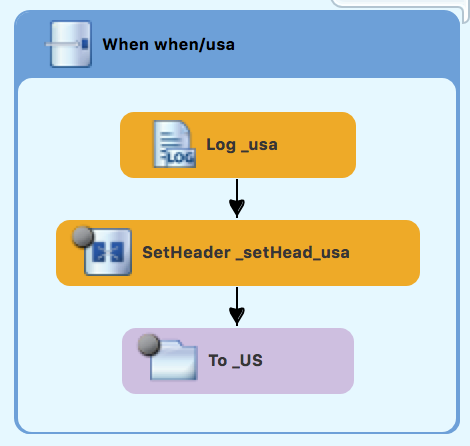
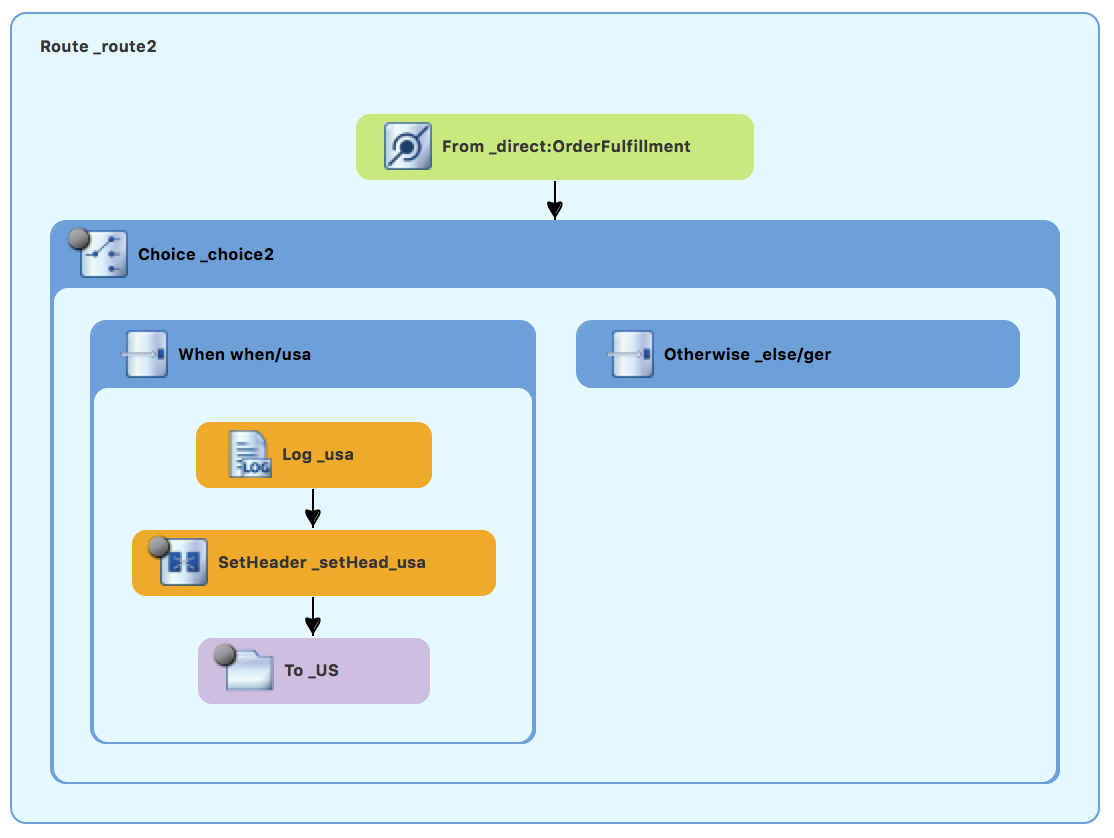
Route_route2美国分支应如下所示:
配置其它分支来处理德国订购
在 canvas 上显示 Route_route2 时:
-
在 面板中,打开 Routing drawer,然后选择 Otherwise pattern (
 )。
)。
在 canvas 中,单击
Choice_choice2容器。Choice_choice2容器扩展以适应Otherwise_otherwise1节点。-
选择
Otherwise_otherwise1节点,以便在 Properties 视图中打开其属性。 -
在 Properties 视图中,为 Id 字段输入
_else/ger。 -
在面板中,打开 Transformation drawer,然后选择 Set Header pattern (
 )。
)。
在 canvas 中,点
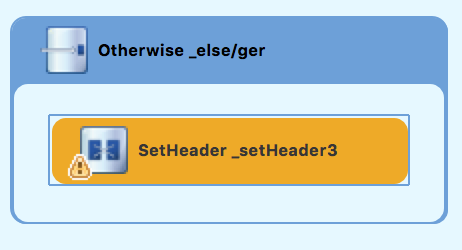
Otherwise_else/ger节点。Otherwise_else/ger容器会展开,以适应SetHeader_setHeader3节点。-
在 canvas 上,选择
SetHeader_setHeader3节点,以便在 Properties 视图中打开其属性。 在 Properties 视图中:
- 从 Expression 下拉列表中,选择 constant。
-
在第二个 Expression 字段中,键入
Germany。 - 将 Trim 保留为.
-
在 Header Name 字段中,键入
Destination。 -
在第二个 Id 字段中,键入
_setHead_ger。
-
在 面板中,打开 Components drawer,然后选择 Log pattern (
 )。
)。
在 canvas 中,单击
SetHeader_setHead_ger节点下方。otherwise
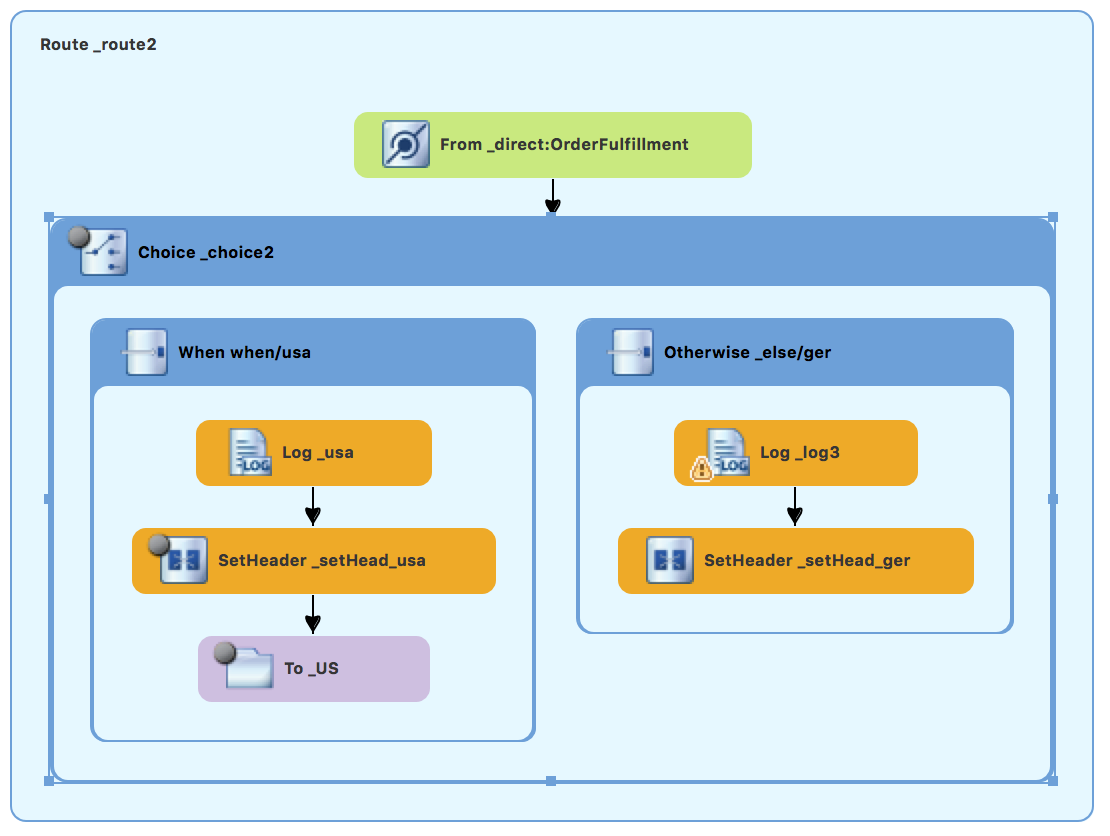
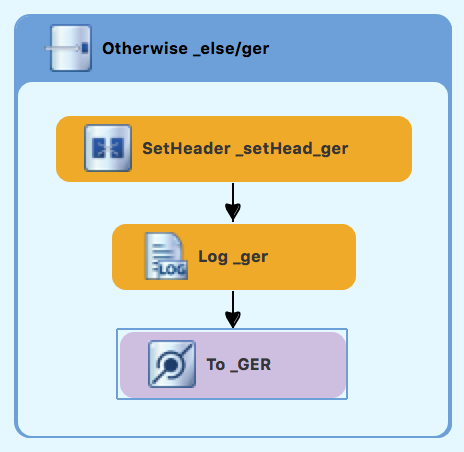
_else/ger容器会展开,以适应Log_log3节点。如果需要,将连接器错误从Log_log3节点拖到SetHeader_setHead_ger节点:-
在 canvas 上,选择
Log_log3节点,以在 Properties 视图中打开其属性。 在 Properties 视图中:
-
在 Message 字段中,键入
Valid order - 向德国客户提供imals。 -
在 Id 字段中,键入
_ger。 - 将 日志记录级别 保留原样。
-
在 Message 字段中,键入
在 Components drawer 中,选择一个 File pattern (
 ),然后点击
 Log_ger节点。otherwise
_else/ger容器会展开,以适应To_to1节点。如果需要,将连接器错误从SetHeader_setHead_ger节点拖到To_to1节点:-
在 canvas 上,选择
To_to1节点,以在 Properties 视图中打开其属性。 在 Properties 视图中:
-
在 Uri 字段中,将
directoryName替换为target/messages/validOrders/Germany -
在 Id 字段中,键入
_GER。
-
在 Uri 字段中,将
- 保存文件。
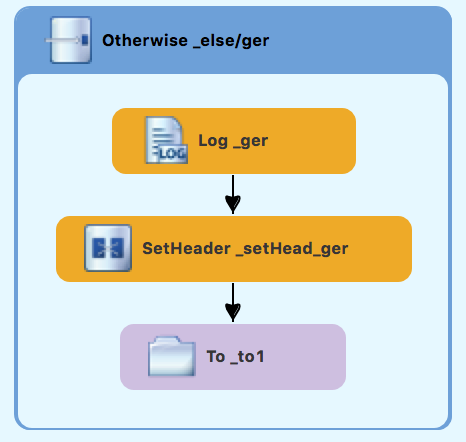
Route_route2 的德国分支应如下所示:
验证第二个路由
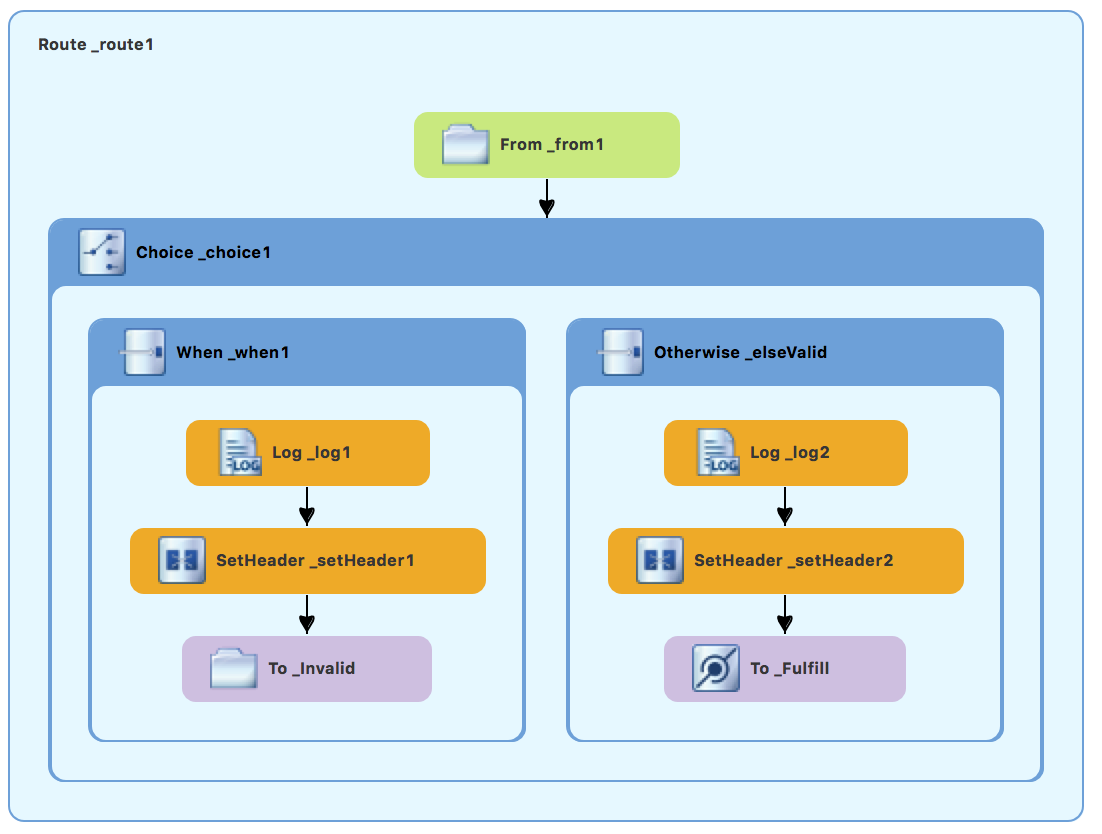
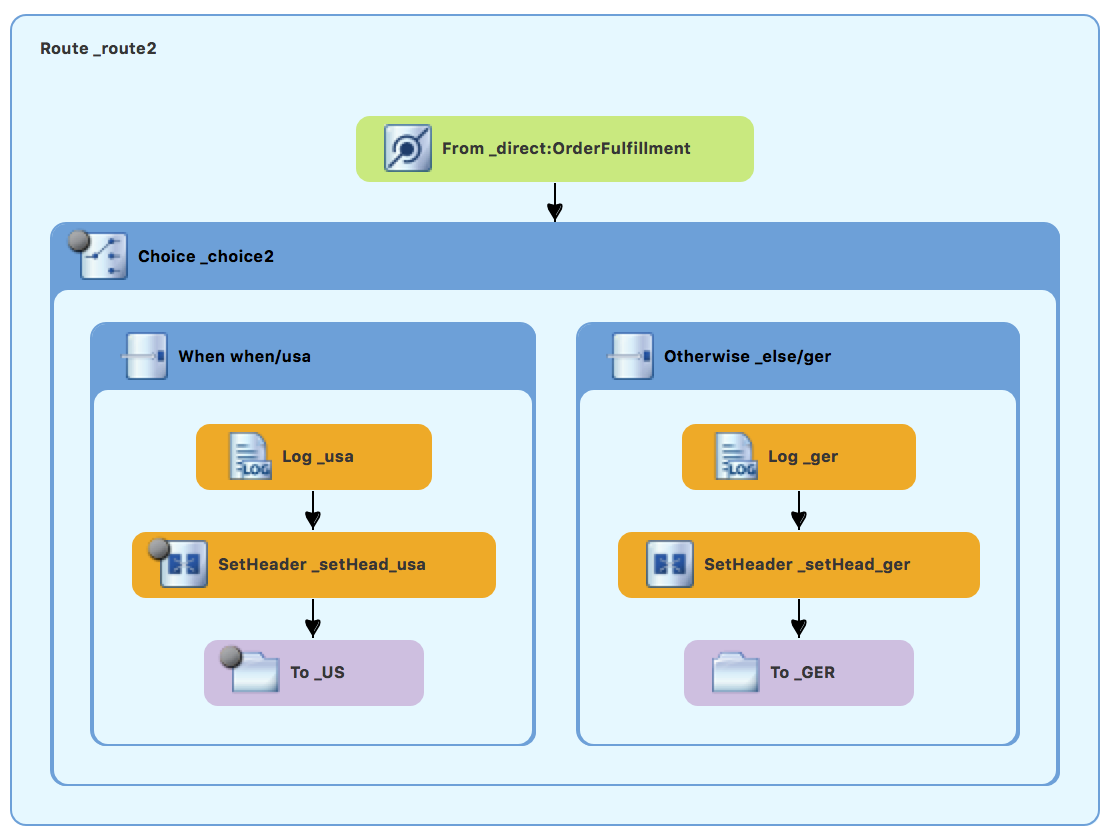
canvas 上的路由应如下所示:
completed route1
已完成的 route2
在 canvas 底部的 Source 选项卡中,camelContext 元素的 XML 应该类似于 例 6.1 “基于双路由内容的路由器 XML” 所示:
例 6.1. 基于双路由内容的路由器 XML
如果工具将属性 shutdownRoute=" " 添加到第二个路由元素(<routeid="route2">),删除该属性。否则,ZooOrderApp 项目可能无法运行。
要确保更新的项目按预期工作,请按照以下步骤执行:
-
将
ZooOrderApp/Camel Contexts/blueprint.xml作为本地 Camel 上下文运行(无需测试)。 检查控制台输出的末尾。您应该看到这些行:
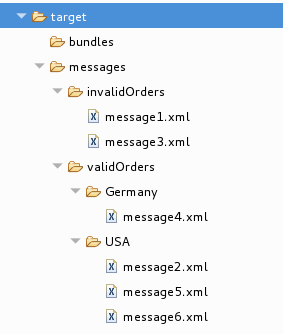
检查目标目标文件夹以验证路由是否已正确执行:
-
在 Project Explorer 中,右键单击
ZooOrderApp,然后选择 Refresh。 展开
target/messages/文件夹。message*.xml文件应该分散在目的地,如下所示:图 6.1. Project Explorer 中的目标消息目的地
-
在 Project Explorer 中,右键单击
后续步骤
在下一个教程 第 7 章 调试路由上下文 中,您将了解如何使用 Fuse 工具调试器。
