此内容没有您所选择的语言版本。
9.10. Backing Up and Restoring the Metrics Storage Database
The storage nodes have a defined flow to manage and archive data. Scheduled snapshots back up all node data (both metrics and node configuration). This allows data to be restored if the cluster is ever corrupted.
9.10.1. About Storage Data Files
复制链接链接已复制到粘贴板!
All of the database files for the node are stored in the
rhq-data/ directory, which is in the same root directory are the JBoss ON server (such as /opt/jon/jon-server-3.3.0.GA). This directory is divided into three subdirectories:
- A commit log for write data that has yet to be written to the database.
- A cache directory for archives.
- A data directory which contains both all monitoring data (aggregated and raw), snapshot archives of monitoring data, and node (system) data.
The
commit_log/ directory contains binary commit logs which store the writes before they are written to the database.
The
saved_caches/ directory contains archives for the major tables within the storage node, both the metrics tables and the storage node configuration.
The
data/ directory contains the most critical data. This directory is organized by keyspace. The keyspaces include the raw and aggregated metric data along with system related configuration, authentication, and schema details.
Some keyspace directories found under
data/ include a snapshot/ sub-directory. The snapshot/ directory represents a snapshot or backup at a specific point in time of the data found in the parent keyspace and its associated data files.
9.10.2. Storage Node Snapshots
复制链接链接已复制到粘贴板!
JBoss ON provides the ability to take snapshots or backups of its monitoring and system data.
9.10.2.1. Taking an Individual Snapshot
复制链接链接已复制到粘贴板!
An individual snapshot may be scheduled using the following steps:
- Click on Inventory in the top navigation bar, then click on Servers - Top Level Imports in the Resources section in the left navigation bar.
- Click on the desired storage node.
- Click on the Operations tab, then click on the New button at the bottom.
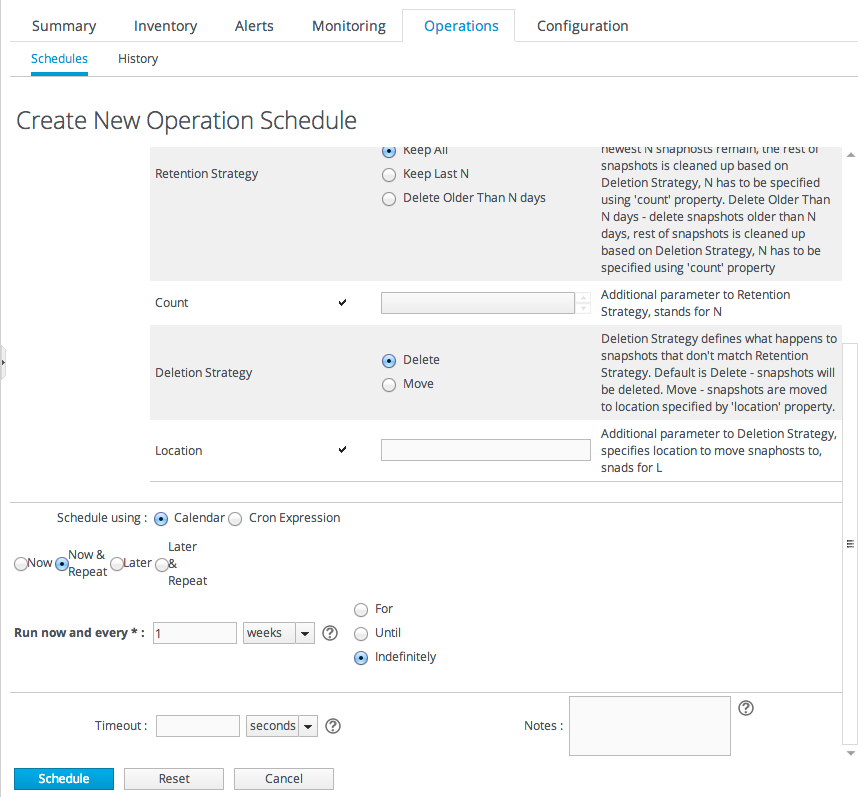
- Select Take Snapshot from the Operation drop down menu.
- Fill in the desired snapshot and retention options.
- Optional. A snapshot may be scheduled for a later time as well as repeated on a specified cycle. By default, snapshots are scheduled for "Now".
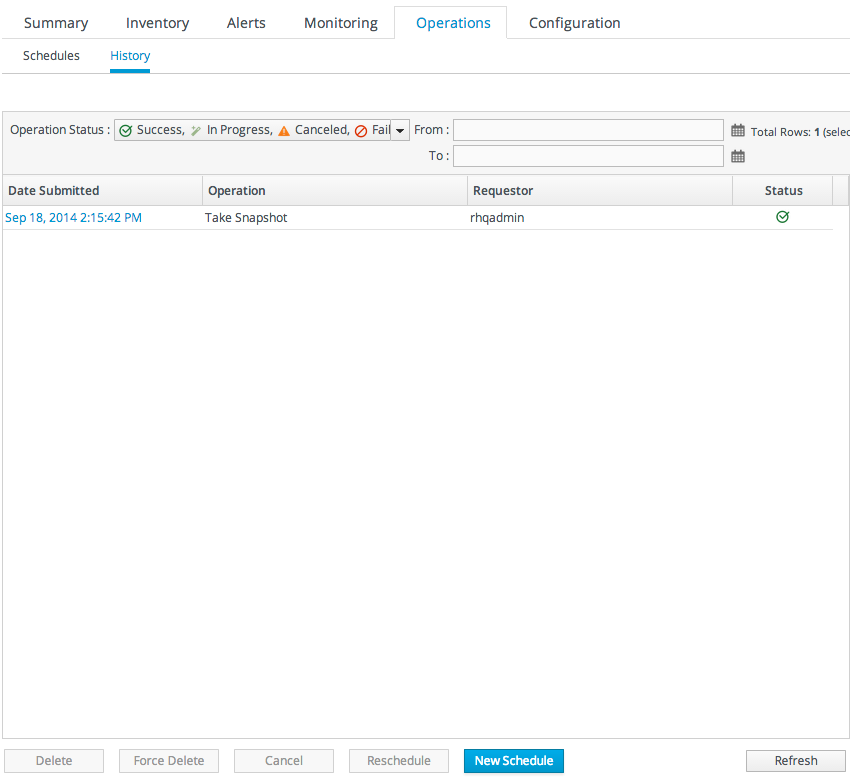
- Click Schedule to schedule the snapshot. The user will then be taken to the operations history section, showing the status of the snapshot.
- If snapshot was scheduled for later or set for repeating, it will also appear in the Schedules sub tab.


In addition to creating repeating snapshots at the individual storage node, repeating snapshots may also be scheduled at the storage node cluster level.
To schedule snapshots for the Storage Node Cluster:
- Click on Adminstration in the top navigation bar, then click on Storage Nodes in the Topology section in the left navigation bar.
- Click on the Cluster Settings tab and scroll down to the Snapshot Management section.
- Repeating snapshots may be enabled by setting the Enabled property to On.
- Configure the desired schedule and retention strategy.
- Click Save.

Note
Snapshot scheduled at the storage node cluster level will appear Schedules sub tab of each storage node in addition to any individually scheduled snapshots . If the snapshot schedule is updated at the storage node cluster level, this will also be reflected in the Schedules sub tab of each storage node. If a repeating snapshot scheduled at the storage node cluster level is disabled, it will be removed from the Schedules sub tab of each storage node and will not show up in History sub tab.
Important
The snapshots are CPU- and disk-intensive. Performing snapshots during high-use times will result in performance degradation.
9.10.3. Restoring the Cluster
复制链接链接已复制到粘贴板!
Note
The restore process restores an entire cluster to a previous state.
This is not intended to restore a single node. Because all data is replicated between all nodes, it is simpler and safer to remove a failed node and install a new one than it is to attempt to restore the node.
Important
Every step must be performed on every node in the cluster.
- Shut down every node in the storage cluster. Run the stop command on every storage machine:
serverRoot/jon-server-3.3.0.GA/bin/rhqctl.sh stop --storage
[root@server ~]# serverRoot/jon-server-3.3.0.GA/bin/rhqctl.sh stop --storageCopy to Clipboard Copied! Toggle word wrap Toggle overflow - Remove the
commit_log/directory for each node.rm * /opt/jon/rhq-data/data/commit_log/*
[root@server ~]# rm * /opt/jon/rhq-data/data/commit_log/*Copy to Clipboard Copied! Toggle word wrap Toggle overflow - Delete all files in the following directories, except for the snapshot files.
- /opt/jon/rhq-data/data/rhq/metrics_index/
- /opt/jon/rhq-data/data/rhq/one_hour_metrics/
- /opt/jon/rhq-data/data/rhq/raw_metrics/
- /opt/jon/rhq-data/data/rhq/schema_version/
- /opt/jon/rhq-data/data/rhq/six_hour_metrics/
- /opt/jon/rhq-data/data/rhq/twenty_four_hour_metrics/
cd /opt/jon/rhq-data/data/rhq/
rm metrics_index/*.* one_hour_metrics/*.* raw_metrics/*.* schema_version/*.* six_hour_metrics/*.* twenty_four_hour_metrics/*.*
[root@server ~]# cd /opt/jon/rhq-data/data/rhq/
[root@server rhq]# rm metrics_index/*.* one_hour_metrics/*.* raw_metrics/*.* schema_version/*.* six_hour_metrics/*.* twenty_four_hour_metrics/*.*
Copy to Clipboard Copied! Toggle word wrap Toggle overflow - Copy all files from the snapshots directory into the
metrics_indexdirectory.cp metrics_index/snapshots/timestamp/* /opt/jon/rhq-data/data/rhq/metrics_index
[root@server rhq]# cp metrics_index/snapshots/timestamp/* /opt/jon/rhq-data/data/rhq/metrics_indexCopy to Clipboard Copied! Toggle word wrap Toggle overflow Repeat the command for the remaining directories:- /opt/jon/rhq-data/data/rhq/metrics_index/
- /opt/jon/rhq-data/data/rhq/one_hour_metrics/
- /opt/jon/rhq-data/data/rhq/raw_metrics/
- /opt/jon/rhq-data/data/rhq/schema_version/
- /opt/jon/rhq-data/data/rhq/six_hour_metrics/
- /opt/jon/rhq-data/data/rhq/twenty_four_hour_metrics/
- Restart each storage node.
serverRoot/jon-server-3.3.0.GA/bin/rhqctl start --storage
[root@server ~]# serverRoot/jon-server-3.3.0.GA/bin/rhqctl start --storageCopy to Clipboard Copied! Toggle word wrap Toggle overflow