此内容没有您所选择的语言版本。
Chapter 1. Creating Red Hat Quay users and organizations
Before you begin creating repositories to hold your container images in Red Hat Quay, you should consider how you want to organize those repositories. Every repository in a Red Hat Quay instance must be associated with one of the following:
-
User: A user account lets you log in to your Red Hat Quay instance, either through the web UI or through a container client (such as
docker login). When you create a repo, its name is associated with your account, such as:myquay.example.com/<user>/<repo>. Once you create that repo, you can allow other Red Hat Quay user accounts or what are referred to asrobotaccounts to access the repo. -
Organization: Although you need superuser privilege to create user accounts, any user can create organizations to efficiently share repositories among groups of users. An organization is like a user account, in that you can define access to your repos for other user and robot accounts. However, you can also add access to sets of users referred to as
teams. A repository created under an organization would look similar to the following:myquay.example.com/<org>/<repo>
The following sections describe how to create user accounts and organizations to Red Hat Quay. Creating user accounts requires superuser privileges.
1.1. Creating user accounts
To create a new user for your Red Hat Quay instance:
- Log in to Red Hat Quay as the superuser (quay by default).
- Select your account name from the upper right corner of the home page and choose Super User Admin Panel.
- Select the Users icon from the left column.
- Select the Create User button.
- Enter the new user’s Username and Email address, then select the Create User button.
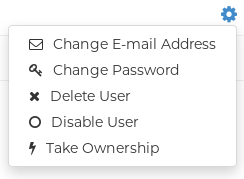
Back on the Users page, select the Options icon to the right of the new Username. A drop-down menu appears, as shown in the following figure:
- Choose Change Password from the menu.
- Add the new password and verify it, then select the Change User Password button.
The new user can now use that username and password to log in via the web ui or through some container client.
1.2. Creating organization accounts
Any user can create their own organization to share repositories of container images. To create a new organization:
- While logged in as any user, select the plus sign (+) from the upper right corner of the home page and choose New Organization.
- Type the name of the organization. The name must be alphanumeric, all lower case, and between 2 and 255 characters long
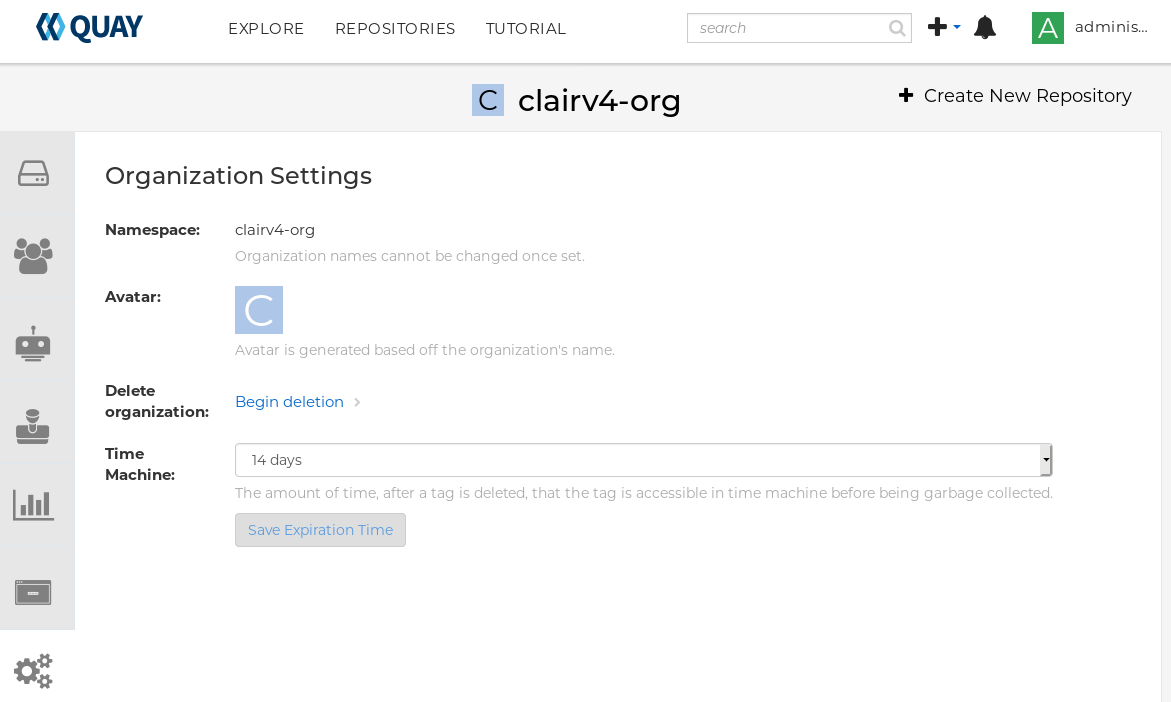
Select Create Organization. The new organization appears, ready for you to begin adding repositories, teams, robot accounts and other features from icons on the left column. The following figure shows an example of the new organization’s page with the settings tab selected.