此内容没有您所选择的语言版本。
Chapter 4. JBoss EAP and JBoss WFK basics in CodeReady Studio
Eclipse IDE supports application development and deployment with Red Hat JBoss Enterprise Application Platform (JBoss EAP) and Red Hat JBoss Web Framework Kit (JBoss WFK). However, you need to configure Maven repositories first. This configuration is essential for using the enterprise versions of the example Maven projects provided in Red Hat Central. These projects are intended for deployment to JBoss EAP and require IDE access to JBoss EAP and JBoss WFK repositories.
The following section describes how to use CodeReady Studio to:
- Configure Maven repositories.
- Set up JBoss EAP.
- Verify that JBoss EAP and CodeReady Studio are working correctly.
4.1. Configuring Maven repositories
The following section describes how to configure Maven repositories.
Procedure
- Start CodeReady Studio.
Click
. The Preferences window appears.
- Enter JBoss Tools in the search field.
Select JBoss Maven Integration.
The JBoss Maven Integration window appears.
Click the button.
The Maven Repositories window appears.
Click the button.
The Add Maven Repository window appears.
- Click the down-arrow in the Profile ID field.
Select the redhat-ga-repository.
Other fields are populated automatically.
- Click the button.
Click the button.
The Confirm File Update window appears.
- Click the .
- Click the button.
Additional resources
- For more information on Maven repositories, see Maven: Getting Started - Developers.
4.2. Setting up JBoss EAP
To set up JBoss EAP in Eclipse IDE, you must direct the IDE to the local or remote runtime servers. This establishes a communication channel between the IDE and the JBoss EAP server for efficient deployment and server management workflows.
The following section describes how to install JBoss EAP in CodeReady Studio.
Prerequisites
Configured Maven repositories.
For more information on how to configure Maven repositories, see Section 4.1, “Configuring Maven repositories”
Procedure
- Start CodeReady Studio.
Click
. The Preferences window appears.
- Enter JBoss Tools in the search field.
Select JBoss Runtime Detection.
The JBoss Runtime Detection window appears.
Click the button.
The Download Runtimes window appears.
Select one of the JBoss EAP versions.
NoteIf you select the JBoss EAP version 6.0.x or earlier, follow the on-screen instructions. If you select a later version, follow the instructions below.
- Click the button.
- Click the button.
- Enter your access.redhat.com username and password.
Click the button.
The Secure Storage Password window appears.
Enter the new master password.
Optionally, you can provide a password hint.
Click the button.
Review the license agreement, if satisfied, accept the license and click the button to continue with the installation.
- Click the button to select the Install folder.
- Click the button to select the Download folder.
Click the button.
The Download Red Hat JBoss EAP window appears.
Note that downloading and installing the Runtime might take a while.
- Ensure the path to the JBoss EAP installation file is checked.
- Click the button.
Verification steps
Click the
. The Show View window appears.
- Type Servers in the search field.
- Select Servers.
Click the button.
The Servers view appears.
Your newly added JBoss EAP is now listed in the Servers view.
4.3. Verifying that JBoss EAP and CodeReady Studio are working correctly
The following section describes how to verify that JBoss EAP and CodeReady Studio are working correctly by building, deploying, and running the imported helloworld application in the JBoss EAP server.
Procedure
- Start CodeReady Studio.
- Open Project Explorer.
Click the Red Hat Central icon.
Figure 4.1. Click the Red Hat Central icon

- Enter helloworld into the search field.
Click the
helloworld-rsquickstart.The New Project Example window appears.
Click the button.
Note that it might take some time for the helloworld application and its Maven dependencies to get imported. Once all the dependencies are imported, the New Project Example window appears.
- Click the button.
- In the Server view select the Red hat JBoss EAP.
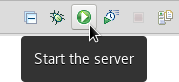
Click the icon.
Figure 4.2. Click the Start the Server icon
In the Project Explorer view right-click the
. The Run on Server window appears.
Click the button.
The helloworld application opens in the internal CodeReady Studio web browser.
- Choose between the JSON or XML format.
The CodeReady Studio web browser prints the Hello World! message.