OpenShift Container Storage is now OpenShift Data Foundation starting with version 4.9.
Dieser Inhalt ist in der von Ihnen ausgewählten Sprache nicht verfügbar.
Chapter 10. Object Bucket Claim
An Object Bucket Claim can be used to request an S3 compatible bucket backend for your workloads.
You can create an Object Bucket Claim in three ways:
An object bucket claim creates a new bucket and an application account in NooBaa with permissions to the bucket, including a new access key and secret access key. The application account is allowed to access only a single bucket and can’t create new buckets by default.
10.1. Dynamic Object Bucket Claim
Similar to Persistent Volumes, you can add the details of the Object Bucket claim (OBC) to your application’s YAML, and get the object service endpoint, access key, and secret access key available in a configuration map and secret. It is easy to read this information dynamically into environment variables of your application.
The Multicloud Object Gateway endpoints uses self-signed certificates only if OpenShift uses self-signed certificates. Using signed certificates in OpenShift automatically replaces the Multicloud Object Gateway endpoints certificates with signed certificates. Get the certificate currently used by Multicloud Object Gateway by accessing the endpoint via the browser. See Accessing the Multicloud Object Gateway with your applications for more information.
Procedure
Add the following lines to your application YAML:
Copy to Clipboard Copied! Toggle word wrap Toggle overflow These lines are the OBC itself.
-
Replace
<obc-name>with the a unique OBC name. -
Replace
<obc-bucket-name>with a unique bucket name for your OBC.
-
Replace
You can add more lines to the YAML file to automate the use of the OBC. The example below is the mapping between the bucket claim result, which is a configuration map with data and a secret with the credentials. This specific job claims the Object Bucket from NooBaa, which creates a bucket and an account.
Copy to Clipboard Copied! Toggle word wrap Toggle overflow -
Replace all instances of
<obc-name>with your OBC name. -
Replace
<your application image>with your application image.
-
Replace all instances of
Apply the updated YAML file:
oc apply -f <yaml.file>
# oc apply -f <yaml.file>Copy to Clipboard Copied! Toggle word wrap Toggle overflow Replace
<yaml.file>with the name of your YAML file.To view the new configuration map, run the following:
oc get cm <obc-name> -o yaml
# oc get cm <obc-name> -o yamlCopy to Clipboard Copied! Toggle word wrap Toggle overflow Replace
obc-namewith the name of your OBC.You can expect the following environment variables in the output:
-
BUCKET_HOST- Endpoint to use in the application. BUCKET_PORT- The port available for the application.-
The port is related to the
BUCKET_HOST. For example, if theBUCKET_HOSTis https://my.example.com, and theBUCKET_PORTis 443, the endpoint for the object service would be https://my.example.com:443.
-
The port is related to the
-
BUCKET_NAME- Requested or generated bucket name. -
AWS_ACCESS_KEY_ID- Access key that is part of the credentials. -
AWS_SECRET_ACCESS_KEY- Secret access key that is part of the credentials.
-
Retrieve the AWS_ACCESS_KEY_ID and AWS_SECRET_ACCESS_KEY. The names are used so that it is compatible with the AWS S3 API. You need to specify the keys while performing S3 operations, especially when you read, write or list from the Multicloud Object Gateway (MCG) bucket. The keys are encoded in Base64. Decode the keys before using them.
oc get secret <obc_name> -o yaml
# oc get secret <obc_name> -o yaml<obc_name>- Specify the name of the object bucket claim.
10.2. Creating an Object Bucket Claim using the command line interface
When creating an Object Bucket Claim (OBC) using the command-line interface, you get a configuration map and a Secret that together contain all the information your application needs to use the object storage service.
Prerequisites
Download the Multicloud Object Gateway (MCG) command-line interface.
subscription-manager repos --enable=rh-odf-4-for-rhel-8-x86_64-rpms
yum install mcg
# subscription-manager repos --enable=rh-odf-4-for-rhel-8-x86_64-rpms
# yum install mcg
Copy to Clipboard Copied! Toggle word wrap Toggle overflow NoteSpecify the appropriate architecture for enabling the repositories using the subscription manager.
- For IBM Power, use the following command:
subscription-manager repos --enable=rh-odf-4-for-rhel-8-ppc64le-rpms
# subscription-manager repos --enable=rh-odf-4-for-rhel-8-ppc64le-rpmsCopy to Clipboard Copied! Toggle word wrap Toggle overflow - For IBM Z infrastructure, use the following command:
subscription-manager repos --enable=rh-odf-4-for-rhel-8-s390x-rpms
# subscription-manager repos --enable=rh-odf-4-for-rhel-8-s390x-rpmsCopy to Clipboard Copied! Toggle word wrap Toggle overflow
Procedure
Use the command-line interface to generate the details of a new bucket and credentials. Run the following command:
noobaa obc create <obc-name> -n openshift-storage
# noobaa obc create <obc-name> -n openshift-storageCopy to Clipboard Copied! Toggle word wrap Toggle overflow Replace
<obc-name>with a unique OBC name, for example,myappobc.Additionally, you can use the
--app-namespaceoption to specify the namespace where the OBC configuration map and secret will be created, for example,myapp-namespace.Example output:
INFO[0001] ✅ Created: ObjectBucketClaim "test21obc"
INFO[0001] ✅ Created: ObjectBucketClaim "test21obc"Copy to Clipboard Copied! Toggle word wrap Toggle overflow The MCG command-line-interface has created the necessary configuration and has informed OpenShift about the new OBC.
Run the following command to view the OBC:
oc get obc -n openshift-storage
# oc get obc -n openshift-storageCopy to Clipboard Copied! Toggle word wrap Toggle overflow Example output:
NAME        STORAGE-CLASS                 PHASE   AGE
test21obc   openshift-storage.noobaa.io   Bound   38s
NAME        STORAGE-CLASS                 PHASE   AGE
test21obc   openshift-storage.noobaa.io   Bound   38s
Copy to Clipboard Copied! Toggle word wrap Toggle overflow Run the following command to view the YAML file for the new OBC:
oc get obc test21obc -o yaml -n openshift-storage
# oc get obc test21obc -o yaml -n openshift-storageCopy to Clipboard Copied! Toggle word wrap Toggle overflow Example output:
Copy to Clipboard Copied! Toggle word wrap Toggle overflow Inside of your
openshift-storagenamespace, you can find the configuration map and the secret to use this OBC. The CM and the secret have the same name as the OBC. Run the following command to view the secret:oc get -n openshift-storage secret test21obc -o yaml
# oc get -n openshift-storage secret test21obc -o yamlCopy to Clipboard Copied! Toggle word wrap Toggle overflow Example output:
Copy to Clipboard Copied! Toggle word wrap Toggle overflow The secret gives you the S3 access credentials.
Run the following command to view the configuration map:
oc get -n openshift-storage cm test21obc -o yaml
# oc get -n openshift-storage cm test21obc -o yamlCopy to Clipboard Copied! Toggle word wrap Toggle overflow Example output:
Copy to Clipboard Copied! Toggle word wrap Toggle overflow The configuration map contains the S3 endpoint information for your application.
10.3. Creating an Object Bucket Claim using the OpenShift Web Console
You can create an Object Bucket Claim (OBC) using the OpenShift Web Console.
Prerequisites
- Administrative access to the OpenShift Web Console.
- In order for your applications to communicate with the OBC, you need to use the configmap and secret. For more information about this, see Section 10.1, “Dynamic Object Bucket Claim”.
Procedure
- Log into the OpenShift Web Console.
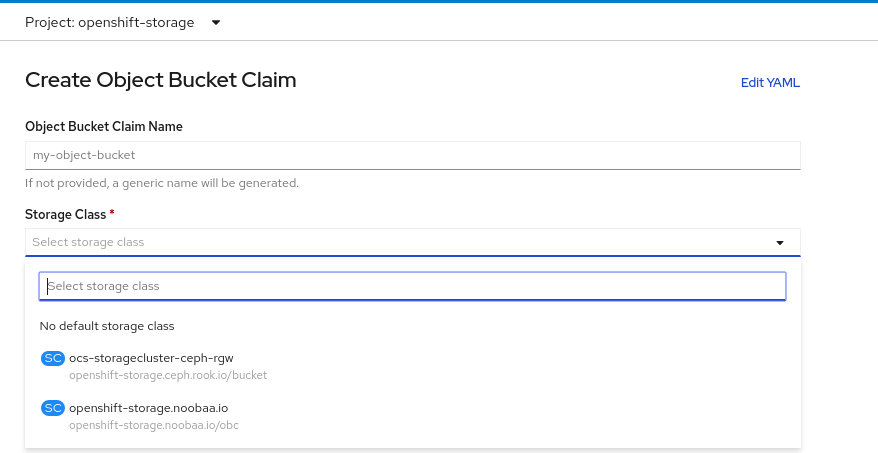
On the left navigation bar, click Storage
Object Bucket Claims Create Object Bucket Claim. Enter a name for your object bucket claim and select the appropriate storage class based on your deployment, internal or external, from the dropdown menu:
- Internal mode
The following storage classes, which were created after deployment, are available for use:
-
ocs-storagecluster-ceph-rgwuses the Ceph Object Gateway (RGW) -
openshift-storage.noobaa.iouses the Multicloud Object Gateway (MCG)
-
- External mode
The following storage classes, which were created after deployment, are available for use:
-
ocs-external-storagecluster-ceph-rgwuses the RGW openshift-storage.noobaa.iouses the MCGNoteThe RGW OBC storage class is only available with fresh installations of OpenShift Data Foundation version 4.5. It does not apply to clusters upgraded from previous OpenShift Data Foundation releases.
-
Click Create.
Once you create the OBC, you are redirected to its detail page:


Additional Resources
10.4. Attaching an Object Bucket Claim to a deployment
Once created, Object Bucket Claims (OBCs) can be attached to specific deployments.
Prerequisites
- Administrative access to the OpenShift Web Console.
Procedure
-
On the left navigation bar, click Storage
Object Bucket Claims. Click the Action menu (⋮) next to the OBC you created.
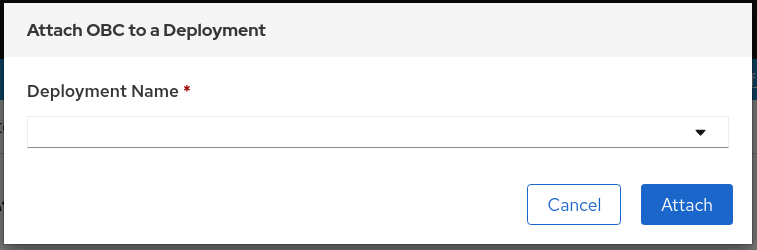
From the drop-down menu, select Attach to Deployment.
Select the desired deployment from the Deployment Name list, then click Attach.

Additional Resources
10.5. Viewing object buckets using the OpenShift Web Console
You can view the details of object buckets created for Object Bucket Claims (OBCs) using the OpenShift Web Console.
Prerequisites
- Administrative access to the OpenShift Web Console.
Procedure
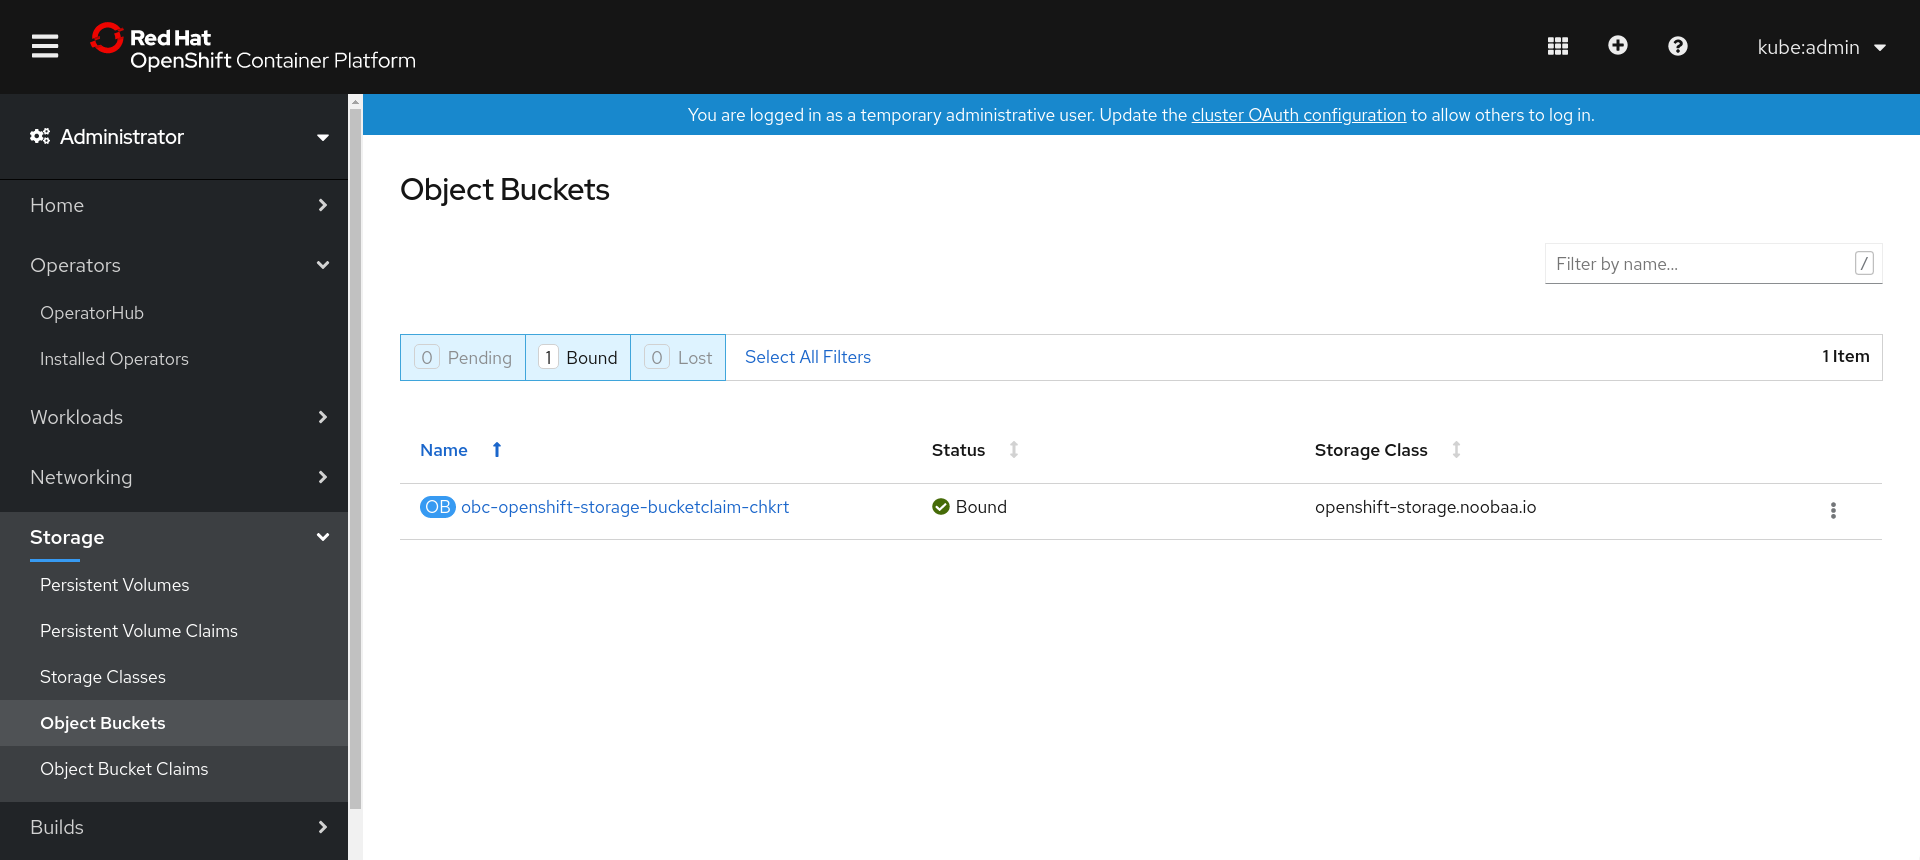
- Log into the OpenShift Web Console.
On the left navigation bar, click Storage
Object Buckets. Alternatively, you can also navigate to the details page of a specific OBC and click the Resource link to view the object buckets for that OBC.
- Select the object bucket you want to see details for. You are navigated to the Object Bucket Details page.
Additional Resources
10.6. Deleting Object Bucket Claims
Prerequisites
- Administrative access to the OpenShift Web Console.
Procedure
-
On the left navigation bar, click Storage
Object Bucket Claims. Click the Action menu (⋮) next to the Object Bucket Claim (OBC) you want to delete.
- Select Delete Object Bucket Claim.
- Click Delete.
Additional Resources