Dieser Inhalt ist in der von Ihnen ausgewählten Sprache nicht verfügbar.
Chapter 3. Process instance filtering
For process instances in Menu
Figure 3.1. Filtering Process Instances - Default View
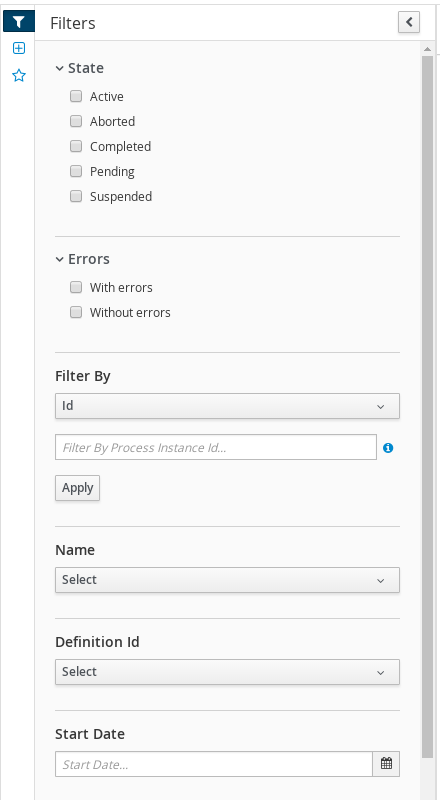
You can filter process instances by the following attributes in the Filters panel:
- Id
Filter by process instance ID.
Input:
Numeric- Initiator
Filter by the user ID of the process instance initiator.
The user ID is a unique value, and depends on the ID management system.
Input:
String- Correlation key
Filter by correlation key.
Input:
String- Description
Filter by process instance description.
Input:
String- State
Filter by different states. You can select more than one status to display results that meet any of the selected states. Removing the status filter displays all processes, regardless of status.
The following filter states are available:
- Active
- Aborted
- Completed
- Pending
- Suspended
- Errors
- Filter by process instances with or without errors.
- Name
- Filter by project name.
- Date and time filtering
- Start Date
- When the process was started.
- Last Update
- When the process was updated or modified.
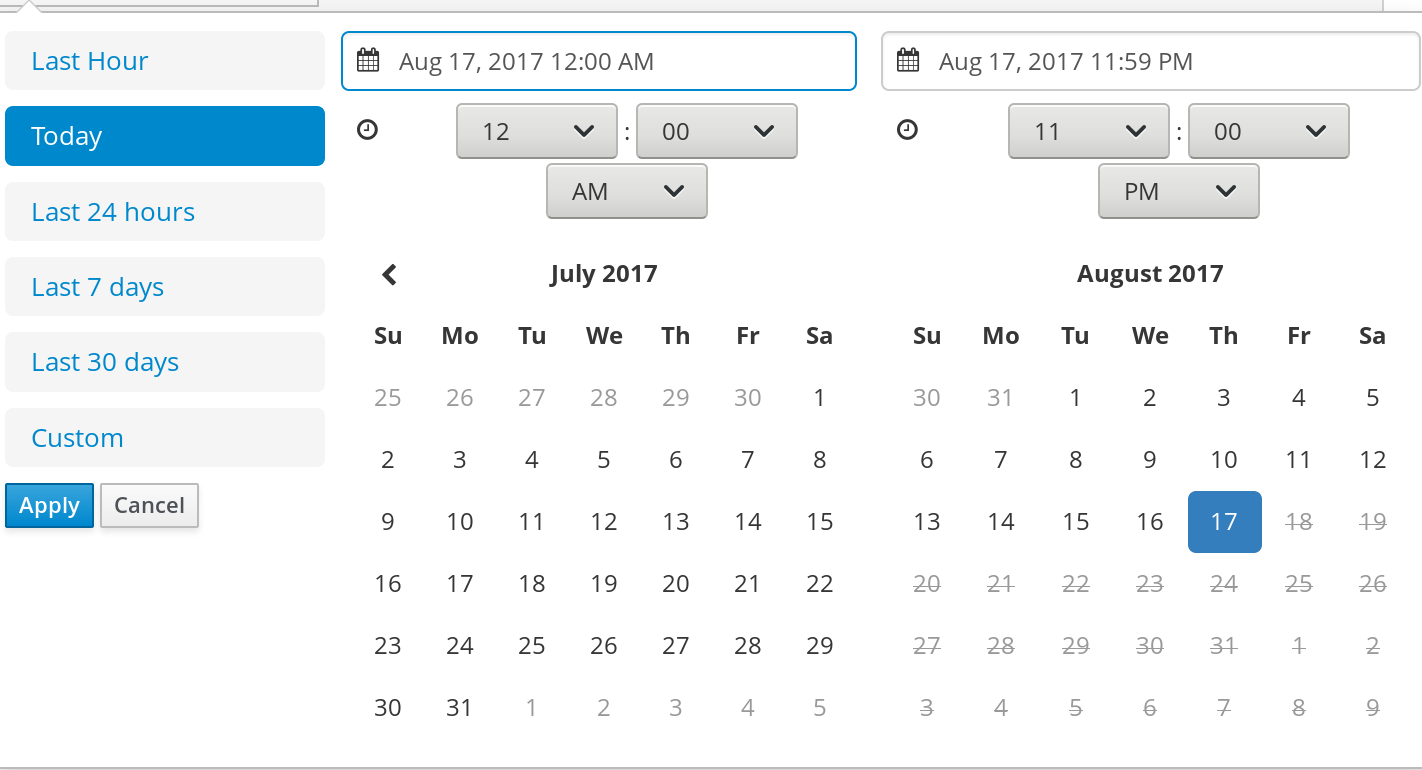
Each of these filters have the following quick filter options:
- Last Hour
- Today
- Last 24 Hours
- Last 7 Days
- Last 30 Days
Custom
Selecting Custom date and time filtering opens a calendar tool for selecting a date and time range.
Figure 3.2. Process Instances Search by Date Range
3.1. Filtering process instances based on business data
You can add process variables as columns in the process instance list in order to enable flexible filtering of process instances based on business data.
Procedure
-
In Business Central, go to Menu
Manage Process Instances. - In the Manage Process Instances page, click the advanced filters icon on the left to open the list of process instance Advanced Filters options.
- In the Advanced Filters panel, enter the name and description of the filter, and click Add New.
- From the list of filter values, select processId and equalsTo.
Provide a valid
processIdvalue and click Ok.A new filter is created and immediately applied to the process instances list. The filter is also saved in the Saved Filters list. You can access saved filters by clicking the star icon on the left side of the Manage Process Instances page.
3.2. Creating a custom process instance list
You can view the list of all the running process instances in Menu
Prerequisites
- A project with a process definition has been deployed in Business Central.
Procedure
-
In Business Central, go to Menu
Manage Process Instances. - In the Manage Process Instances page, click the advanced filters icon on the left to open the list of process instance Advanced Filters options.
- In the Advanced Filters panel, enter the name and description of the filter that you want to use for your custom process instance list, and click Add New.
From the list of filter values, select the parameters and values to configure the custom process instance list, and click Ok.
A new filter is created and immediately applied to the process instances list. The filter is also saved in the Saved Filters list. You can access saved filters by clicking the star icon on the left side of the Manage Process Instances page.
3.3. Aborting a process instance using Business Central
If a process instance becomes obsolete, you can abort the process instance in Business Central.
Procedure
-
In Business Central, go to Menu
Manage Process Instances to view the list of available process instances. - Select the process instance you want to abort from the list.
- In the process details page, click the Abort button in the upper-right corner.
3.4. Signaling process instances from Business Central
You can signal a process instance from Business Central.
Prerequisite
- A project with a process definition has been deployed in Business Central.
Procedure
-
In Business Central, go to Menu
Manage Process Instances. -
Locate the required process instance, click the
 button and select Signal from the drop-down menu.
Fill the following fields:
Signal Name: Corresponds to the
SignalReforMessageRefattributes of the signal. This field is required.NoteYou can also send a
Messageevent to the process by adding theMessage-prefix in front of theMessageRefvalue.- Signal Data: Corresponds to data accompanying the signal. This field is optional.
When using the Business Central user interface, you can only signal Signal intermediate catch events.
3.5. Asynchronous signal events
When several process instances from different process definitions are waiting for the same signal, they are executed sequentially in the same thread. But, if one of those process instances throws a runtime exception, all the other process instances are affected and usually result in a rolled back transaction. To avoid this situation, Red Hat Process Automation Manager supports using asynchronous signals events for:
- Throwing intermediate signal events
- End events
3.5.1. Configuring asynchronous signals for intermediate events
Intermediate events drive the flow of a business process. Intermediate events are used to either catch or throw an event during the execution of the business process. An intermediate event handles a particular situation that occurs during process execution. A throwing signal intermediate event produces a signal object based on the defined properties.
You can configure an asynchronous signal for intermediate events in Business Central.
Prerequisites
- You have created a project in Business Central and it contains at least one business process asset.
- A project with a process definition has been deployed in Business Central.
Procedure
- Open a business process asset.
- In the process designer canvas, drag and drop the Intermediate Signal from the left toolbar.
- Click the Properties icon on the upper-right side of the screen to open the Properties panel.
- Expand the Data Assignments section.
- Click the box under the Assignments sub-section. The Task Data I/O dialog box opens.
- Click Add next to Data Inputs and Assignments.
- Enter a name of the throw event as async in the Name field.
- Leave the Data Type and Source fields blank.
- Click OK.
It will automatically set the executor service on each session. This ensures that each process instance is signaled in a different transaction.
3.5.2. Configuring asynchronous signals for end events
End events indicate the completion of a business process. All end events, with the exception of the none and terminate end events, are throw events. A throwing signal end event is used to finish a process or subprocess flow. When the execution flow enters the element, the execution flow finishes and produces a signal identified by its SignalRef property.
You can configure an asynchronous signal for end events in Business Central.
Prerequisites
- You have created a project in Business Central and it contains at least one business process asset.
- A project with a process definition has been deployed in Business Central.
Procedure
- Open a business process asset.
- In the process designer canvas, drag and drop the End Signal from the left toolbar.
- Click the Properties icon on the upper-right side of the screen to open the Properties panel.
- Expand the Data Assignments section.
- Click the box under the Assignments sub-section. The Task Data I/O dialog box opens.
- Click Add next to Data Inputs and Assignments.
- Enter a name of the throw event as async in the Name field.
- Leave the Data Type and Source fields blank.
- Click OK.
It will automatically set the executor service on each session. This ensures that each process instance is signaled in a different transaction.