Chapter 15. Basic Subsystem Management
This chapter discusses the Certificate System administrative console, the configuration files, and other basic administrative tasks such as starting and stopping the server, managing logs, changing port assignments, and changing the internal database.
15.1. PKI instances
This version of Red Hat Certificate System continues to support separate PKI instances for all subsystems.
- Separate PKI instances
- run as a single Java-based Apache Tomcat instance,
- contain a single PKI subsystem (CA, KRA, OCSP, TKS, or TPS), and
- must utilize unique ports if co-located on the same physical machine or virtual machine (VM). Additionally, this version of the Certificate System introduces the notion of a shared PKI instance.
- Shared PKI instances
- run as a single Java-based Apache Tomcat instance,
- can contain a single PKI subsystem that is identical to a separate PKI instance,
can contain any combination of up to one of each type of PKI subsystem:
- CA
- TKS
- CA, KRA
- CA, OCSP
- TKS, TPS
- CA, KRA, TKS, TPS
- CA, KRA, OCSP, TKS, TPS
- and so on.
- allow all of their subsystems contained within that instance to share the same ports, and
- must utilize unique ports if more than one is co-located on the same physical machine or VM.
15.2. PKI instance execution management
The act of starting, stopping, restarting, or obtaining the status of a PKI instance is known as execution management. Each PKI instance, separate or shared, is started, stopped, restarted, and has its status obtained separately. This section describes the execution management for any PKI instance.
15.2.1. Starting, stopping, and restarting a PKI instance
A PKI instance is started, stopped, and restarted like other system programs, using systemd.
-
Log in to the server machine as
root. Run the
systemctlcommand, specifying the action and the instance name:# systemctl start|stop|restart pki-tomcatd@instance_name.serviceFor example:
# systemctl restart pki-tomcatd@pki-tomcat.serviceAlternatively, you can use the
pki-serveralias:# pki-server start|stop|restart instance_nameFor example:
# pki-server restart pki-tomcat
15.2.2. Restarting a PKI instance after a machine restart
If a computer running one or more PKI instances is shut down unexpectedly, more services than just the PKI instances must be restarted, in the proper order, for the subsystem to be available both through the HTML services page and the administrative console.
If the Directory Server instance used by the subsystem is installed on the local machine, restart the {ADS} and the Directory Server processes.
# systemctl start dirsrv-admin.service
# systemctl start dirsrv@instance_name.service
Start the Certificate System subsystem instances.
# pki-server start instance_name
15.2.3. Checking the PKI instance status
The systemctl command can be used to check the status of a process, showing whether it is running or stopped. For example:
systemctl -l status pki-tomcatd@pki-tomcat.service
pki-tomcatd@pki-tomcat.service - PKI Tomcat Server pki-tomcat
   Loaded: loaded (/lib/systemd/system/pki-tomcatd@.service; enabled)
   Active: inactive (dead) since Fri 2015-11-20 19:04:11 MST; 12s ago
  Process: 8728 ExecStop=/usr/libexec/tomcat/server stop (code=exited, status=0/SUCCESS)
  Process: 8465 ExecStart=/usr/libexec/tomcat/server start (code=exited, status=143)
  Process: 8316 ExecStartPre=/usr/bin/pkidaemon start tomcat %i (code=exited, status=0/SUCCESS)
 Main PID: 8465 (code=exited, status=143)

Nov 20 19:04:10 pki.example.com server[8728]: options used: -Dcatalina.base=/var/lib/pki/pki-tomcat -Dcatalina.home=/usr/share/tomcat -Djava.endorsed.dirs= -Djava.io.tmpdir=/var/lib/pki/pki-tomcat/temp -Djava.util.logging.config.file=/var/lib/pki/pki-tomcat/conf/logging.properties -Djava.util.logging.manager=org.apache.juli.ClassLoaderLogManager
Nov 20 19:04:10 pki.example.com server[8728]: arguments used: stop
Nov 20 19:04:11 pki.example.com server[8465]: Nov 20, 2015 7:04:11 PM org.apache.catalina.core.StandardServer await
Nov 20 19:04:11 pki.example.com server[8465]: INFO: A valid shutdown command was received via the shutdown port. Stopping the Server instance.
Nov 20 19:04:11 pki.example.com server[8465]: PKIListener: org.apache.catalina.core.StandardServer[before_stop]
Nov 20 19:04:11 pki.example.com server[8465]: PKIListener: org.apache.catalina.core.StandardServer[stop]
Nov 20 19:04:11 pki.example.com server[8465]: PKIListener: org.apache.catalina.core.StandardServer[configure_stop]
Nov 20 19:04:11 pki.example.com server[8465]: Nov 20, 2015 7:04:11 PM org.apache.coyote.AbstractProtocol pause
Nov 20 19:04:11 pki.example.com server[8465]: INFO: Pausing ProtocolHandler ["http-bio-8080"]
Nov 20 19:04:11 pki.example.com systemd[1]: Stopped PKI Tomcat Server pki-tomcat.
If the instance is running, the status check returns information similar to the following example:
systemctl -l status pki-tomcatd@pki-tomcat.service
pki-tomcatd@pki-tomcat.service - PKI Tomcat Server pki-tomcat
   Loaded: loaded (/lib/systemd/system/pki-tomcatd@.service; enabled)
   Active: active (running) since Fri 2015-11-20 19:09:09 MST; 3s ago
  Process: 8728 ExecStop=/usr/libexec/tomcat/server stop (code=exited, status=0/SUCCESS)
  Process: 9154 ExecStartPre=/usr/bin/pkidaemon start tomcat %i (code=exited, status=0/SUCCESS)
 Main PID: 9293 (java)
   CGroup: /system.slice/system-pki\x2dtomcatd.slice/pki-tomcatd@pki-tomcat.service
           ������9293 java -DRESTEASY_LIB=/usr/share/java/resteasy-base -Djava.library.path=/usr/lib64/nuxwdog-jni -classpath /usr/share/tomcat/bin/bootstrap.jar:/usr/share/tomcat/bin/tomcat-juli.jar:/usr/share/java/commons-daemon.jar -Dcatalina.base=/var/lib/pki/pki-tomcat -Dcatalina.home=/usr/share/tomcat -Djava.endorsed.dirs= -Djava.io.tmpdir=/var/lib/pki/pki-tomcat/temp -Djava.util.logging.config.file=/var/lib/pki/pki-tomcat/conf/logging.properties -Djava.util.logging.manager=org.apache.juli.ClassLoaderLogManager -Djava.security.manager -Djava.security.policy==/var/lib/pki/pki-tomcat/conf/catalina.policy org.apache.catalina.startup.Bootstrap start

Nov 20 19:09:10 pki.example.com server[9293]: Nov 20, 2015 7:09:10 PM org.apache.catalina.core.StandardService startInternal
Nov 20 19:09:10 pki.example.com server[9293]: INFO: Starting service Catalina
Nov 20 19:09:10 pki.example.com server[9293]: Nov 20, 2015 7:09:10 PM org.apache.catalina.core.StandardEngine startInternal
Nov 20 19:09:10 pki.example.com server[9293]: INFO: Starting Servlet Engine: Apache Tomcat/7.0.54
Nov 20 19:09:10 pki.example.com server[9293]: Nov 20, 2015 7:09:10 PM org.apache.catalina.startup.HostConfig deployDescriptor
Nov 20 19:09:10 pki.example.com server[9293]: INFO: Deploying configuration descriptor /etc/pki/pki-tomcat/Catalina/localhost/ROOT.xml
Nov 20 19:09:12 pki.example.com server[9293]: Nov 20, 2015 7:09:12 PM org.apache.catalina.startup.HostConfig deployDescriptor
Nov 20 19:09:12 pki.example.com server[9293]: INFO: Deployment of configuration descriptor /etc/pki/pki-tomcat/Catalina/localhost/ROOT.xml has finished in 2,071 ms
Nov 20 19:09:12 pki.example.com server[9293]: Nov 20, 2015 7:09:12 PM org.apache.catalina.startup.HostConfig deployDescriptor
Nov 20 19:09:12 pki.example.com server[9293]: INFO: Deploying configuration descriptor /etc/pki/pki-tomcat/Catalina/localhost/pki#admin.xml
15.2.4. Configuring a PKI instance to automatically start upon reboot
The systemctl command can be used to automatically start instances upon reboot. For example, the following commands automatically start the Red Hat Administration Server, Directory Server, and a CA upon reboot:
# systemctl enable dirsrv-admin.service
# systemctl enable dirsrv.target
# systemctl enable pki-tomcatd@pki-tomcat.service
The default PKI instance installation and configuration using the pkispawn command automatically enables the instance to start upon reboot.
To disable this behavior (that is, to prevent PKI instances from automatically starting upon reboot), issue the following commands:
# systemctl disable pki-tomcatd@pki-tomcat.service
# systemctl disable dirsrv.target
# systemctl disable dirsrv-admin.service
15.2.5. Setting sudo permissions for Certificate System services
For both simplicity of administration and security, the Certificate System and Directory Server processes can be configured so that PKI administrators (instead of only root) can start and stop the services.
A recommended option when setting up subsystems is to use a pkiadmin system group. (Details are in the Red Hat Certificate System Planning, Installation, and Deployment Guide.) All of the operating system users which will be Certificate System administrators are then added to this group. If this pkiadmin system group exists, then it can be granted sudo access to perform certain tasks.
Edit the
/etc/sudoersfile; on Red Hat Enterprise Linux, you can do this using thevisudocommand:# visudoDepending on what is installed on the machine, add a line for the Directory Server, the {ADS}, PKI management tools, and each PKI subsystem instance, granting
sudorights to thepkiadmingroup:# For Directory Server services %pkiadmin ALL = PASSWD: /usr/bin/systemctl * dirsrv.target %pkiadmin ALL = PASSWD: /usr/bin/systemctl * dirsrv-admin.service # For PKI instance management %pkiadmin ALL = PASSWD: /usr/sbin/pkispawn * %pkiadmin ALL = PASSWD: /usr/sbin/pkidestroy * # For PKI instance services %pkiadmin ALL = PASSWD: /usr/bin/systemctl * pki-tomcatd@instance_name.service
Make sure to set sudo permissions for every Certificate System, Directory Server, and {ADS} on the machine -and only for those instances on the machine. There could be multiple instances of the same subsystem type on a machine or no instance of a subsystem type. It depends on the deployment.
15.3. Opening subsystem consoles and services
Each subsystem has different interfaces for different user types to access. All subsystems have some kind of web services page for agents, administrators, or end users (or all three), with the exception of the TKS. Additionally, the CA, KRA, OCSP, and TKS all have a Java-based Console, which must be installed on a server, to perform administrative tasks to manage the subsystem itself.
The appearance and, to a limited extent, functionality of the subsystem’s web-based services pages can be customized to better integrate with an organization’s existing websites. See the Red Hat Certificate System Planning, Installation, and Deployment Guide.
15.3.1. Finding the subsystem web services pages
The CA, KRA, OCSP, TKS, and TPS subsystems have web services pages for agents, regular users, and administrators. These menu of web services can be accessed by opening the URL to the subsystem host over the subsystem’s secure end user’s port. For example, for the CA:
https://server.example.com:8443/ca/servicesThe main web services page for each subsystem has a list of available services pages; these are summarized in the table below. To access any service specifically, access the appropriate port and append the appropriate directory to the URL. For example, to access the CA’s end entities (regular users) web services:
https://server.example.com:8443/ca/ee/caIf DNS is properly configured, then an IPv4 or IPv6 address can be used to connect to the services pages. For example:
https://1.2.3.4:8443/ca/services
https://[00:00:00:00:123:456:789:00:]:8443/ca/services
Some subsystem interfaces require client authentication to access them, usually interfaces associated with agent or administrator roles. Other interfaces, even those that run over secure (SSL connections) do not require client authentication. Some of these interfaces (such as end entities services) can be configured to require client authentication, but others cannot be configured to support client authentication. These differences are noted in the following table.
Anyone can access the end user pages for a subsystem, but accessing agent or admin web services pages requires that an agent or administrator certificate be issued and installed in the web browser, or authentication to the web services fails.
| Used for SSL | Used for Client Authentication | Web Services | Web Service Location |
|---|---|---|---|
| Certificate Manager | |||
| No | End Entities | ca/ee/ca/ | |
| Yes | No | End Entities | ca/ee/ca |
| Yes | Yes | Agents | ca/agent/ca |
| Yes | No | Services | ca/services |
| Yes | No | Console | pkiconsole https://host:port/ca |
| Key Recovery Authority | |||
| Yes | Yes | Agents | kra/agent/kra |
| Yes | No | Services | kra/services |
| Yes | No | Console | pkiconsole https://host:port/kra |
| Online Certificate Status Manager | |||
| Yes | Yes | Agents | ocsp/agent/ocsp |
| Yes | No | Services | ocsp/services |
| Yes | No | Console | pkiconsole https://host:port/ocsp |
| Token Key Service | |||
| Yes | No | Services | tks/services |
| Yes | No | Console | pkiconsole https://host:port/tks |
| Token Processing System | |||
| Yes | Services | index.cgi | |
Services with a client authentication value of No can be reconfigured to require client authentication. Services which do not have either a Yes or No value cannot be configured to use client authentication.
15.3.1.1. Starting the Certificate System administrative console
pkiconsole is being deprecated.
The Console is opened by connecting to the subsystem instance over its SSL port using the pkiconsole command. This command has the format:
pkiconsole https://server.example.com:admin_port/subsystem_type
The subsystem_type can be ca, kra, ocsp, or tks. For example, this opens the KRA console:
pkiconsole https://server.example.com:8443/kraIf DNS is properly configured, then an IPv4 or IPv6 address can be used to connect to the console. For example:
pkiconsole https://1.2.3.4:8443/ca
pkiconsole https://[00:00:00:00:123:456:789:00:]:8443/ca
15.3.2. Enabling SSL for the Java Administrative Console
Certificate-based authentication to the Certificate System Console can be enabled so that administrators must authenticate using a client certificate before logging into the Certificate System Console. Store the administrators' certificates before enabling certificate-based authentication.
To enable SSL in the Console, configure both the client and the server.
If a CA is configured for client authentication over the admin port and that CA is a security domain manager, then no new PKI subsystems can be configured that use that CA for its security domain. New PKI instances register themselves to the security domain CA over the admin port but without using client authentication. If the CA requires client authentication, then the registration attempt fails.
First, set up the Certificate System server to use SSL client authentication:
Store the certificates for any administrator using this system. The certificate should be either from the CA itself or from whichever CA signed the certificate for the subsystem.
- Open the subsystem console.
- Select the Users and Groups option on the left.
- In the Users tab, select the administrative user, and click .
- Click .
Paste in the base-64 encoded SSL client certificate, such as the administrator certificate stored in the web browser.
Make sure the client certificate is good for SSL client authentication; otherwise, the server will not accept the client certificate and will post an error message in the error log in the
/var/log/<instanceID>/system:failure (14290): Error receiving connection SEC_ERROR_INADEQUATE_CERT_TYPE - Certificate type not approved for application.)
Stop the subsystem.
# pki-server stop instance_name-
Open the instance configuration directory,
/var/lib/pki/ instance_name/subsystem_type/conf. -
Open the file
CS.cfg. Change the value of the
authTypeparameter frompwdtosslclientauth:authType=sslclientauth- Save the file.
-
Open the
server.xmlfile. Change the
clientAuth="false"attribute toclientAuth="want"in the admin interface connector section:<Connector port="8443" maxHttpHeaderSize="8192" maxThreads="150" minSpareThreads="25" maxSpareThreads="75" enableLookups="false" disableUploadTimeout="true" acceptCount="100" scheme="https" secure="true" clientAuth="want" sslProtocol="SSL" ..... serverCertFile="/var/lib/pki/pki-tomcat/conf/serverCertNick.conf" passwordFile="/var/lib/pki/pki-tomcat/conf/password.conf" passwordClass="org.apache.tomcat.util.net.jss.PlainPasswordFile" certdbDir="/var/lib/pki/pki-tomcat/alias"/>The
wantvalue means that client authentication is preferred, but not required. This allows client authentication through interfaces that can easily use it (like the Console) while still allowing clients which do not easily support client authentication (other subsystems within the security domain) to connect using regular connections.Start the subsystem.
pki-server start instance_name
After setting up the server, then configure the client to use SSL client authentication.
The Console must have access to the administrator certificate and keys used for SSL client authentication to the server. The Console’s default certificate and key databases are stored in the .redhat-idm-console directory.
To provide access to the administrator certificate and keys, either export them from the administrator’s browser into a .p12 file and then import it by using pk12util, or copy the browser’s certificate and key databases into the .redhat-idm-console directory. (This procedure assumes that the certificates are exported from the browser into a .p12 file.)
-
Export the administrator user certificate and keys from the browser into a file, such as
admin.p12. Open the user’s console directory.
/user-directory/.redhat-idm-consoleIf necessary, create new security databases.
certutil -N -d .Stop the Certificate System instance.
pki-server stop <instance_name>Use
pk12utilto import the certificates.# pk12util -i /tmp/admin.p12 -d /user-directory/.redhat-idm-console -W [p12filepassword]If the procedure is successful, the command prints the following:
pk12util: PKCS12 IMPORT SUCCESSFUL-
Export the 64-bit blob of the issuing CA certificate from the browser and save it to a file like
ca.crt. Import the CA certificate from the base 64-blob associated with the admin user cert.
certutil -A -d . -n ca -t CT,C,C -i ./ca.crtStart the Certificate System instance.
pki-server start <instance_name>- Start the console: now, it prompts for a certificate.
15.4. Configuring the LDAP database
The Certificate System performs certificate- and key-management functions in response to the requests it receives. These functions include the following:
- Storing and retrieving certificate requests
- Storing and retrieving certificate records
- Storing CRLs
- Storing ACLs
- Storing privileged user and role information
- Storing and retrieving end users' encryption private key records
To fulfill these functions, the Certificate System is incorporated with a Red Hat Directory Server, referred to as the internal database or local database. The Directory Server is referenced as part of the Certificate System configuration; when the Certificate System subsystem is configured, a new database is created within the Directory Server. This database is used as an embedded database exclusively by the Certificate System instance and can be managed using directory management tools that come with the Directory Server.
The Certificate System instance database is listed with the other Directory Server databases in the serverRoot/slapd-DS_name/db/ directory. These databases are named by the value determined by the value of the pki_ds_database variable under the specified subsystem section within the /usr/share/pki/server/etc/default.cfg file (CS_instance_name-CA, CS_instance_name-KRA, CS_instance_name-OCSP, CS_instance_name-TKS, and CS_instance_name-TPS by default), which is the default format given during the instance configuration.
For example, for a Certificate Manager named ca1, the database name would be ca1-CA. Similarly, the database name is determined by the value of the pki_ds_base_dn variable under the specified subsystem section within the /usr/share/pki/server/etc/default.cfg file (o=CS_instance_name-CA, o=CS_instance_name-KRA, o=CS_instance_name-OCSP, o=CS_instance_name-TKS, or o=CS_instance_name-TPS by default), and is also set during the configuration.
The subsystems use the database for storing different objects. A Certificate Manager stores all the data, certificate requests, certificates, CRLs, and related information, while a KRA only stores key records and related data.
The internal database schema is configured to store only Certificate System data. Do not make any changes to it or configure the Certificate System to use any other LDAP directory. Doing so can result in data loss.
Additionally, do not use the internal LDAP database for any other purpose.
15.4.1. Changing the internal database configuration
To change the Directory Server instance that a subsystem instance uses as its internal database:
Log into the subsystem administrative console.
pkiconsole https://server.example.com:admin_port/<subsystem_type>Notepkiconsoleis being deprecated.- In the Configuration tab, select the Internal Database tab.
Change the Directory Server instance by changing the hostname, port, and bind DN fields.
The hostname is the fully qualified hostname of the machine on which the Directory Server is installed, such as
certificates.example.com. The Certificate System uses this name to access the directory.By default, the hostname of the Directory Server instance used as the internal database is shown as
localhostinstead of the actual hostname. This is done to insulate the internal database from being visible outside the system since a server onlocalhostcan only be accessed from the local machine. Thus, the default configuration minimizes the risk of someone connecting to this Directory Server instance from outside the local machine.The hostname can be changed to something other than
localhostif the visibility of the internal database can be limited to a local subnet. For example, if the Certificate System and Directory Server are installed on separate machines for load balancing, specify the hostname of the machine in which the Directory Server is installed.The port number is the TCP/IP port used for non-SSL communications with the Directory Server.
The DN should be the Directory Manager DN. The Certificate System subsystem uses this DN when it accesses the directory tree to communicate with the directory.
Click .
The configuration is modified. If the changes require restarting the server, a prompt appears with that message. In that case, restart the server.
15.4.2. Using a certificate issued by Certificate System in Directory Server
To use an encrypted connection to Directory Server when you installed Certificate System, it was necessary to either use a certificate issued by an external Certificate Authority (CA) or a self-signed certificate. However, after setting up the Certificate System CA, administrators often want to replace this certificate with one issued by Certificate System.
To replace the TLS certificate used by Directory Server with a certificate issued by Certificate System:
On the Directory Server host:
Stop the Directory Server instance:
# systemctl stop dirsrv@<instance_name>Generate a Certificate Signing Request (CSR).
For example, to generate a CSR which uses 2048 bit RSA encryption, and to store it in the
~/ds.csrfile:# PKCS10Client -d /etc/dirsrv/slapd-<instance_name>/ -p password -a rsa -l 2048 -o ~/ds.csr -n "CN=$HOSTNAME" PKCS10Client: Debug: got token. PKCS10Client: Debug: thread token set. PKCS10Client: token Internal Key Storage Token logged in... PKCS10Client: key pair generated. PKCS10Client: CertificationRequest created. PKCS10Client: b64encode completes. Keypair private key id: -3387b397ebe254b91c5d6c06dc36618d2ea8b7e6 -----BEGIN CERTIFICATE REQUEST----- ... -----END CERTIFICATE REQUEST----- PKCS10Client: done. Request written to file: ~/ds.csrStart the Directory Server instance to enable the CA to process the request:
# systemctl start dirsrv@<instance_name>Submit the CSR to the Certificate System’s CA. For example:
# pki -d /etc/dirsrv/slapd-<instance_name>/ ca-cert-request-submit --profile caServerCert --csr-file ~/ds.csr
-----------------------------
Submitted certificate request
-----------------------------
  Request ID: 13
  Type: enrollment
  Request Status: pending
  Operation Result: success
On the Certificate System host:
Import the CA agent certificate into a Network Security Services (NSS) database to sign the CMC full request:
Create a new directory. For example:
# mkdir ~/certs_db/Initialize the database in the newly created directory:
# certutil -N -d ~/certs_db/Display the serial number of the CA signing certificate:
# pki -p 8080 ca-cert-find --name "CA Signing Certificate"
---------------
1 entries found
---------------
Serial Number: 0x87bbe2d
...
Use the serial number from the previous step to download the CA signing certificate into the
~/certs`db/CA.pemfile:# pki -p 8080 ca-cert-show 0x87bbe2d --output ~/certs_db/CA.pemImport the CA signing certificate into the NSS database:
# pki -d ~/certs_db/ -c password client-cert-import "CA Certificate" --ca-cert ~/certs_db/CA.pemImport the agent certificate:
# pk12util -d ~/certs_db/ -i ~/.dogtag/<instance_name>/ca_admin_cert.p12
Enter Password or Pin for "NSS FIPS 140-2 Certificate DB": password
Enter password for PKCS12 file: password
pk12util: PKCS12 IMPORT SUCCESSFUL
Create the Certificate Management over CMS (CMC) request:
Create a configuration file, such as
~/sslserver-cmc-request.cfg, with the following content:# NSS database directory where the CA agent certificate is stored. dbdir=~/certs_db/ # NSS database password. password=password # Token name (default is internal). tokenname=internal # Nickname for CA agent certificate. nickname=caadmin # Request format: pkcs10 or crmf. format=pkcs10 # Total number of PKCS10/CRMF requests. numRequests=1 # Path to the PKCS10/CRMF request. # The content must be in Base-64 encoded format. # Multiple files are supported. They must be separated by space. input=~/ds.csr # Path for the CMC request. output=~/sslserver-cmc-request.binCreate the CMC request:
# CMCRequest ~/sslserver-cmc-request.cfg
...
The CMC enrollment request in base-64 encoded format:
...
The CMC enrollment request in binary format is stored in ~/sslserver-cmc-request.bin
Submit the CMC request:
Create a configuration file, such as
~/sslserver-cmc-submit.cfg, with the following content:# PKI server host name. host=server.example.com # PKI server port number. port=8443 # Use secure connection. secure=true # Use client authentication. clientmode=true # NSS database directory where the CA agent certificate is stored. dbdir=~/certs_db/ # NSS database password. password=password # Token name (default: internal). tokenname=internal # Nickname of CA agent certificate. nickname=caadmin # CMC servlet path servlet=/ca/ee/ca/profileSubmitCMCFull?profileId=caCMCserverCert # Path for the CMC request. input=~/sslserver-cmc-request.bin # Path for the CMC response. output=~/sslserver-cmc-response.binSubmit the request:
# HttpClient sslserver-cmc-submit.cfg
...
The response in binary format is stored in
~/sslserver-cmc-response.bin
Optionally, verify the result:
# CMCResponse -d ~/certs_db/ -i ~/sslserver-cmc-response.bin
...
Number of controls is 1
Control #0: CMCStatusInfoV2
   OID: {1 3 6 1 5 5 7 7 25}
   BodyList: 1
   Status: SUCCESS
Display the serial number of the Directory Server certificate:
# pki -p 8080 ca-cert-find --name "DS Certificate"
---------------
1 entries found
---------------
Serial Number: 0xc3eeb0c
...
Use the serial number from the previous step to download the certificate:
# pki -p 8080 ca-cert-show 0xc3eeb0c --output ~/ds.crtCopy the certificate for Directory Server and the CA certificate to the Directory Server host. For example:
# scp ~/ds.crt ~/certs_db/CA.pem ds.example.com:~/Stop Certificate System:
# pki-server stop <instance_name>
On the Directory Server host:
Stop the Directory Server instance:
# systemctl stop dirsrv@<instance_name>Replace the certificates. For details, see the corresponding sections in the Red Hat Directory Server Administration Guide:
- Remove the old certificate and CA certificate. See Removing a Certificate.
- Install the CA certificate issued by Certificate System. See Installing a CA Certificate.
- Install the certificate for Directory Server issued by Certificate System. See Installing a Certificate.
Start the Directory Server instance:
# systemctl start dirsrv@<instance_name>
Start Certificate System:
# pki-server stop <instance_name>- Optionally, configure certificate-based authentication. For details, see Section 15.4.3, “Enabling SSL/TLS client authentication with the internal database”.
15.4.3. Enabling SSL/TLS client authentication with the internal database
Client authentication allows one entity to authenticate to another entity by presenting a certificate. This method of authentication is used by Certificate System agents to log into agent services pages, for example.
To use an SSL/TLS connection between a Certificate System instance and the LDAP directory instance that it uses as its internal database, client authentication must be enabled to allow the Certificate System instance to authenticate and bind to the LDAP directory.
There are two parts to setting up client authentication. The first is configuring the LDAP directory, such as setting up SSL/TLS and setting ACIs to control the Certificate System instance access. The second is creating a user on the Certificate System instance which it will use to bind to the LDAP directory and setting up its certificate.
To configure LDAPS for a PKI instance, see the pkispawn(8) man page (Example: Installing a PKI subsystem with a secure LDAP connection).
15.4.3.1. Restricting access to the internal database
The Red Hat Directory Server Console displays an entry or icon for the Directory Server instance that the Certificate System uses as its internal database.
Unlike the Certificate System Console, in which access is restricted to users with Certificate System administrator privileges, the Directory Server Console can be accessed by any user. The user can open the Directory Server Console for the internal database and change to the data stored there, such as deleting users from the Certificate System administrators group or adding his own entry to the group.
Access can be restricted to the internal database to only those users who know the Directory Manager DN and password. This password can be changed by modifying the single sign-on password cache.
- Log into the Directory Server Console.
- Select the Certificate System internal database entry, and click .
- Select the Configuration tab.
- In the navigation tree, expand Plug-ins, and select Pass-Through Authentication.
- In the right pane, deselect the Enable plugin checkbox.
Click .
The server prompts to restart the server.
- Click the Tasks tab, and click .
- Close the Directory Server Console.
When the server is restarted, open the Directory Server Console for the internal database instance.
The Login to Directory dialog box appears; the Distinguished Name field displays the Directory Manager DN; enter the password.
The Directory Server Console for the internal database opens only if the correct password is entered.
15.5. Viewing security domain configuration
A security domain is a registry of PKI services. PKI services, such as CAs, register information about themselves in these domains so users of PKI services can find other services by inspecting the registry. The security domain service in Certificate System manages both the registration of PKI services for Certificate System subsystems and a set of shared trust policies.
The security domain manages the trust relationships between subsystems automatically, so if a TPS, TKS, and KRA are within the same security domain, they can communicate securely.
The security domain is used during subsystem configuration. When a subsystem is being set up, it can check the security domain registry to see available instances. If it needs to create a trusted relationship with another instance - like a TPS which uses a TKS and KRA for its operations - then the security domain is used to create a TPS agent user on the selected TKS and KRA instances.
The registry provides a complete view of all PKI services provided by the subsystems within that domain. Each Certificate System subsystem must be either a host or a member of a security domain.
Only a CA can host and manage a security domain. Each CA has its own LDAP entry, and the security domain is an organizational group underneath that CA entry:
ou=Security Domain,dc=example,dc=com
Then there is a list of each subsystem type beneath the security domain organizational group, with a special object class (pkiSecurityGroup) to identify the group type:
cn=KRAList,ou=Security Domain,dc=example,dc=com
objectClass: top
objectClass: pkiSecurityGroup
cn: KRAList
Each subsystem instance is then stored as a member of that group, with a special pkiSubsystem object class to identify the entry type:
dn: cn=server.example.com:8443,cn=KRAList,ou=Security Domain,dc=example,dc=com
objectClass: top
objectClass: pkiSubsystem
cn: kra.example.com:8443
host: server.example.com
SecurePort: 8443
SecureAgentPort: 8443
SecureAdminPort: 8443
UnSecurePort: 8080
DomainManager: false
Clone: false
SubsystemName: KRA server.example.com 8443
15.6. Managing the SELinux policies for subsystems
SELinux is a collection of mandatory access control rules which are enforced across a system to restrict unauthorized access and tampering. For more information about SELinux, see the Using SELinux guide for Red Hat Enterprise Linux 8.
15.6.1. About SELinux
Basically, SELinux identifies objects on a system, which can be files, directories, users, processes, sockets, or any other thing on a Linux host. These objects correspond to the Linux API objects. Each object is then mapped to a security context, which defines the type of object it is and how it is allowed to function on the Linux server.
System processes run within SELinux domains. Each domain has a set of rules that defines how the SELinux domain interacts with other SELinux objects on the system. This set of rules, then, determines which resources a process may access and what operations it may perform on those resources.
For Certificate System, each subsystem type runs within a specific domain for that subsystem type. Every instance of that subsystem type belongs to the same SELinux domain, regardless of how many instances are on the system For example, if there are three CAs installed on a server, all three belong to the http_port_t SELinux domain.
The rules and definitions for all the subsystems comprise the overall Certificate System SELinux policy. Certificate System SELinux policies are already configured when the subsystems are installed, and all SELinux policies are updated every time a subsystem is added with pkispawn or removed with pkidestroy.
The Certificate System subsystems run with SELinux set in enforcing mode, meaning that Certificate System operations can be successfully performed even when all SELinux rules are required to be followed.
By default, the Certificate System subsystems run confined by SELinux policies.
15.6.2. Viewing SELinux policies for subsystems
All Certificate System policies are are part of the system SELinux policy. The configured policies can be viewed using the SELinux Administration GUI, which you can get by installing the policycoreutils-gui package.
Either run the
system-config-selinuxcommand or open the utility by accessing for the main system menu.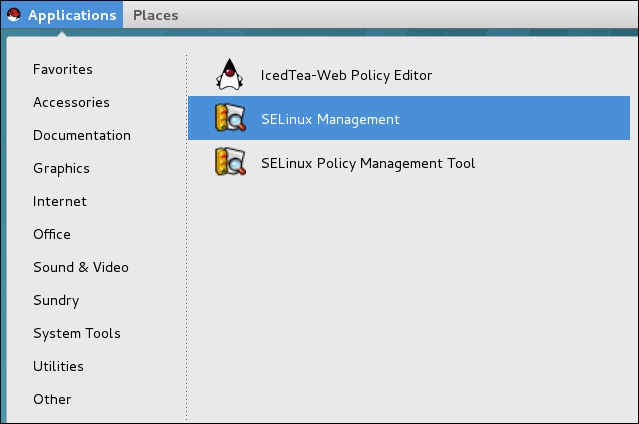
To check the version of the Certificate System SELinux policy installed, click the Policy Module section in the left bar.
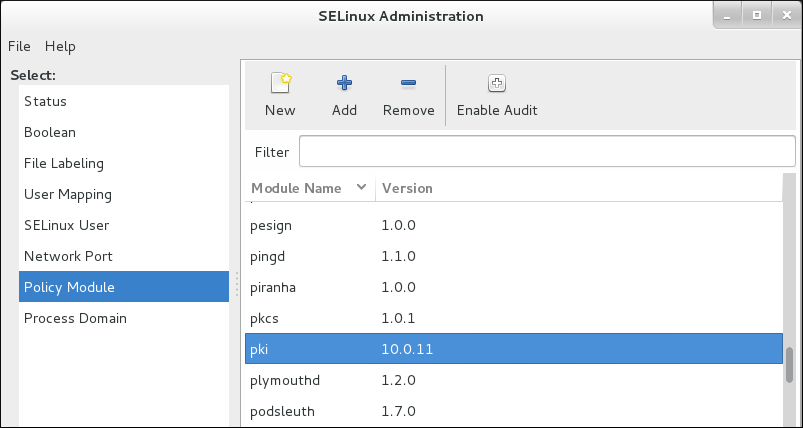
To view the policies set on the individual files and processes, click the File Labeling section. To view the policies for the port assignments for the subsystems, click the Network Port section.

15.6.3. Relabeling nCipher netHSM contexts
The nCipher netHSM software does not come with its own SELinux policy, so the Certificate System contains a default netHSM policy, shown in the below example.
Example 15.1. netHSM SELinux policy
# default labeling for nCipher
/opt/nfast/scripts/init.d/(.) gen_context(system_u:object_r:initrc_exec_t,s0) /opt/nfast/sbin/init.d-ncipher gen_context(system_u:object_r:initrc_exec_t,s0) /opt/nfast(/.)?                gen_context(system_u:object_r:pki_common_t, s0)
/dev/nfast(/.*)?                gen_context(system_u:object_r:pki_common_dev_t,0)
Other rules allow the pki_*_t domain to talk to files that are labeled pki_common_t and pki_common_dev_t.
If any of the nCipher configuration is changed (even if it is in the default directory, /opt/nfast), run the restorecon to make sure all files are properly labeled:
restorecon -R /dev/nfast
restorecon -R /opt/nfast
If the nCipher software is installed in a different location or if a different HSM is used, the default Certificate System HSM policy needs to be relabelled using semanage.
15.7. Backing up and restoring Certificate System
Certificate System does not include backup and restore tools. However, the Certificate System components can still be archived and restored manually, which can be necessary for deployments where information cannot be accessed if certificate or key information is lost. Three major parts of Certificate System need to be backed up routinely in case of data loss or hardware failure:
- Internal database. Subsystems use an LDAP database to store their data. The Directory Server provides its own backup scripts and procedures.
-
Security databases. The security databases store the certificate and key material. If these are stored on an HSM, then consult the HSM vendor documentation for information on how to back up the data. If the information is stored in the default directories in the instance
aliasdirectory, then it is backed up with the instance directory. To back it up separately, use a utility such astarorzip. -
Instance directory. The instance directory contains all configuration files, security databases, and other instance files. This can be backed up using a utility such as
tarorzip.
15.7.1. Backing up and restoring the LDAP internal database
The Red Hat Directory Server documentation contains more detailed information on backing up and restoring the databases.
15.7.1.1. Backing up the LDAP internal database
Two pairs of subcommands of the dsctl command are available to back up the Directory Server instance. Each back-up subcommand has a counterpart to restore the files it generated:
-
The
db2ldifsubcommand creates a LDIF file you can restore using theldif2dbsubcommand. -
The
db2baksubcommand creates a backup file you can restore using thebak2dbsubcommand.
15.7.1.1.1. Backing up using db2ldif
Running the db2ldif subcommand backs up a single subsystem database.
As the db2ldif subcommand runs with the dirsrv user, it doesn’t have permissions to write under the /root/ directory, so you need to provide a path where it can write.
Back up each Directory Server database used by PKI subsystems. You can use the pki-server ca-db-config-show command to check the database name for a given subsystem. For example, to back up the main database, userRoot:
Stop the instance:
# dsctl <instance_name> stopExport the database into an LDIF file:
# dsctl <instance_name> db2ldif userroot /tmp/example.ldif
OK group dirsrv exists
OK user dirsrv exists
ldiffile: /tmp/example.ldif
[18/Jul/2018:10:46:03.353656777 +0200] - INFO - ldbm_instance_config_cachememsize_set - force a minimal value 512000
[18/Jul/2018:10:46:03.383101305 +0200] - INFO - ldbm_back_ldbm2ldif - export userroot: Processed 160 entries (100%).
[18/Jul/2018:10:46:03.391553963 +0200] - INFO - dblayer_pre_close - All database threads now stopped
db2ldif successful
Start the instance:
# dsctl <instance_name> start
To restore the LDIF file using the ldif2db subcommand, see Section 15.7.1.2.1, “Restoring using ldif2db”.
15.7.1.1.2. Backing up using db2bak
Running the db2bak subcommand backs up all Certificate System subsystem databases for that Directory Server (and any other databases maintained by that Directory Server instance). For example:
For example:
Stop the instance:
# dsctl <instance_name> stopBackup the database:
# dsctl <instance_name> db2bak
OK group dirsrv exists
OK user dirsrv exists
[18/Jul/2018:14:02:37.358958713 +0200] - INFO - ldbm_instance_config_cachememsize_set - force a minimal value 512000
...
db2bak successful
Start the instance:
# dsctl <instance_name> start
As the db2bak subcommand runs with the dirsrv user, the target directory must be writeable by dirsrv. Running the subcommand without any argument creates the backup in the /var/lib/dirsrv/slapd_-<instance_name>_/bak folder where db2bak has the proper write permissions.
To restore the LDIF file using bak2db, see Section 15.7.1.2.2, “Restoring using bak2db”.
15.7.1.2. Restoring the LDAP internal database
Depending on how you backed up the Directory Server instance, use ldif2db or bak2db with the corresponding file(s) to restore the database.
Make sure you stop the instance before restoring databases.
15.7.1.2.1. Restoring using ldif2db
If you created a LDIF file with db2ldif, stop the Directory Server instance and import the files using the ldif2db subcommand. You can specify a single database to restore from the backup. For example, for the main database, userRoot:
Stop the Directory Server instance:
# dsctl <instance_name> stopImport the data from the LDIF file:
# dsctl <instance_name> ldif2db userroot /tmp/example.ldif
OK group dirsrv exists
OK user dirsrv exists
[17/Jul/2018:13:42:42.015554231 +0200] - INFO - ldbm_instance_config_cachememsize_set - force a minimal value 512000
...
[17/Jul/2018:13:42:44.302630629 +0200] - INFO - import_main_offline - import userroot: Import complete.  Processed 160 entries in 2 seconds. (80.00 entries/sec)
ldif2db successful
Start the Directory Server instance:
# dsctl <instance_name> start
15.7.1.2.2. Restoring using bak2db
If you created a backup file with db2bak, stop the Directory Server and import the file using the bak2db subcommand. For example:
Stop the Directory Server instance:
# dsctl <instance_name> stopRestore the databases:
# dsctl <instance_name> bak2db /var/lib/dirsrv/slapd-<instance_name>/bak/<instance_name>-time_stamp/
OK group dirsrv exists
OK user dirsrv exists
[20/Jul/2018:15:52:24.932598675 +0200] - INFO - ldbm_instance_config_cachememsize_set - force a minimal value 512000
...
bak2db successful
Start the Directory Server instance:
# dsctl <instance_name> start
15.7.2. Backing up and Restoring the instance directory
The instance directory has all of the configuration information for the subsystem instance, so backing up the instance directory preserves the configuration information not contained in the internal database.
Stop the subsystem instance before backing up the instance or the security databases.
15.7.2.1. Backing up the instance directory
Stop the subsystem instance.
# pki-server stop <instance_name>Save the directory to a compressed file:
# cd /var/lib/pki/
# tar -chvf /export/archives/pki/<instance_name>.tar <instance_name>/
For example:
# cd /var/lib/pki/
# tar -chvf /tmp/test.tar pki-tomcat/ca/
pki-tomcat/ca/
pki-tomcat/ca/registry/
pki-tomcat/ca/registry/ca/
...........
Restart the subsystem instance.
pki-server start <instance_name>
15.7.2.2. Restoring the instance directory
You can use the Certificate System backup files, both the alias database backups and the full instance directory backups, to replace the current directories if the data is corrupted or the hardware is damaged. To restore the data, uncompress the archive file using the unzip or tar tools, and copy the archive over the existing files.
To restore the instance directory:
Uncompress the archive:
cd /export/archives/pki/
tar -xvf <instance_name>.tar
For example:
# cd /tmp/
# tar -xvf test.tar
pki-tomcat/ca/
pki-tomcat/ca/registry/
pki-tomcat/ca/registry/ca/
pki-tomcat/ca/registry/ca/default.cfg
.........
Stop the subsystem instance if it is not already stopped.
pki-server stop <instance_name>Copy the archived files to restore the instance directory:
cp -r /export/archives/pki/<instance_name> /var/lib/pki/<instance_name>For example:
# cp -r /tmp/pki-tomcat/ca/ /var/lib/pki/pki-tomcat/ca/Make sure the ownership and group permissions of the restored files are set to the
pkiuser:# chown -R pkiuser:pkiuser /var/lib/pki/pki-tomcat/ca/Restart the subsystem instance.
pki-server start <instance_name>
15.8. Running self-tests
Red Hat Certificate System has the added functionality to allow self-tests of the server. The self-tests are run at start up and can also be run on demand. The startup self-tests run when the server starts and keep the server from starting if a critical self-test fails. The on-demand self-tests are run by clicking the self-tests button in the subsystem console.
15.8.1. Running self-tests
The on-demand self-test for the CA, OCSP, KRA, or TKS subsystems are run from the console. The on-demand self-tests for the TPS system are run from the web services page.
15.8.1.1. Running self-tests from the console
Log into the Console.
pkiconsole https://server.example.com:admin_port/subsystem_typeNotepkiconsoleis being deprecated.Select the subsystem name at the top of the left pane.
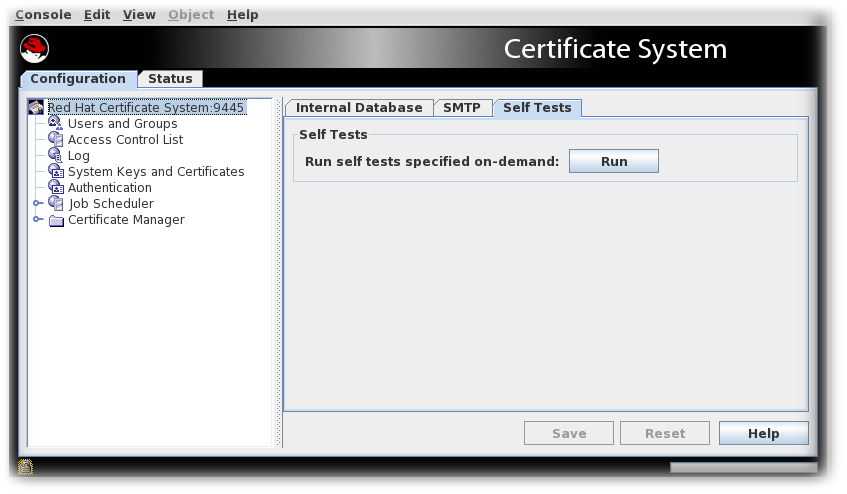
- Select the Self Tests tab.
Click .
The self-tests that are configured for the subsystem will run. If any critical self-tests fail, the server will stop.
- The On-Demand Self Tests Results window appears, showing the logged events for this run of the self-tests.
15.8.1.2. Running TPS self-tests
To run TPS self-tests from the command-line interface (CLI):
-
pki tps-selftest-find -
pki tps-selftest-run -
pki tps-selftest-show
15.8.2. Self-test logging
A separate log, selftest.log, is added to the log directory that contains reports for both the start up self-tests and the on-demand self-tests. This log is configured by changing the setting for the log in the CS.cfg file. See the Modifying Self-Test Configuration section in the Red Hat Certificate System Planning, Installation, and Deployment Guide for details.
15.8.3. Configuring POSIX system ACLs
POSIX system access control rules provide finer granularity over system user permissions. These ACLs must be set for each instance after it is fully configured. For more details on ACLs, see the corresponding chapter in the Red Hat Enterprise Linux System Administration Guide.
15.8.3.1. Setting POSIX system ACLs for the CA, KRA, OCSP, TKS, and TPS
Modern file systems like ext4 and XFS enable ACLs by default, and are most likely used on modern Red Hat Enterprise Linux installations.
Stop the instance.
# pki-server stop instance_nameSet the group readability to the pkiadmin group for the instance’s directories and files.
# setfacl -R -L -m g:pkiadmin:r,d:g:pkiadmin:r /var/lib/pki/instance_nameApply execute (x) ACL permissions on all directories:
# find -L /var/lib/pki/instance_name -type d -exec setfacl -L -n -m g:pkiadmin:rx,d:g:pkiadmin:rx {} \;Remove group readability for the pkiadmin group from the instance’s signedAudit/ directory and its associated files:
# setfacl -R -L -x g:pkiadmin,d:g:pkiadmin /var/lib/pki/ instance_name/logs/signedAuditSet group readability for the pkiaudit group for the instance’s signedAudit/ directory and its associated files:
# setfacl -R -L -m g:pkiaudit:r,d:g:pkiaudit:r /var/lib/pki/ instance_name/logs/signedAuditRe-apply execute (x) ACL permissions on the signedAudit/ directory and all of its subdirectories:
# find -L /var/lib/pki/ instance_name/logs/signedAudit -type d -exec setfacl -L -n -m g:pkiaudit:rx,d:g:pkiaudit:rx {} \;Start the instance.
pki-server start instance_nameConfirm that the file access controls were properly applied by using the
getfaclcommand to show the current ACL settings:# getfacl /var/lib/pki/instance_name /var/lib/pki/ instance_name/subsystem_type/logs/signedAudit/ getfacl: Removing leading '/' from absolute path names # file: var/lib/pki/instance_name # owner: pkiuser # group: pkiuser user::rwx group::rwx group:pkiadmin:r-x mask::rwx other::r-x default:user::rwx default:group::rwx default:group:pkiadmin:r-x default:mask::rwx default:other::r-x # file: var/lib/pki/ instance_name/logs/signedAudit # owner: pkiuser # group: pkiaudit user::rwx group::rwx group:pkiaudit:r-x mask::rwx other::--- default:user::rwx default:group::rwx default:group:pkiaudit:r-x default:mask::rwx default:other::---