Chapter 3. Inviting Users And Managing Rights
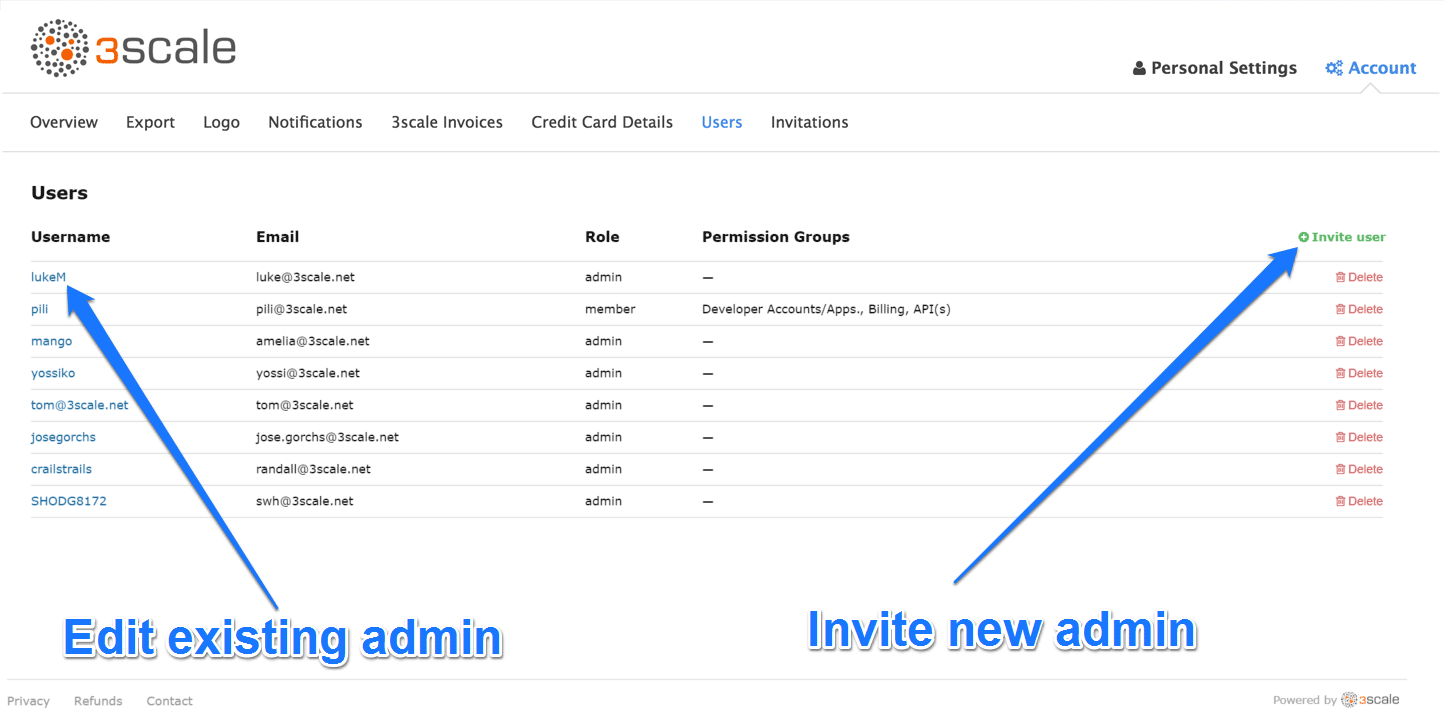
In order to share the workload of administering your APIs, you may wish to invite team members from your organization to access the 3scale Admin Portal. In this tutorial, you’ll see how to that and what types of roles and rights are available. Note: The 'invite' feature is only available for Pro and Enterprise customers.
We’ll walk you through how to give access rights to the 3scale Admin Portal to one or more team members.
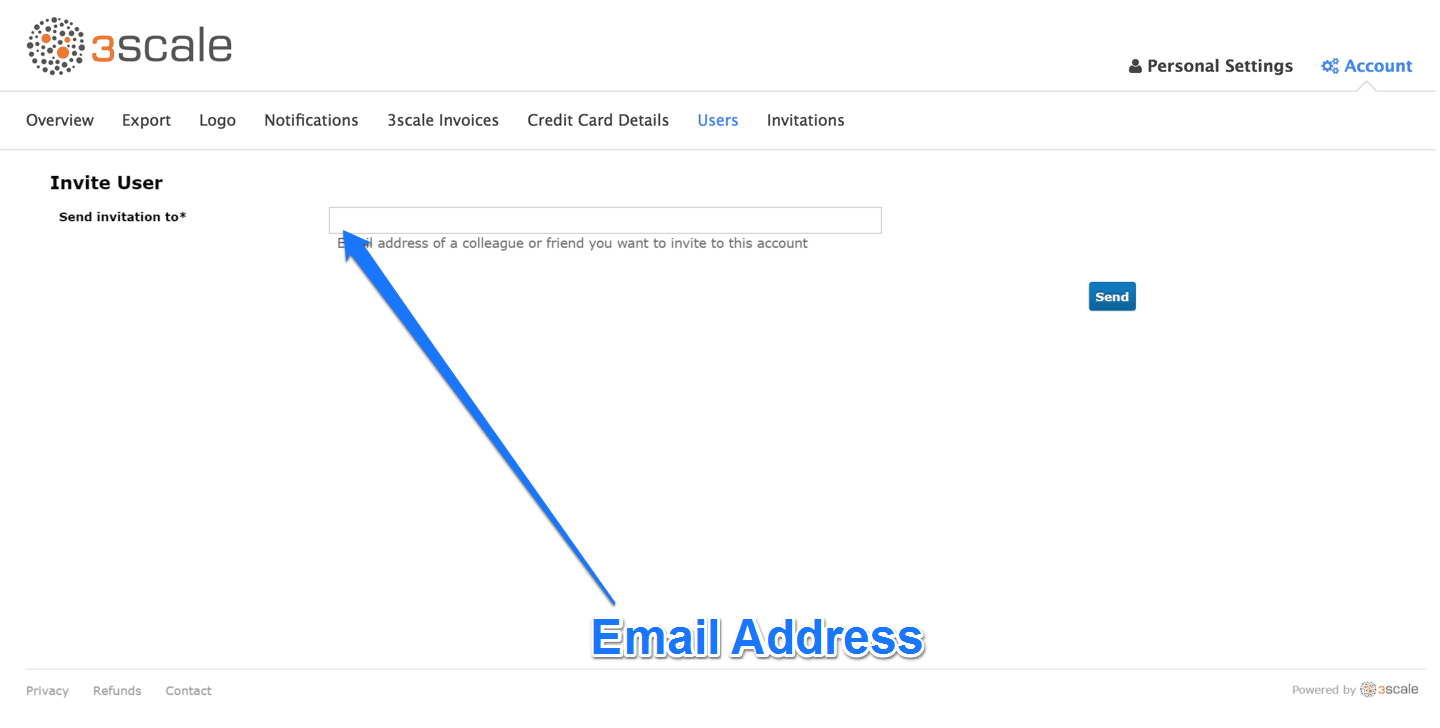
3.2. Step 2: Send an invitation
Enter the email address of the person you want to invite and click send. An invitation email will be sent to the address you entered. If the email doesn’t arrive, make sure it didn’t get marked as spam.
3.3. Step 3: Accept the invitation
Your new administrator or member must click the link in the invitation email and complete the form to complete the process. Once the form is submitted, their account will be activated.
3.4. Step 4: Give new users rights
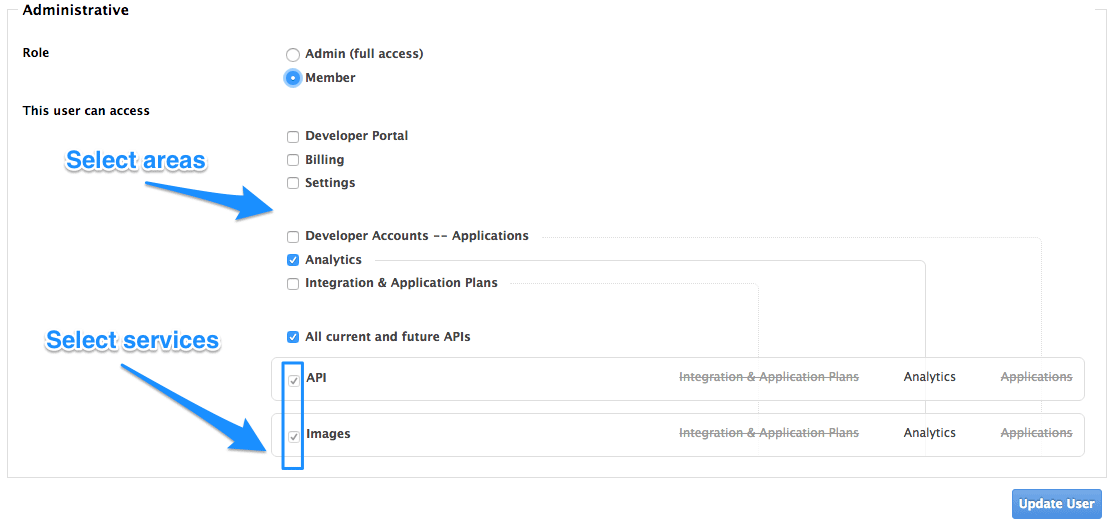
There are two main type of rights you can give to members of your team:
- By area: Such as analytics, billing, or developer administration.
- By service: Choose which services to give access to members amongst all of your services. Note: This feature is only available for enterprise customers.
To give a new user rights, edit the new user by selecting them from the user menu and clicking on Edit.
Changing their rights to “admin” will give them full access to control the dashboard.
Changing their rights to "member" will give you the option of choosing which areas and services the team member has access to.
Giving members access to certain areas of the 3scale Admin Portal will give them access only to the equivalent API:
- Developer accounts — Applications: Gives access to the Account management API
- Analytics: Gives access to the Analytics API
- Billing: Gives access to the Billing API


