Chapter 6. Quarkus tools basics in CodeReady Studio
Quarkus is a Kubernetes-Native full-stack Java framework aimed to optimize work with Java virtual machines. Quarkus provides tools for Quarkus application developers, helping them to reduce the size of Java applications and container image footprint, eliminate programming baggage, and reduce the amount of memory required.
Prerequisites
- Ensure that you have the latest version of JBoss Tools installed. For more information, see JBoss Tools.
6.1. Creating a new Quarkus project
The following section describes how to create a new Quarkus project in CodeReady Studio.
Procedure
- Start CodeReady Studio.
Press Ctrl+N.
The Select a wizard window appears.
- Enter Quarkus in the search field.
- Select Quarkus Project.
Click .
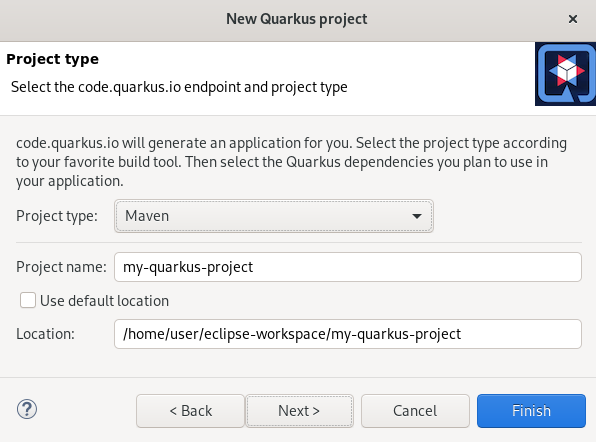
The New Quarkus project window appears.
- Select the appropriate project type.
- Name your project.
- Select the location for your project.
Click .
The Project type window appears.
- Ensure that the default values are correct.
Click .
The Quarkus extensions window appears.
Select the appropriate Categories for your projects.
The available extensions for the selected category are displayed in the Extensions column.
Select the appropriate Extensions for your projects.
Double-click on the extension to select or deselect it. The selected extensions appear in the Selected column.
- Click .


Your newly created Quarkus project is now listed in the Project Explorer view.
6.2. Running a Quarkus application
The following section describes how to run a Quarkus application in CodeReady Studio.
Procedure
- Start CodeReady Studio.
Click
. The Run Configurations window appears.
Scroll down to Quarkus Application.
Right-click
. - Name your configuration.
- Click to locate your project.
- Click .
Click .
The Console view appears.


Your application will start after the built process.
6.3. Debugging a Quarkus application
The following section describes how to debug a Quarkus application in CodeReady Studio.
Procedure
- Start CodeReady Studio.
Click
. Tha Debug Configurations window appears.
- Expand your Quarkus Application.
- Select your configuration.
Click .
The Console view appears.


Your Quarkus application starts and connects to a remote JVM debug configuration. If you set breakpoints in your application source files, the execution automatically stops after reaching the breakpoint.
6.4. Using language support in CodeReady Studio
Every Quarkus application is configured through an application.properties configuration file. The content of this configuration file is dependent of the set of Quarkus extensions that your application is using.
Quarkus Tools includes content assist which provides code completion, validation, and documentation. Code completion allows you to quickly complete statements in your code. Multiple choices are available to you via popups.
This language support is now available for Kubernetes, OpenShift, S2i, Docker properties, MicroProfile REST Client properties, and MicroProfile Health artifacts.
6.4.1. Using Quarkus code completion
The following section describes how to use Quarkus application.properties content assist in CodeReady Studio.
Prerequisites
An existing Quarkus project.
For more information on how to create a Quarkus project, see Section 6.1, “Creating a new Quarkus project”
Procedure
- Start CodeReady Studio.
- Start Project Explorer.
-
Expand your
. Right-click
. The Text Editor window appears.
- Navigate to an empty line.
Press Ctr+Space to invoke code completion.
The code completion suggestions appear. Hover the mouse over the suggestions to display documentation.
If you enter a wrong value, the editor underlines the error with a red wavy line.


Additional resources
- Language support for MicroProfile REST Client properties and MicroProfile Health artifacts need to be enabled separately. For more information, see Section 6.4.2, “Enabling language support for MicroProfile”.
6.4.2. Enabling language support for MicroProfile
The following section describes how to enable language support for MicroProfile REST Client properties.
Prerequisites
An existing Quarkus project.
For more information on how to create a Quarkus project, see Section 6.1, “Creating a new Quarkus project”
Procedure
- Start CodeReady Studio.
- Start Project Explorer.
-
Expand your
. Right-click
. The Select wizard window appears.
- Enter file in the search field.
- Select File.
Click the button.
The Create a new file resource window appears.
- Name your new file.
- Click .
Paste the following content into your newly created file:
Copy to Clipboard Copied! Toggle word wrap Toggle overflow - Press Ctrl+S to save the changes.


Note that you can adjust the language support by changing the configuration key for the client from @RegisterRestClient to @RegisterRestClient(configKey = "myclient"). The language support will be adjusted accordingly.
Additional resources
- For more information on how to use language support, see Section 6.4.1, “Using Quarkus code completion”.