7.2. Configure Bonding Using the Text User Interface, nmtui
The text user interface tool nmtui can be used to configure bonding in a terminal window. Issue the following command to start the tool:
The text user interface appears. Any invalid command prints a usage message.
~]$ nmtui
To navigate, use the arrow keys or press Tab to step forwards and press Shift+Tab to step back through the options. Press Enter to select an option. The Space bar toggles the status of a check box.
- From the starting menu, select Edit a connection. Select Add, the New Connection screen opens.
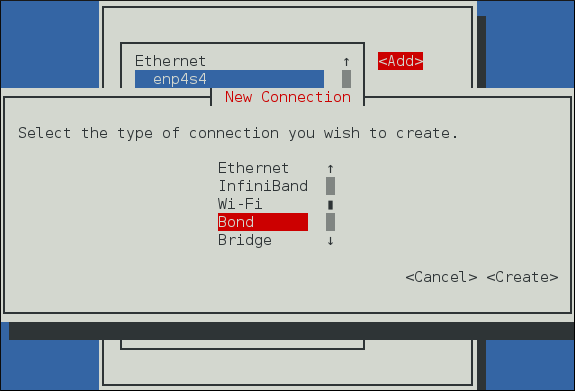
Figure 7.1. The NetworkManager Text User Interface Add a Bond Connection menu
- Select Bond and then Create; the Edit connection screen for the bond will open.
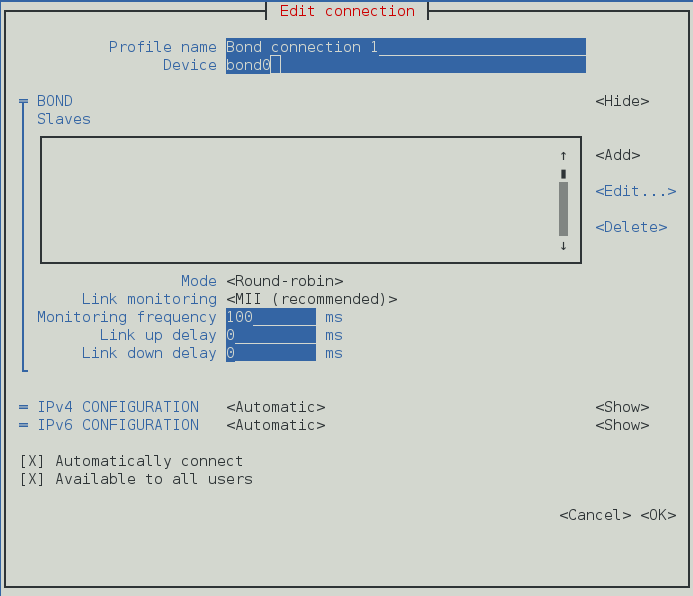
Figure 7.2. The NetworkManager Text User Interface Configuring a Bond Connection menu
- At this point port interfaces will need to be added to the bond; to add these select Add, the New Connection screen opens. Once the type of Connection has been chosen select the Create button.
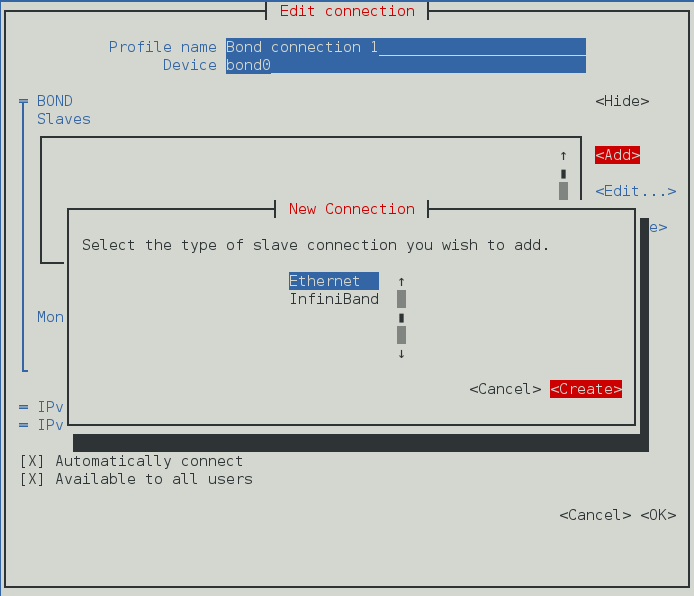
Figure 7.3. The NetworkManager Text User Interface Configuring a New Bond Slave Connection menu
- The port's Edit Connection display appears; enter the required port's device name or MAC address in the Device section. If required, enter a clone MAC address to be used as the bond's MAC address by selecting Show to the right of the Ethernet label. Select the OK button to save the port.
Note
If the device is specified without a MAC address the Device section will be automatically populated once the Edit Connection window is reloaded, but only if it successfully finds the device.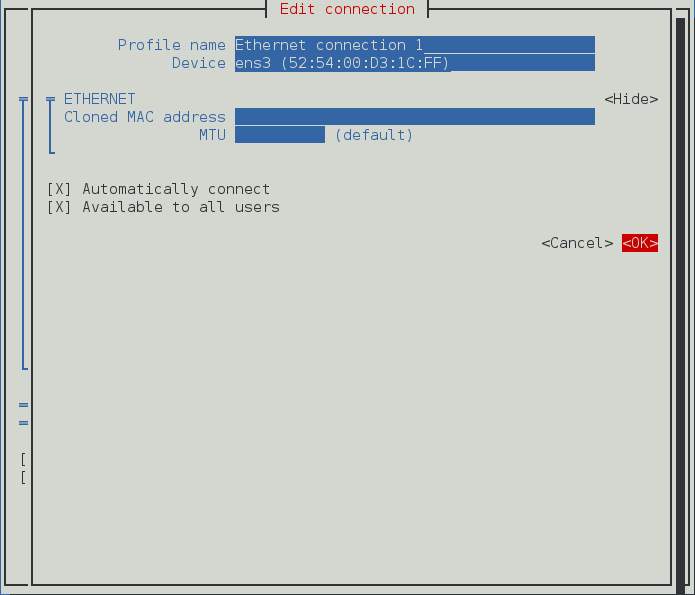
Figure 7.4. The NetworkManager Text User Interface Configuring a Bond Slave Connection menu
- The name of the bond port appears in the Slaves section. Repeat the above steps to add further port connections.
- Review and confirm the settings before selecting the OK button.

Figure 7.5. The NetworkManager Text User Interface Completed Bond
See Section 7.8.1.1, “Configuring the Bond Tab” for definitions of the bond terms.
See Section 3.2, “Configuring IP Networking with nmtui” for information on installing nmtui.