2.2. Eclipse Install New Software Method
With Eclipse running JBoss Developer Studio:
- On the menu bar, click
to open the Install wizard. - Click the Add... button next to the Work with: field to open the Add Repository window.
- In Name:, enter a name for the repository; for example,
Red Hat JBoss Fuse Tooling. - In Location: enter
https://devstudio.jboss.com/updates/7.0/integration-stack/The name and location you entered are combined and displayed in the Work with: field in the Available Software window: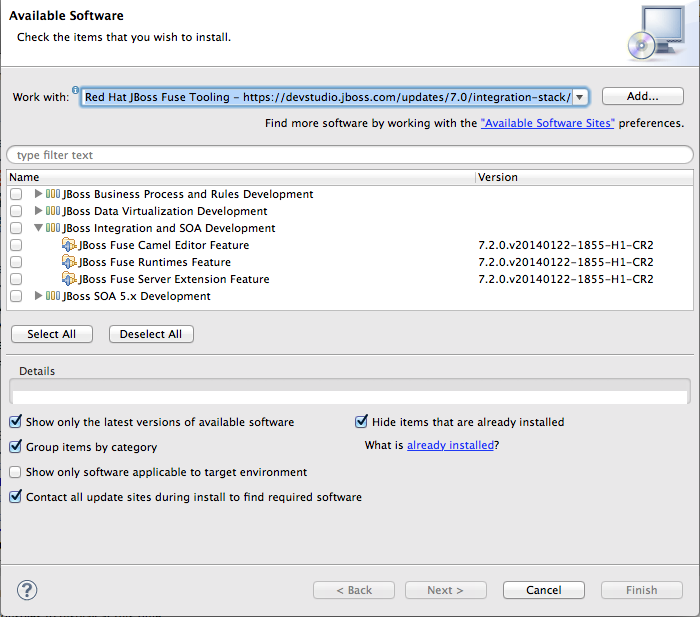
- In the list of available software, expand
JBoss Integration and SOA Development. - Select the JBoss Fuse Tooling features you want to install (
JBoss Fuse Camel Editor Feature,JBoss Fuse Runtimes Feature,JBoss Fuse Server Extension Feature) by clicking the checkbox next to each. - Click Next.Wait while the installer checks for dependencies and hardware requirements.
- In the Install Details window, review the items to be installed, and then click Next, if you are satisfied with your selection.
- Accept the terms of the license agreement, and then click Finish.
- If a Security Warning regarding unsigned content appears, disregard it and click OK.
- When prompted to restart Eclipse, click .When Eclipse restarts, the new version of the Red Hat JBoss Fuse Tooling will be available.