Chapter 27. Managing servers
For step by step instructions on how to publish a Camel project to Red Hat Fuse, see Chapter 28, Publishing Fuse Integration Projects to a Server.
27.1. Adding a Server
Overview
For the tooling to manage a server, you need to add the server to the Servers list. Once added, the server appears in the Servers view, where you can connect to it and publish your Fuse Integration projects.
If adding a Red Hat Fuse server, it is recommended that you edit its installDir/etc/users.properties file and add user information, in the form of user=password,role, to enable the tooling to establish an SSH connection to the server.
Procedure
There are three ways to add a new server to the Servers view:
In the Servers view, click
No servers are available. Click this link to create a new server….NoteThis link appears in the Servers view only when no server has been defined. If you defined and added a server when you first created your project, the Servers view displays that server.
-
In the Servers view, right-click to open the context menu and select New
Server. -
On the menu bar, select File
New Other Server Server.
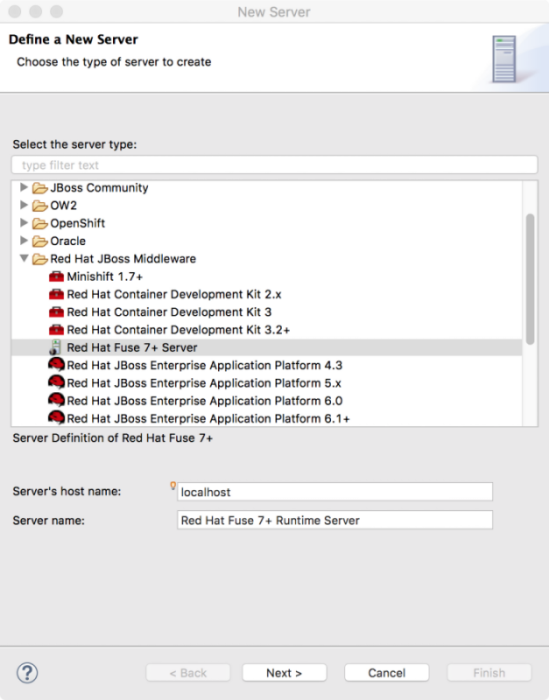
In the Define a New Server dialog, to add a new server:
Expand the Red Hat JBoss Middleware node to expose the list of available server options:
- Click the server that you want to add.
In the Server’s host name field, accept the default (
localhost).NoteThe address of
localhostis0.0.0.0.- In the Server name field, accept the default, or enter a different name for the runtime server.
For Server runtime environment, accept the default or click Add to open the server’s runtime definition page:
NoteIf the server is not already installed on your machine, you can install it now by clicking Download and install runtime… and following the site’s download instructions. Depending on the site, you might be required to provide valid credentials before you can continue the download process.
- Accept the default for the installation Name.
- In the Home Directory field, enter the path where the server runtime is installed, or click Browse to find and select it.
Next to Execution Environment, select the runtime JRE from the drop-down menu.
If the version you want does not appear in the list, click Environments and select the version from the list that appears. The JRE version you select must be installed on your machine.
NoteSee Red Hat Fuse Supported Configurations for the required Java version.
- Leave the Alternate JRE option as is.
Click Next to save the server’s runtime definition and open its Configuration details page:
Accept the default for SSH Port (
8101).The runtime uses the SSH port to connect to the server’s Karaf shell. If this default is incorrect for your setup, you can discover the correct port number by looking in the server’s installDir
/etc/org.apache.karaf.shell.cfgfile.In the User Name field, enter the name used to log into the server.
For Red Hat Fuse, this is a user name stored in the Red Hat Fuse installDir
/etc/users.propertiesfile.NoteIf the default user has been activated (uncommented) in the
/etc/users.propertiesfile, the tooling autofills the User Name and Password fields with the default user’s name and password, as shown in [servCnfigDetails].If a user has not been set up, you can either add one to that file by using the format
user=password,role(for example,joe=secret,Administrator), or you can set one using the karafjaascommand set:-
jaas:realms— to list the realms -
jaas:manage --index 1— to edit the first (server) realm -
jaas:useradd <username> <password>— to add a user and associated password -
jaas:roleadd <username> Administrator— to specify the new user’s role -
jaas:update— to update the realm with the new user information
If a
jaasrealm has already been selected for the server, you can discover the user name by issuing the commandJBossFuse:karaf@root>jaas:users.-
- In the Password field, enter the password required for User Name to log into the server.
Click Finish to save the server’s configuration details.
The server runtime appears in the Servers view.
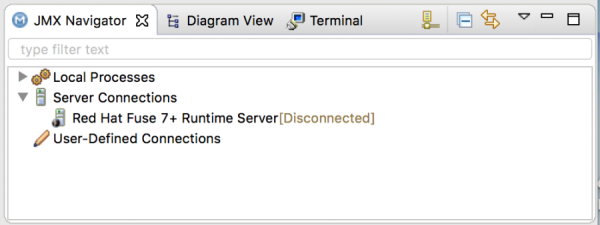
Expanding the server node exposes the server’s JMX node:
27.2. Starting a Server
Overview
When you start a configured server, the tooling opens the server’s remote management console in the Terminal view. This allows you to easily manage the container while testing your application.
Procedure
To start a server:
- In the Servers view, select the server you want to start.
Click
 .
.
The Console view opens and displays a message asking you to wait while the container is starting, for example:
NoteIf you did not properly configure the user name and password for opening the remote console, a dialog opens asking you to enter the proper credentials. See Section 27.1, “Adding a Server”.
- After the container has started up, the Terminal view opens to display the container’s management console.
The running server appears in the Servers view:
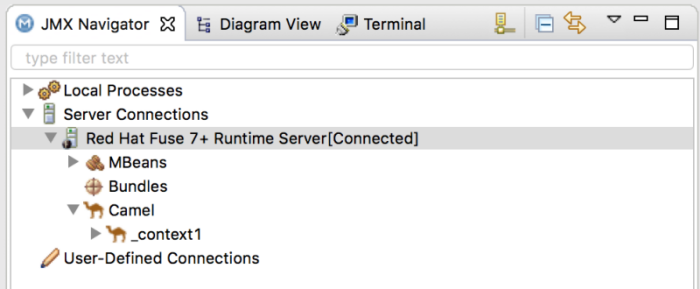
The running server also appears in the JMX Navigator view under Server Connections:
NoteIf the server is running on the same machine as the tooling, the server also has an entry under Local Processes.
27.3. Connecting to a Running Server
Overview
After you start a configured server, it appears in the Servers view and in the JMX Navigator view under the Server Connections node. You may need to expand the Server Connections node to see the server.
To publish and test your Fuse project application on the running server, you must first connect to it. You can connect to a running server either in the Servers view or in the JMX Navigator view.
The Servers view and the JMX Navigator view are synchronized with regards to server connections. That is, connecting to a server in the Servers view also connects it in the JMX Navigator view, and vice versa.
Connecting to a running server in the Servers view
- In the Servers view, expand the server runtime to expose its JMX[Disconnected] node.
Double-click the JMX[Disconnected] node:
Viewing bundles installed on the connected server
- In either the Servers view or the JMX Navigator view, expand the server runtime tree to expose the Bundles node, and select it.
The tooling populates the Properties view with a list of bundles that are installed on the server:
Using the Properties view’s Search tool, you can search for bundles by their Symbolic Name or by their Identifier, if you know it. As you type the symbolic name or the identifier, the list updates, showing only the bundles that match the current search string.
NoteAlternatively, you can issue the
osgi:listcommand in the Terminal view to see a generated list of bundles installed on the Red Hat Fuse server runtime. The tooling uses a different naming scheme for OSGi bundles displayed by theosgi:listcommand.In the
<build>section of project’spom.xmlfile, you can find the bundle’s symbolic name and its bundle name (OSGi) listed in themaven-bundle-pluginentry. For more details, see the section called “Verifying the project was published to the server”.
27.4. Disconnecting from a Server
Overview
When you are done testing your application, you can disconnect from the server without stopping it.
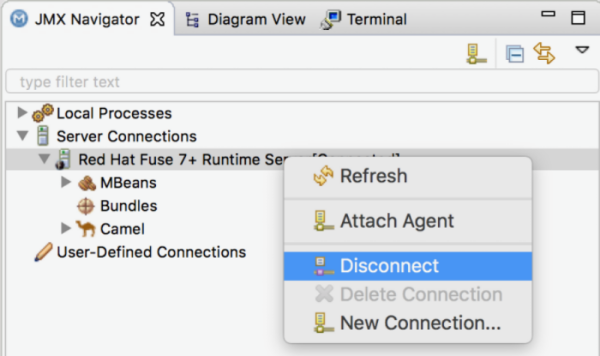
The Servers view and the JMX Navigator view are synchronized with regards to server connections. That is, disconnecting from a server in the Servers view also disconnects it in the JMX Navigator view, and vice versa.
Disconnecting from a server in the Servers view
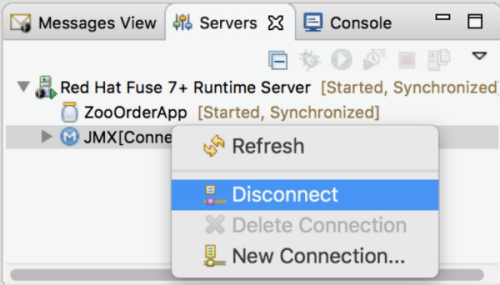
- In the Servers view, expand the server runtime to expose its JMX[Connected] node.
Right-click the JMX[Connected] node to open the context menu, and then select Disconnect.
27.5. Stopping a Server
Overview
You can shut down a server in the Servers view or in the server’s remote console in the Terminal view.
Using the Servers view
To stop a server:
- In the Servers view, select the server you want to stop.
-
Click
 .
.
Using the remote console
To stop a server:
- Open the Terminal view that is hosting the server’s remote console.
- Press: CTRL+D
27.6. Deleting a Server
Overview
When you are finished with a configured server, or if you misconfigure a server, you can delete it and its configuration.
First, delete the server from the Servers view or from the JMX Navigator view. Next, delete the server’s configuration.
Deleting a server
- In the Servers view, right-click the server you want to delete to open the context menu.
- Select Delete.
- Click OK.
Deleting the server’s configuration
On Linux and Windows machines, select Window
- Expand the Server folder, and then select Runtime Environments to open the Server Runtime Environments page.
- From the list, select the runtime environment of the server that you previously deleted from the Servers view, and then click Remove.
- Click OK.
