5. Writing Agent Plug-ins: Procedures
5.1. Tip: Checking XSD Annotations
Copy linkLink copied to clipboard!
There are a couple of XSD files that provide elements for agent (resource) plug-ins:
rhq-configuration.xsd and rhq-plugin.xsd.
A lot of different properties and attributes are defined in these schema files. All of these are annotated so that you can have a good grasp of what the existing, default schema makes available.
For example, for the
subCategory attribute:
Read through the annotations in the XSD files to help plan what your plug-in will do based on what's already available. This can also illuminate any specific configuration that requires custom schema.
5.2. Validating Agent Plug-ins
Copy linkLink copied to clipboard!
If the agent plug-in was generated using the JBoss ON plug-in generator and then built with Maven, the plug-in itself can be validated using Maven. The JBoss ON/RHQ plug-in source files have a special validation class which can help ensure that the agent plug-in is valid before deploying it (and potentially harming an agent).
mvn org.rhq:rhq-plugin-validator:rhq-plugin-validate
mvn org.rhq:rhq-plugin-validator:rhq-plugin-validate
If the agent plug-in was not created using the JBoss ON/RHQ plug-in generator, then add a
<build> element to point to the validator and a pointer to the <pluginRepositories> element to point to the Maven repository.
5.3. Notes on Editing Agent Plug-ins
Copy linkLink copied to clipboard!
The settings for a resource plug-in can be changed by editing the
rhq-plugin.xml file and rebuilding the plug-in.
Important
Do not rename resource types when you edit the resource plug-in. This breaks backward compatibility with any resource that was inventoried using the older version of the plug-in.
5.4. Deploying Agent Plug-ins
Copy linkLink copied to clipboard!
Agent plug-in files wind up in the agentInstallDir
/rhq-agent/plugins/ directory. Agent plug-ins are deployed, however, by uploading them to the JBoss ON server, and then the JBoss ON servers distribute them to the agents. As with server-side plug-ins, agent plug-ins can be deployed to a local JBoss ON server or through the JBoss ON UI.
Agent plug-ins are loaded when the agent starts. When a new agent plug-in is added, the agent needs to be restarted or a manual plug-in load operation has to be launched.
5.4.1. Remotely Deploying Agent Plug-ins
Copy linkLink copied to clipboard!
- In the top menu, click the Administration tab.
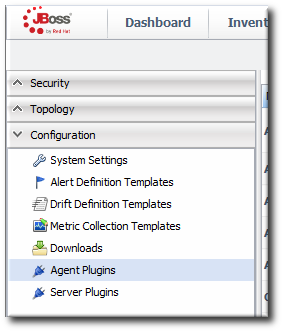
- In the Configuration box on the left navigation bar, click the Plugins link.
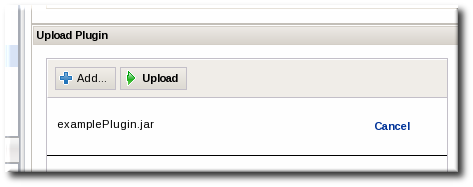
- In the Agent Plugins tab, scroll to the Upload Plugin section at the bottom of the page.
- Click the Add button, and browse to the plug-in JAR file's location. If there are multiple plug-ins to deploy, just hit Add again and add in each one.
- When all of the plug-ins to be deployed are listed in the box, click the Upload button.
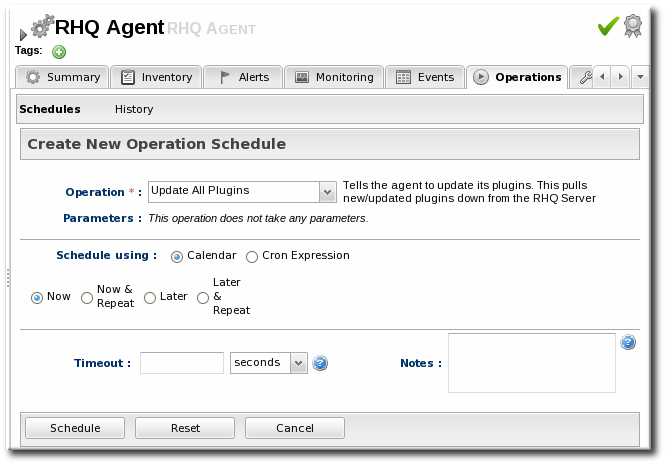
- Tell the agent to upload the new plug-in.
- Search for the agent, and then select it from the search results.
- Open the agent resource page.
- In the Operations tab, select the Update Plugins operation and schedule it to run immediately.
Agent plug-ins can also be updated by restarting the agent or by running the plugins update command in the agent command line.
5.4.2. Locally Deploying Agent Plug-ins
Copy linkLink copied to clipboard!
- If the agent plug-in is built or accessible on the same machine as a JBoss ON server, then the agent plug-in can be dropped into a deployment folder:
serverRoot/jon-server-3.1.0.GA1/jbossas/server/default/deploy/rhq.ear/rhq-downloads/rhq-plugins
serverRoot/jon-server-3.1.0.GA1/jbossas/server/default/deploy/rhq.ear/rhq-downloads/rhq-pluginsCopy to Clipboard Copied! Toggle word wrap Toggle overflow The JBoss ON server detects the new or updated plug-in and makes it available to the agents with other agent updates. - Have the agent load the new plug-ins. Either restart the agent or pass a command through the agent command line to upload the new plug-in.
> plugins update
> plugins updateCopy to Clipboard Copied! Toggle word wrap Toggle overflow
5.5. Removing and Re-deploying Agent Plug-ins
Copy linkLink copied to clipboard!
An agent plug-in, like a server-side plug-in, can be in one of three states:
- Deployed and active
- Deleted (disabled)
- Purged
Both active and disabled plug-ins present, as JAR files, in the server and agent configuration. When a plug-in is present but disabled, it prevents any future updates of the plug-in from being deployed. Purging an agent plug-in permanently removes it from the configuration, which allows a new version of that agent plug-in to be deployed.
5.5.1. Deleting a Plug-in
Copy linkLink copied to clipboard!
- In the top menu, click the Administration tab.
- In the Configuration box on the left navigation bar, click the Agent Plugins link.
- Select the plug-ins to delete.
- Click the Delete button.
To view all of the undeployed plug-ins, click the SHOW DELETED button.
5.5.2. Purging and Re-deploying an Agent Plug-in
Copy linkLink copied to clipboard!
- In the top menu, click the Administration tab.
- In the Configuration box on the left navigation bar, click the Agent Plugins link.
- Click the SHOW DELETED button at the bottom of the plug-ins list.
- Select the checkbox by the plug-in to re-deploy, and then click the PURGE button. This removes the entry in the JBoss ON database that tells the servers to ignore that plug-in and any updates to it.
- Add and upload the plug-in like it is being deployed as new. This is described in Section 5.4, “Deploying Agent Plug-ins”.


