Experience Red Hat OpenShift Virtualization: Advanced operations and automation
Red Hat® OpenShift® Virtualization allows organizations to run and deploy new and existing virtual machines on a modernized platform. Learn how to manage your environment and perform critical operational tasks often required of virtual machine administrators from day-2 onward.
This learning path is for operations teams or system administrators
Developers may want to check out Foundations of OpenShift on developers.redhat.com.
Automation of virtual machines
The rapid expansion of our virtual machine (VM) fleet at "Legacy Systems Inc." has led to a significant increase in manual, repetitive tasks, such as patching, resource modification, and state management. We, as the VM administrators, are struggling to keep up, limiting our ability to innovate and respond quickly to business demands. Organizations need a solution that makes it simple to migrate their existing virtual machines onto an alternative platform with minimal risk of disrupting their existing workloads and associated services, and to automate their VM lifecycle to improve efficiency and speed of delivery.
In this module we will cover how to create a dynamic inventory of virtual machines, and how to leverage Ansible Automation Platform to perform a number of virtual infrastructure management tasks in an automated manner.
Prerequisites:
- A computer with a web browser and internet access
- A Chromium-based browser is preferred: these are recommended, as some copy/paste functions don’t work in Firefox for the time being
- (Recommended for non-US users) Familiarity with special characters in other countries’ keyboard layouts, since the remote access console uses the US keyboard by default
In this resource, you will:
- Create a dynamic inventory of virtual machines
- Leverage Ansible to perform and automate virtual infrastructure management tasks
Credentials for Ansible
Your Ansible admin login is available with the following credentials:
User: username
Password: password
Figure 1. Ansible login
| Note: The Ansible Automation Platform console has a 5 minute timeout for admin users for security purposes. If you find yourself logged out accidentally you can log back in using the credentials above. |
Create a dynamic inventory for OpenShift virtual machines
Dynamic inventories allow Ansible to automatically fetch and update the list of systems from external sources, eliminating the need for manual management.
In this lab, we will configure a dynamic inventory to pull data from OpenShift Virtualization. This will enable Ansible to manage OpenShift VMs residing in the vms-aap-day2 namespace of an OpenShift Container Platform cluster.
Create an inventory
- In the left side menu, click to expand the menu for Automation Execution, then click on Infrastructure, followed by Inventories.
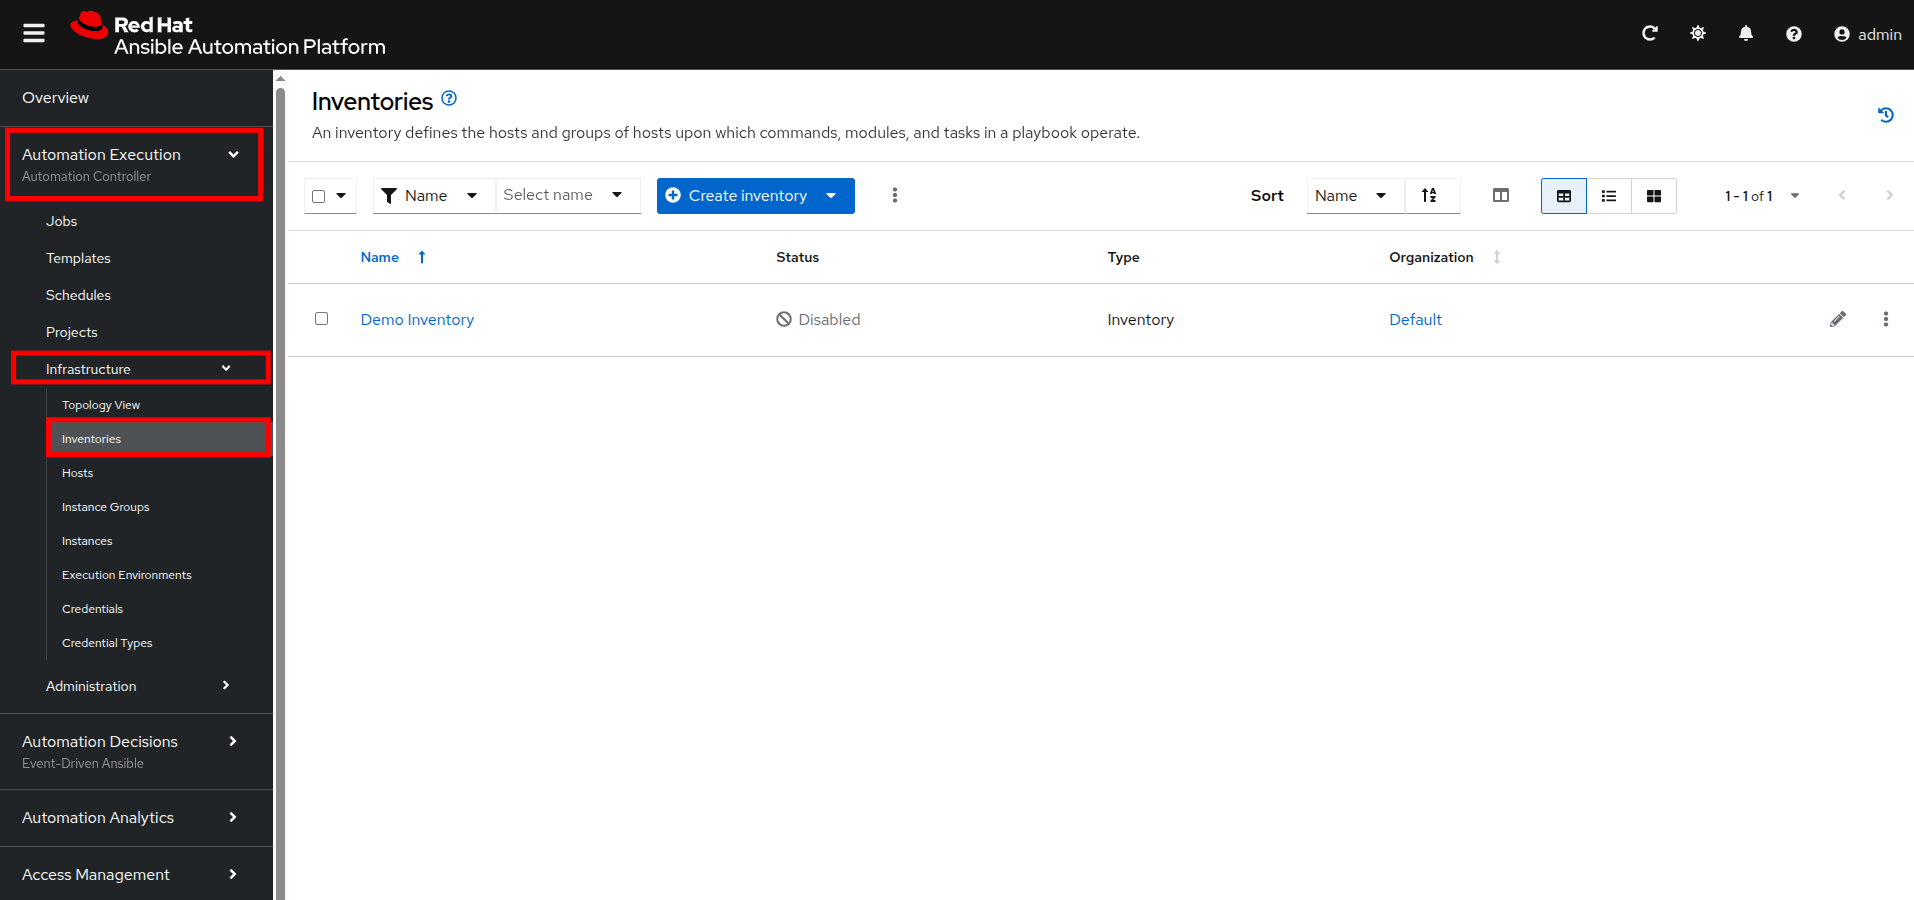
Figure 2. Automation execution, infrastructure, inventories
- Click the Create inventory dropdown box and select the Create inventory option.
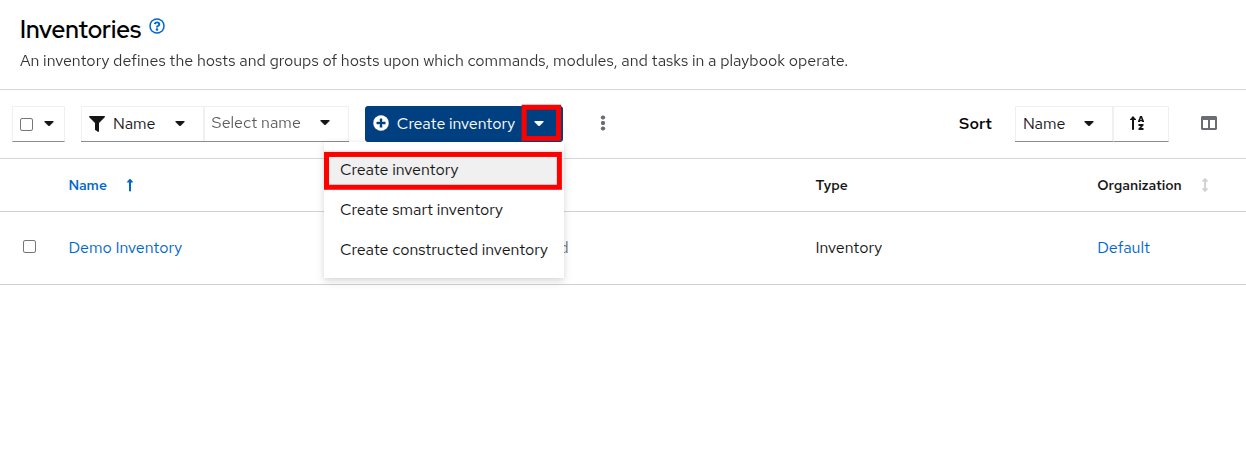
Figure 3. Create inventory dropdown
- Fill out or select the appropriate value from the drop down menus available for the following fields in the Create Inventory form:
- Name: OpenShift Virtual Machines
- Organization: Default
- Click the Create inventory button at the bottom.
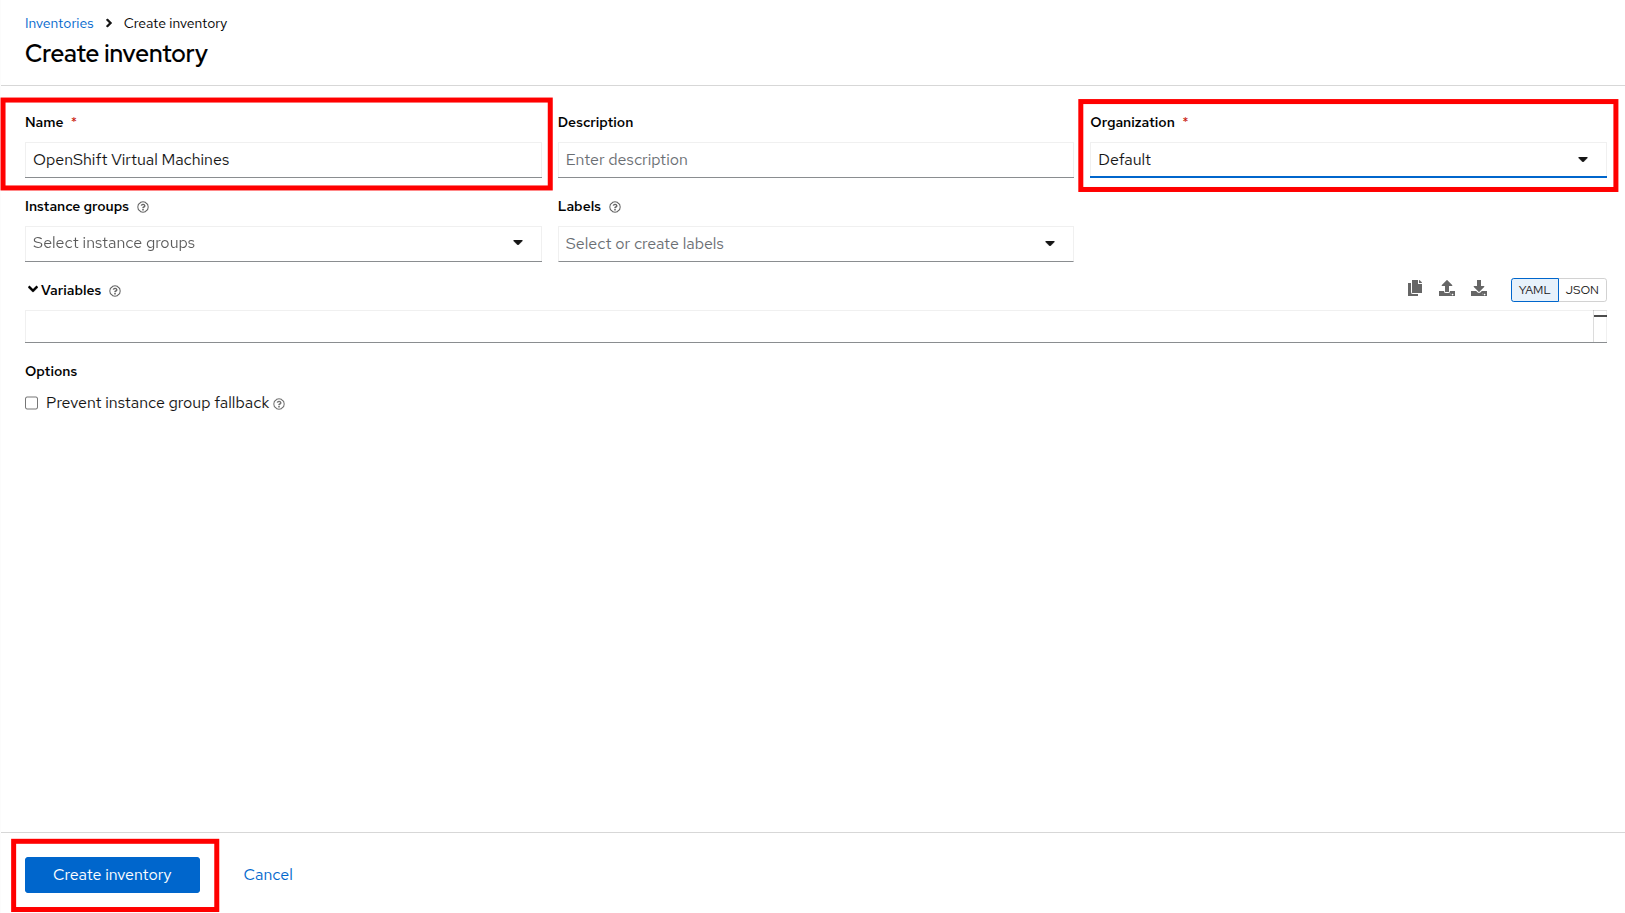
Figure 4. Create inventory
Add a source to the inventory
- After creating the inventory, switch to the Sources tab.
- Select the Create source button.
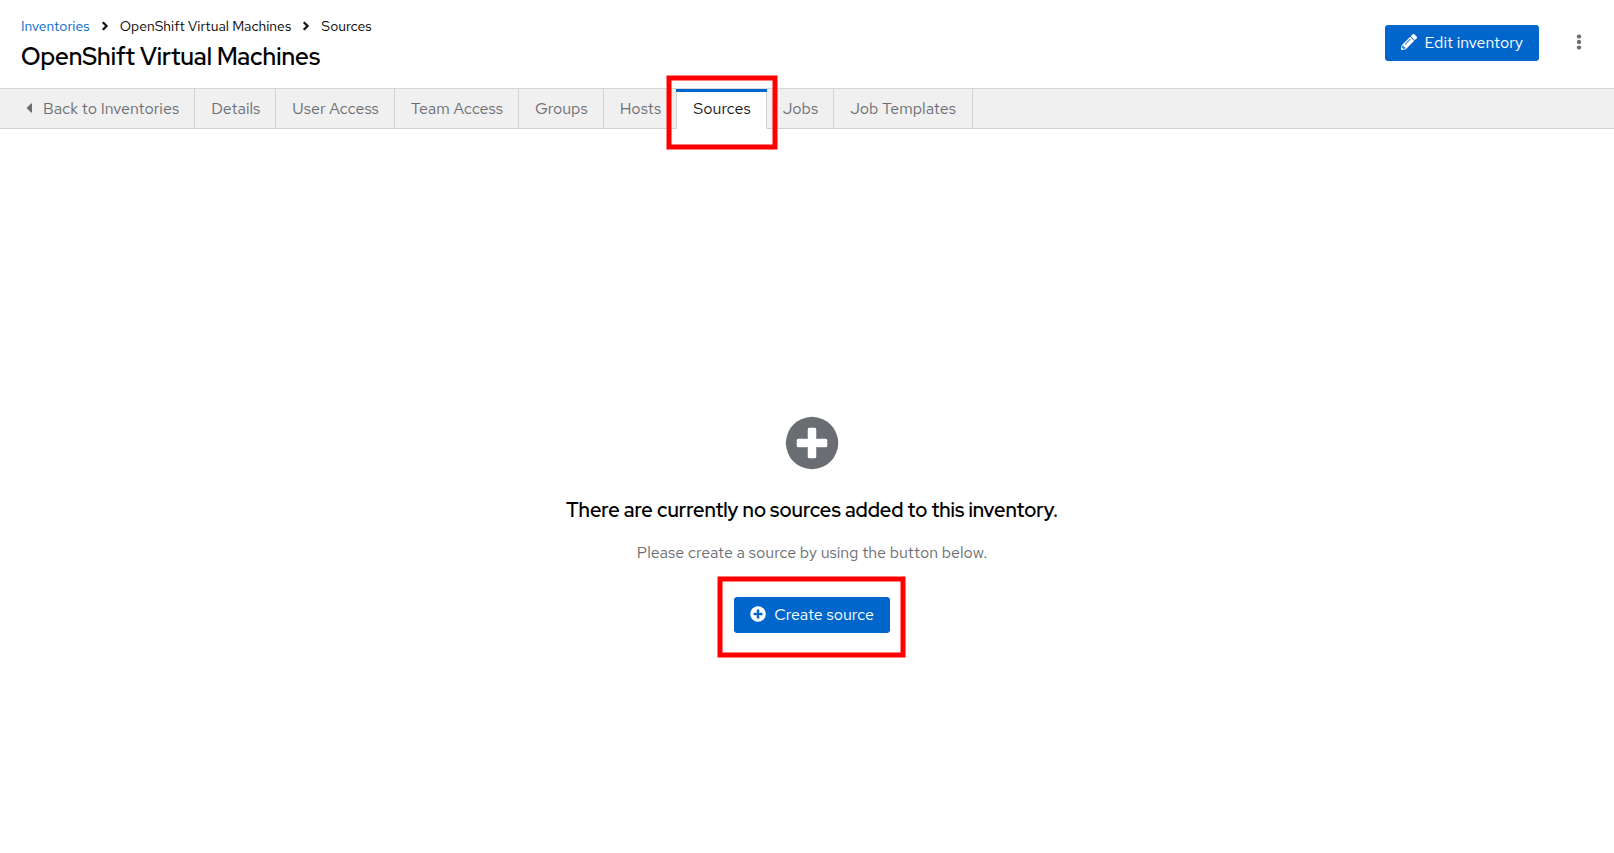
Figure 5. Sources tab
- Fill out or select the appropriate value from the drop down menus available for the following fields in the Create Source form:
- Name: OpenShift Virtual Machines Source
- Execution environment: Day 2 EE
- Source: OpenShift Virtualization
- Credential: OpenShift Credential
- Update on launch Checkbox: Checked
- Cache timeout (seconds): 0
Copy and paste the following YAML snippet into the Source variables field on the form.
namespaces: - vms-aap-day2- Click the Create source button to save the configuration.
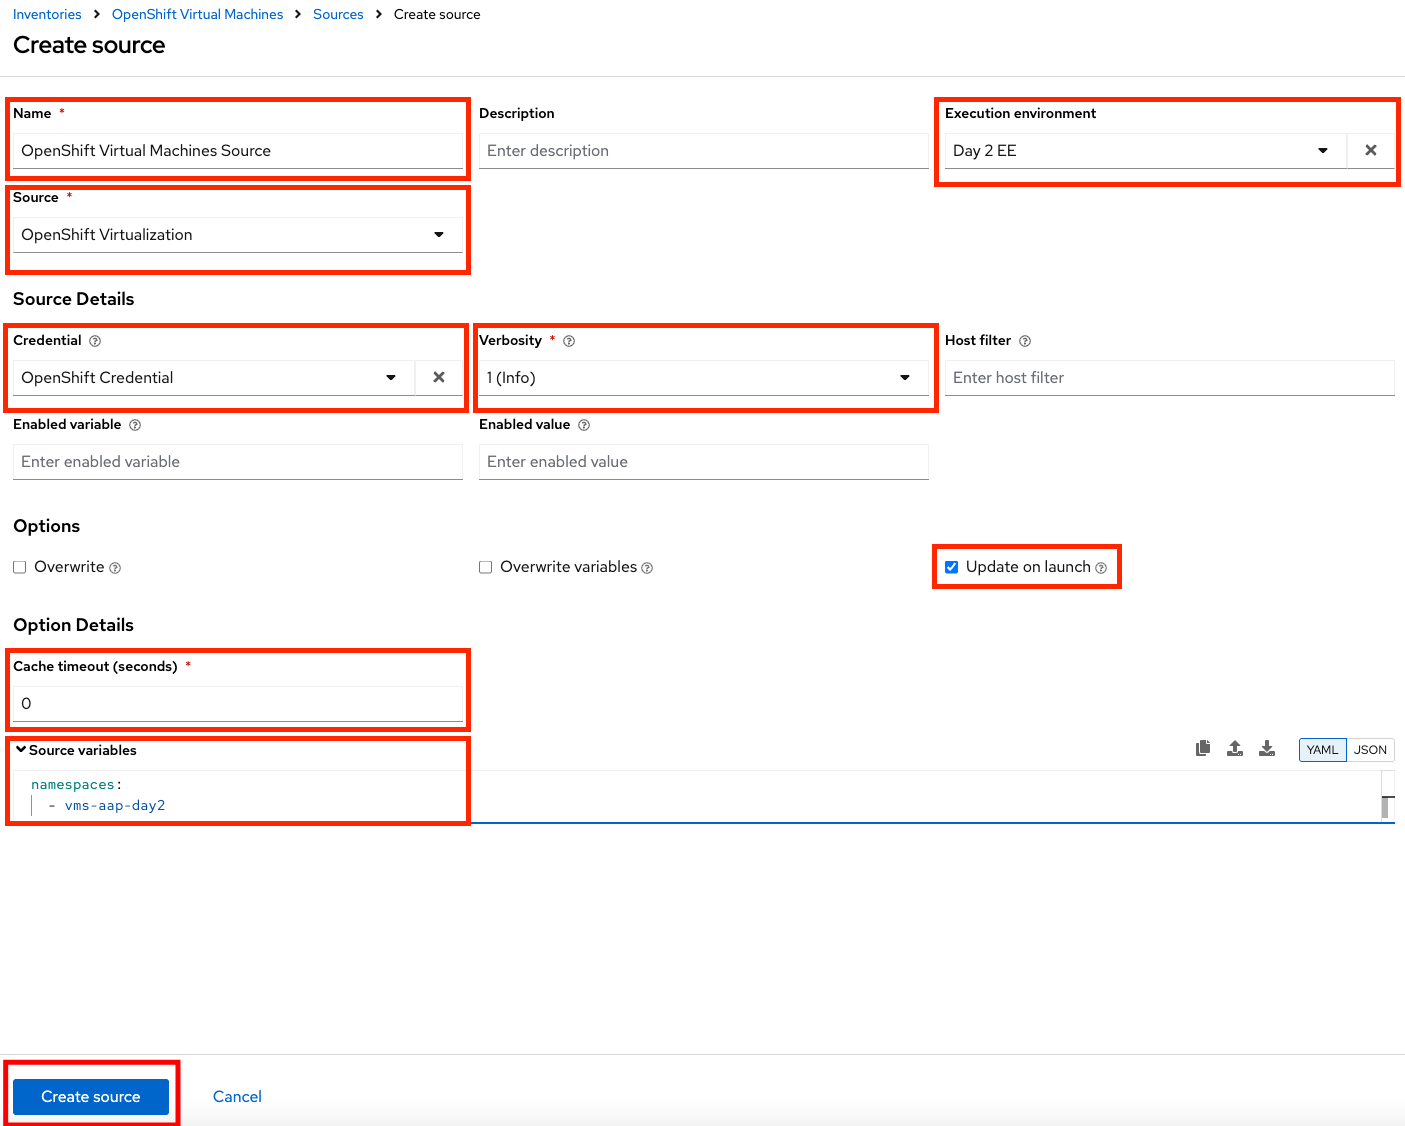
Figure 6. Create inventory source
Update the inventory
- Click the Launch Inventory Update button in the top-right corner to start inventory collection.
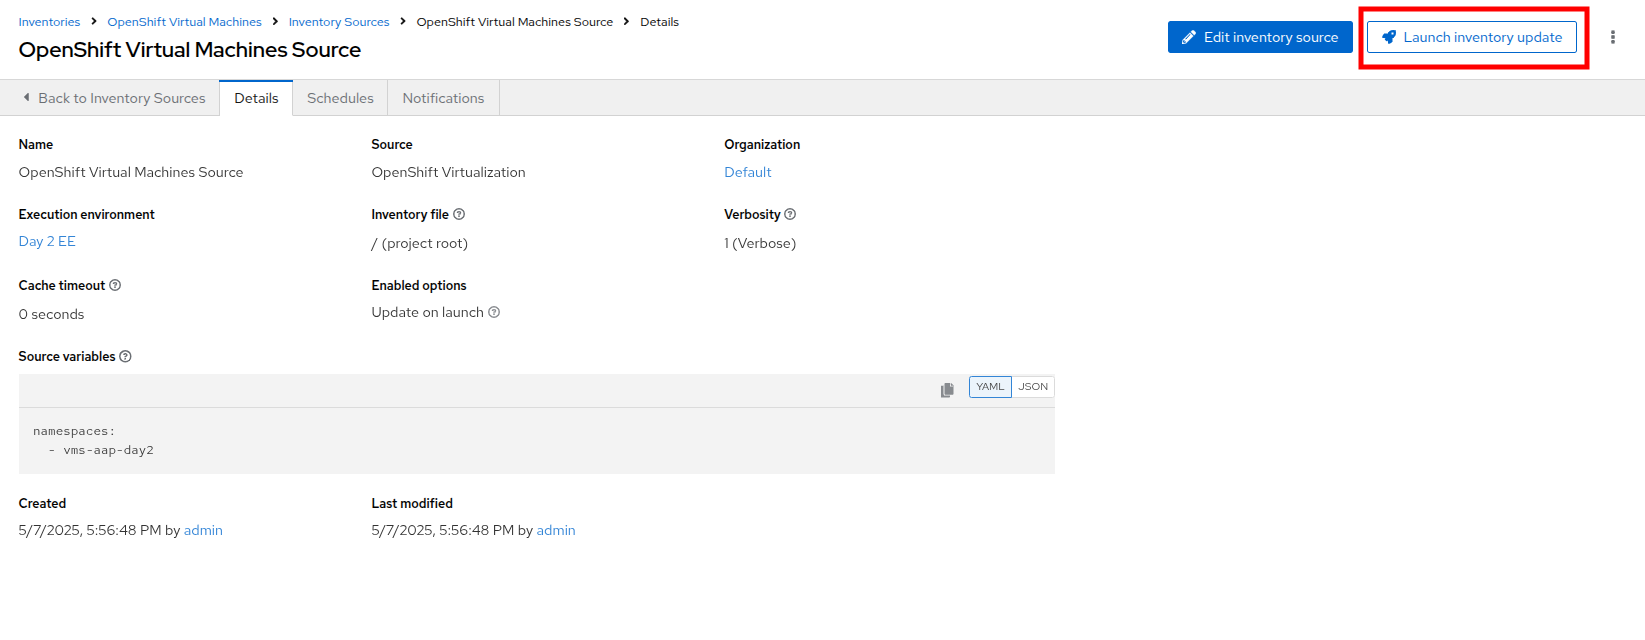
Figure 7. Update inventory
- Wait for the Last Job Status to show Success.
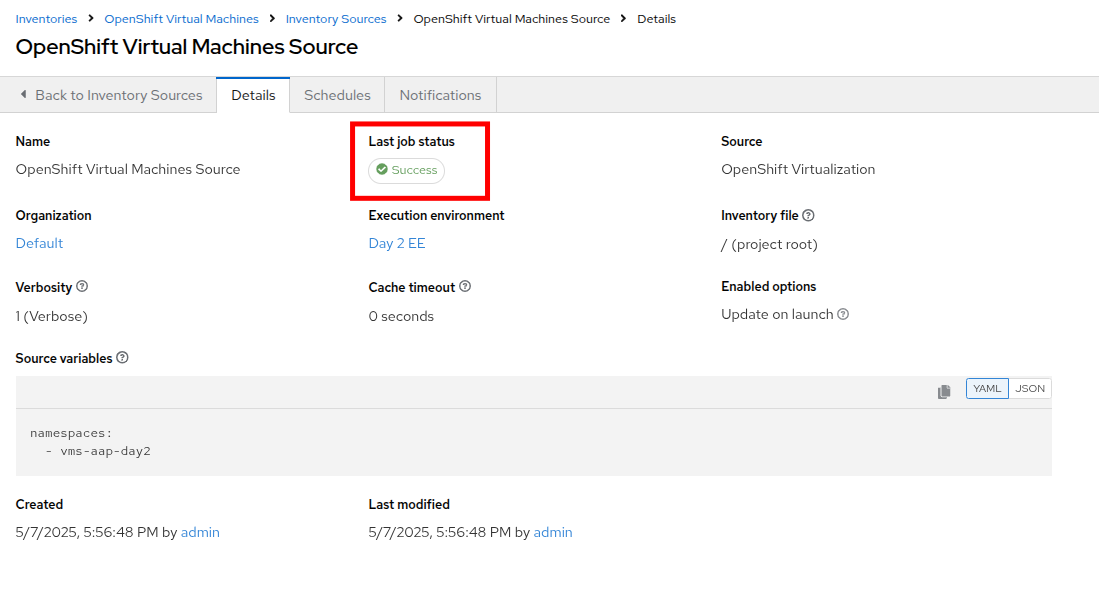
Figure 8. Job status success
- Click on the tab for Back to Inventory Sources.

Figure 9. Back to Inventory Sources
- Switch to the Hosts tab at the top of the screen.
- Confirm that the virtual machines from the vms-app-day2 namespace of your OpenShift cluster are listed as inventory hosts.
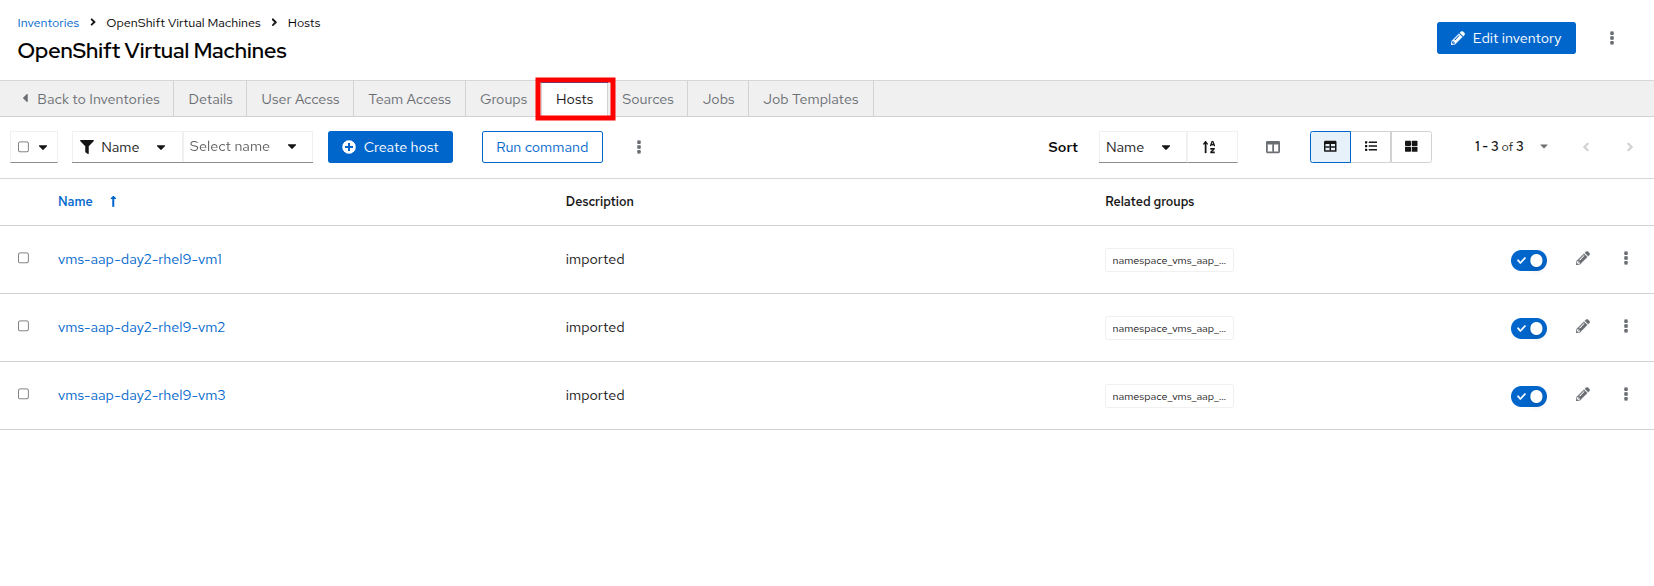
Figure 10. Verify hosts
- To verify that the machines are alive, we can select the three VMs we have discovered and run an automated ping job against them by clicking the Run command button.

Figure 11. Run command
- You will be presented with the Run command wizard with several pages:
- On the Details page, select ping from the Module dropdown menu, and click Next.
- On the Execution Environment page, select Day2 EE from the Execution Environment dropdown, and click Next.
- On the Credential page, select Workshop Credential from the Credential dropdown, and click Next.
- On the Review page, check over your selected options, and when you are ready click the Finish button.
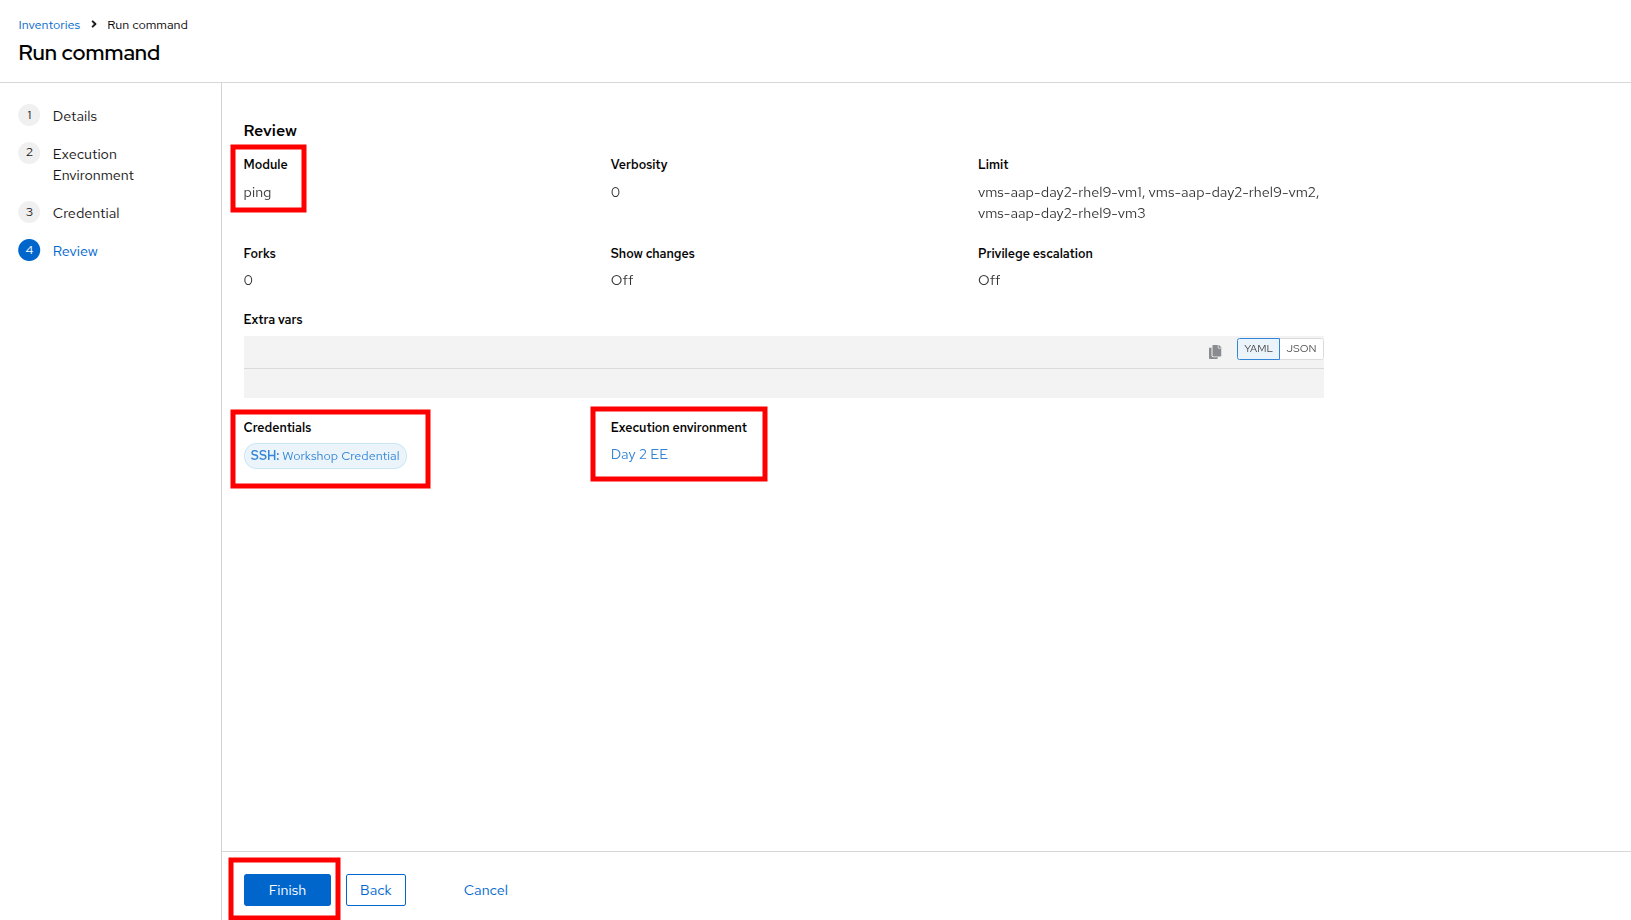
Figure 12. Review run command
- The output of running the command should be similar to the output below, including the names of each VM and their status:
vms-aap-day2-rhel9-vm1 | SUCCESS => {
    "ansible_facts": {
        "discovered_interpreter_python": "/usr/bin/python3"
    },
    "changed": false,
    "ping": "pong"
}
vms-aap-day2-rhel9-vm2 | SUCCESS => {
    "ansible_facts": {
        "discovered_interpreter_python": "/usr/bin/python3"
    },
    "changed": false,
    "ping": "pong"
}
vms-aap-day2-rhel9-vm3 | SUCCESS => {
    "ansible_facts": {
        "discovered_interpreter_python": "/usr/bin/python3"
    },
    "changed": false,
    "ping": "pong"
}
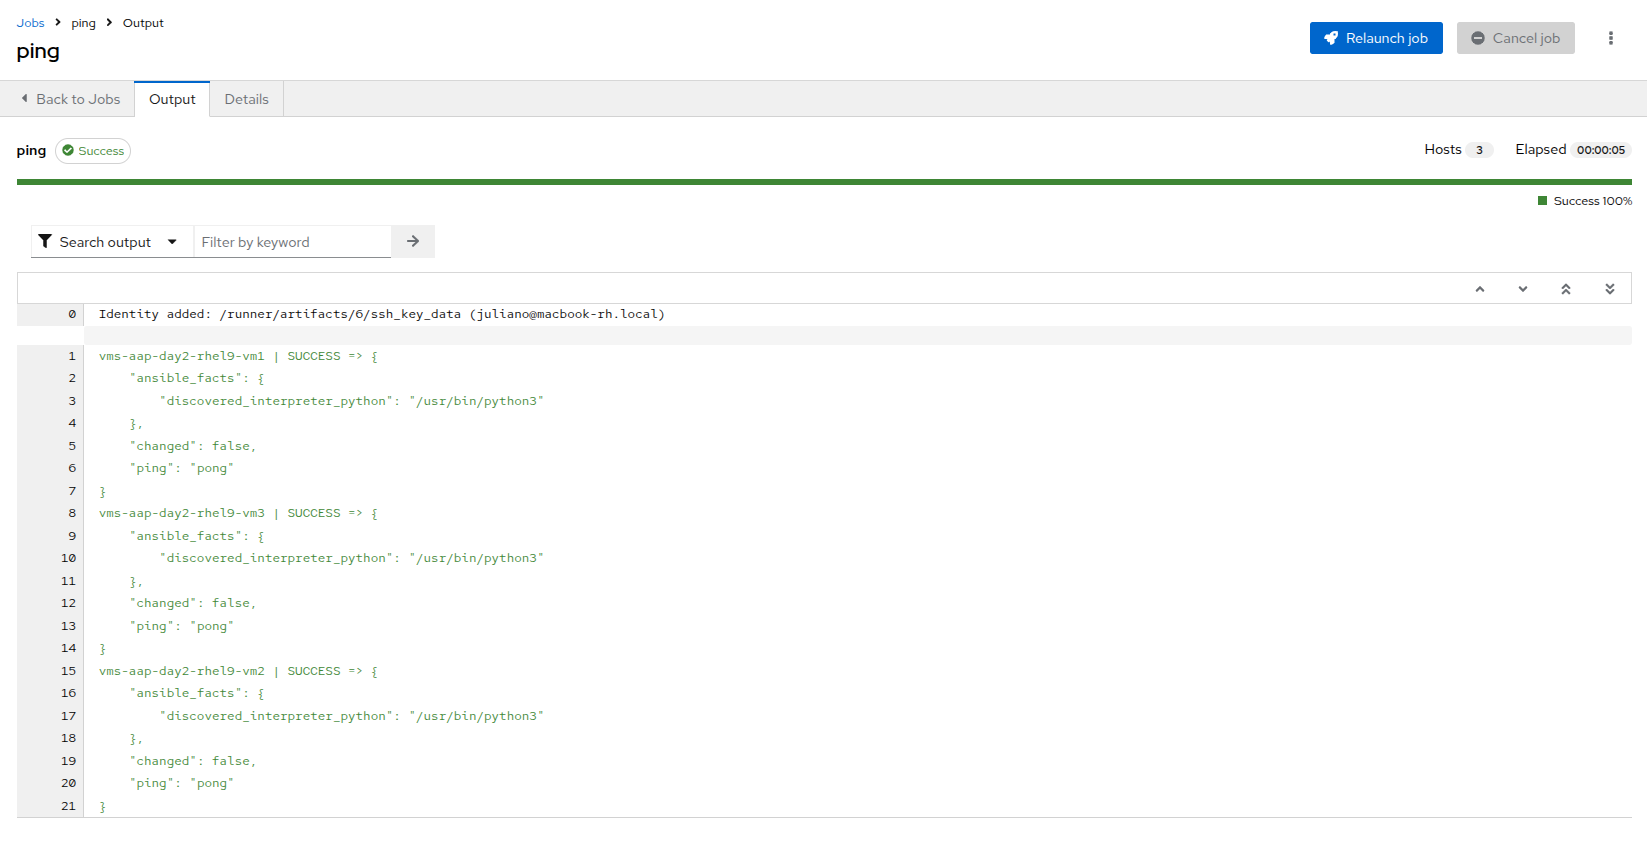
Figure 13. Ping success
| Note: You may also confirm the VMs are running in a manual manner by logging into your OpenShift console, and viewing the virtual machines there manually. |
Verifying VM inventory in the OpenShift console
- Switch to your OpenShift administration console window.
- On the left side navigation menu, click on Virtualization and then VirtualMachines.
- Highlight the vms-aap-day2 project in the central navigation column.
- Confirm that the virtual machines are running.
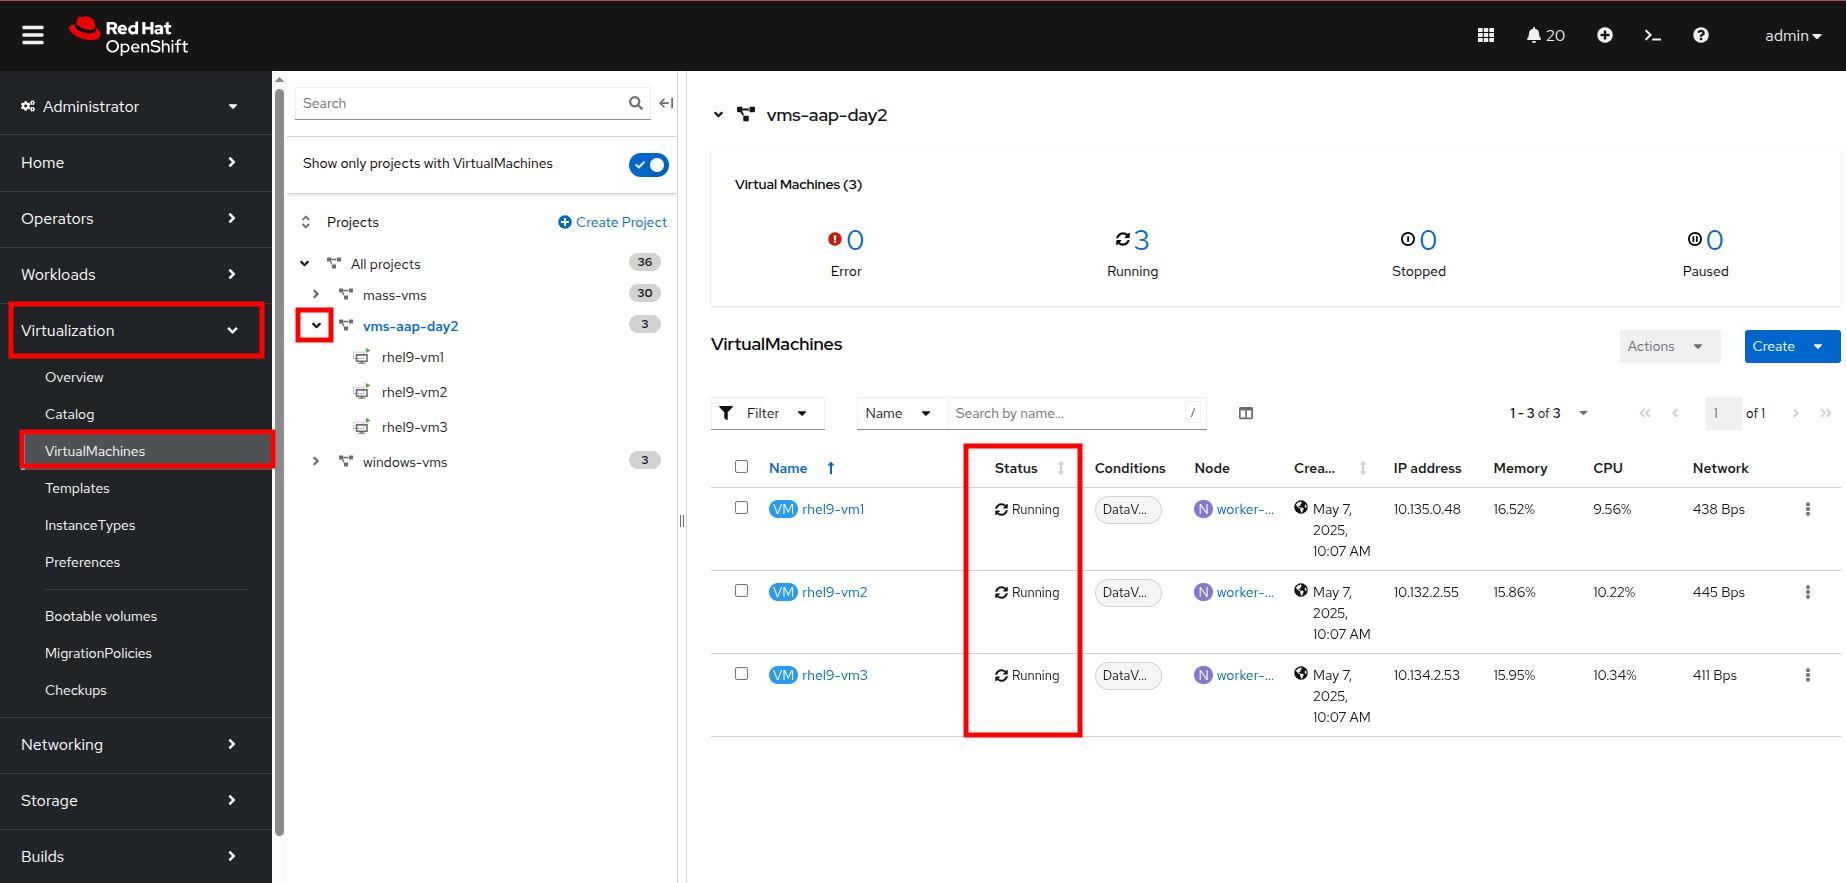
Figure 14. Virtual machines running on OpenShift
In the next resource, we’ll continue to demonstrate how to automate virtual machines, focusing on automated VM management.