Este contenido no está disponible en el idioma seleccionado.
7.3. Preparing and Adding Local Storage
7.3.1. Preparing Local Storage
Copiar enlaceEnlace copiado en el portapapeles!
A local storage domain can be set up on a host. When you set up a host to use local storage, the host automatically gets added to a new data center and cluster that no other hosts can be added to. Multiple host clusters require that all hosts have access to all storage domains, which is not possible with local storage. Virtual machines created in a single host cluster cannot be migrated, fenced or scheduled. For more information on the required system users and groups see Appendix G, System Accounts.
Important
On Red Hat Enterprise Virtualization Hypervisors the only path permitted for use as local storage is
/data/images. This directory already exists with the correct permissions on Hypervisor installations. The steps in this procedure are only required when preparing local storage on Red Hat Enterprise Linux virtualization hosts.
Procedure 7.3. Preparing Local Storage
- On the virtualization host, create the directory to be used for the local storage.
mkdir -p /data/images
# mkdir -p /data/imagesCopy to Clipboard Copied! Toggle word wrap Toggle overflow - Ensure that the directory has permissions allowing read/write access to the
vdsmuser (UID 36) andkvmgroup (GID 36).chown 36:36 /data /data/images
# chown 36:36 /data /data/imagesCopy to Clipboard Copied! Toggle word wrap Toggle overflow chmod 0755 /data /data/images
# chmod 0755 /data /data/imagesCopy to Clipboard Copied! Toggle word wrap Toggle overflow
Your local storage is ready to be added to the Red Hat Enterprise Virtualization environment.
7.3.2. Adding Local Storage
Copiar enlaceEnlace copiado en el portapapeles!
Storage local to your host has been prepared. Now use the Manager to add it to the host.
Adding local storage to a host in this manner causes the host to be put in a new data center and cluster. The local storage configuration window combines the creation of a data center, a cluster, and storage into a single process.
Procedure 7.4. Adding Local Storage
- Click the Hosts resource tab, and select a host in the results list.
- Click to open the Maintenance Host(s) confirmation window.
- Click to initiate maintenance mode.
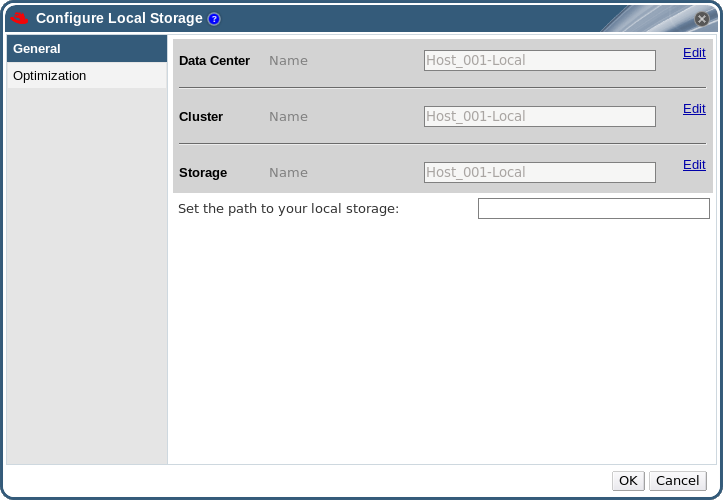
- Click to open the Configure Local Storage window.
Figure 7.2. Configure Local Storage Window
- Click the buttons next to the Data Center, Cluster, and Storage fields to configure and name the local storage domain.
- Set the path to your local storage in the text entry field.
- If applicable, select the Optimization tab to configure the memory optimization policy for the new local storage cluster.
- Click to save the settings and close the window.
Your host comes online in a data center of its own.