Este contenido no está disponible en el idioma seleccionado.
Chapter 2. Managing Volumes
A volume is a logical collection of bricks where each brick is an export directory on a host in the trusted storage pool. Most Red Hat Gluster Storage management operations affect the volume.
2.1. Creating a volume using the Administration Portal
- Log in to the Administration Portal.
-
Click Storage
Volumes. Click New. The New Volume window opens.

- Select the Volume Cluster to use.
- Specify the Name of the new volume.
- Specify the Type of the new volume.
- (Optional) For replicated and distributed replicated volumes, check the Arbiter checkbox to configure one or more arbiter bricks for the volume.
Click Add Bricks and specify the bricks you want to use in the new volume.
For a replicate volume you must select at least 3 bricks.
To add a brick, perform the following steps.
- Select the Host of the brick to use.
- Select the Brick Directory of the brick to use.
Click Add.
The brick is listed in the Add Bricks window.
- Click OK when all bricks have been added. The Add Bricks window closes, and the number of bricks selected is displayed in the New Volume window.
- Click OK.
2.2. Starting a volume using the Administration Portal
- Log in to the Administration Portal.
-
Click Storage
Volumes. - Select the volume that you want to start.
- Click Start.
2.3. Stopping a volume using the Administration Portal
- Log in to the Administration Portal.
-
Click Storage
Volumes. - Select the volume that you want to stop.
- Click Stop.
- Click OK.
2.4. Configuring options on a volume using the Administration Portal
- Log in to the Administration Portal.
-
Click Storage
Volumes. - Click the name of the volume to configure.
- Click Volume Options.
Click Add. The Add Option window opens.
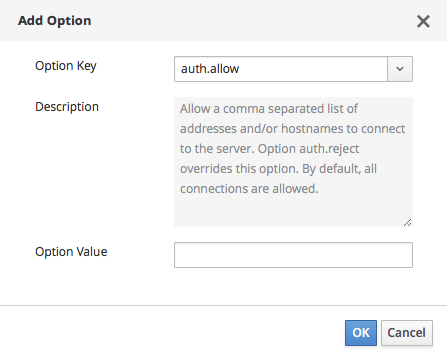
- Select the Option Key to specify.
- Specify the Option Value to set.
- Click OK. The Add Option window closes and the Volume Options view updates with the new configuration setting.
2.5. Expanding a volume using the Administration Portal
- Log in to the Administration Portal.
-
Click Storage
Volumes. - Click the name of the volume you want to expand.
- Click Bricks.
- Click Add. A warning about expanding volumes on hyperconverged hosts appears.
Read the warning and click Yes if you want to proceed. The Add Bricks window opens.

Follow the following steps for each brick to add to the volume.
- Select the Host of the brick to use.
- Select the Brick Directory of the brick to use.
Click Add.
The brick is listed in the Add Bricks window.
- Click OK when all bricks have been added. The Add Bricks window closes, and the number of bricks selected is displayed in the New Volume window.
- Click OK to finish adding bricks to the volume.
- You may also need to rebalance the volume.
2.6. Shrinking a volume using the Administration Portal
You can expand a Gluster volume by adding new bricks to the volume in multiples of the replica count of the volume.
- Log in to the Administration Portal.
-
Click Storage
Volumes. - Click the name of the volume you want to shrink.
- Click Stop.
- Click OK and wait for the volume to stop.
- Click Bricks and select the brick to remove.
- Click Remove. The Remove Bricks window opens.
- Confirm the removal of the selected brick, and wait for the brick to be removed.
- Check the Activities column and verify all data has been migrated off the brick.
- Click Commit to finish removing the brick.
- You may also need to rebalance the volume.
2.7. Rebalancing a volume using the Administration Portal
After expanding or shrinking a volume (without migrating data), you need to rebalance the data among the hosts. In a non-replicated volume, all bricks must be online to perform the rebalance operation. In a replicated volume, at least one of the bricks in the replica must be online.
- Log in to the Administration Portal.
-
Click Storage
Volumes. - Select the volume to rebalance.
- Click Rebalance. The rebalance process starts, and the rebalance icon is displayed in the Activities column related to the volume.
2.8. Deleting a volume using the Administration Portal
- Log in to the Administration Portal.
-
Click Storage
Volumes. - Select the volume you want to delete.
- Click Stop and confirm that the volume should be stopped.
- Click Remove and confirm that the volume should be removed.
2.9. Synchronizing volume state using the Administration Portal
- Log in to the Administration Portal.
-
Click Compute
Volumes. - Select the volume that you want to synchronize.
- Click the Geo-replication sub-tab.
- Click Sync.